Sngine is a Social Network Platform is the best way to create your own social website or
online community. Launch it in just 1 minute with ultimate features. It’s easy to
install
If you have any questions that are beyond the scope of this documentation, please feel
free to create a support ticket on our support system. Thanks so much!
License
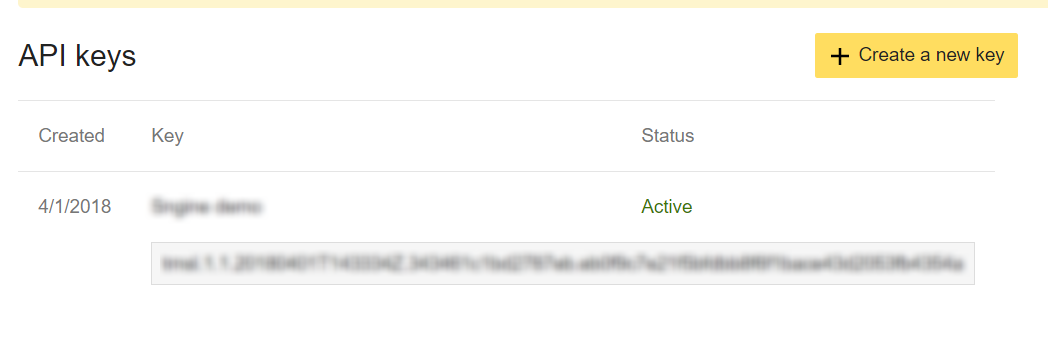
To install Sngine or even to open a support ticket you must know your Purchase Code of
Sngine and to get your Purchase Code
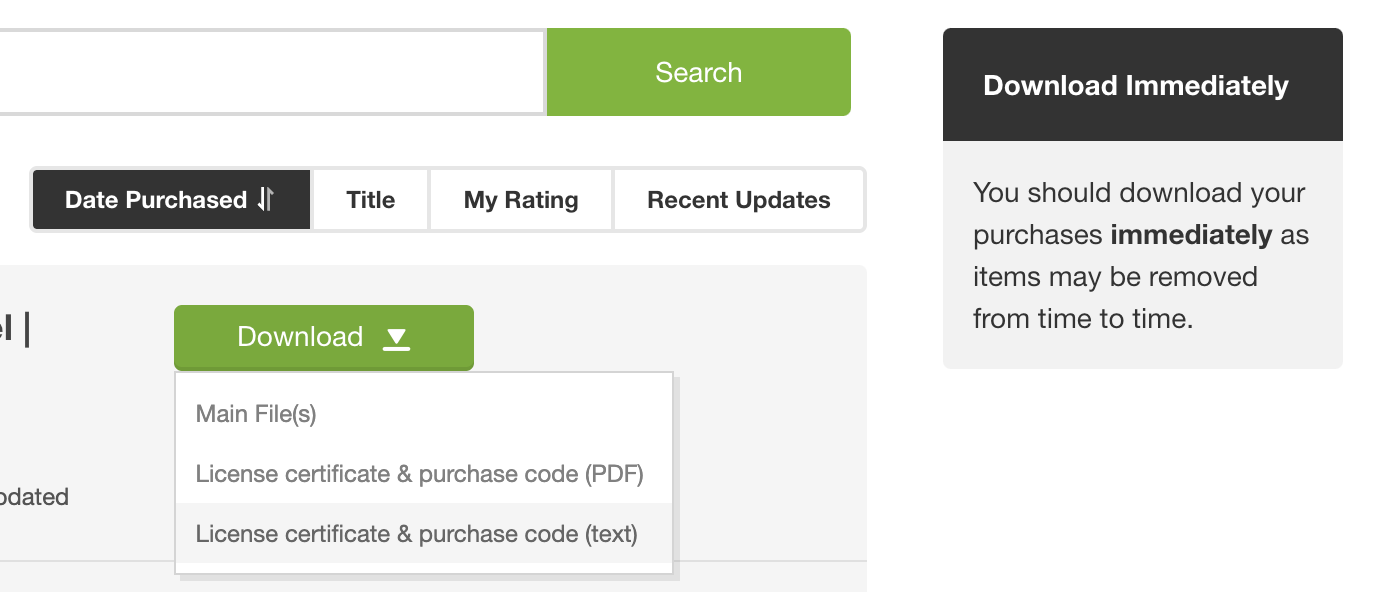
Click on the download button of Sngine and download License certificate & purchase code
You can download it as a PDF or text file
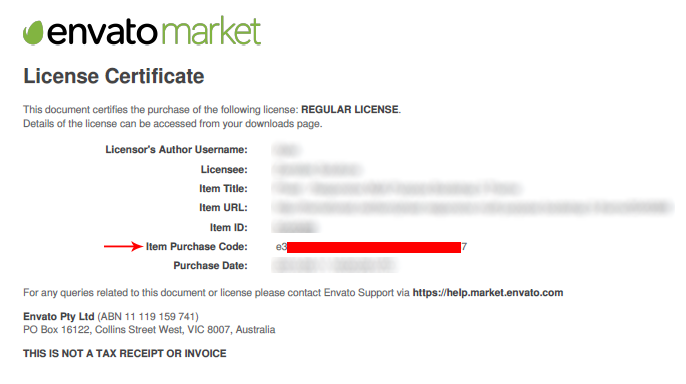
You will find your code as the following
Installation
No coding or design skills needed.
Important
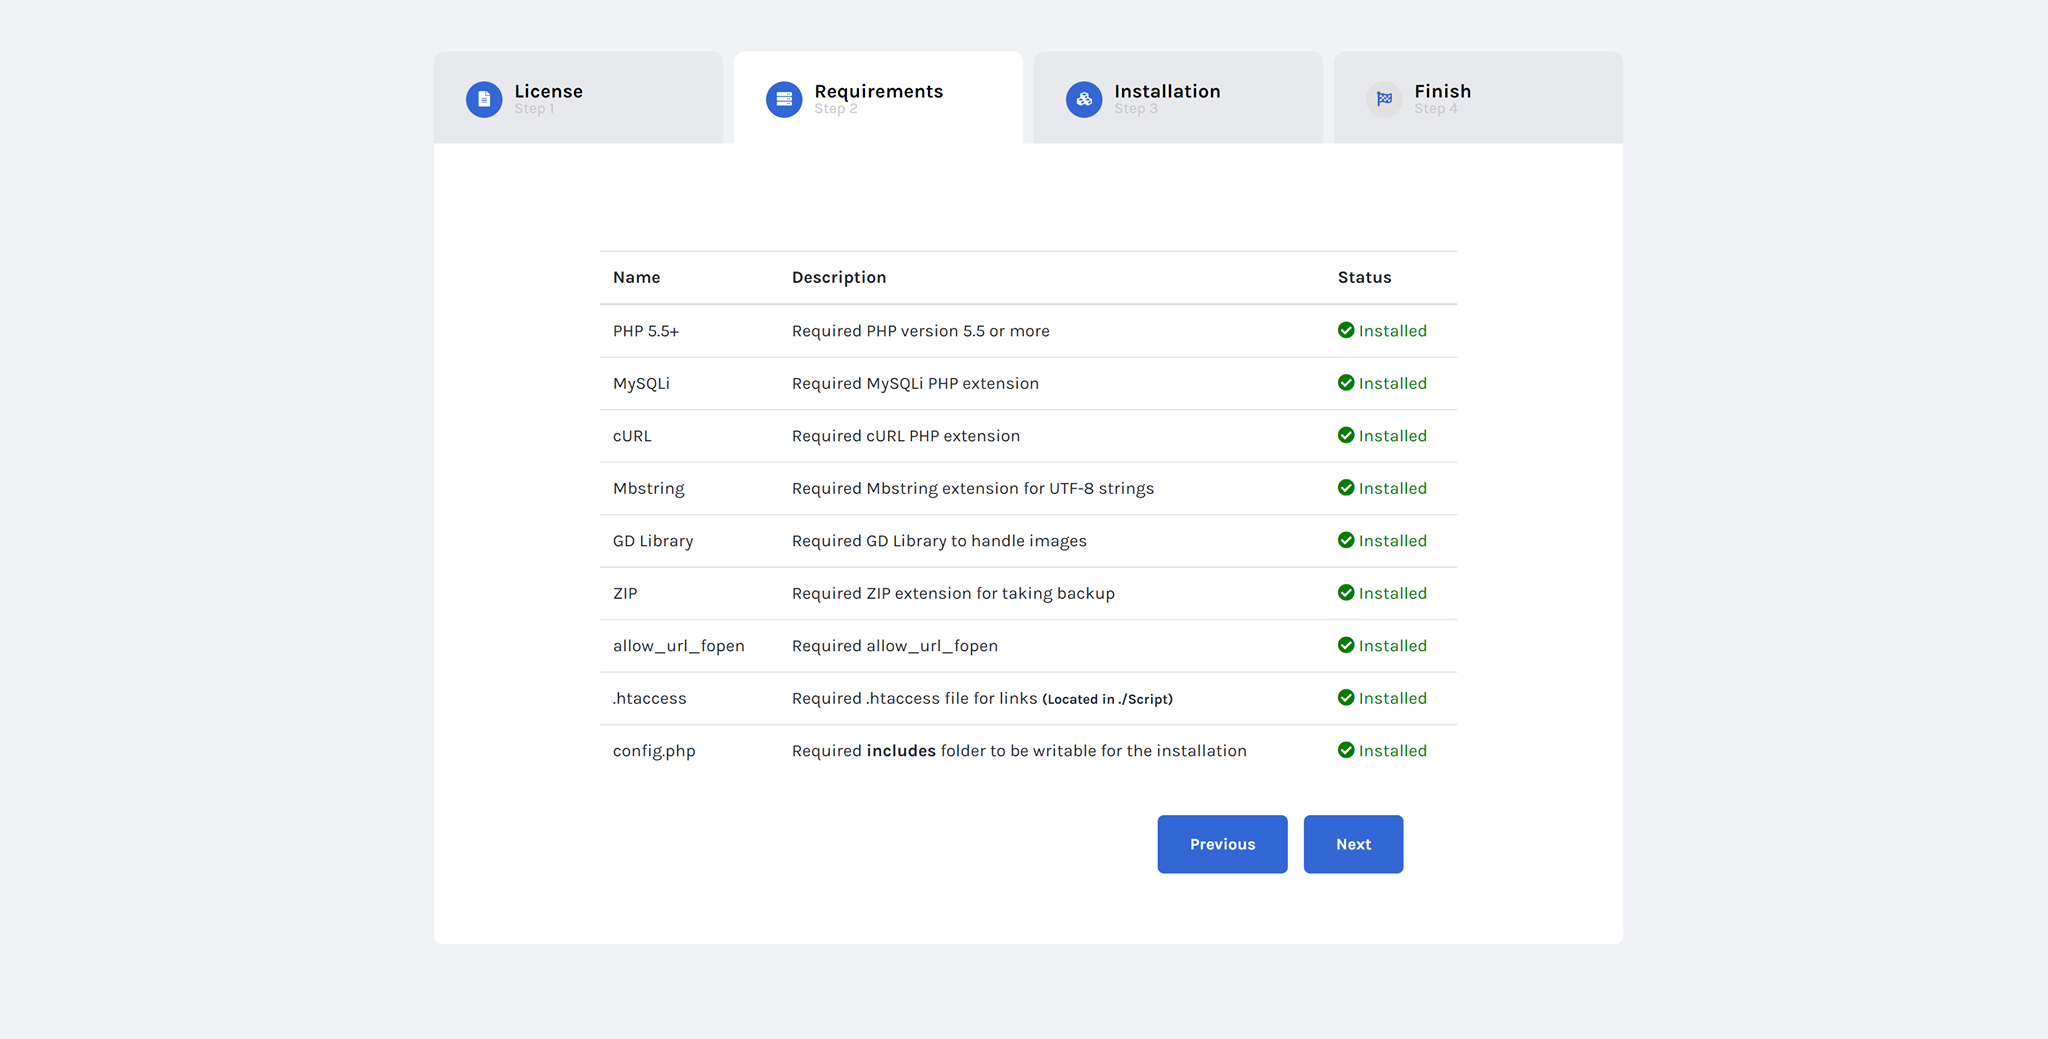
This script requires the following system requirments to run:
Apache, Nginx or IIS Sever
PHP 7.4+ and MySQL 5.0+ (Sngine also supports PHP 8+ and MySQL 8+)
PHP Extensions: mysqli, mbstring & curl
PHP Library: GD
PHP Funcrions: allow_url_fopen() & mail()
You can ask your hosting company support to make sure to install/enable them for you
Note
Sngine requires SSL certificate only if you will enable video/audio chat or
live streaming or to build the mobile apps Check the FAQs to learn more
Tip
To run Sngine on Nginx & IIS severs, Check the FAQs to learn more
How to Install
Now make sure you created an empty MySQL database along with user account for it.
After unzip Sngine Files, you will found Script Folder
Start your FTP client (Like Filezila which is free) and login. Login to your server. You
will need your host name (often times this will be your domain name), username, and
password that you setup with the hosting company.
Locate the domain folder you wish to upload your Sngine files to on your server. You are
going to upload all files located in Script Folder to
your FTP client.
Once the files are done uploading, you have to change chmod of content/uploads folder and content/themes/default/templates_compiled folder to 777.
Just goto your website and Sngine installer wizard will run automatically http://yourdomain.com/path_to_script
In case you got the following error "wizard cannot create the
config file" just make sure that the includes
folder is writable "777" then go and empty the database then try to run the installer
wizard again and after installation change it back to its normal permissions.
Sngine installer wizard is very clean, you will need to put your Purchase Code at step #3 and the rest is simple just
follow the video tutorial
That's all, Enjoy!
Socail Logins
Learn how to integrate Sngine with the different social login supported by Sngine like
Facebook, Google, Twitter and much more.
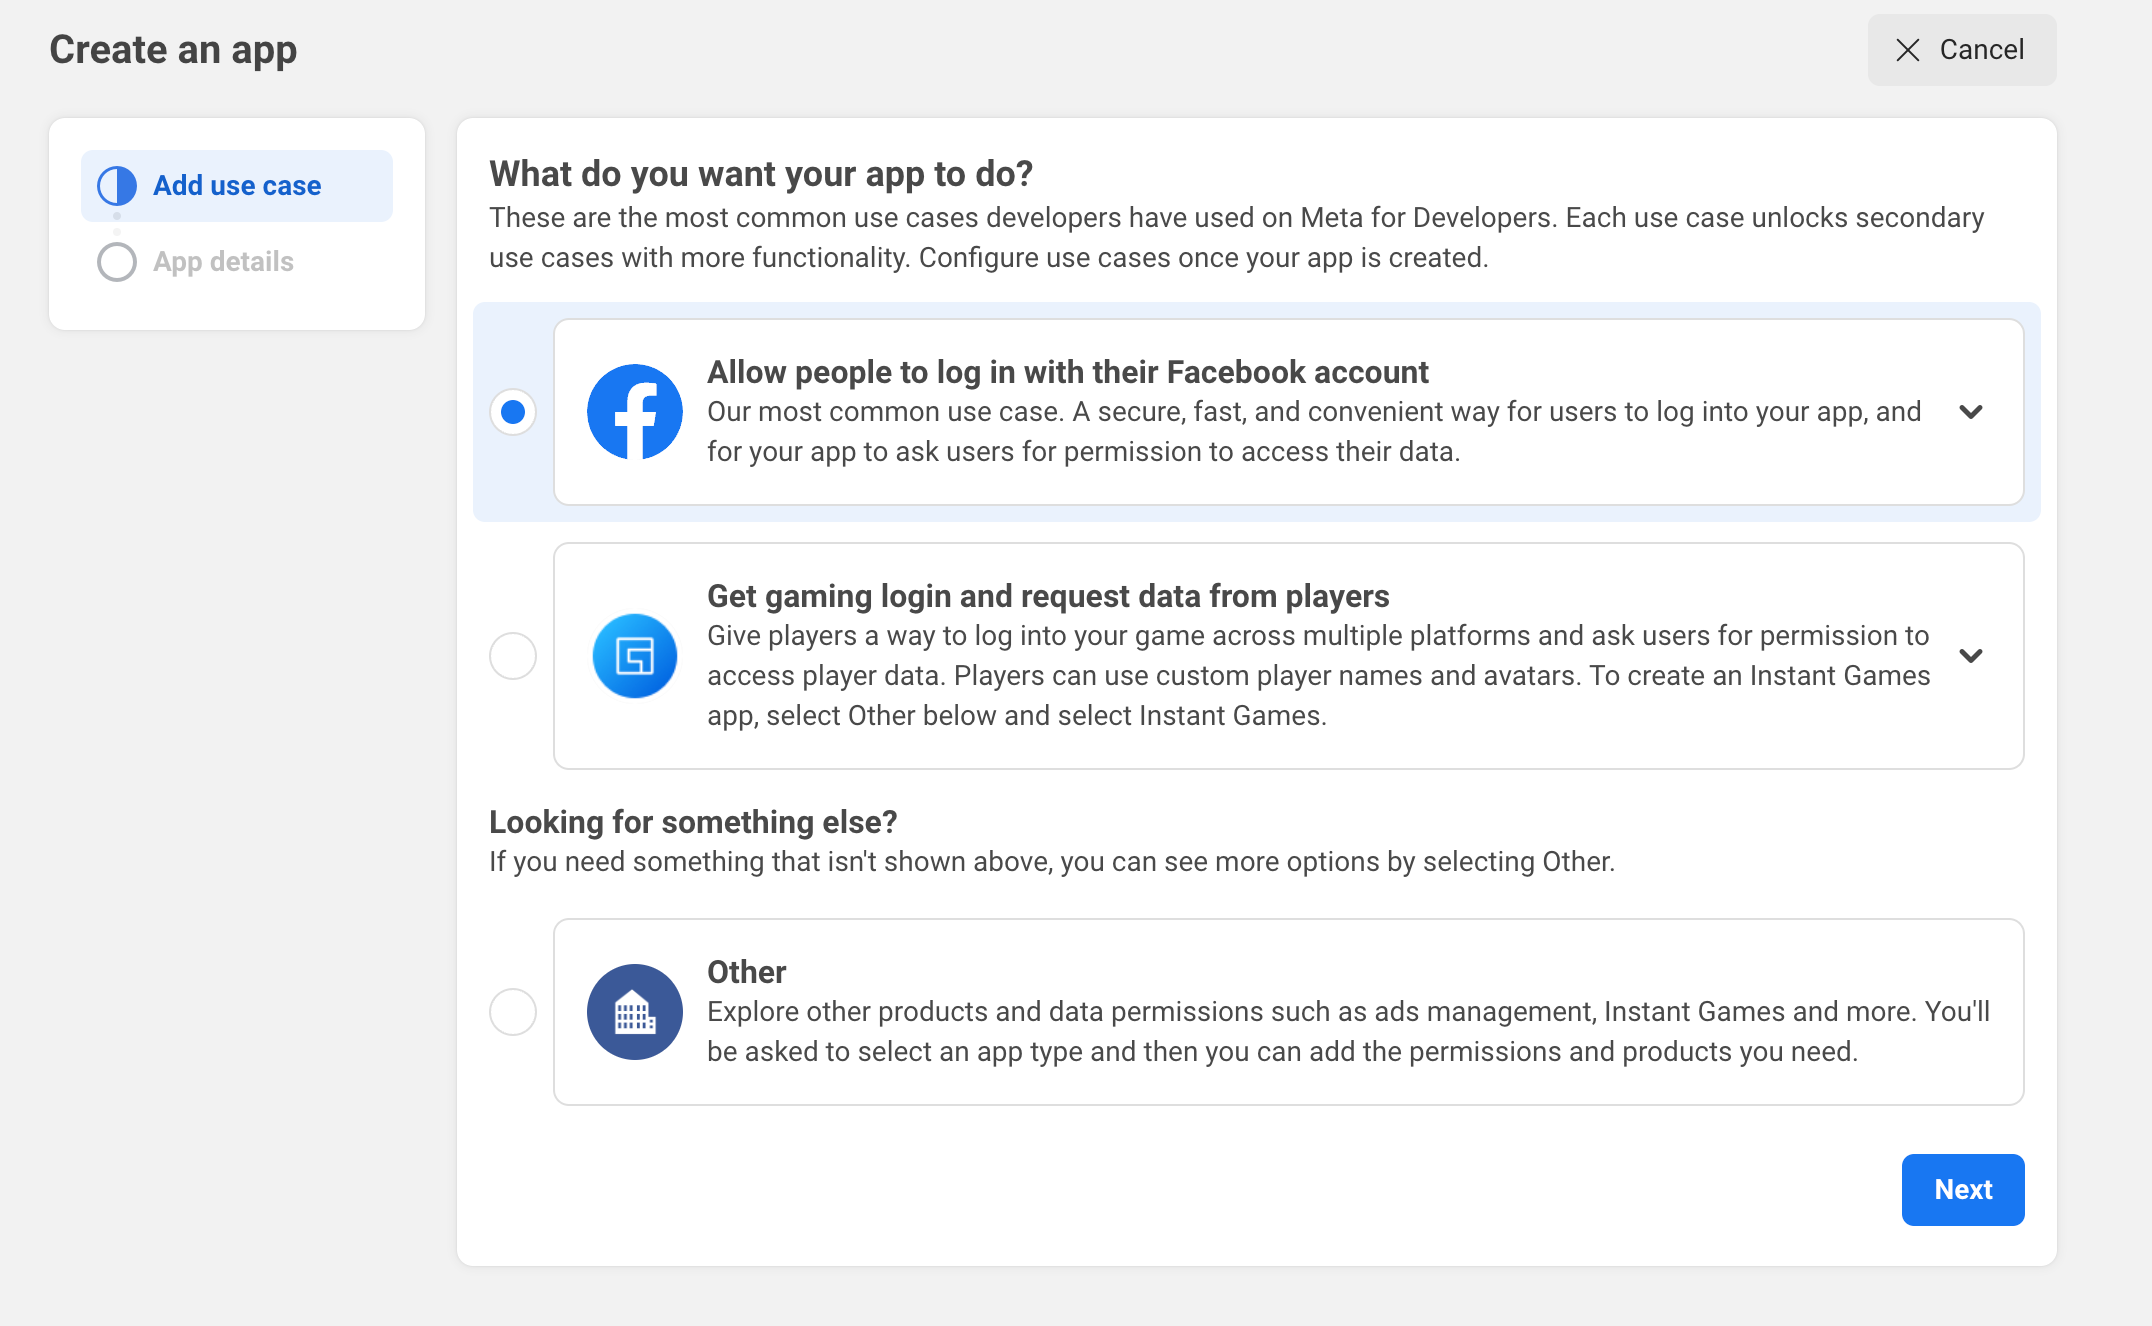
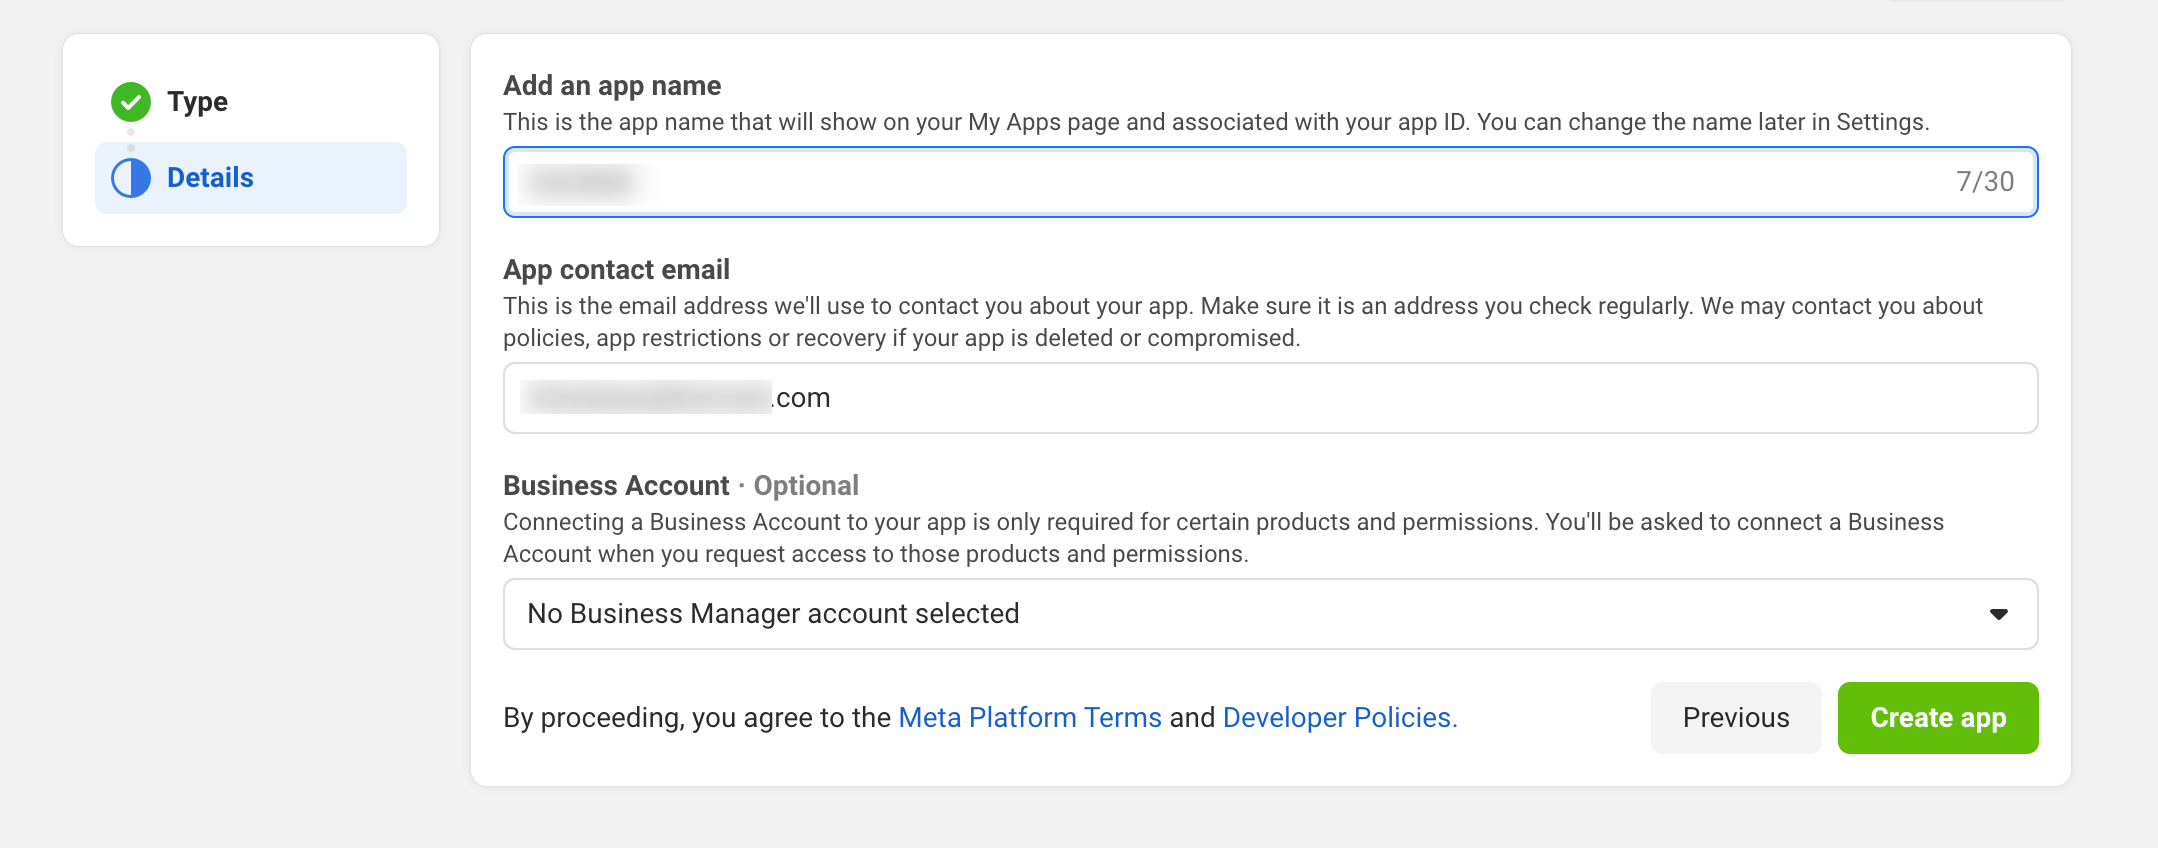
Facebook
After installing Sngine now you can in easy steps integrate Facebook with it to let your
users login with their Facebook accounts
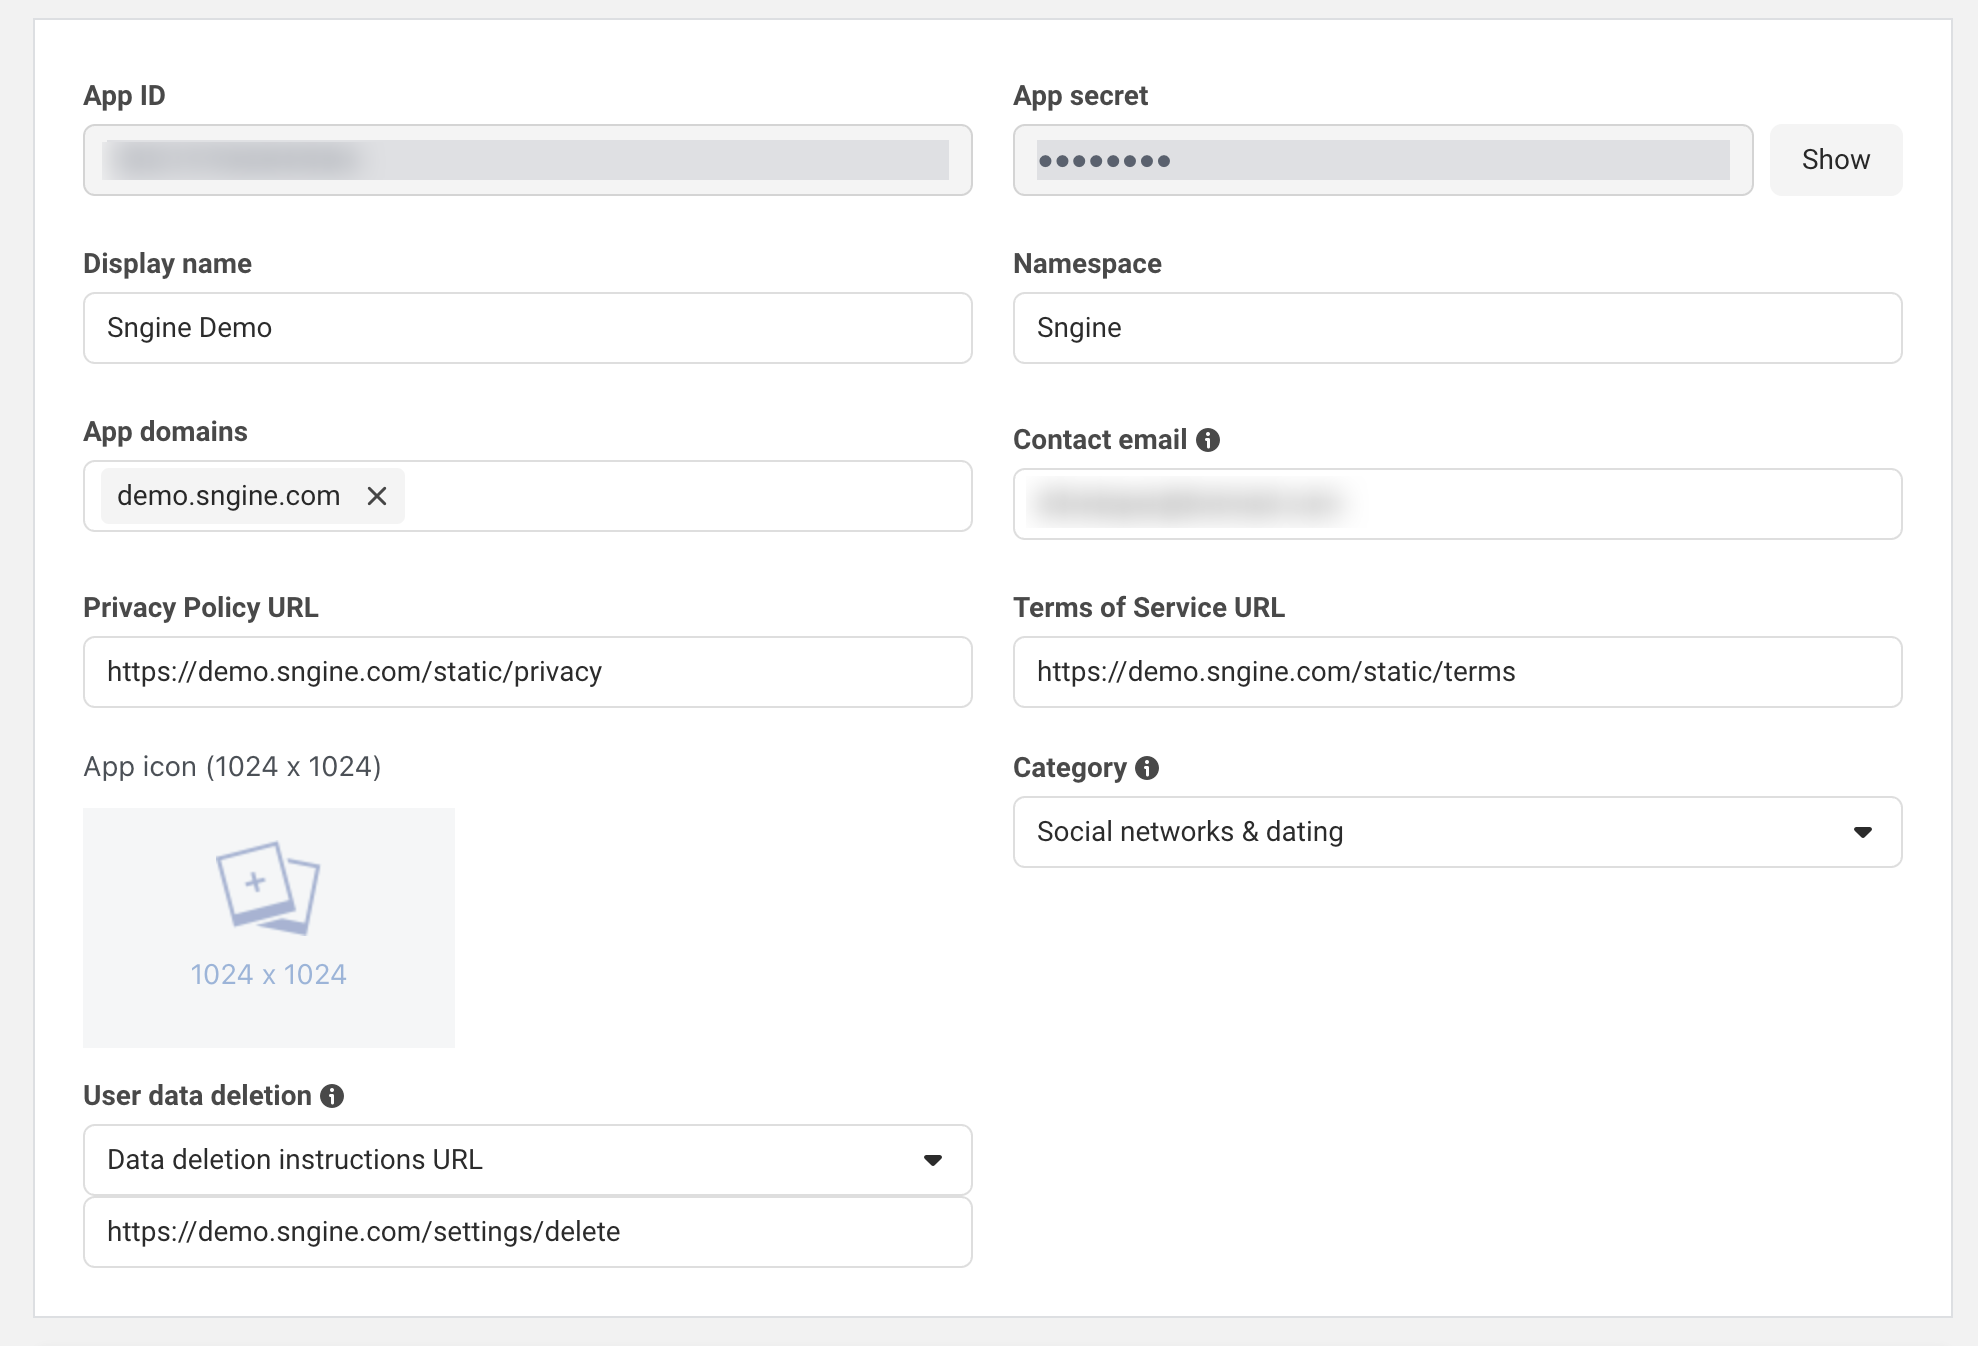
Now go to Settings and enter your domain or subdomain
where you installed Sngine in the App Domains
Also provide Privacy Policy URL and Terms of Service URL you can use your Sngine static pages
for these also you will need to select the app Category
For User Data Deletion add your website link then /settings/delete
Finally click Save Changes
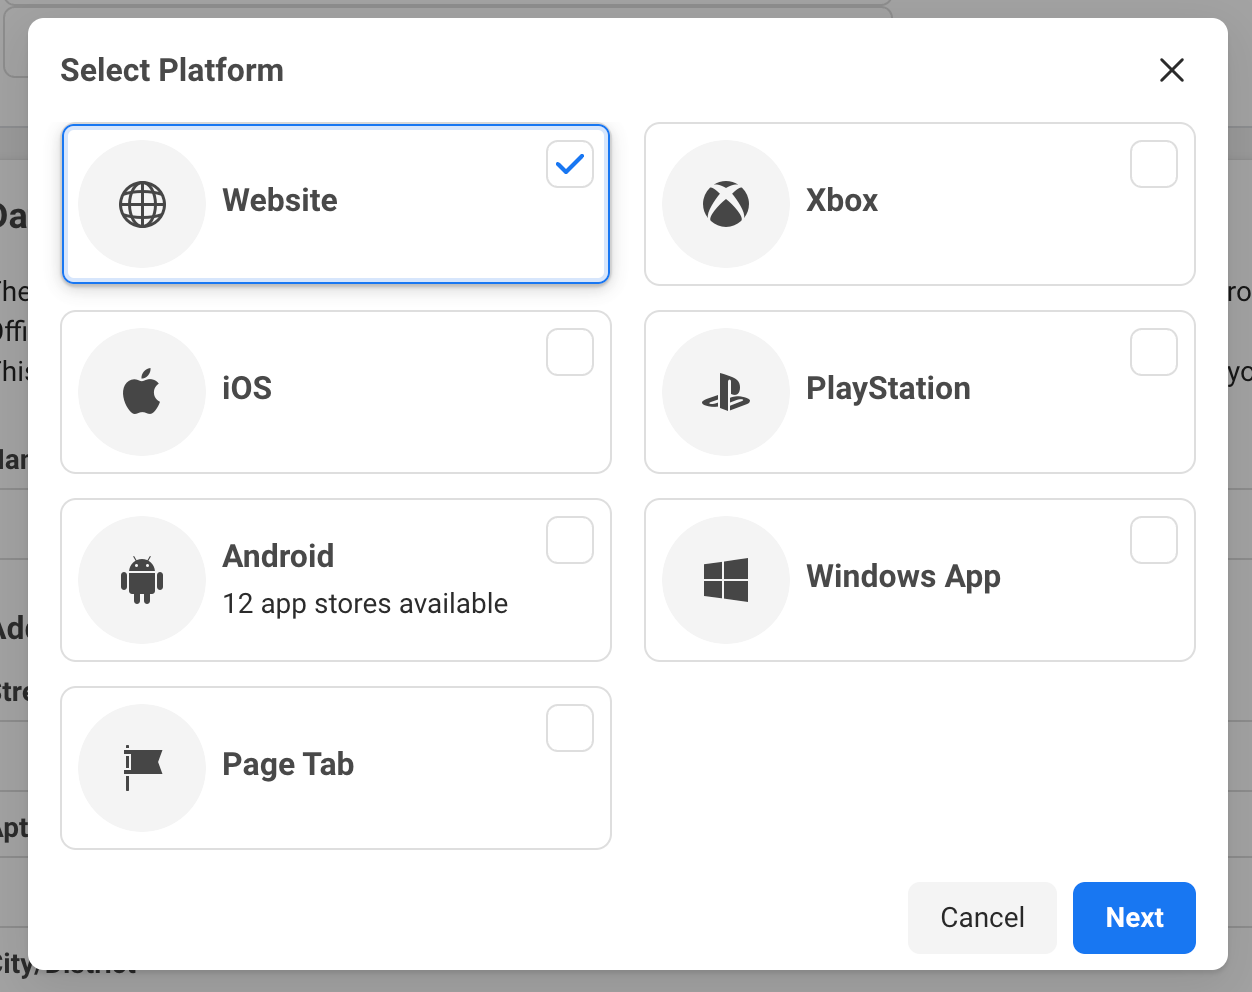
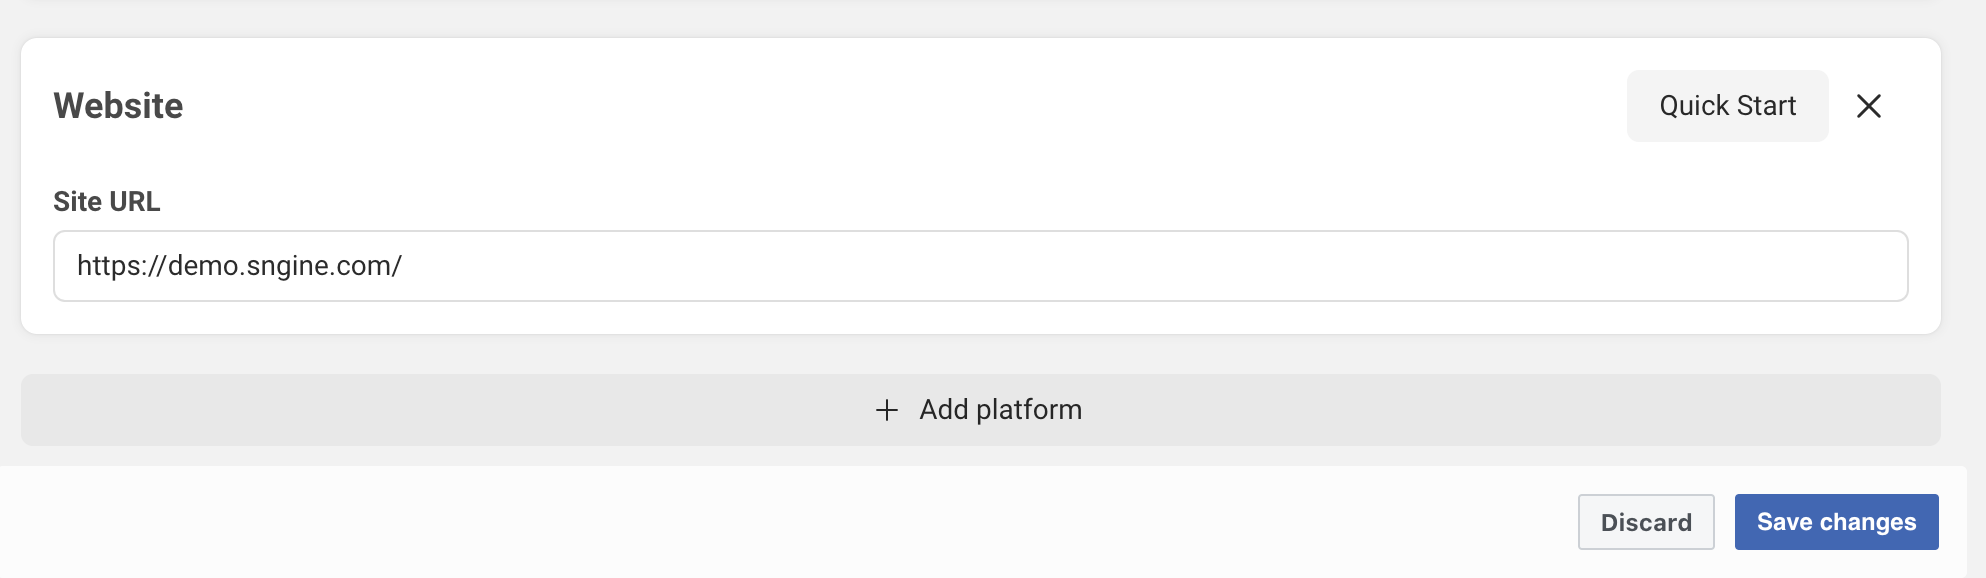
Also make sure you added your website URL in Site URL
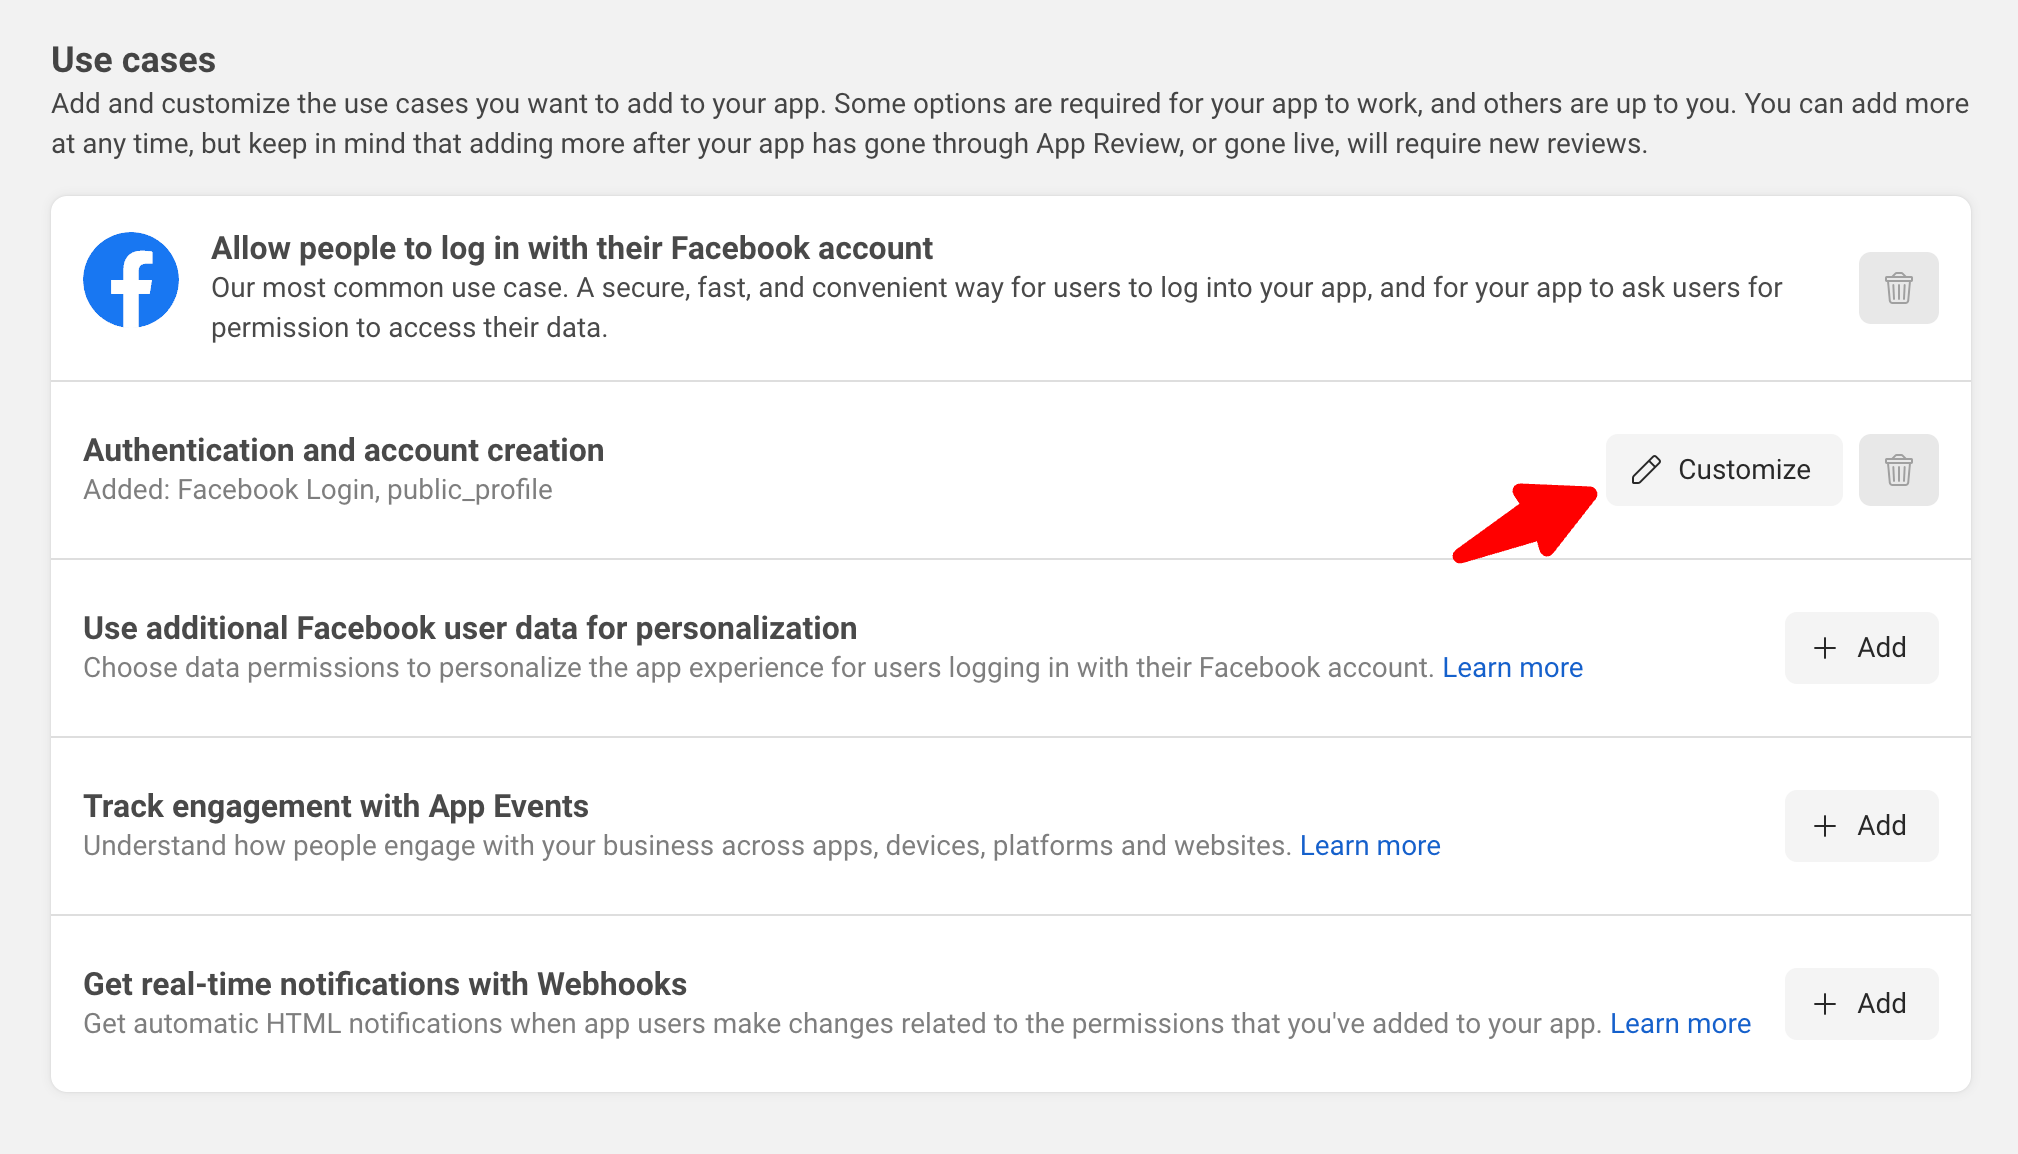
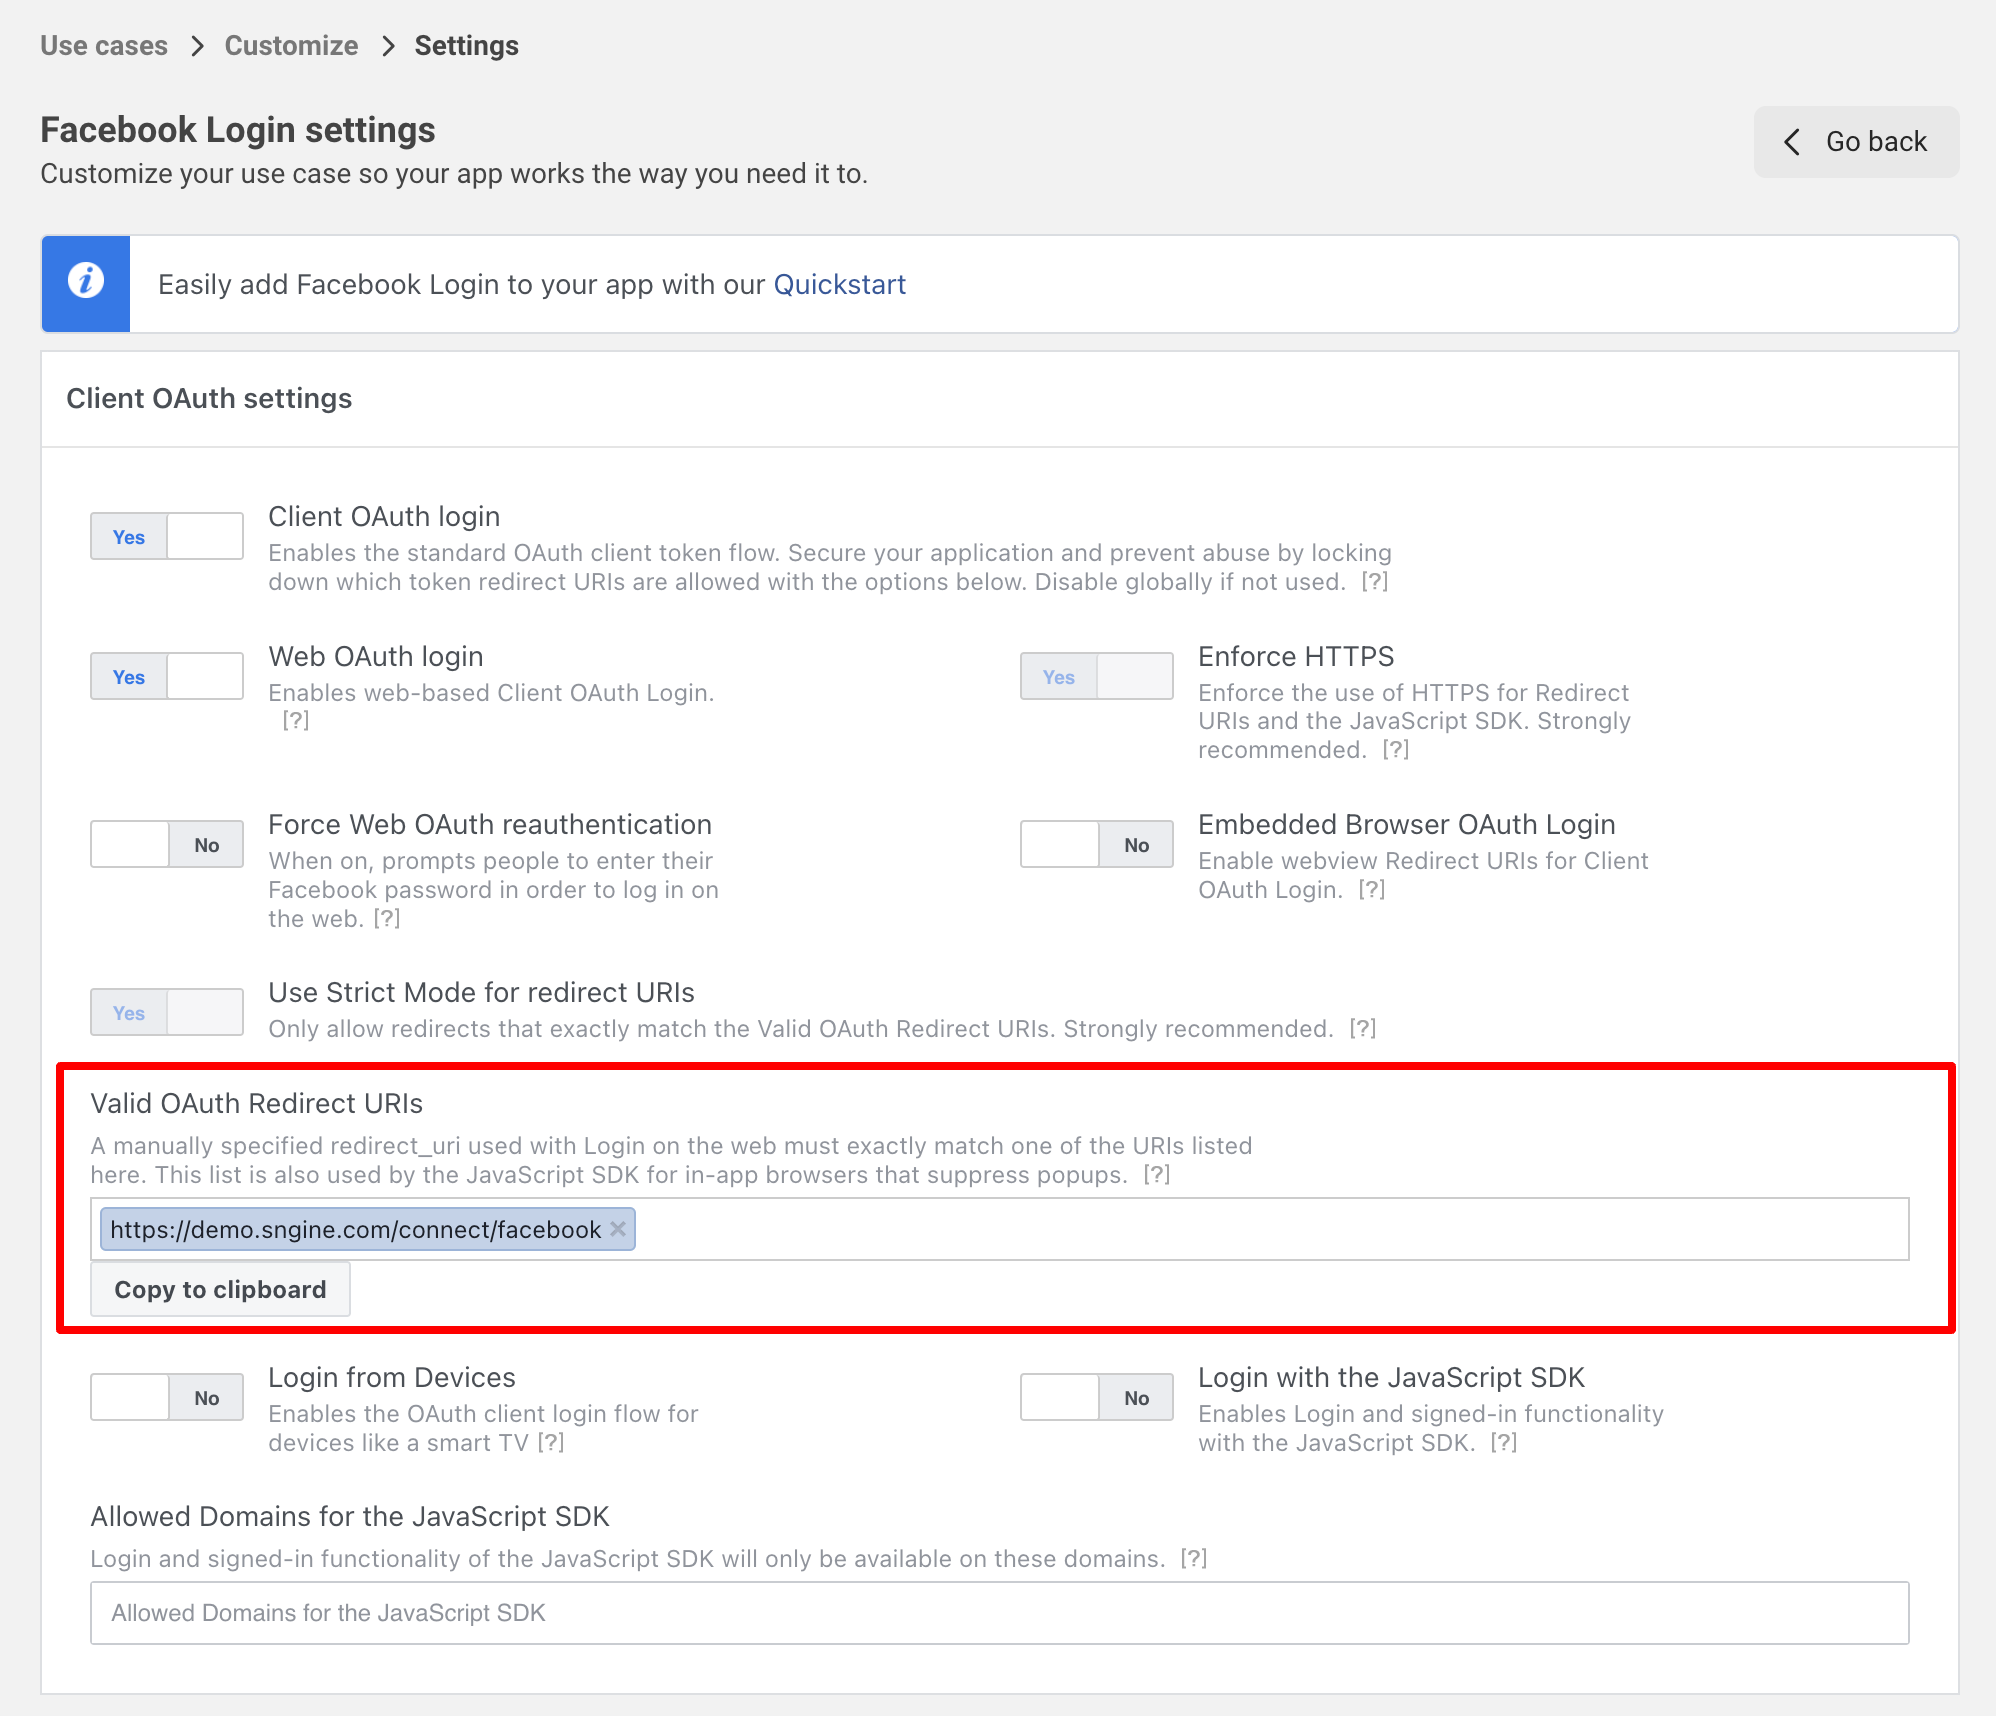
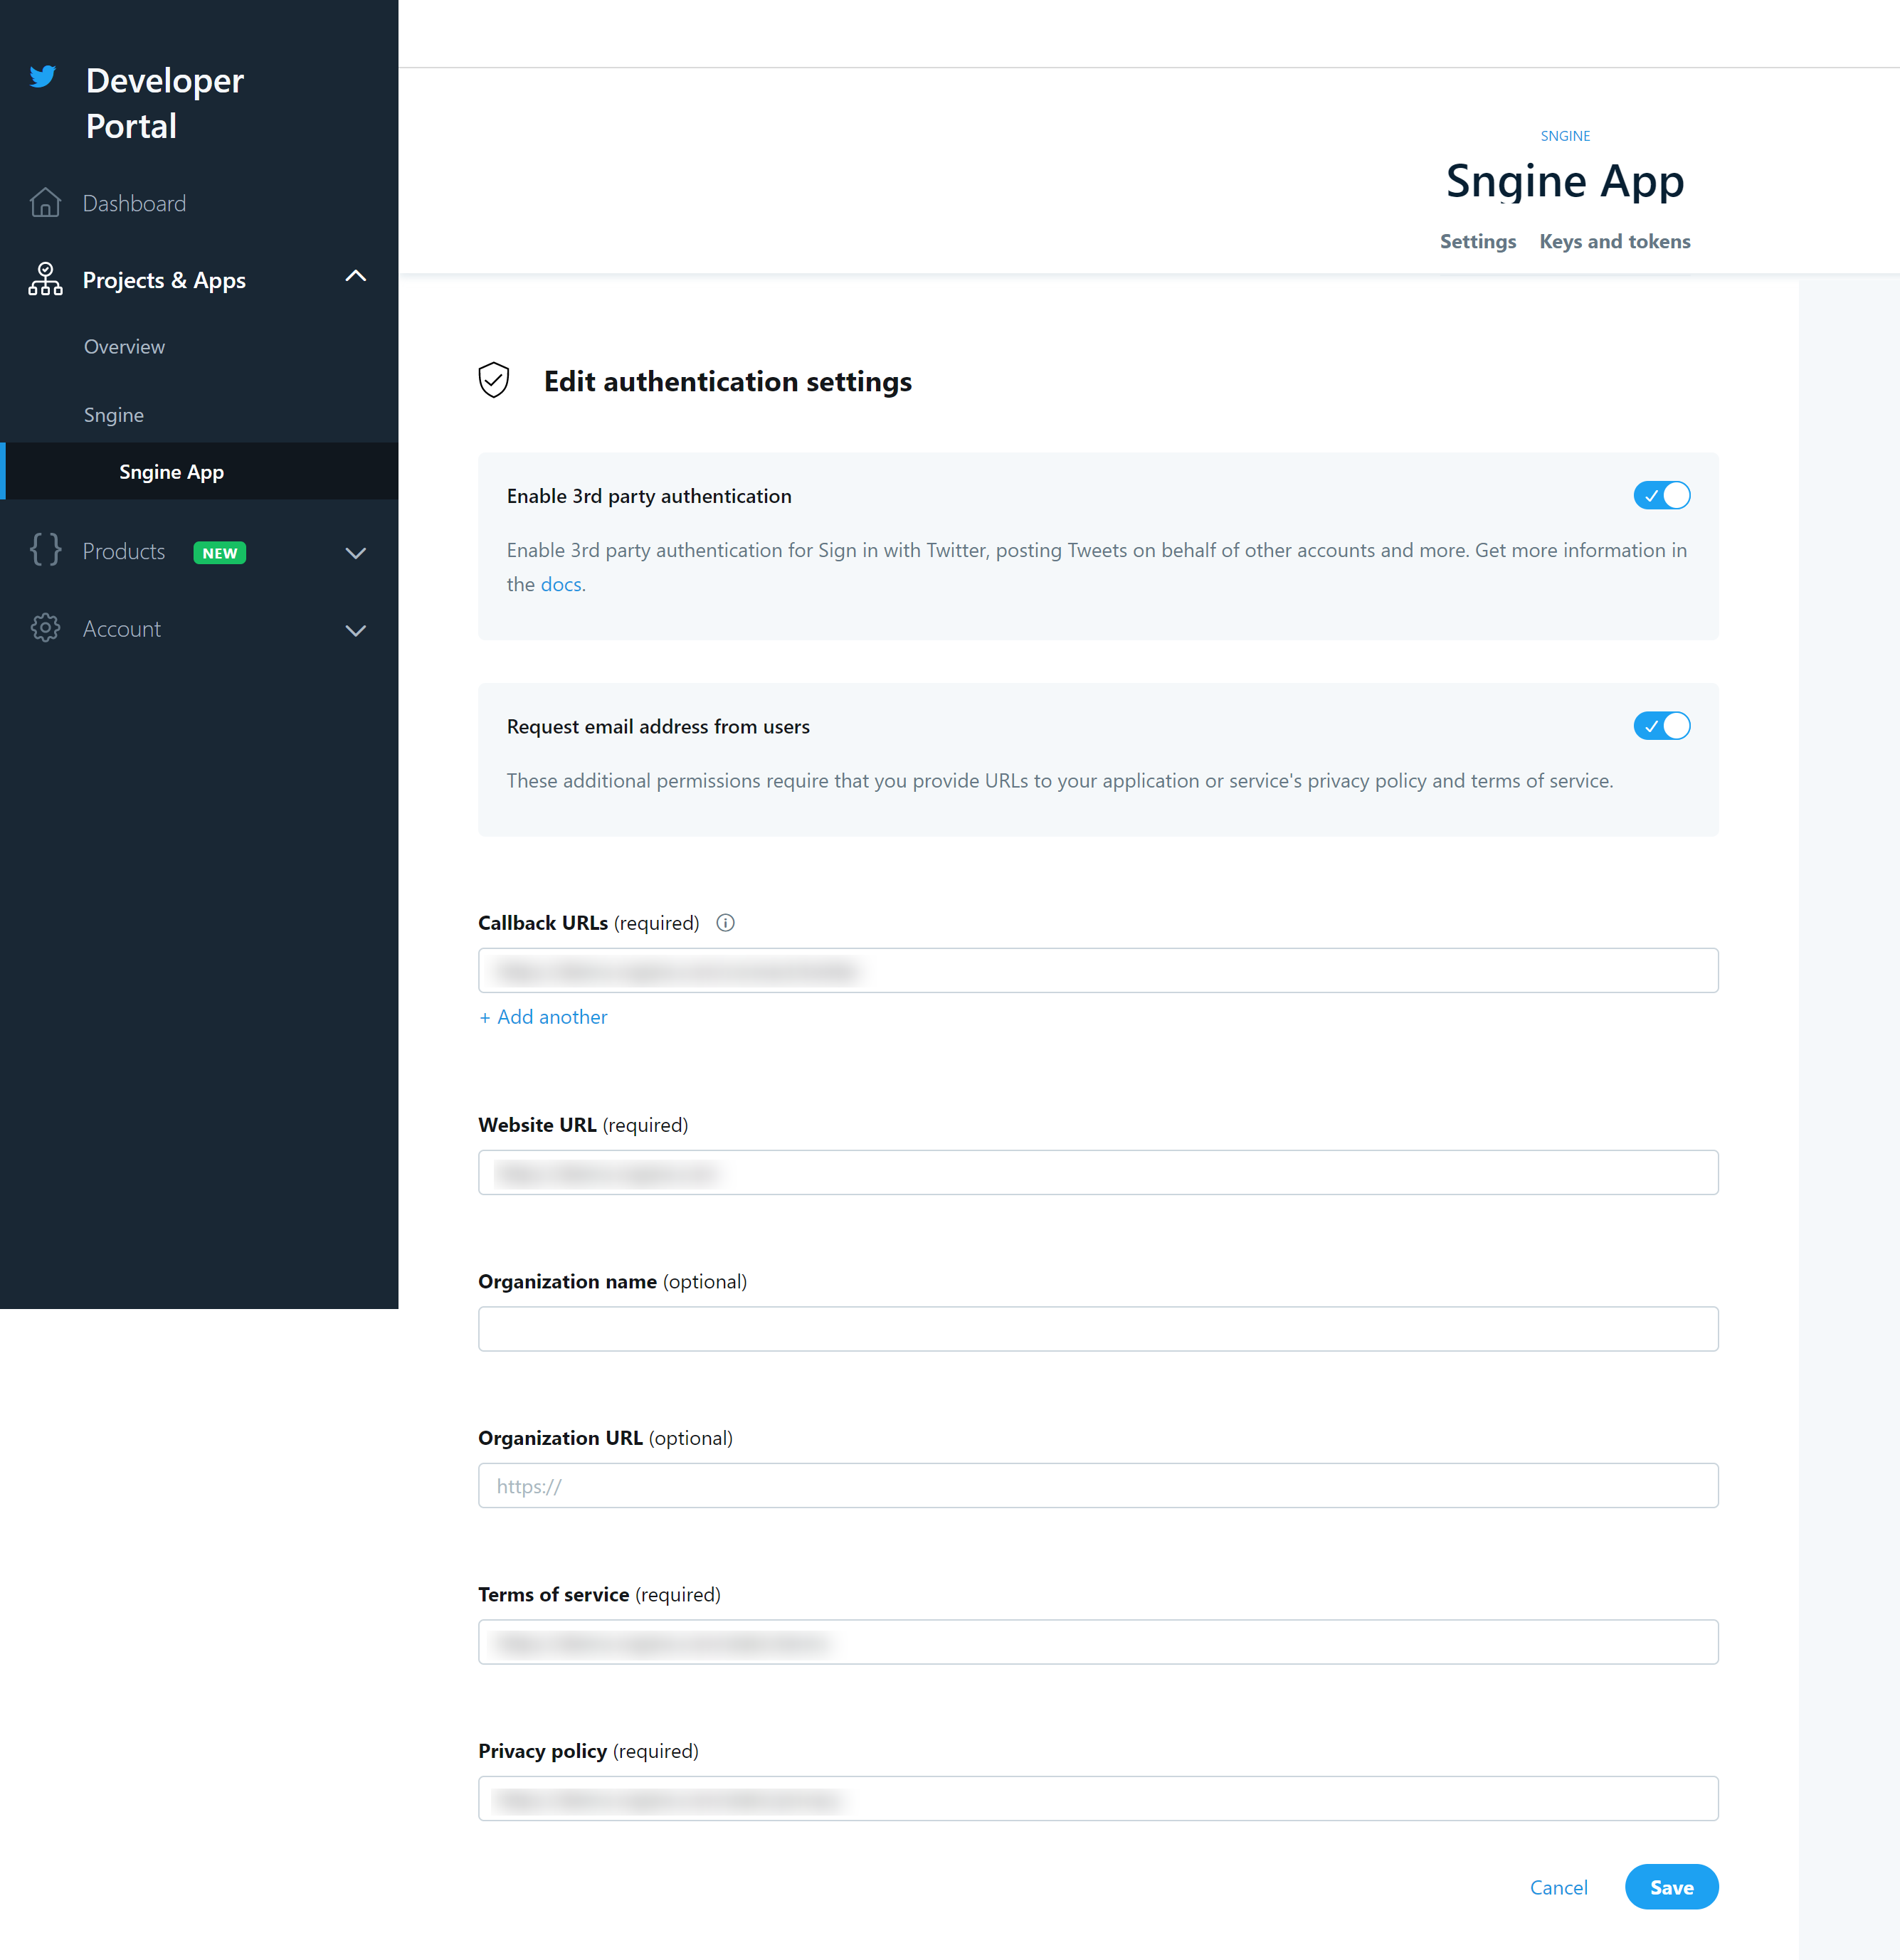
Now go to Use cases then Use cases then Settings and put the
following URL as Valid OAuth redirect URIs then
click Save Changes
Make sure you have enabled the Use Strict Mode for Redirect URIs
If you installed Sngine in your domain directly like www.domain.com the URI should
be like this: https://www.domain.com/connect/facebook
If you installed Sngine in your domain directly but without www like domain.com the URI should be like this: https://domain.com/connect/facebook
If you installed Sngine in sub-domain like sub.domain.com the URI should be like
this: https://sub.domain.com/connect/facebook
If you installed Sngine in a directory like domain.com/directory the URI should be
like this: https://www.domain.com/directory/connect/facebook
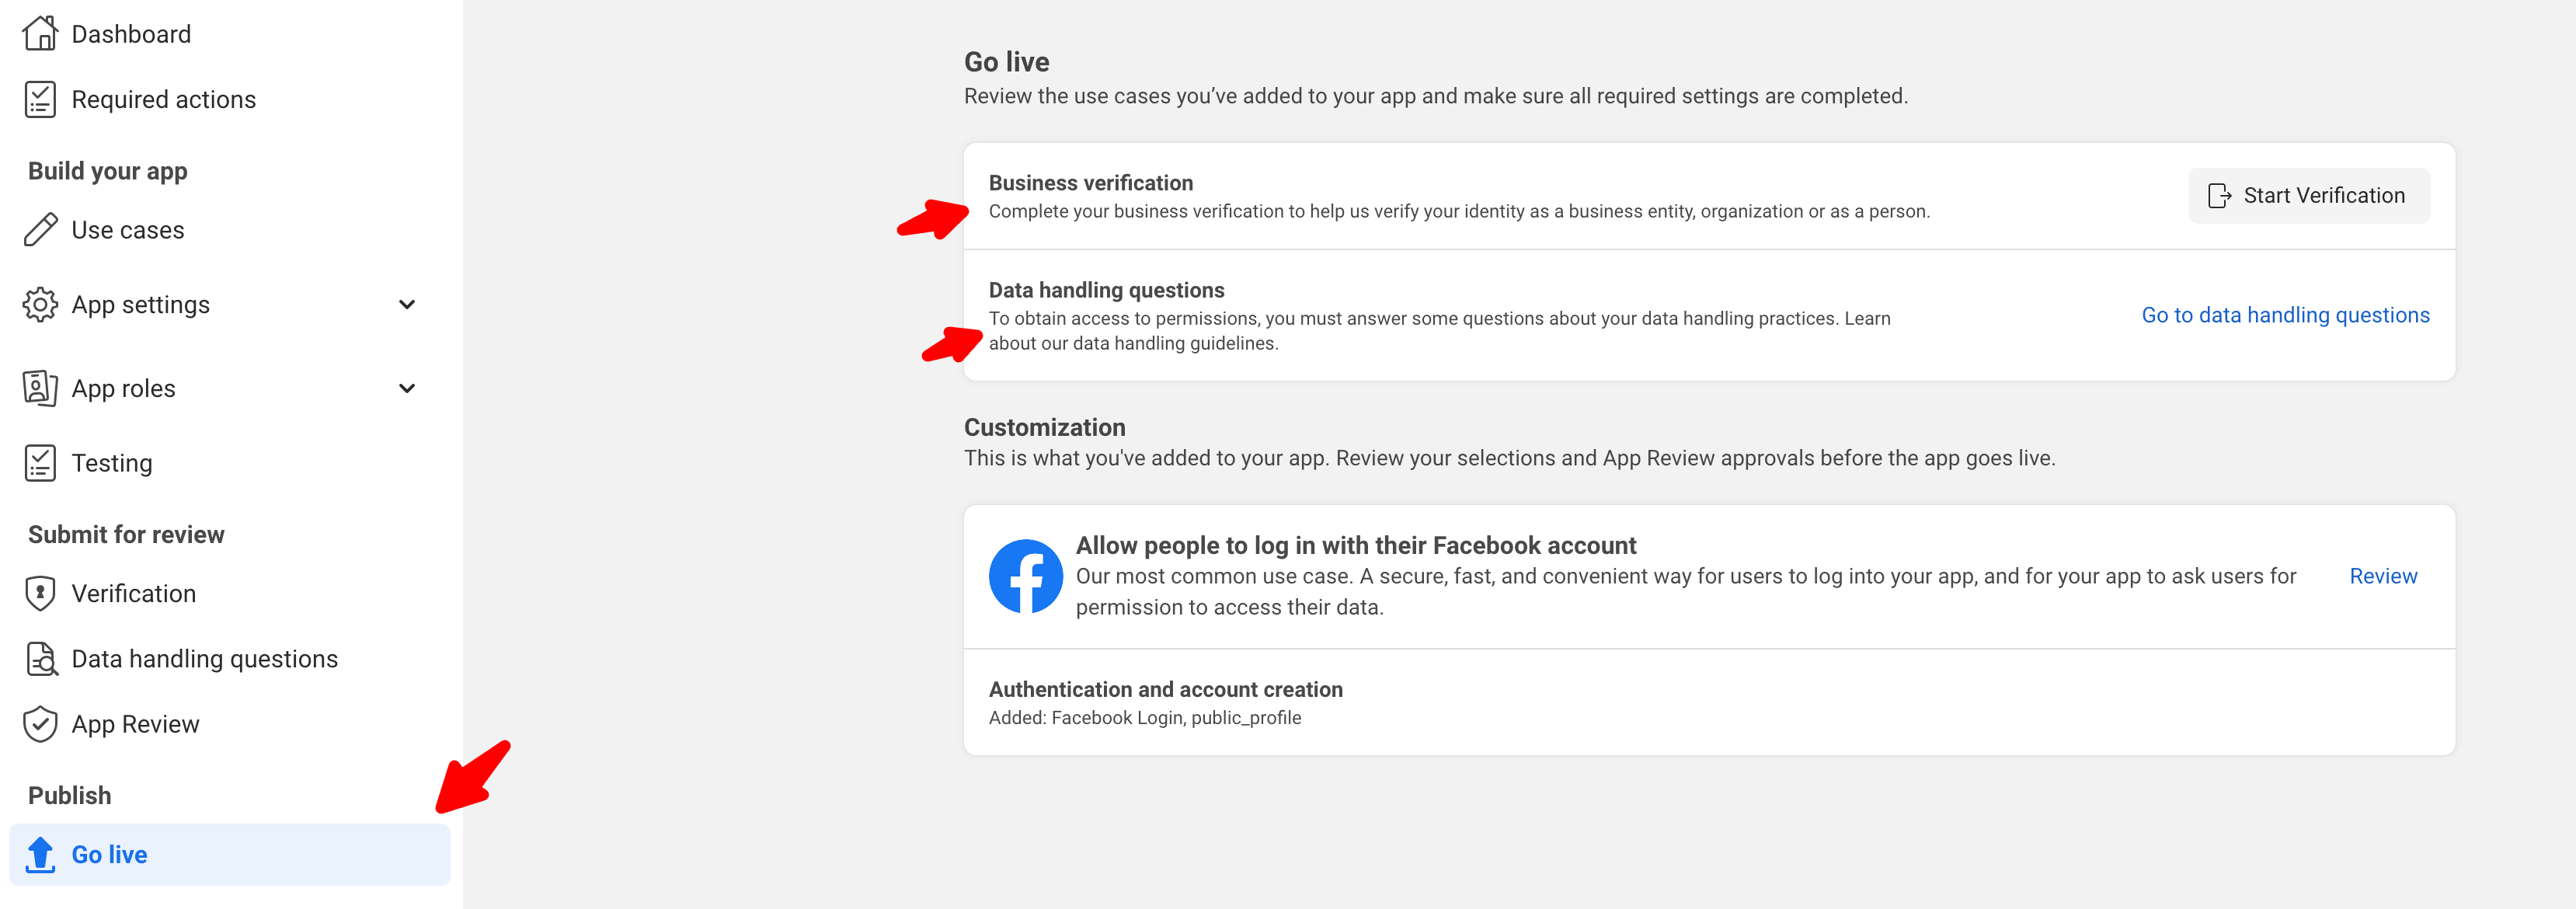
App still "In Development" mode and to make the app live, Click on the Go Live and follow the steps as required by Facebook then click Go Live
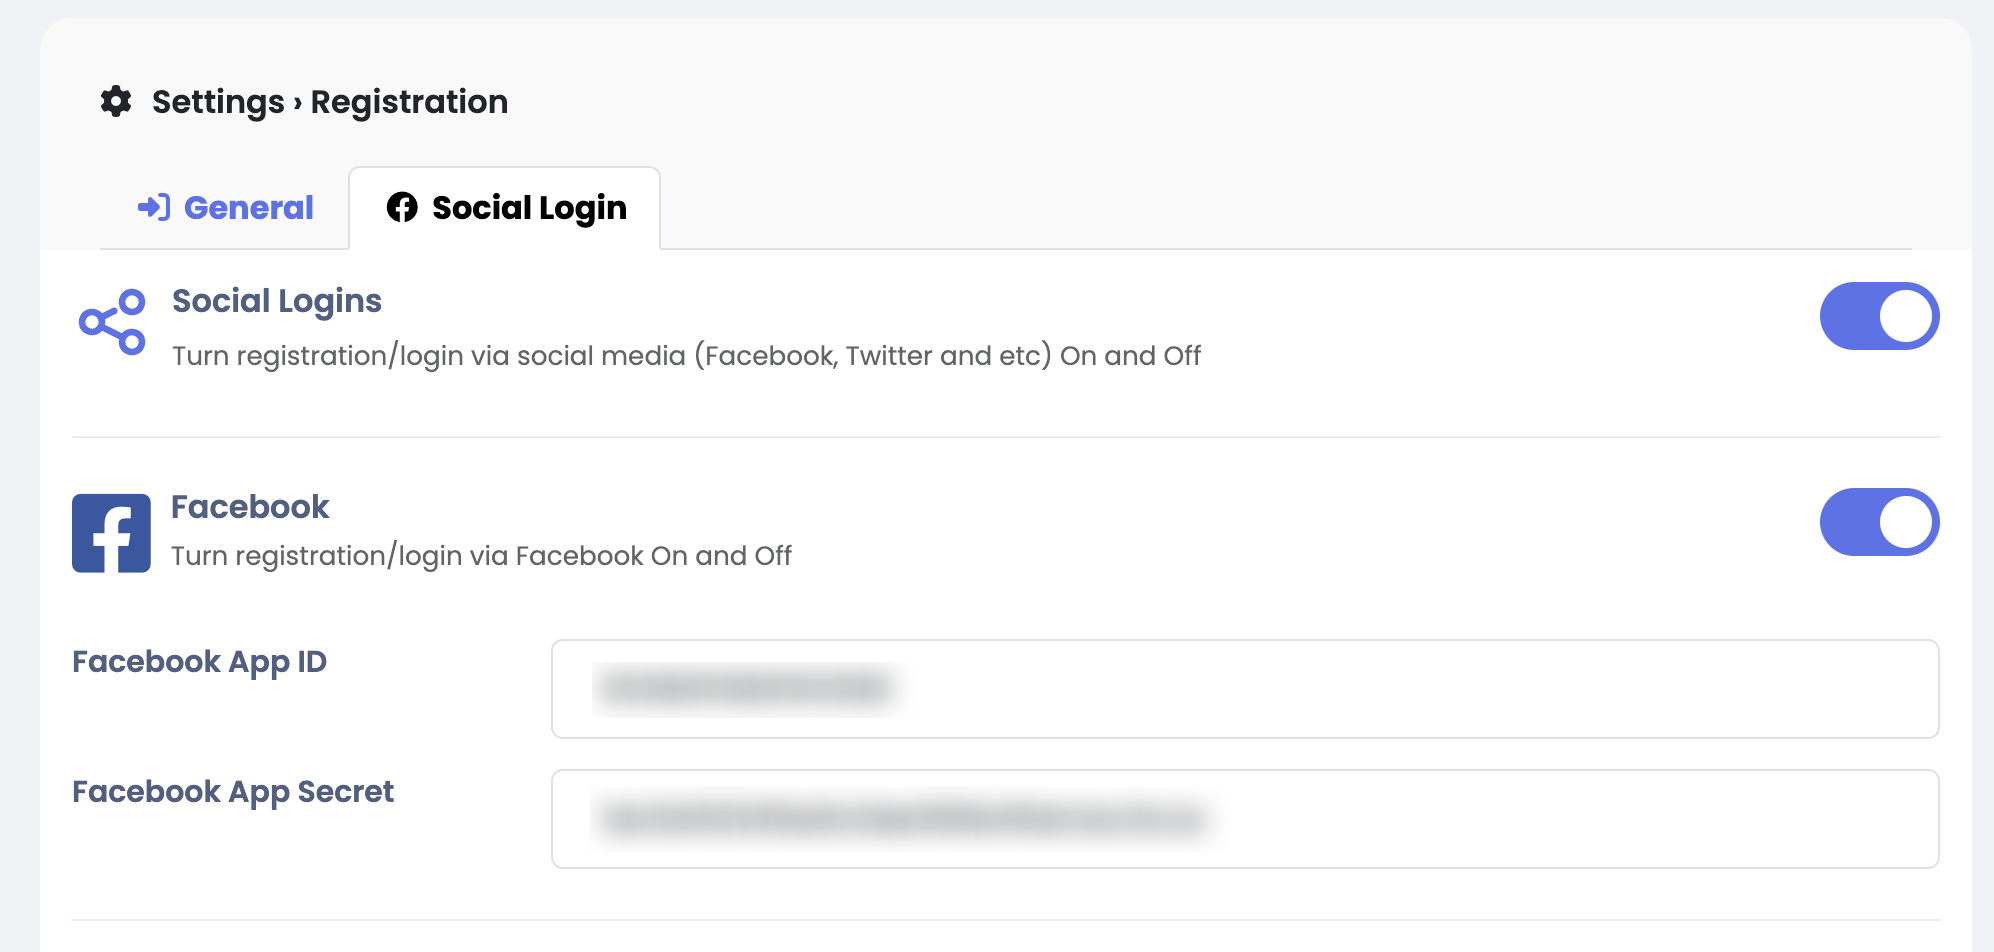
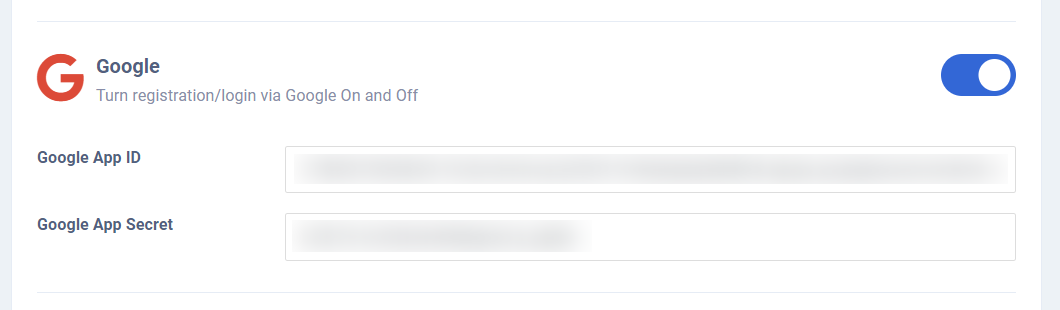
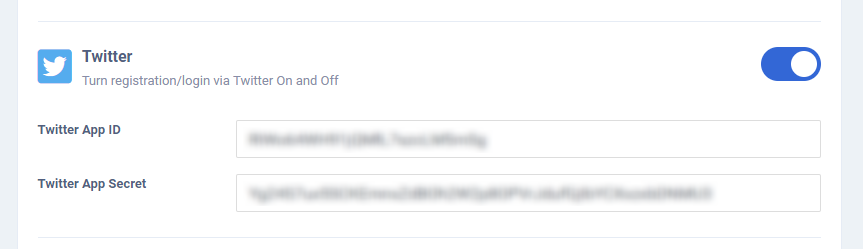
Now goto to Sngine Admin Panel -> Settings -> Registration Settings -> Social Login tab
and paste both keys (App ID & App Secret) as shown
That's all, Enjoy!
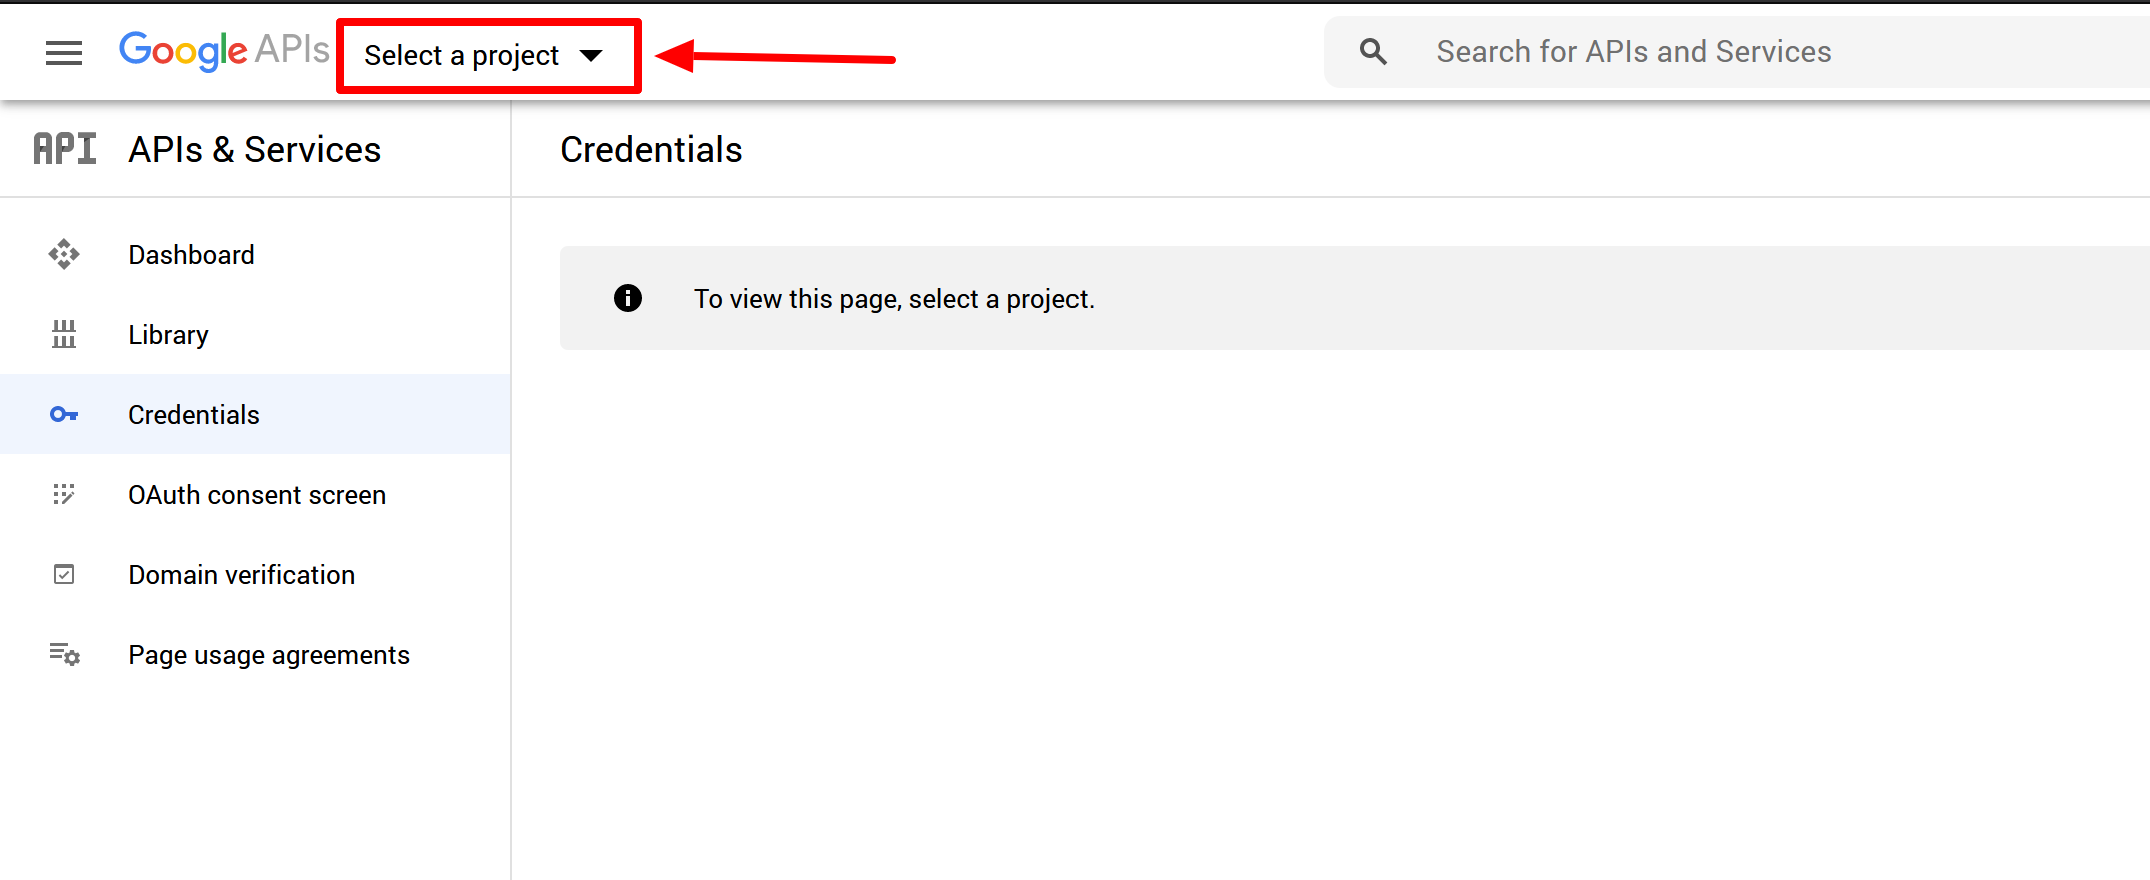
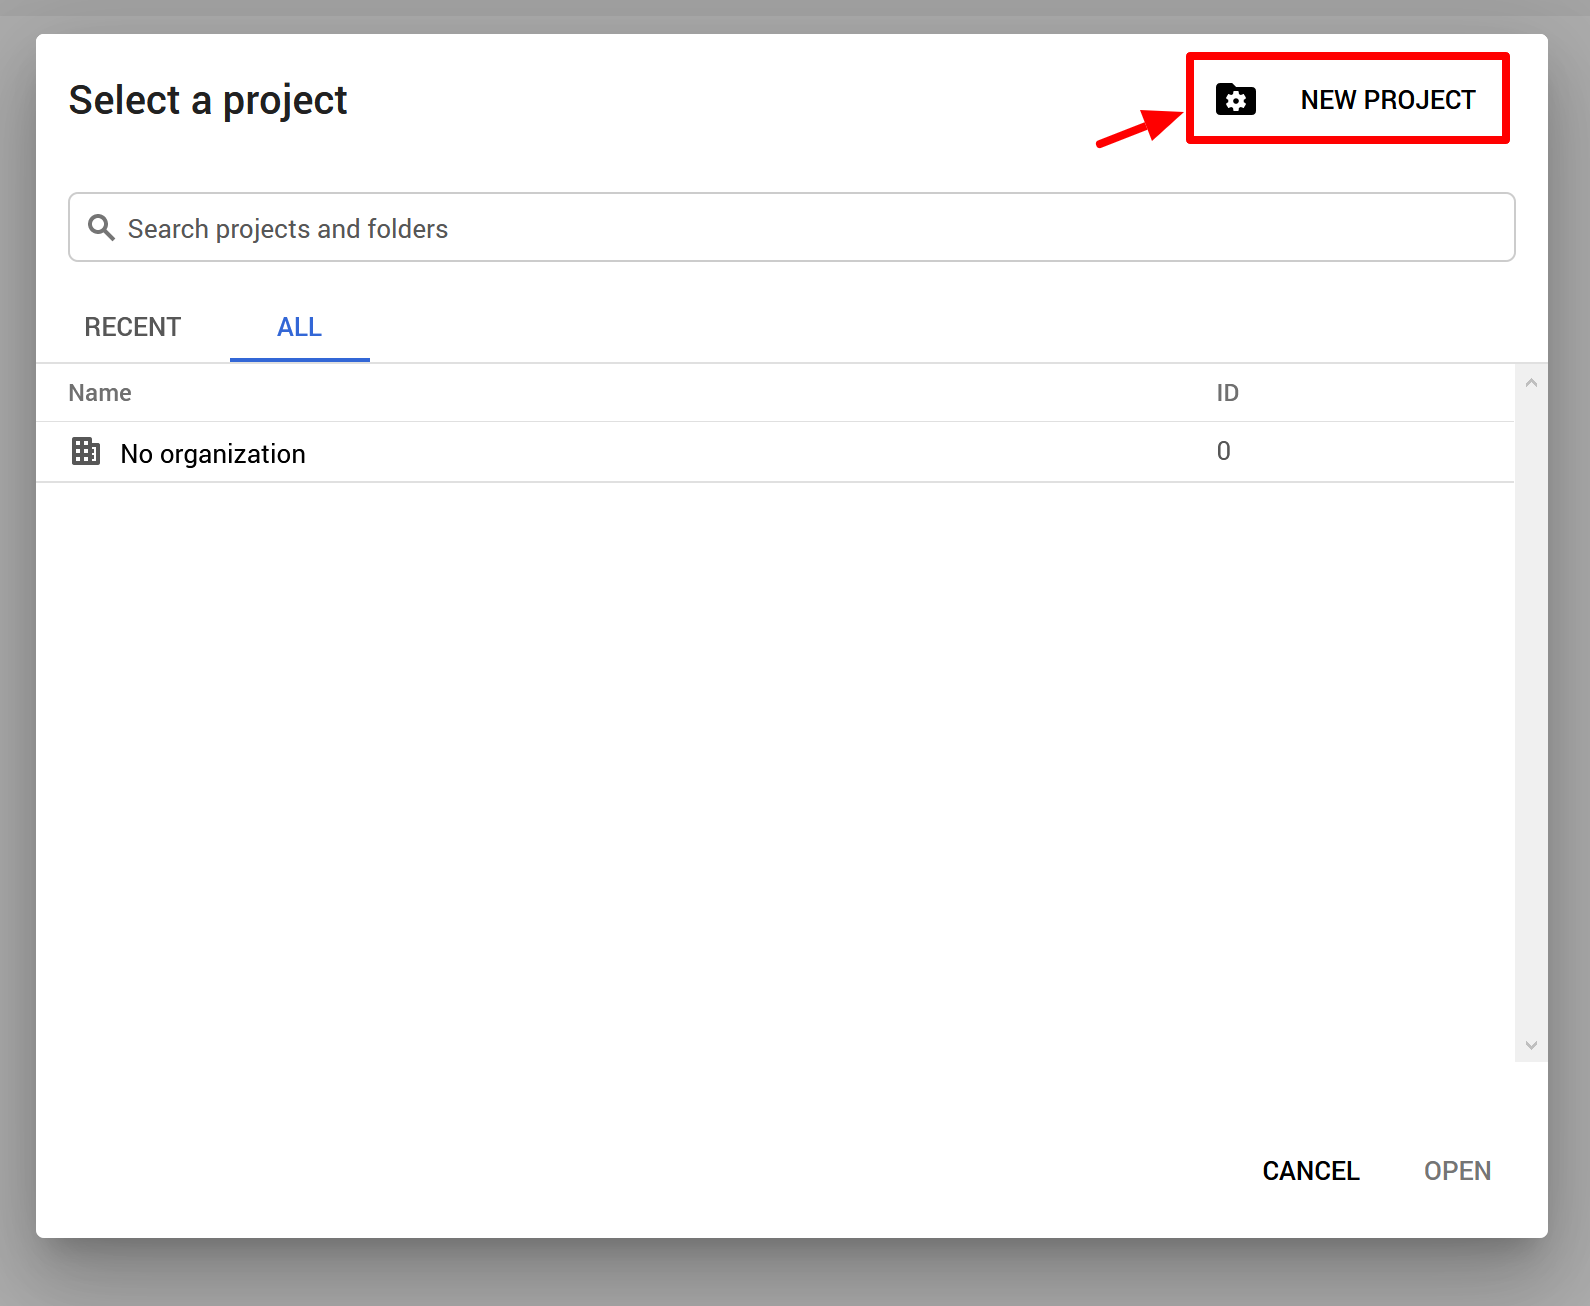
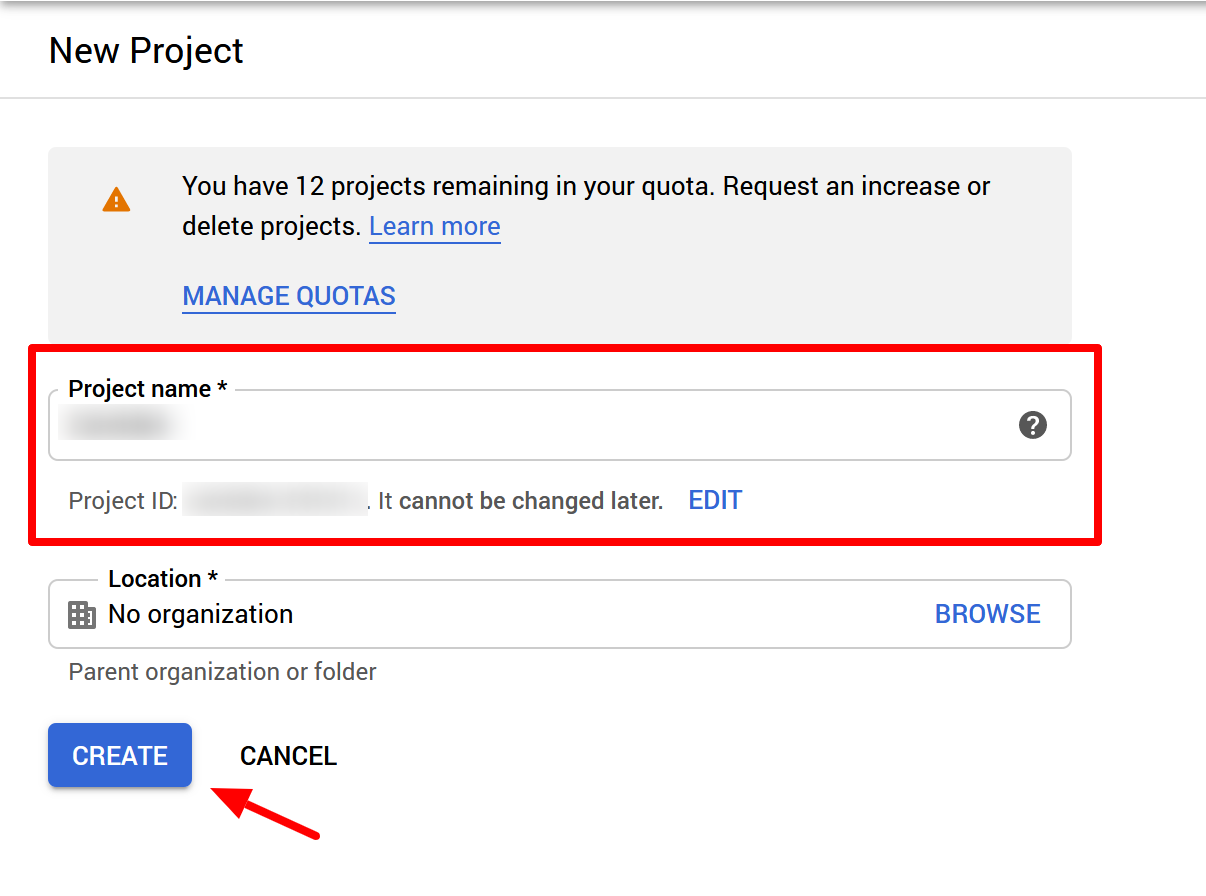
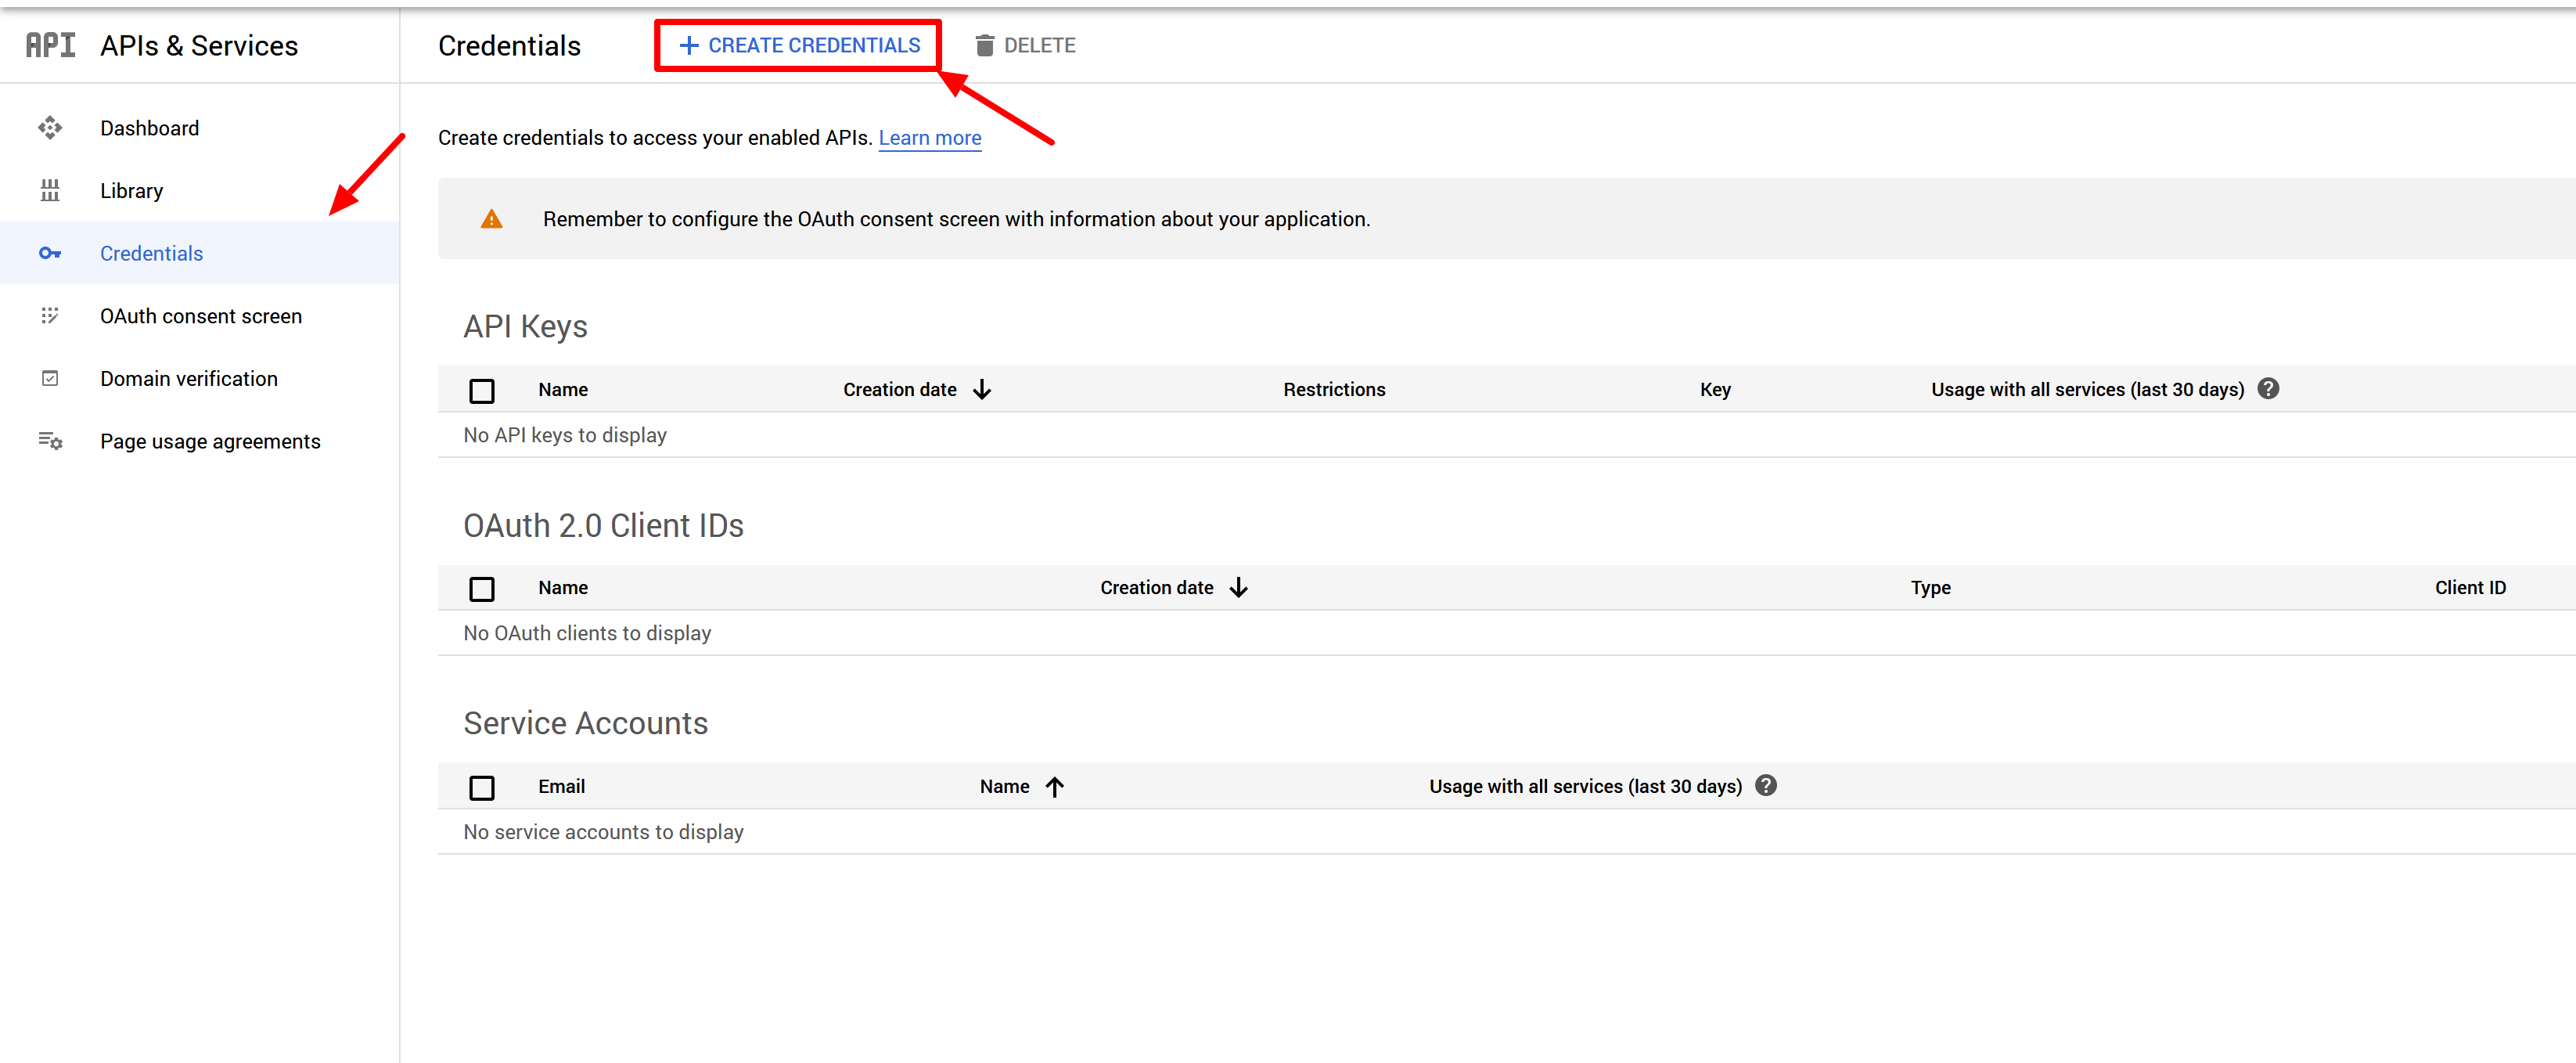
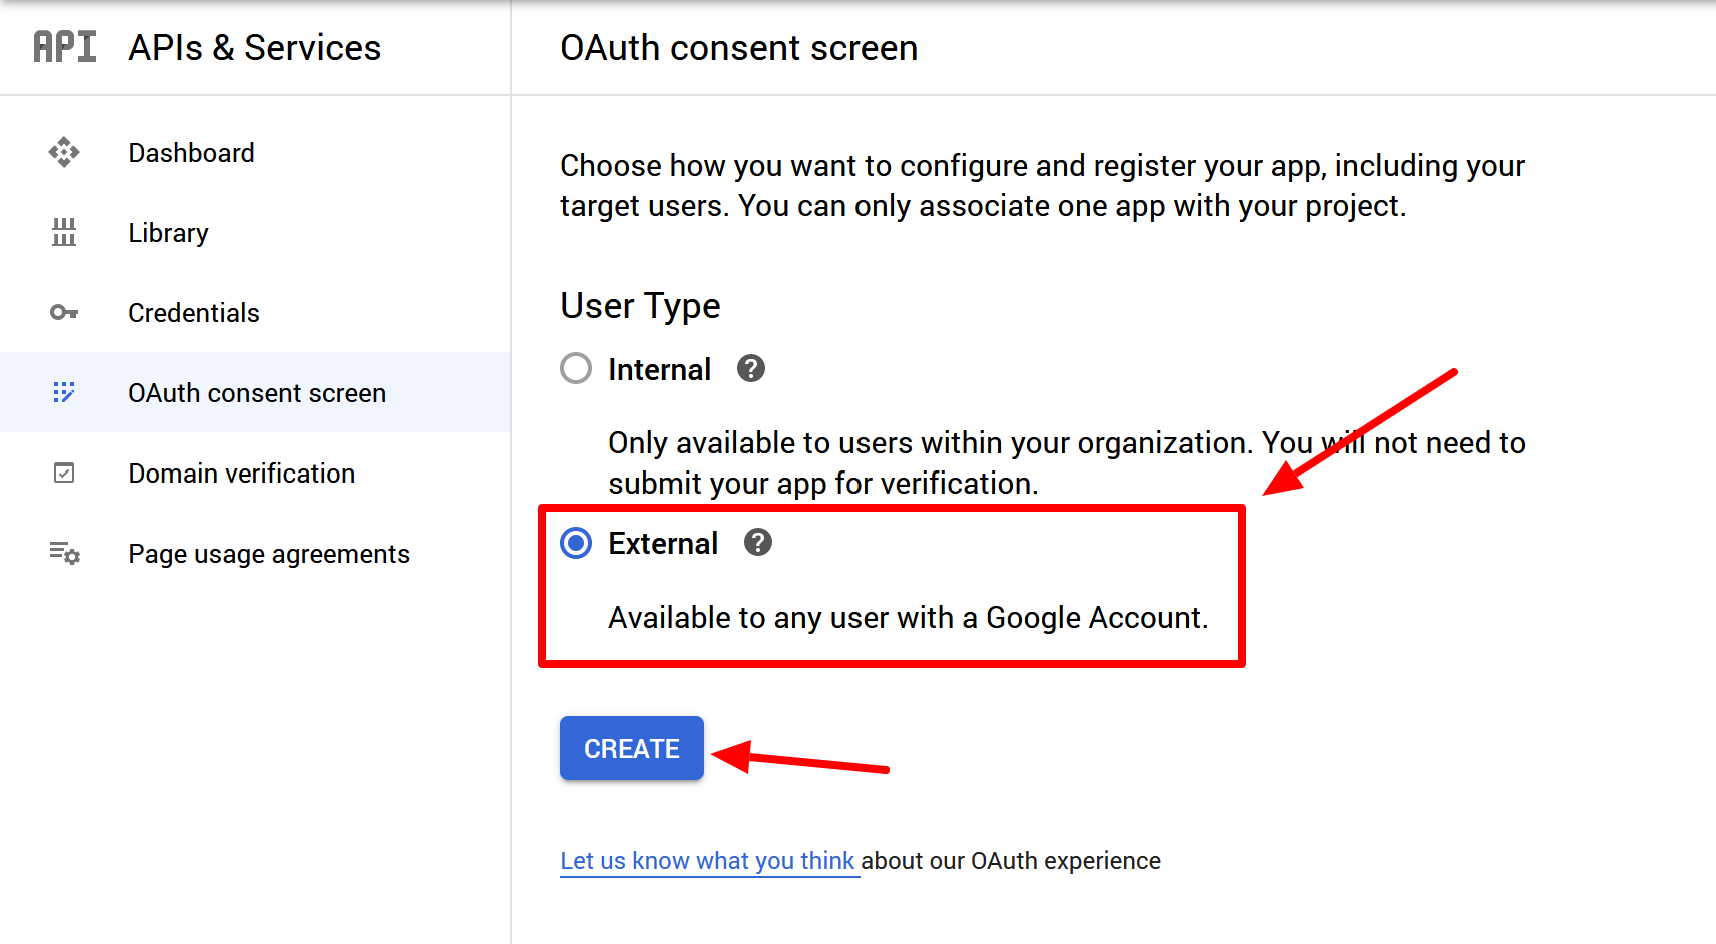
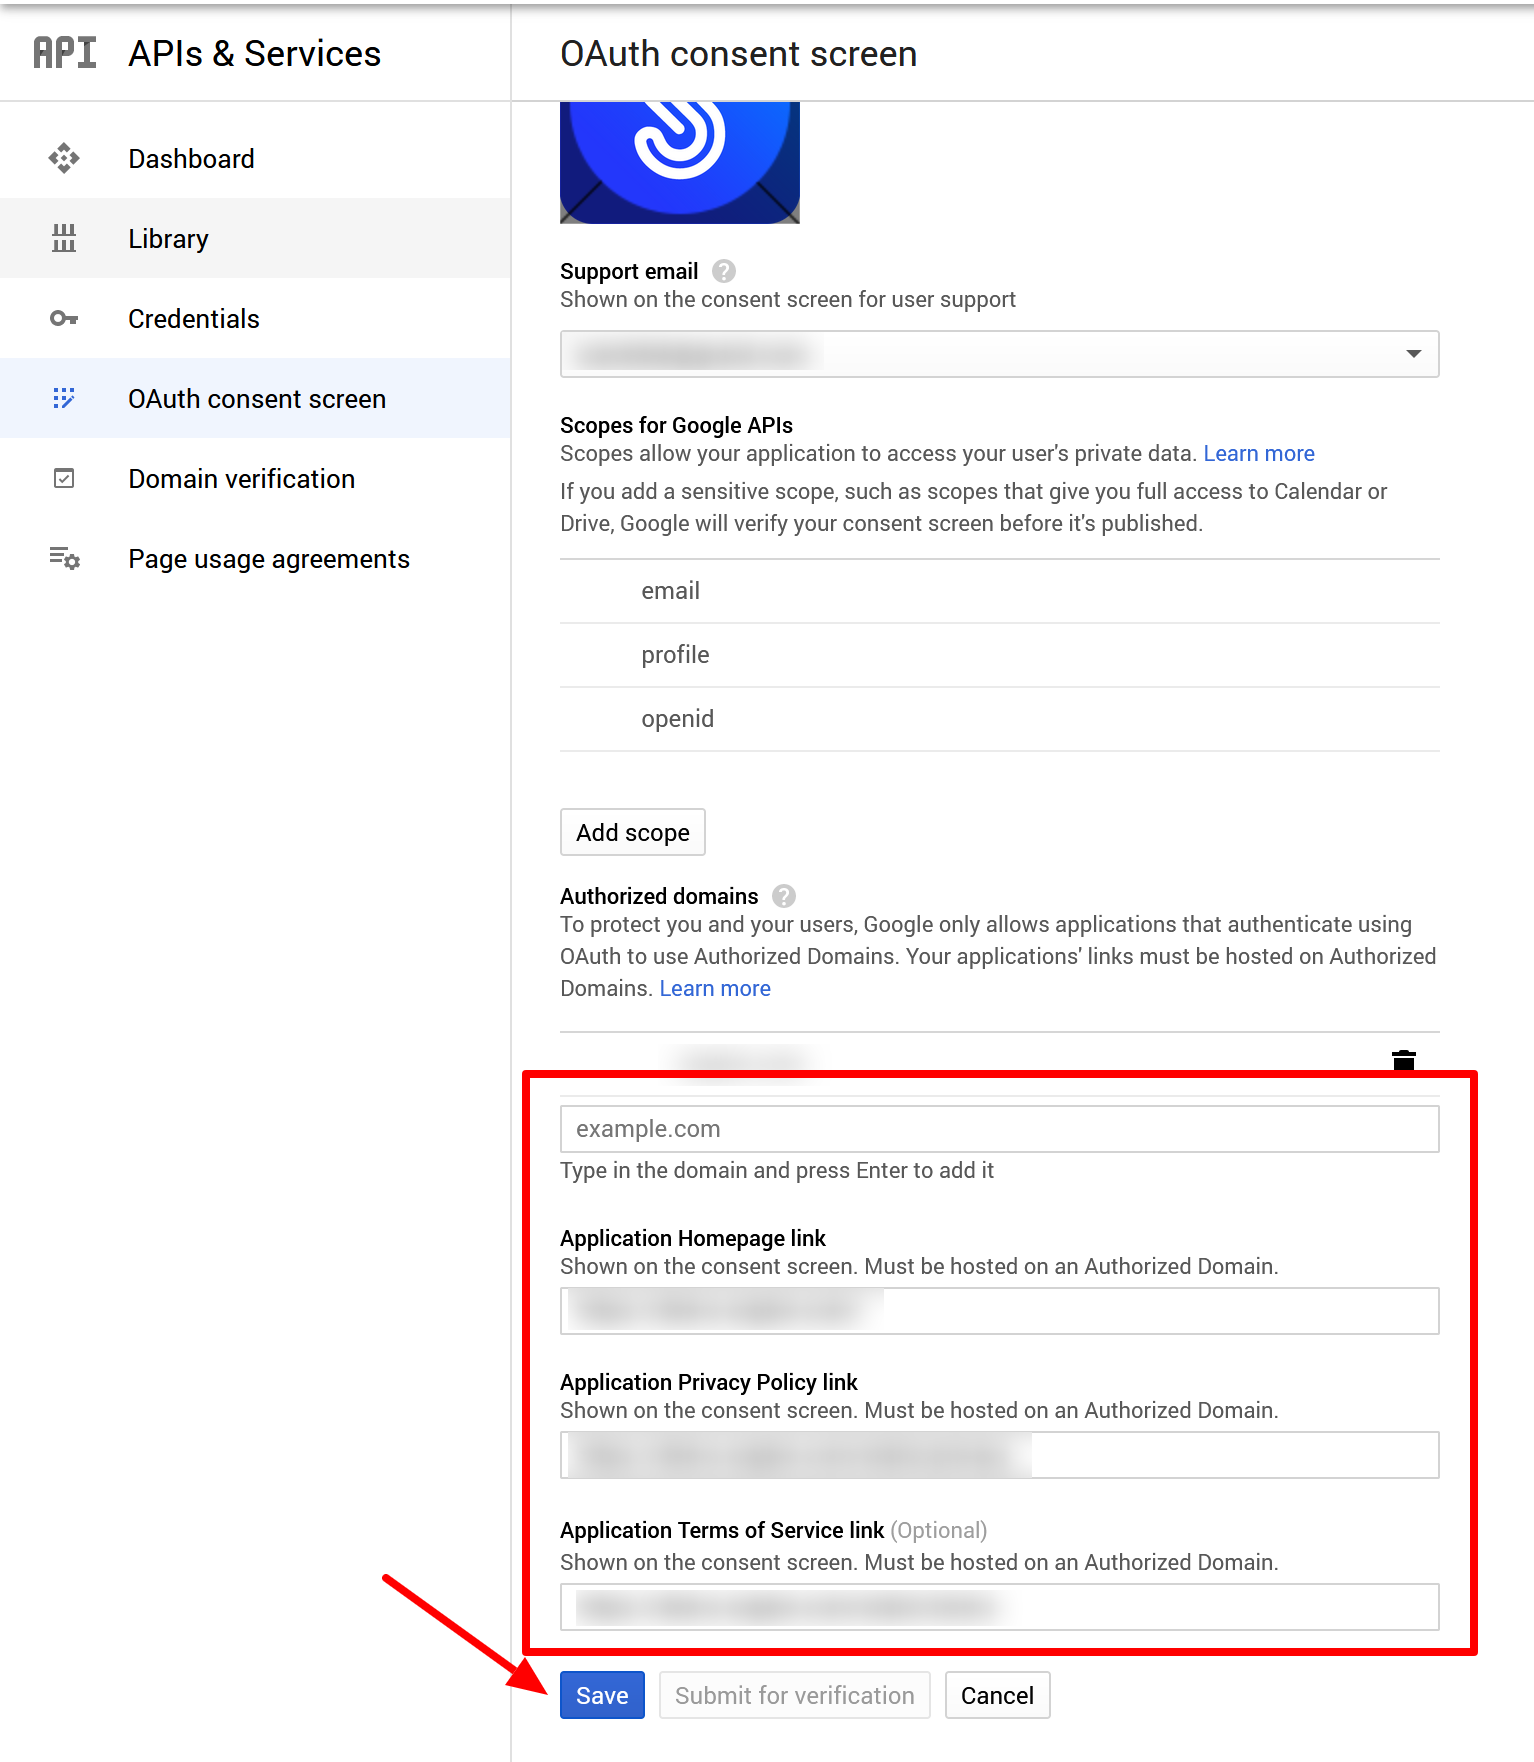
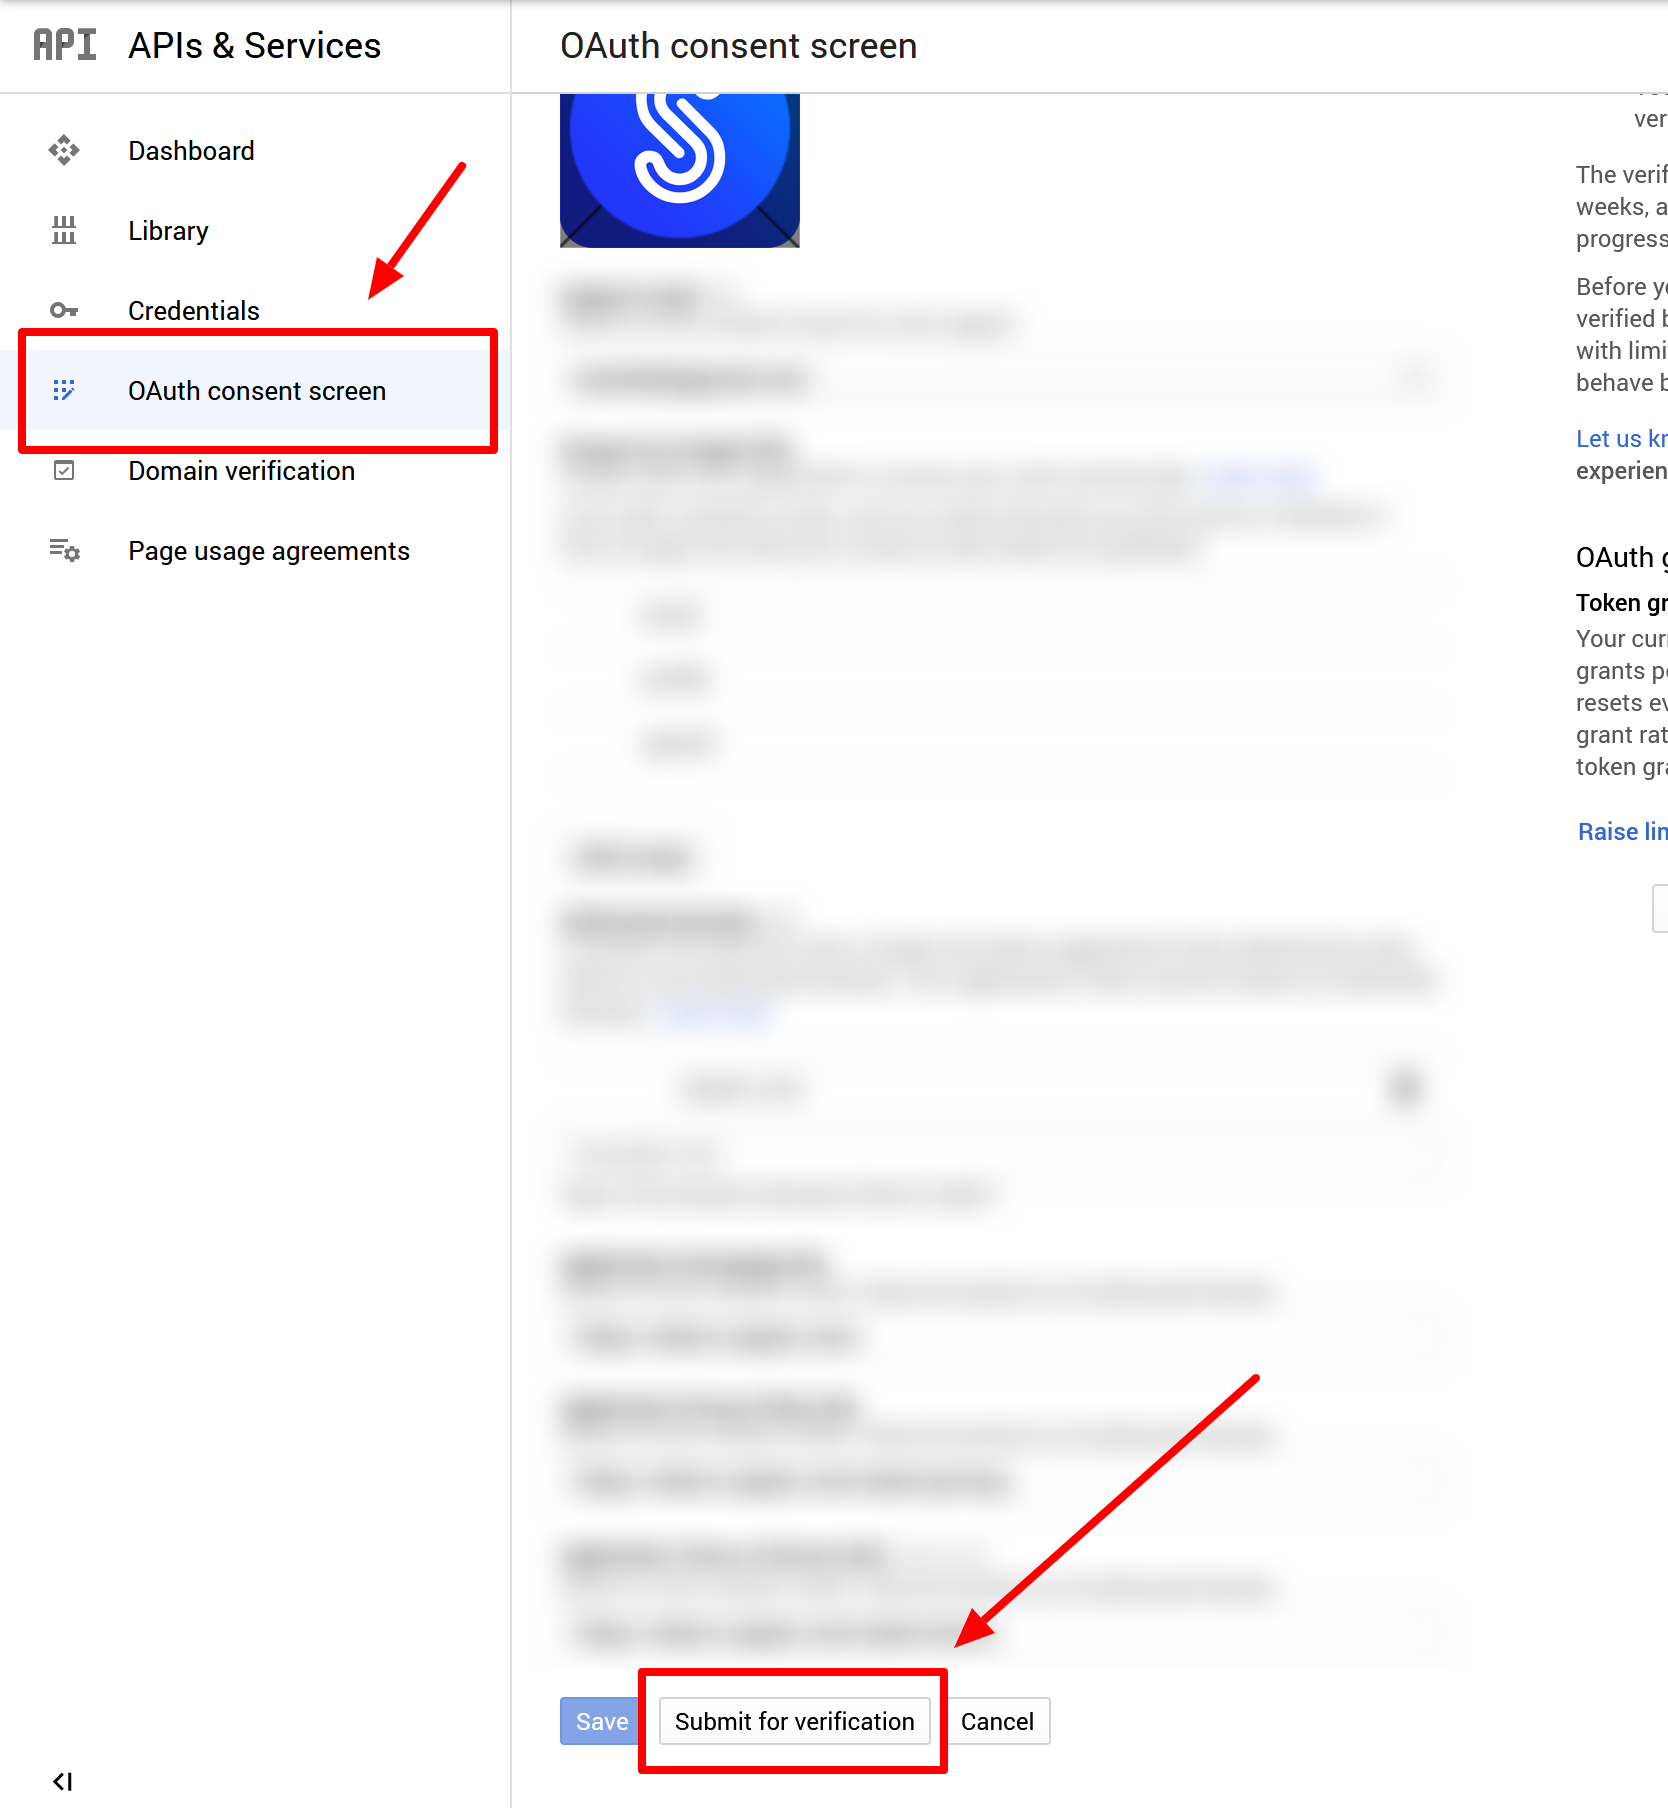
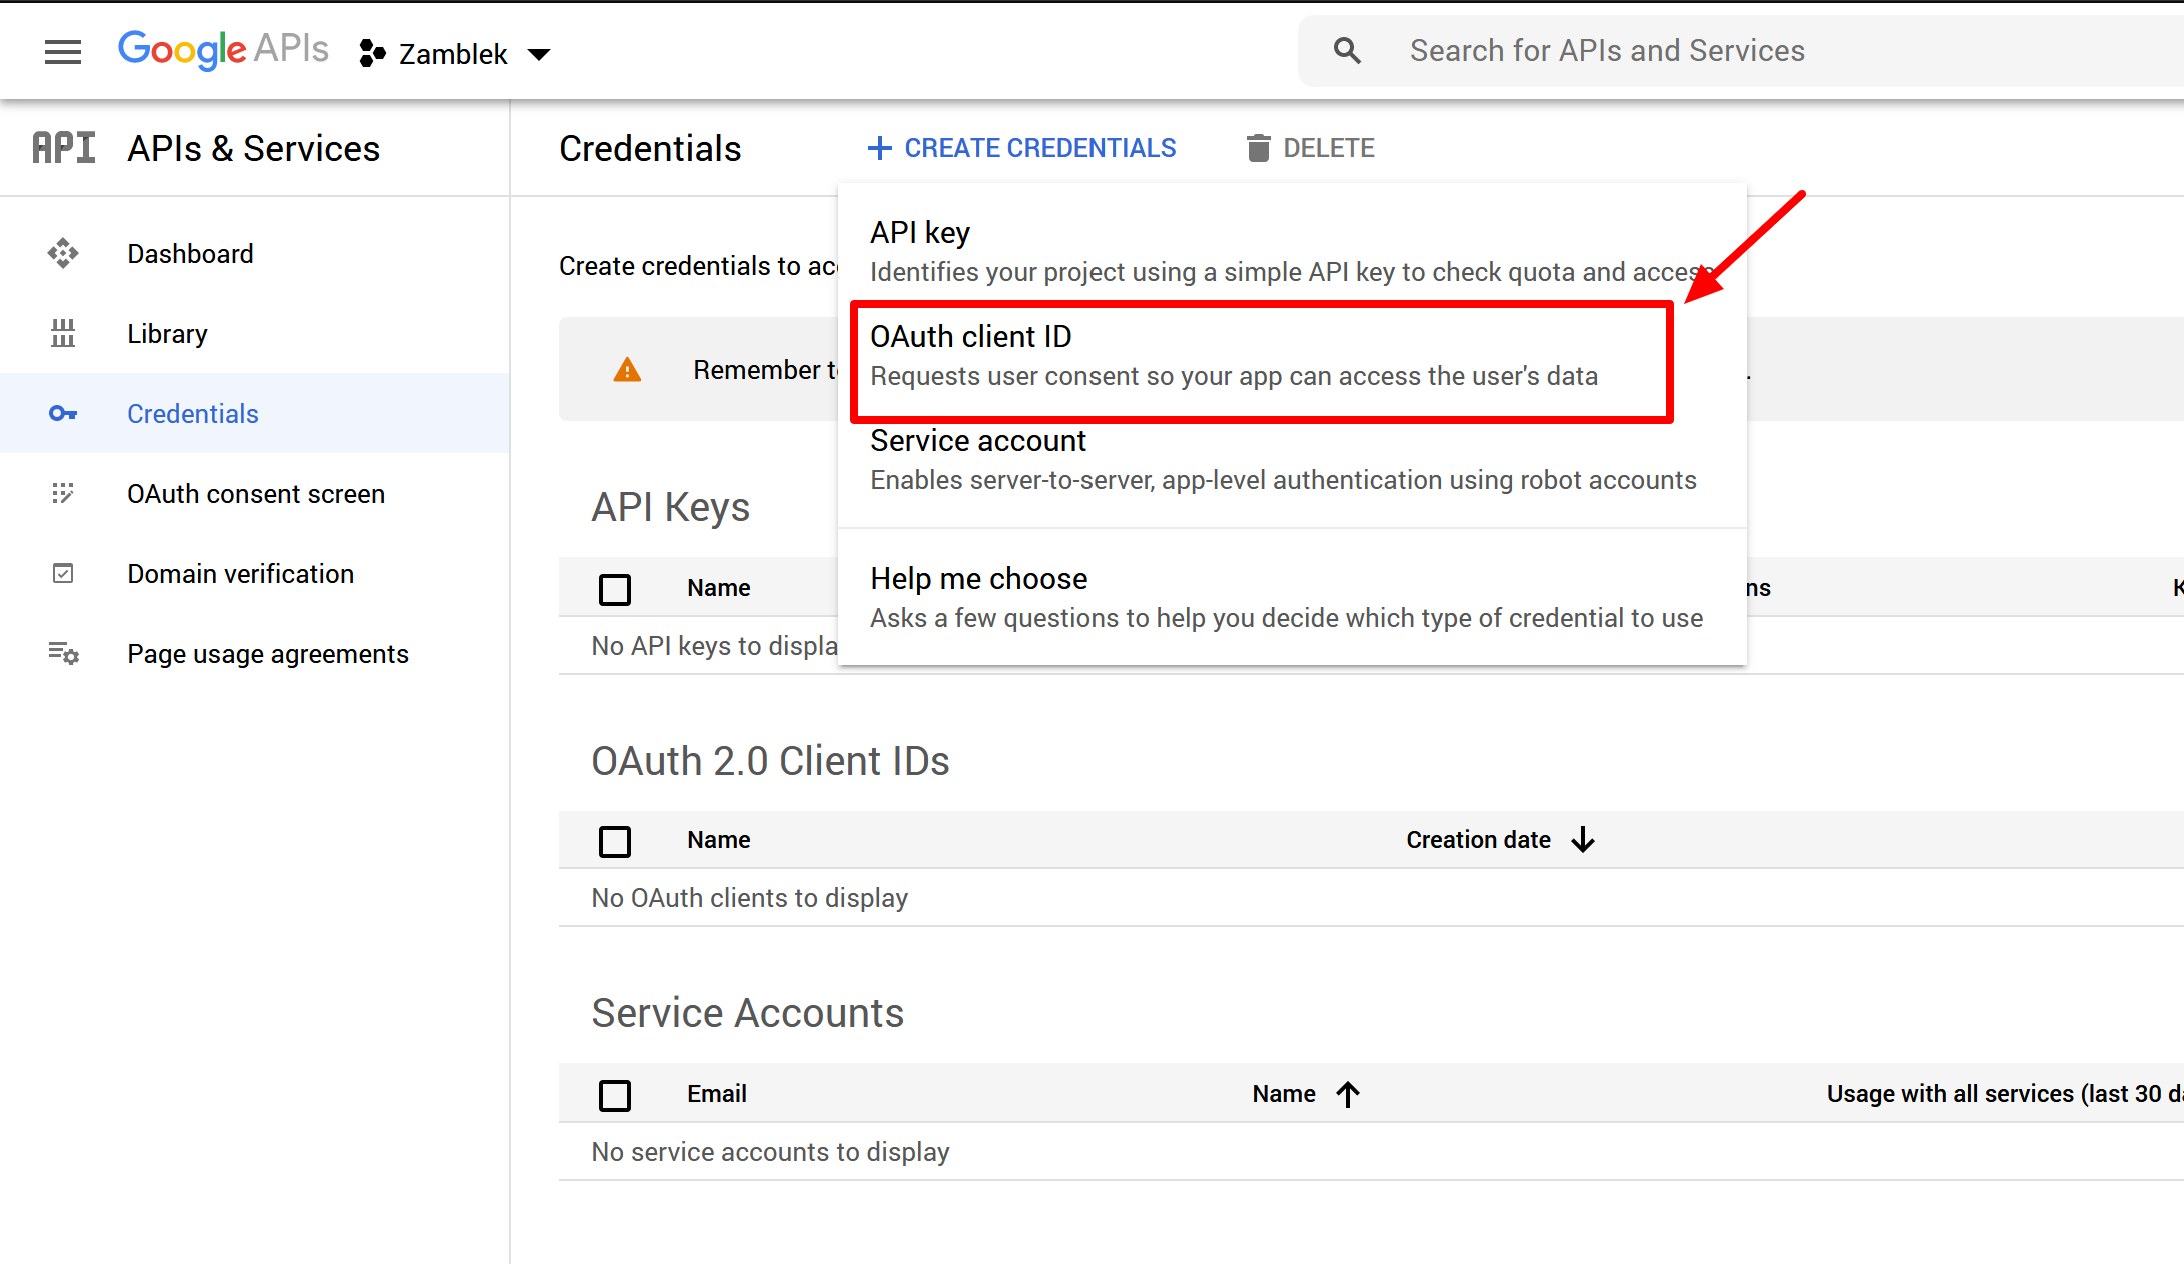
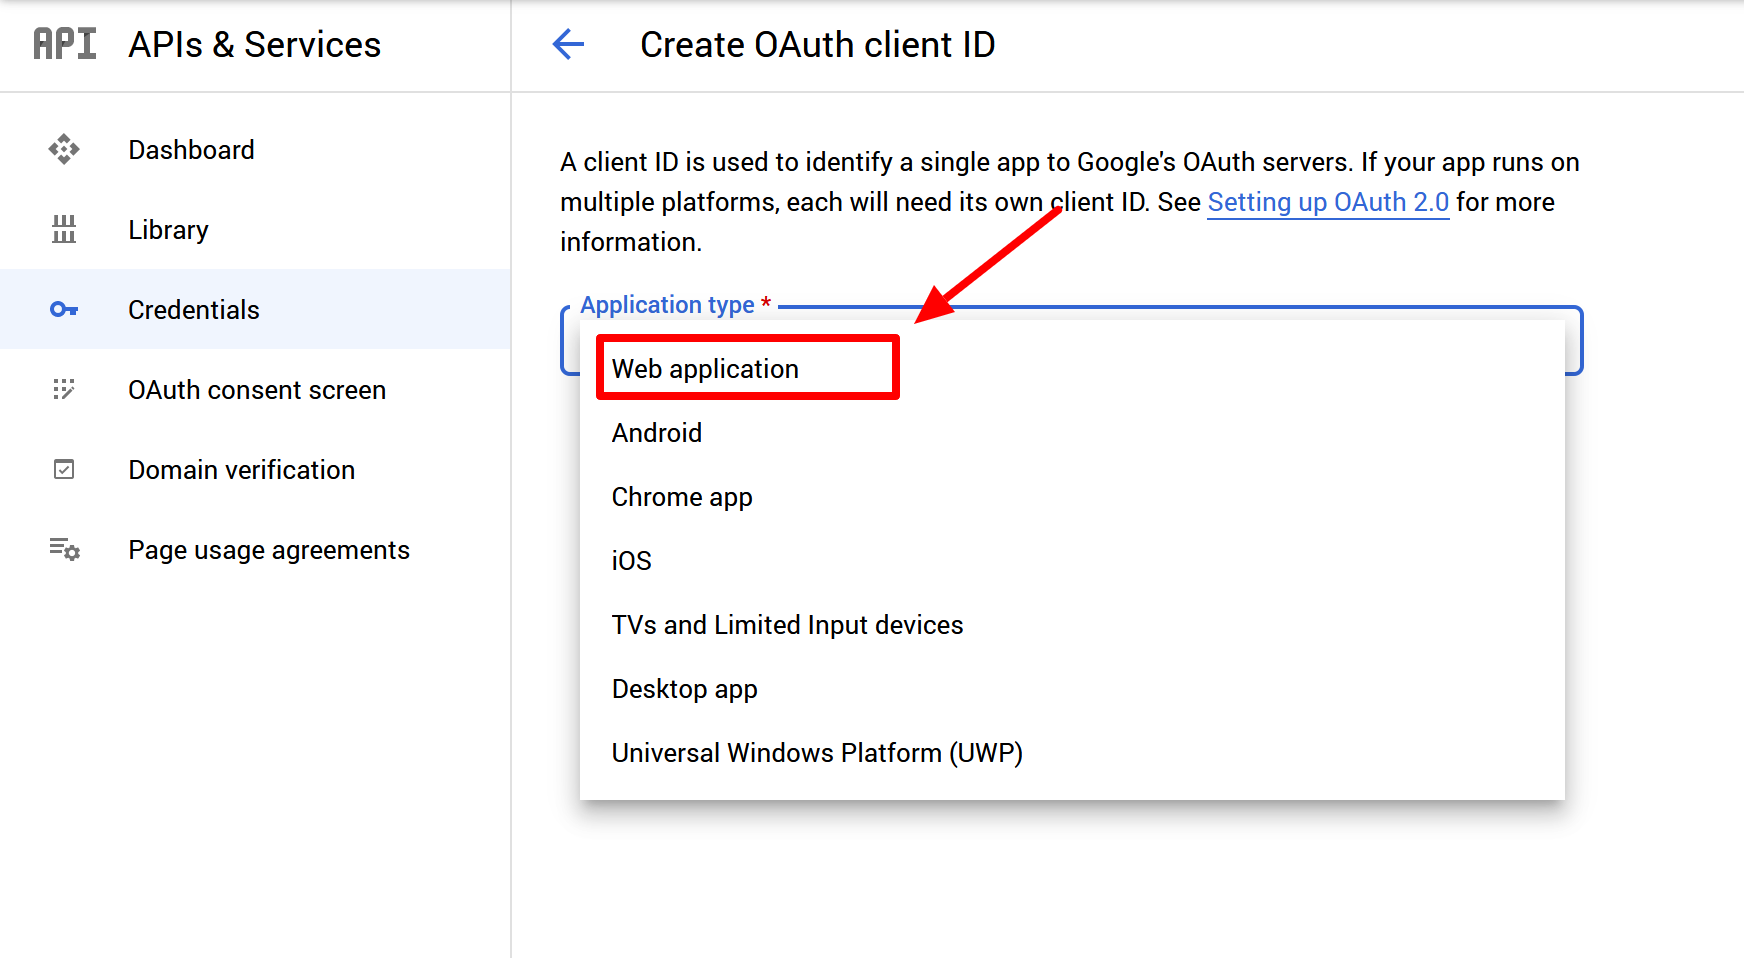
Google
After installing Sngine now you can in easy steps integrate Google with it to let your users login with their Google
accounts
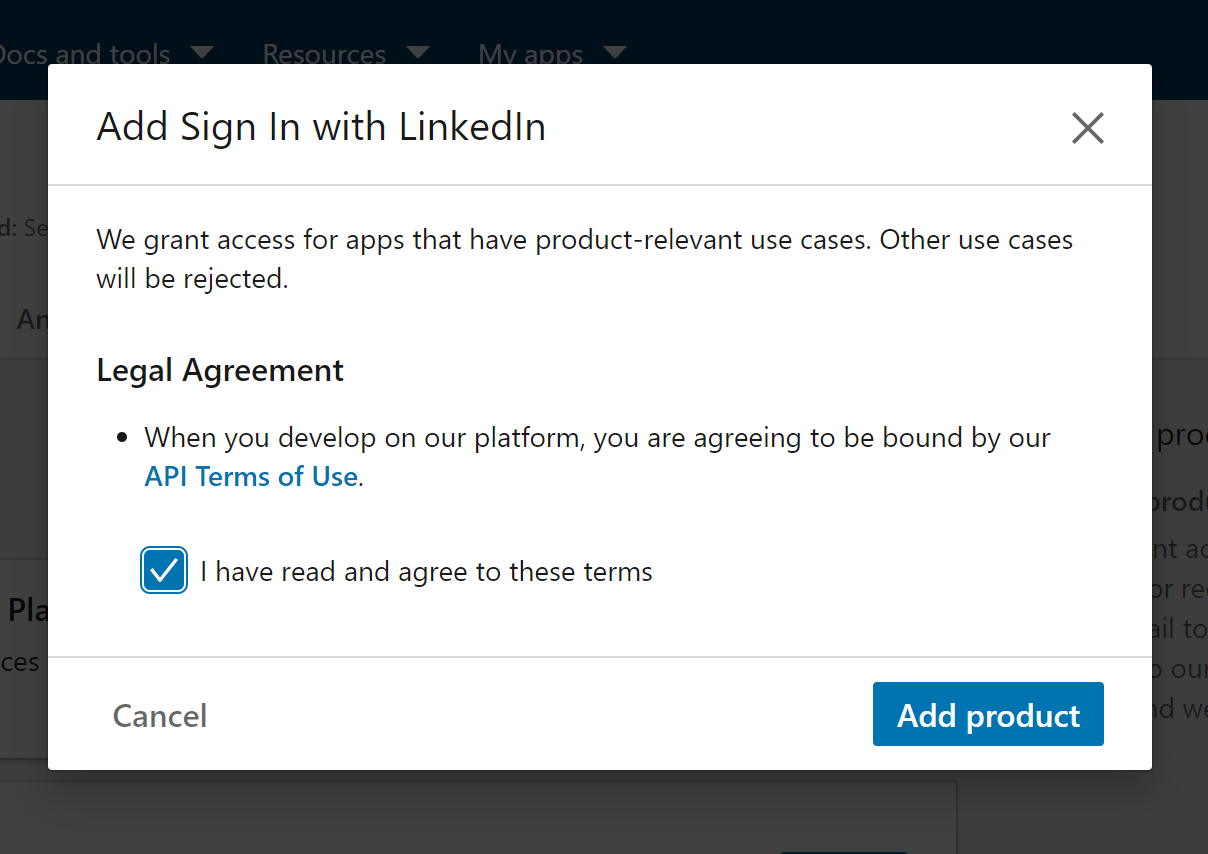
Now after creating the app go to Products tab and select
Sign in with Linkedin and it will need review from
Linkedin team
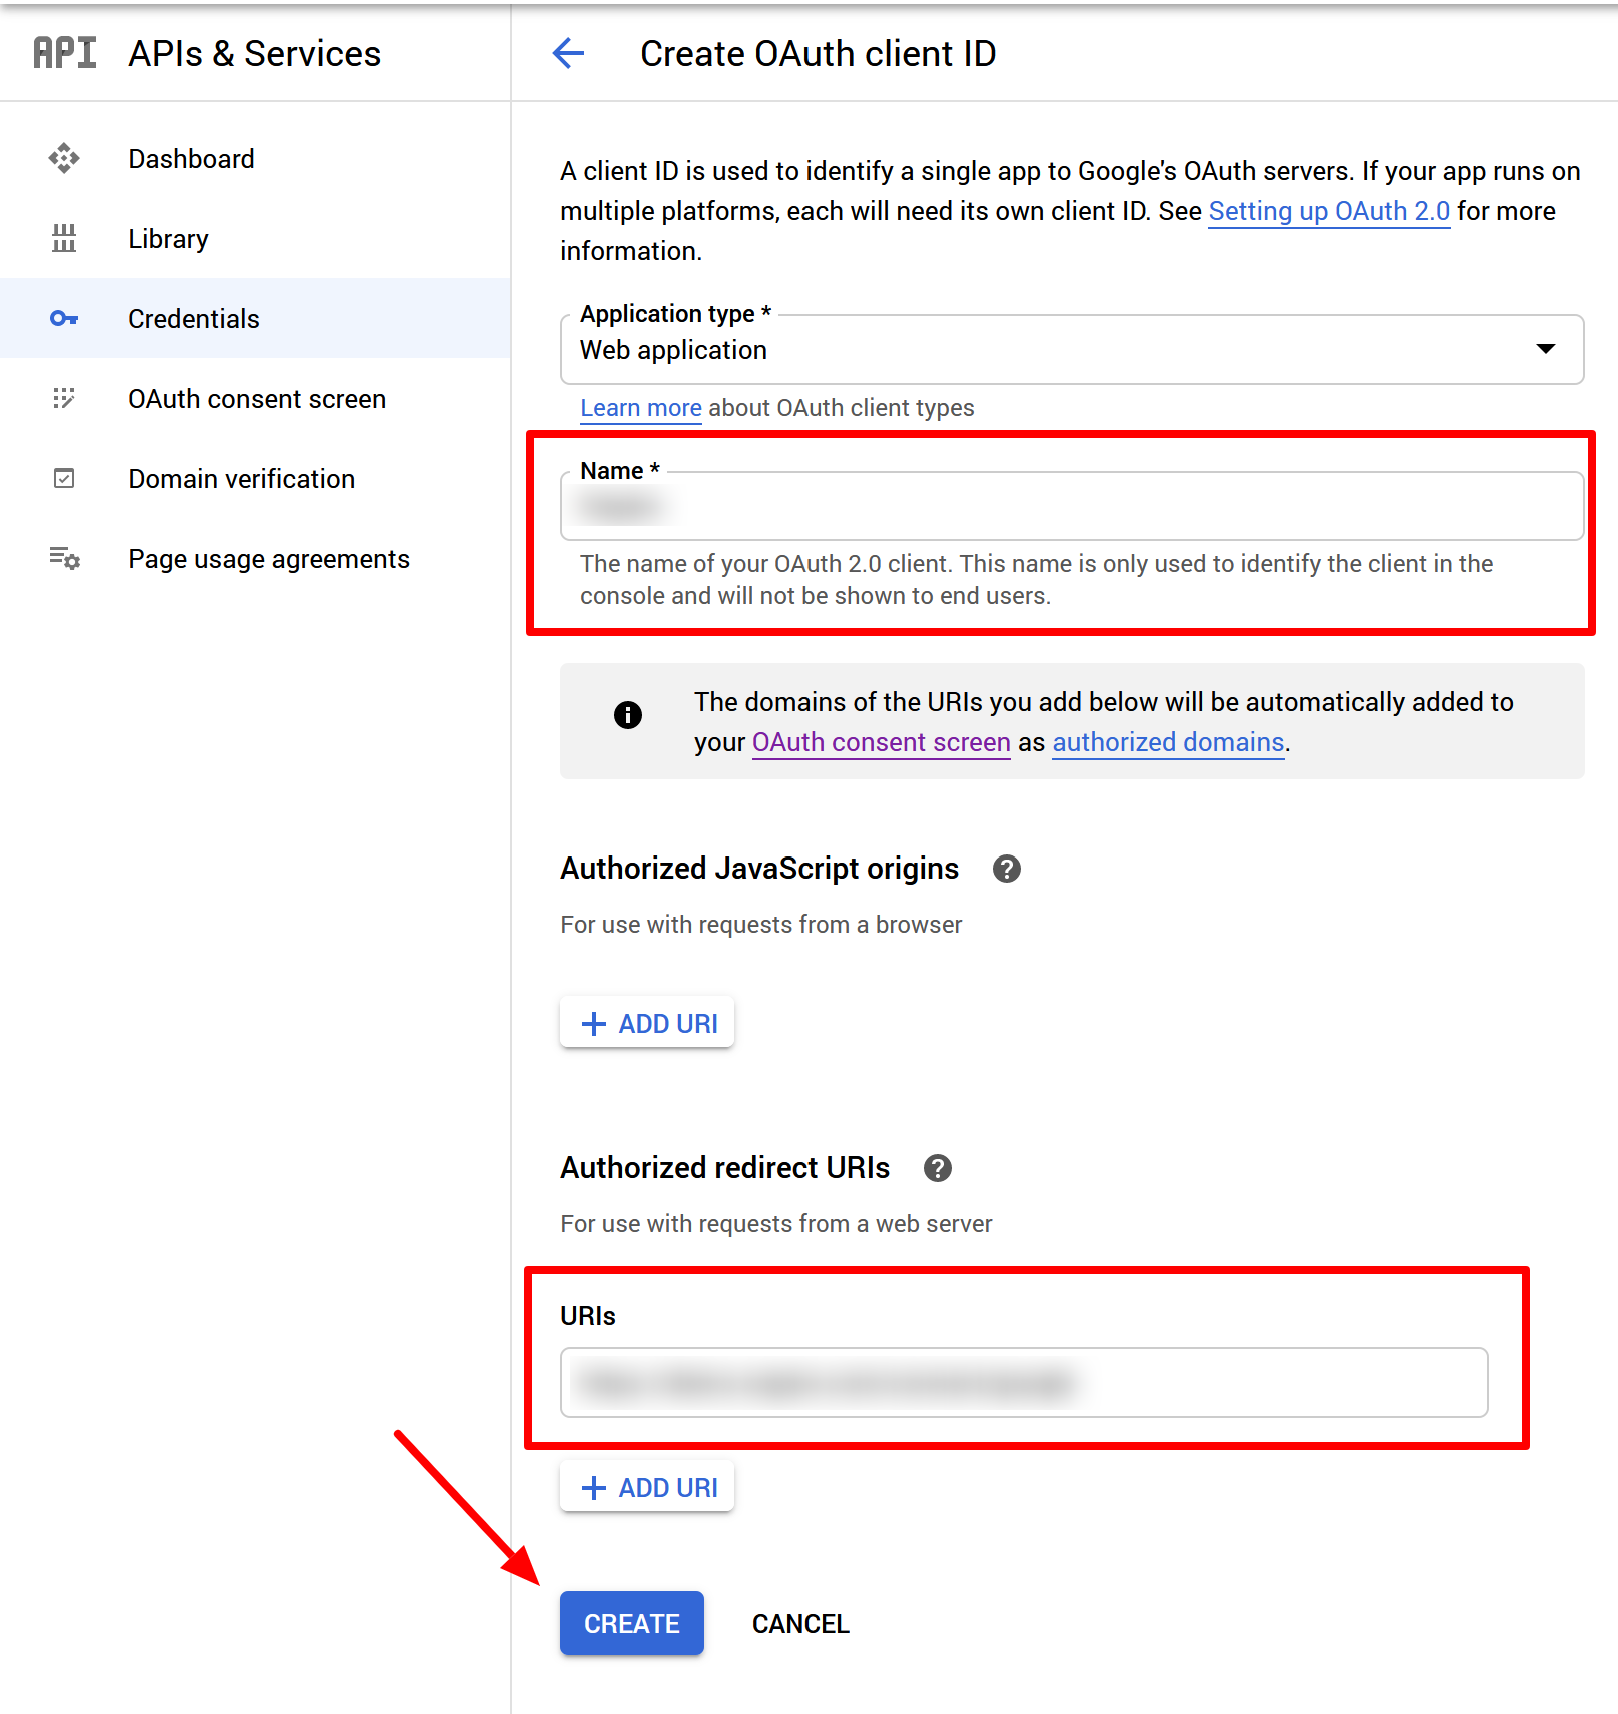
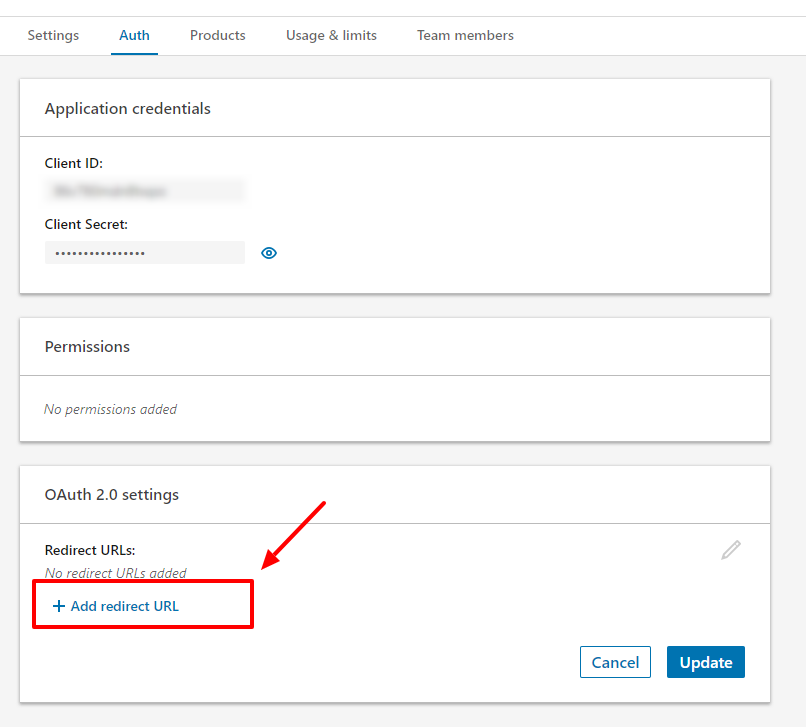
Now back to your Authentication and Provide this URI as the OAuth 2.0 Redirect URIs for your application as following:
If you installed Sngine in your domain directly like domain.com the URI should be
like this: https://www.domain.com/connect/linkedin
If you installed Sngine in your domain directly but without www like domain.com the URI should be like this: https://domain.com/connect/linkedin
If you installed Sngine in sub-domain like sub.domain.com the URI should be like
this: https://sub.domain.com/connect/linkedin
If you installed Sngine in a directory like domain.com/directory the URI should be
like this: https://www.domain.com/directory/connect/linkedin
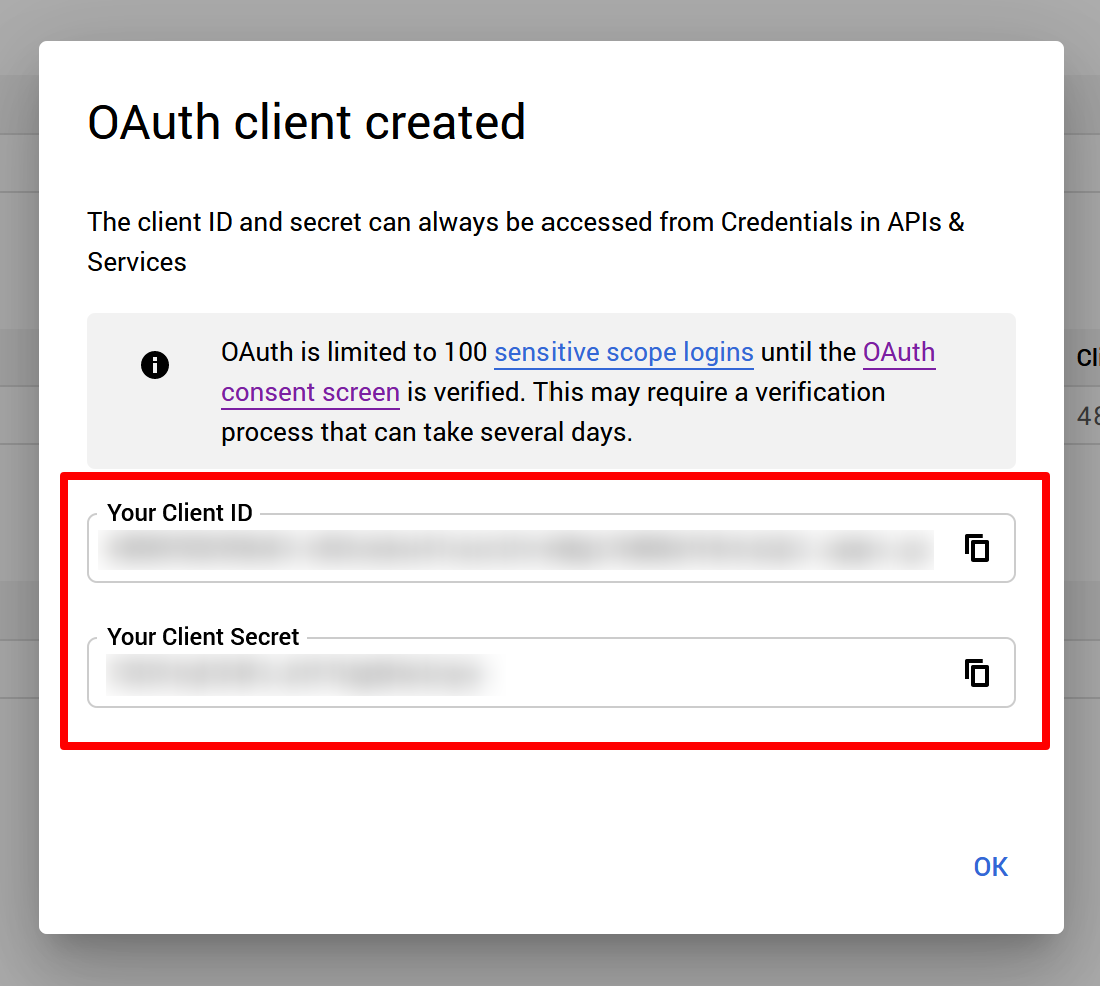
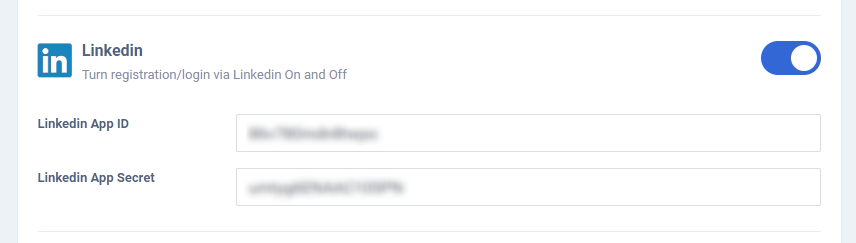
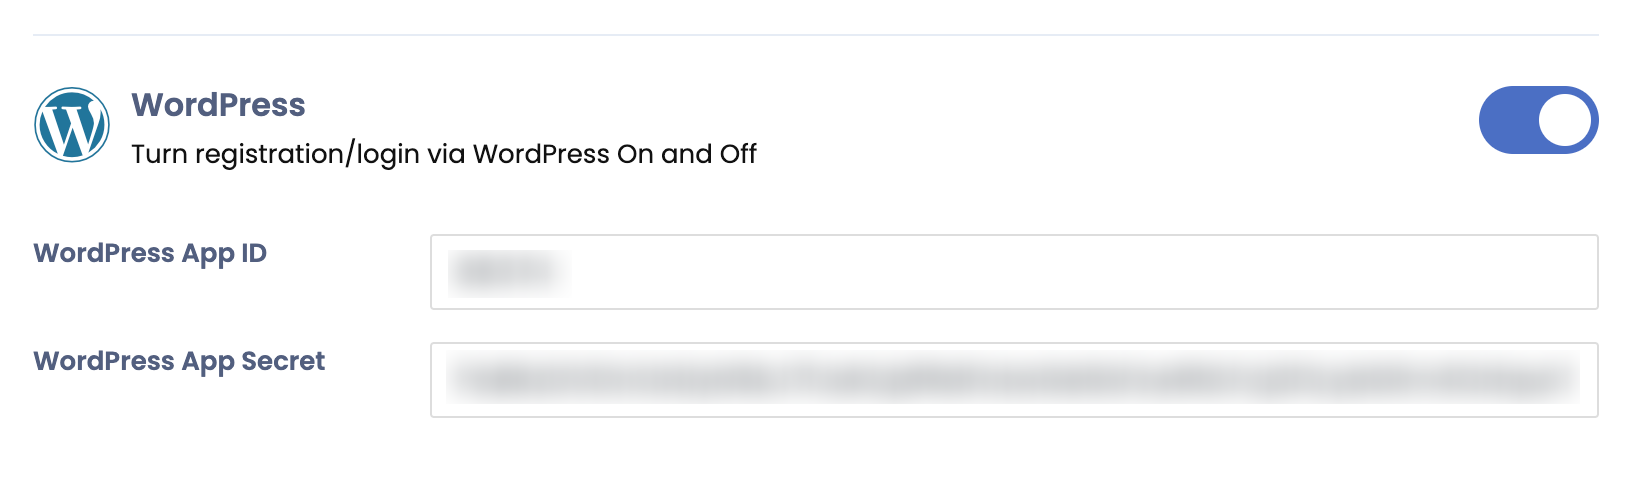
If your app got approved Now goto to Sngine Admin Panel -> Settings -> Registration
Settings -> Social Login tab and paste both keys as shown
That's all, Enjoy!
Vkontakte
After installing Sngine now you can in easy steps integrate Vkontakte with it to let your users login with their Vkontakte
accounts
First goto: http://vk.com/dev and Sign
in with your Vkontakte account
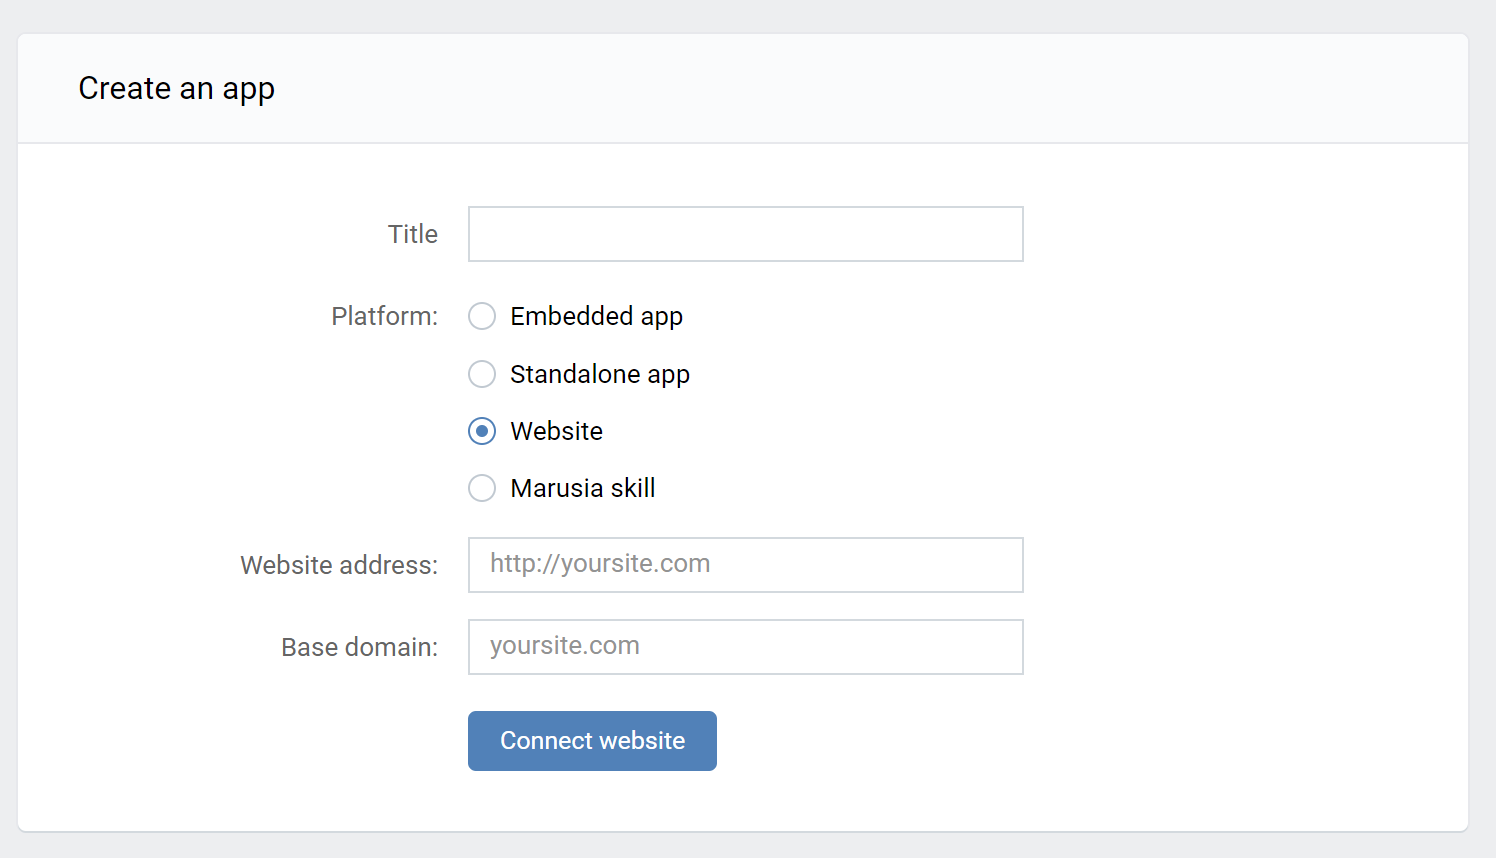
Click Create App and fill the form
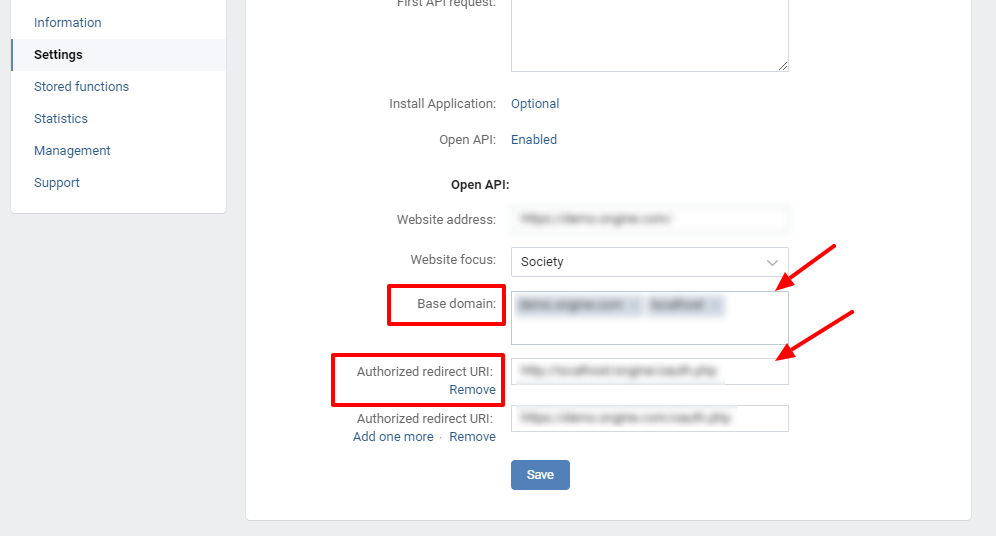
Now back to your Settings page and enter your domain name as base domain & Provide this URI as the OAuth 2.0 Redirect URIs for your application as following:
If you installed Sngine in your domain directly like domain.com the URI should be
like this: https://www.domain.com/connect/vkontakte
If you installed Sngine in your domain directly but without www like domain.com the URI should be like this: https://domain.com/connect/vkontakte
If you installed Sngine in sub-domain like sub.domain.com the URI should be like
this: https://sub.domain.com/connect/vkontakte
If you installed Sngine in a directory like domain.com/directory the URI should be
like this: https://www.domain.com/directory/connect/vkontakte
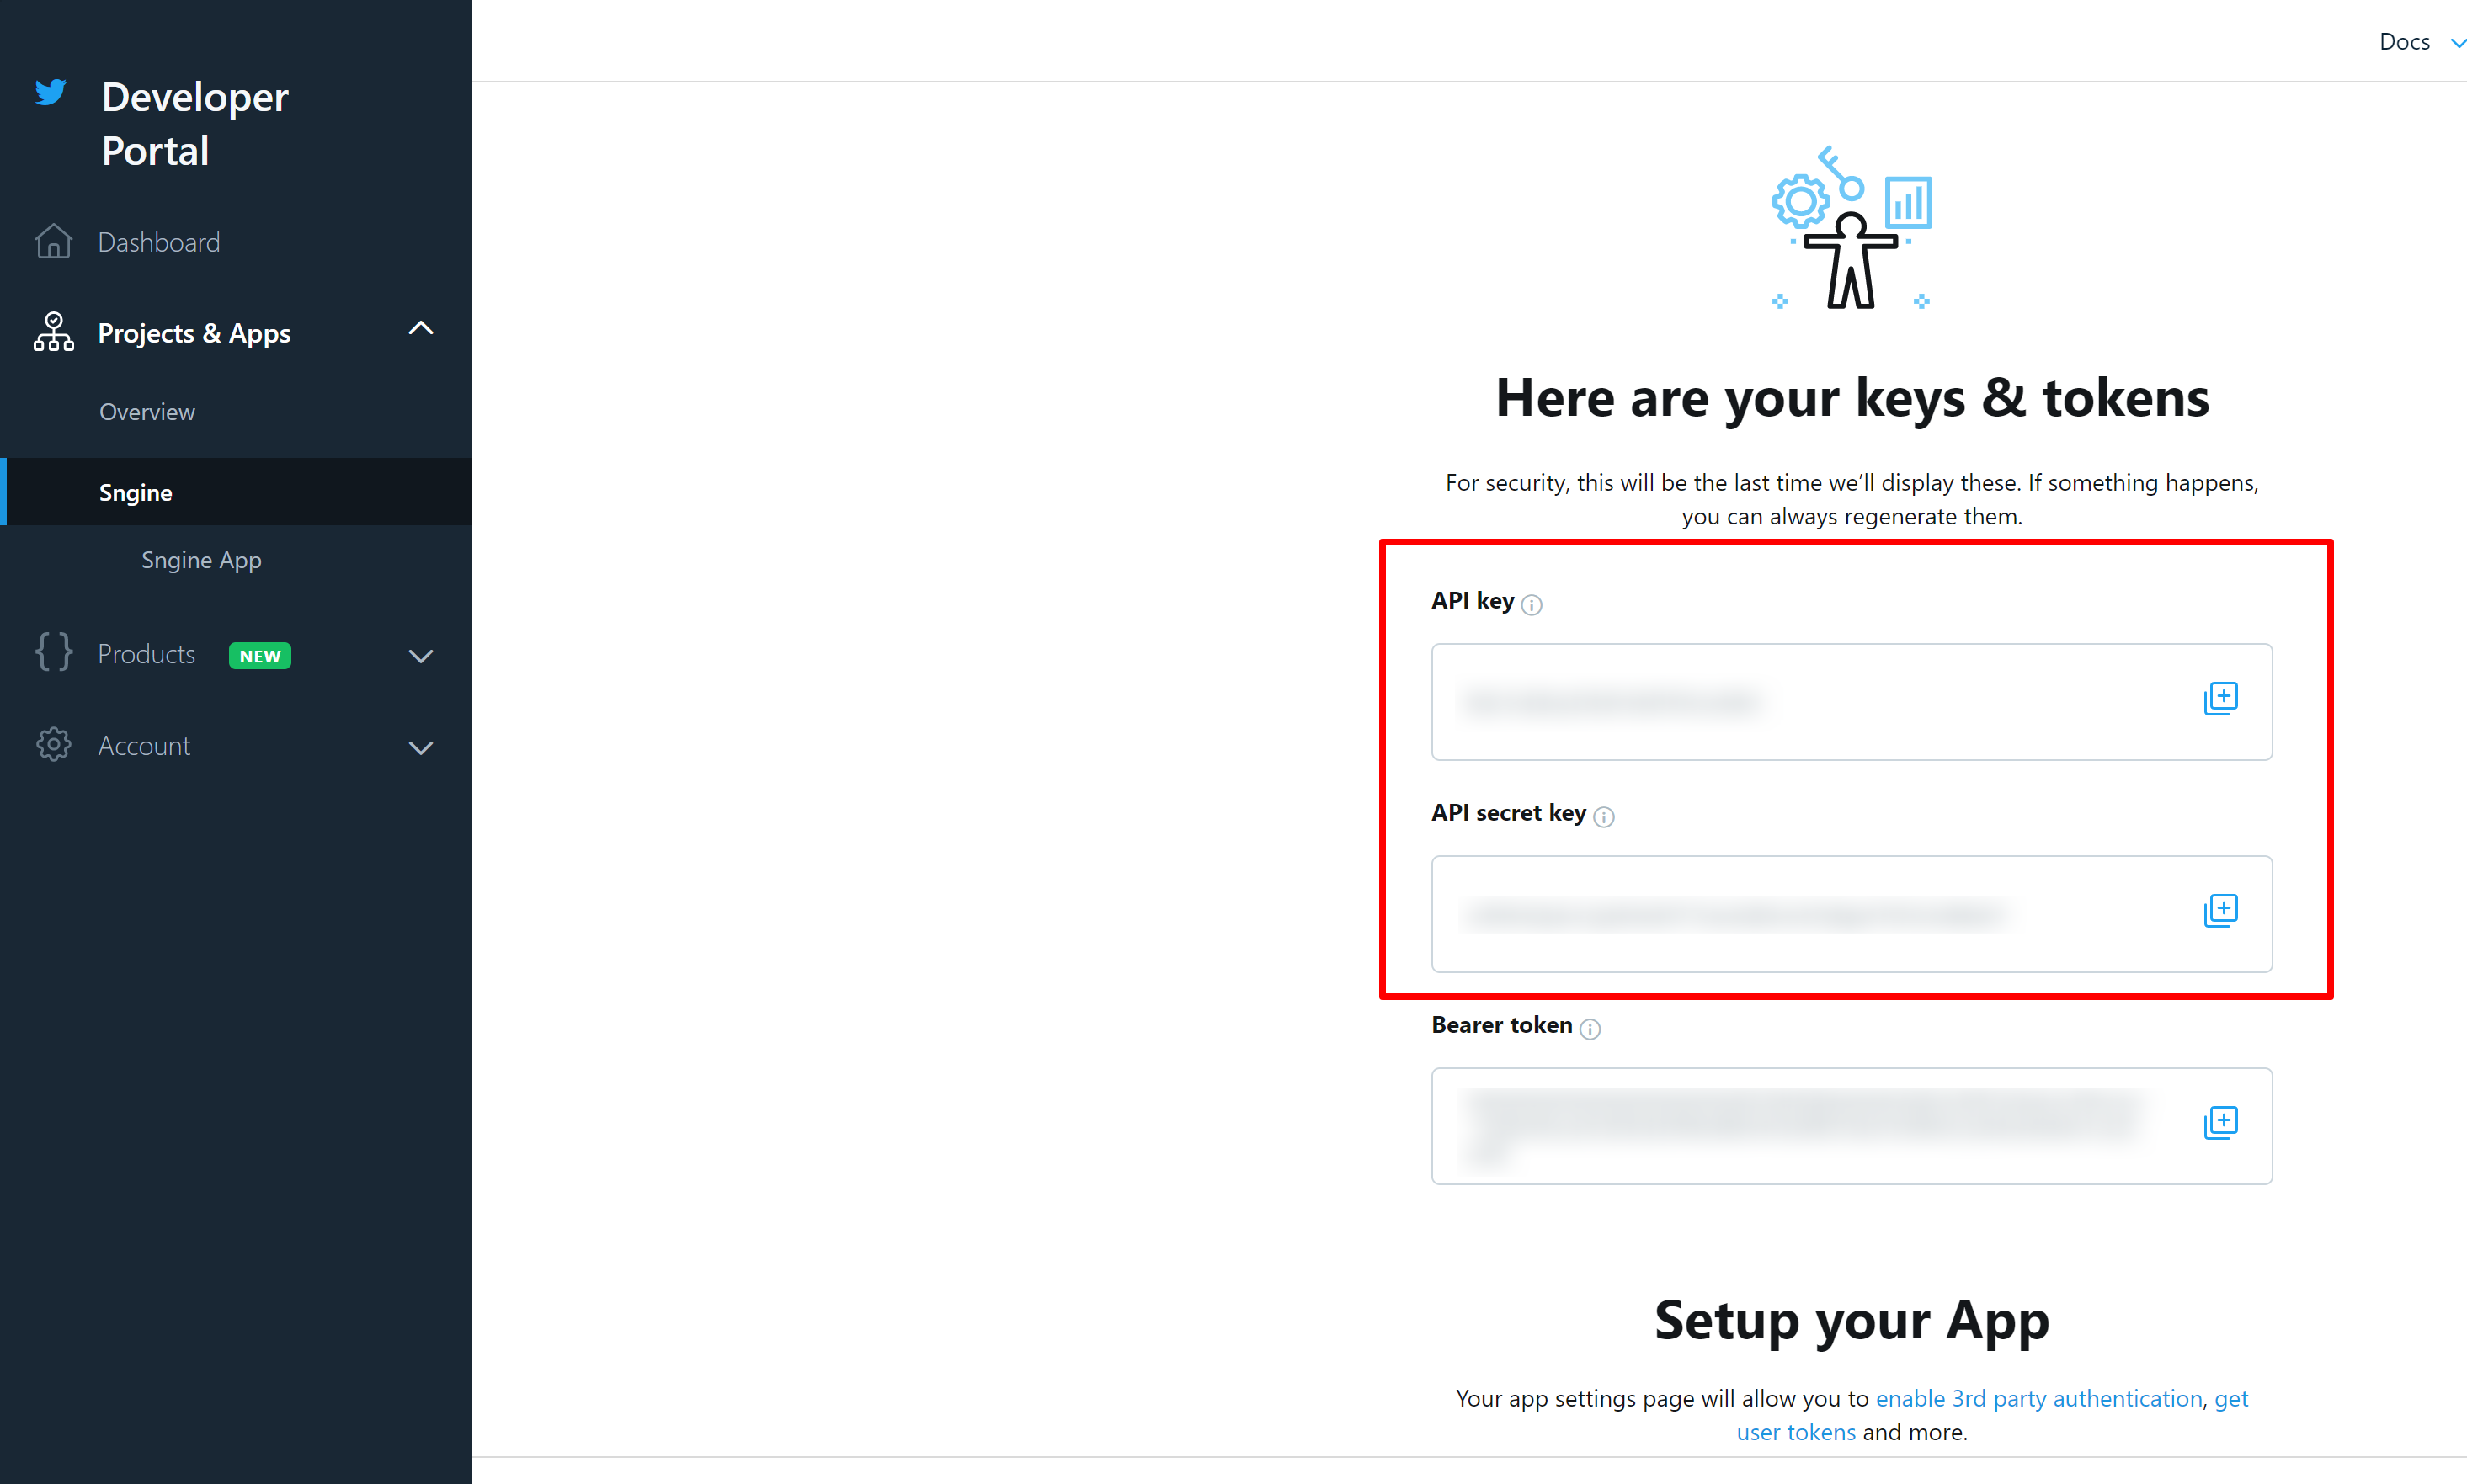
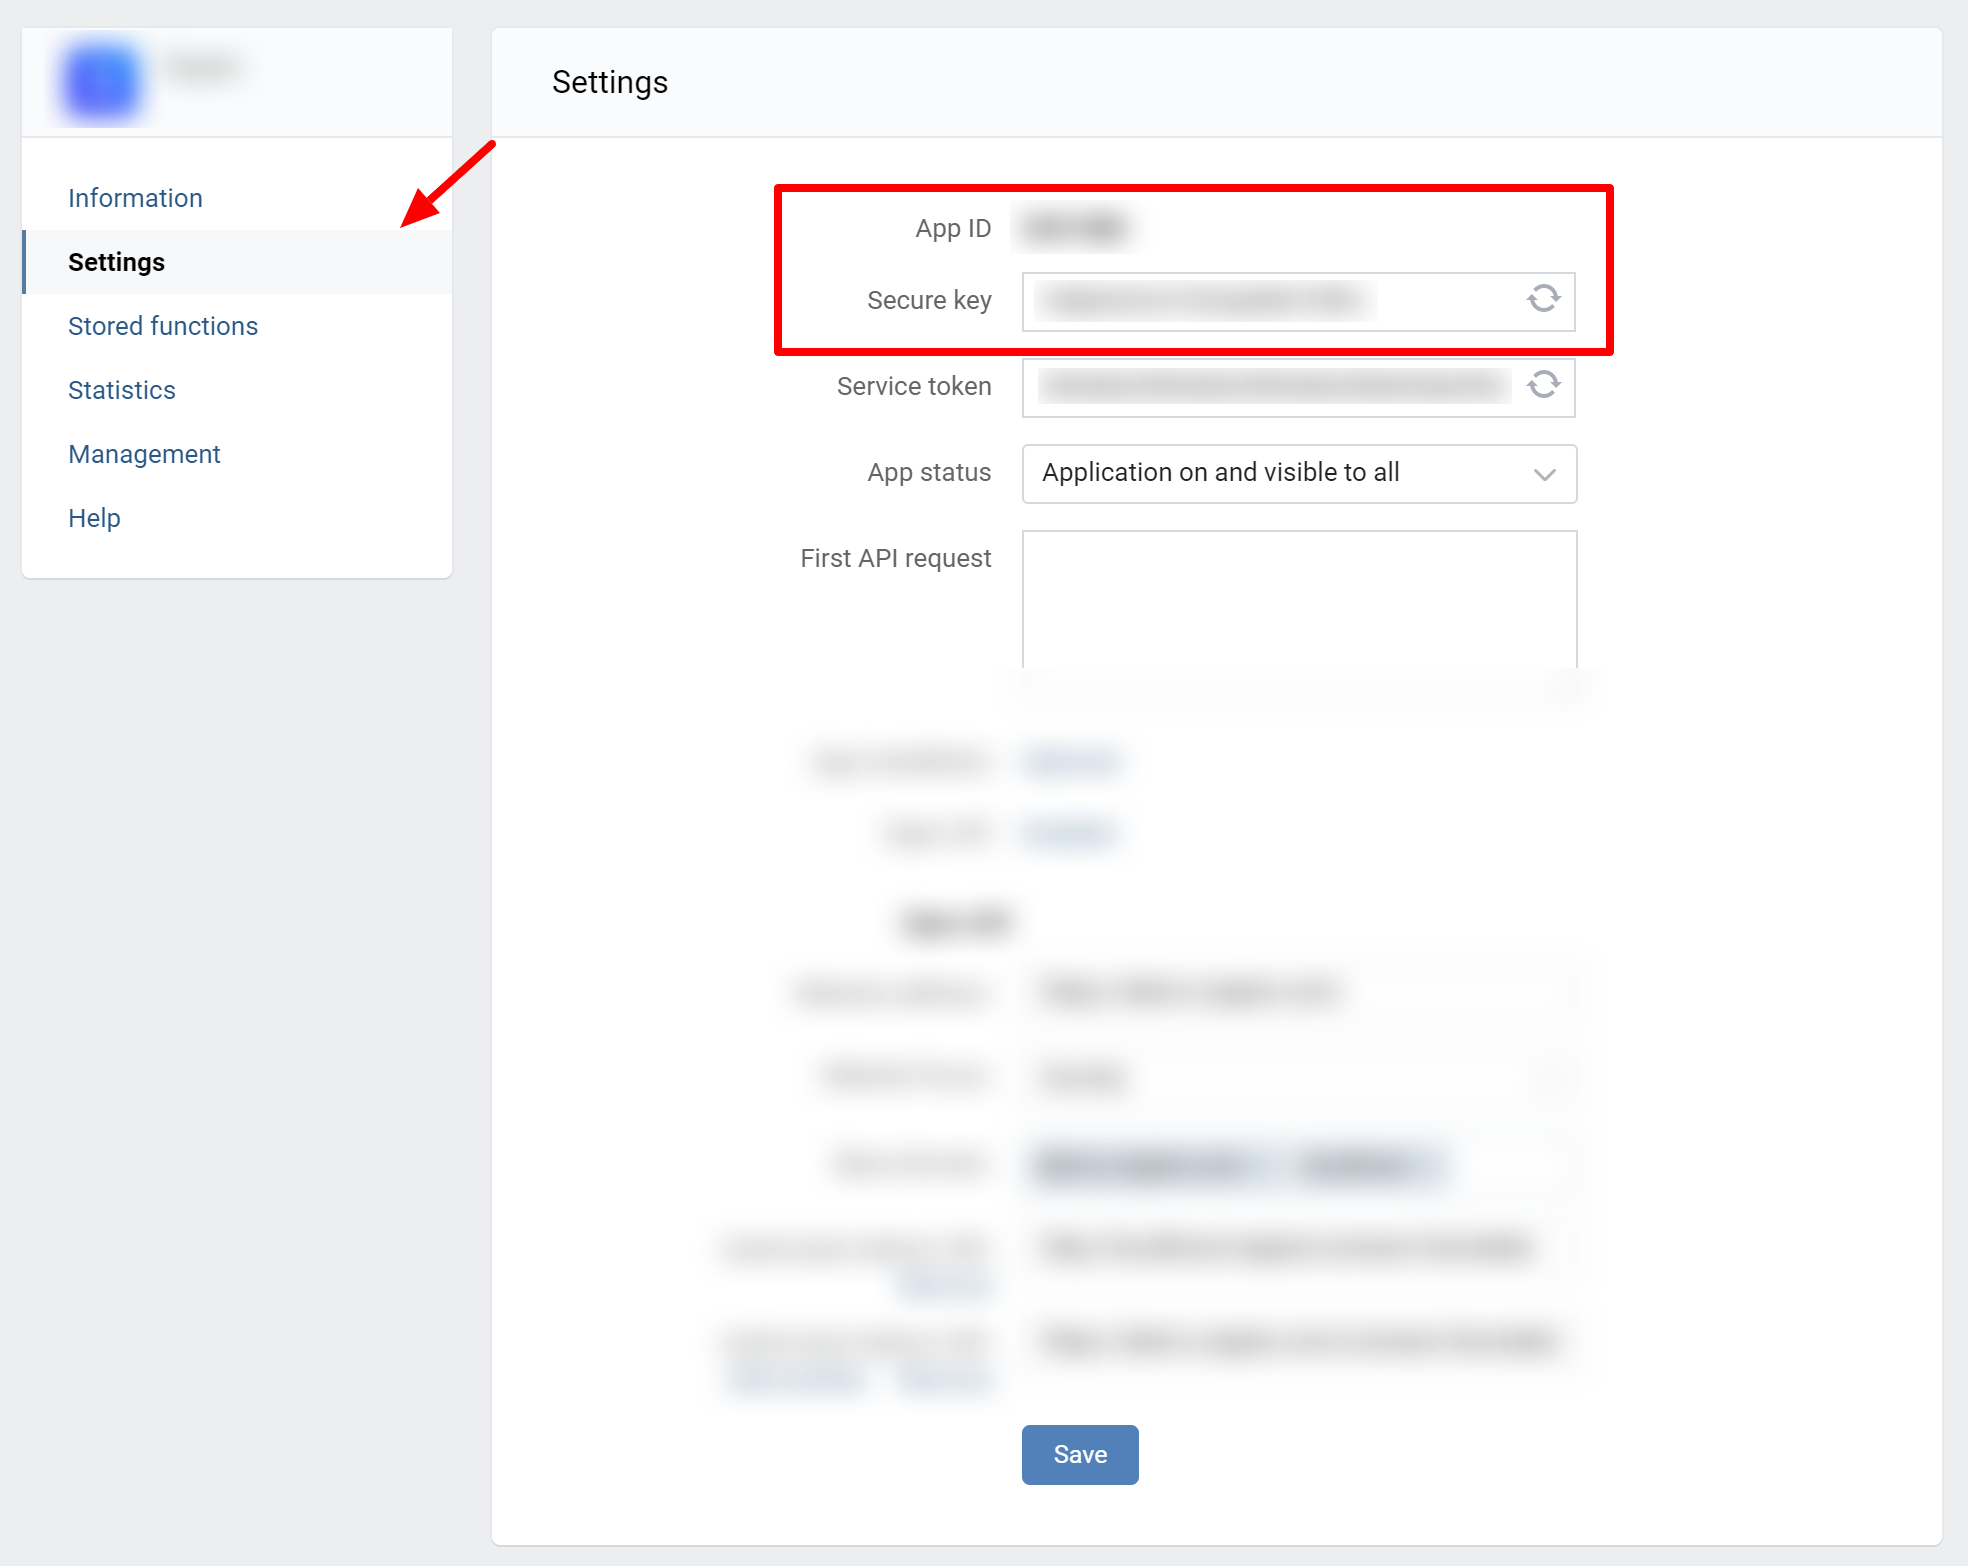
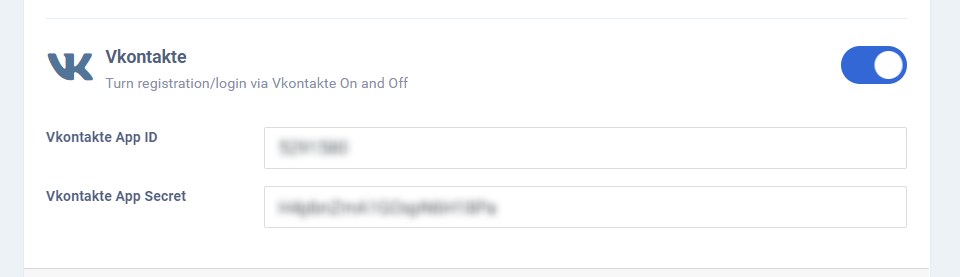
Now copy both Application ID and Secure key
Now goto to Sngine Admin Panel -> Settings -> Registration Settings -> Social Login tab
and paste both keys as shown
That's all, Enjoy!
WordPress
After installing Sngine now you can in easy steps integrate WordPress with it to let your users login with their WordPress accounts
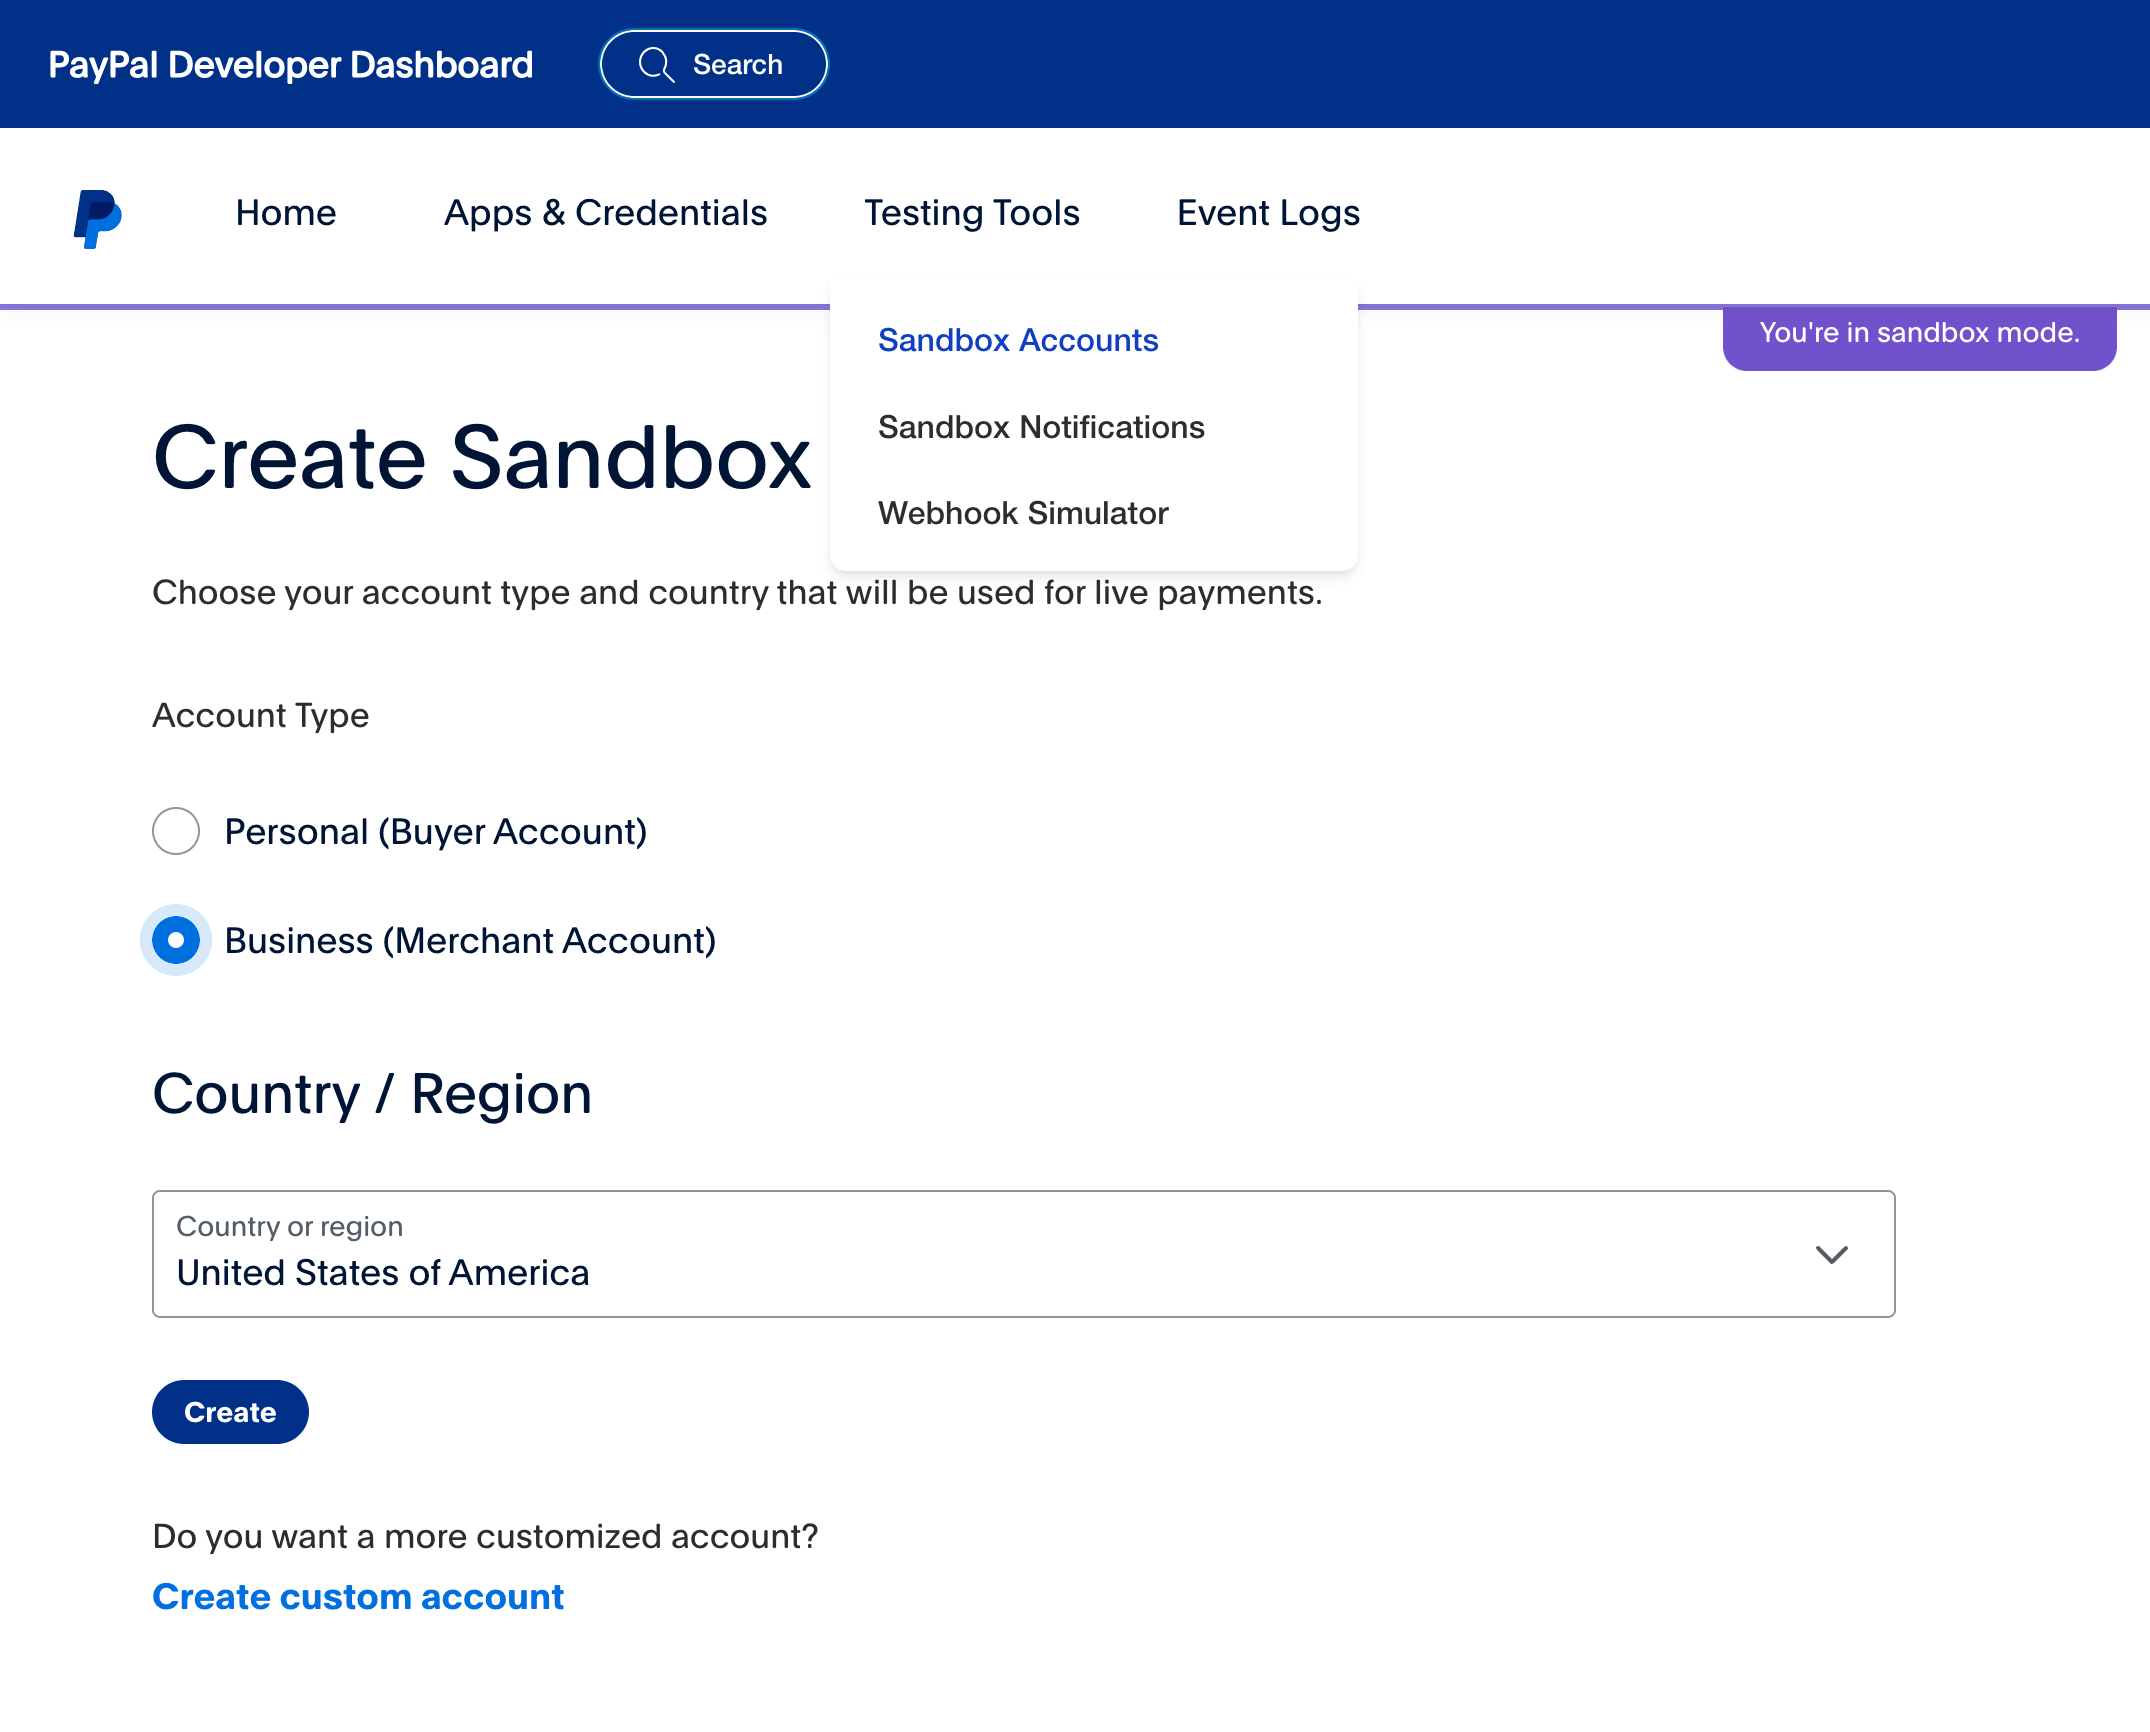
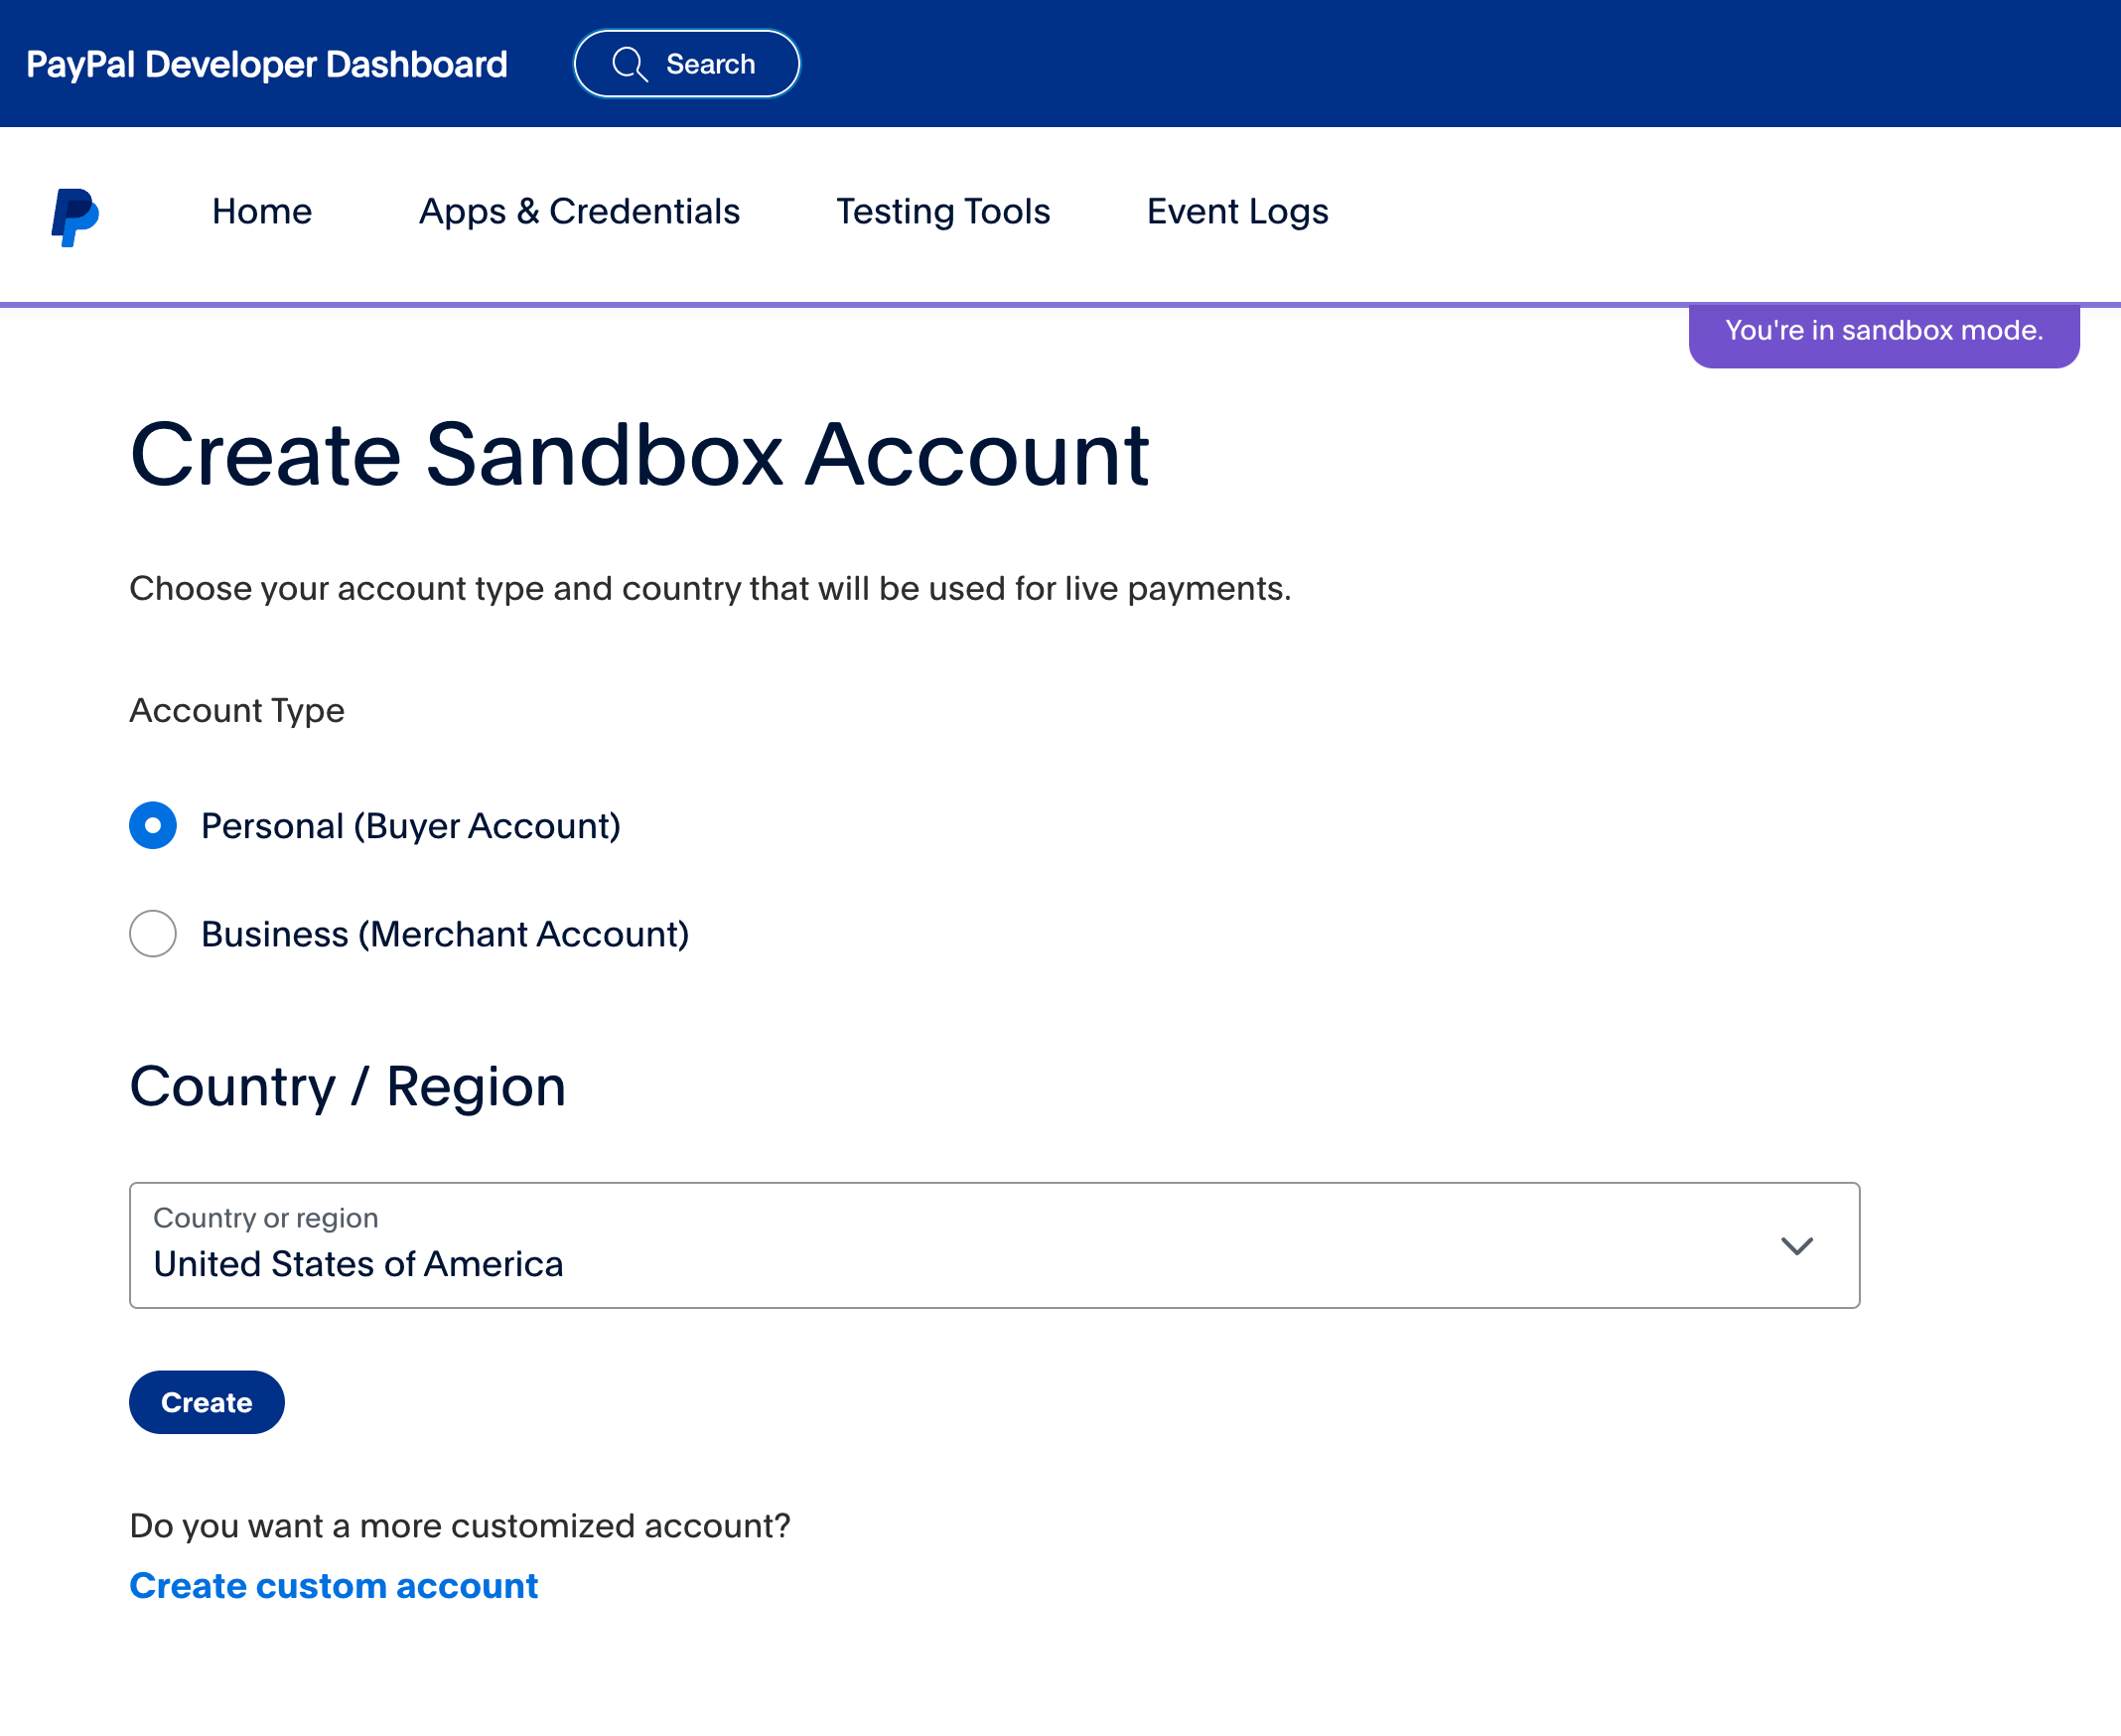
Now under Testing Tools click Sandbox Accounts then click Accounts then click on Create
Account button and Create new Business (Merchant Account) and fill the form
Then Create Personal (Buyer Account) and fill the form
Both accounts will be linked with your new PayPal app for SandBox Mode
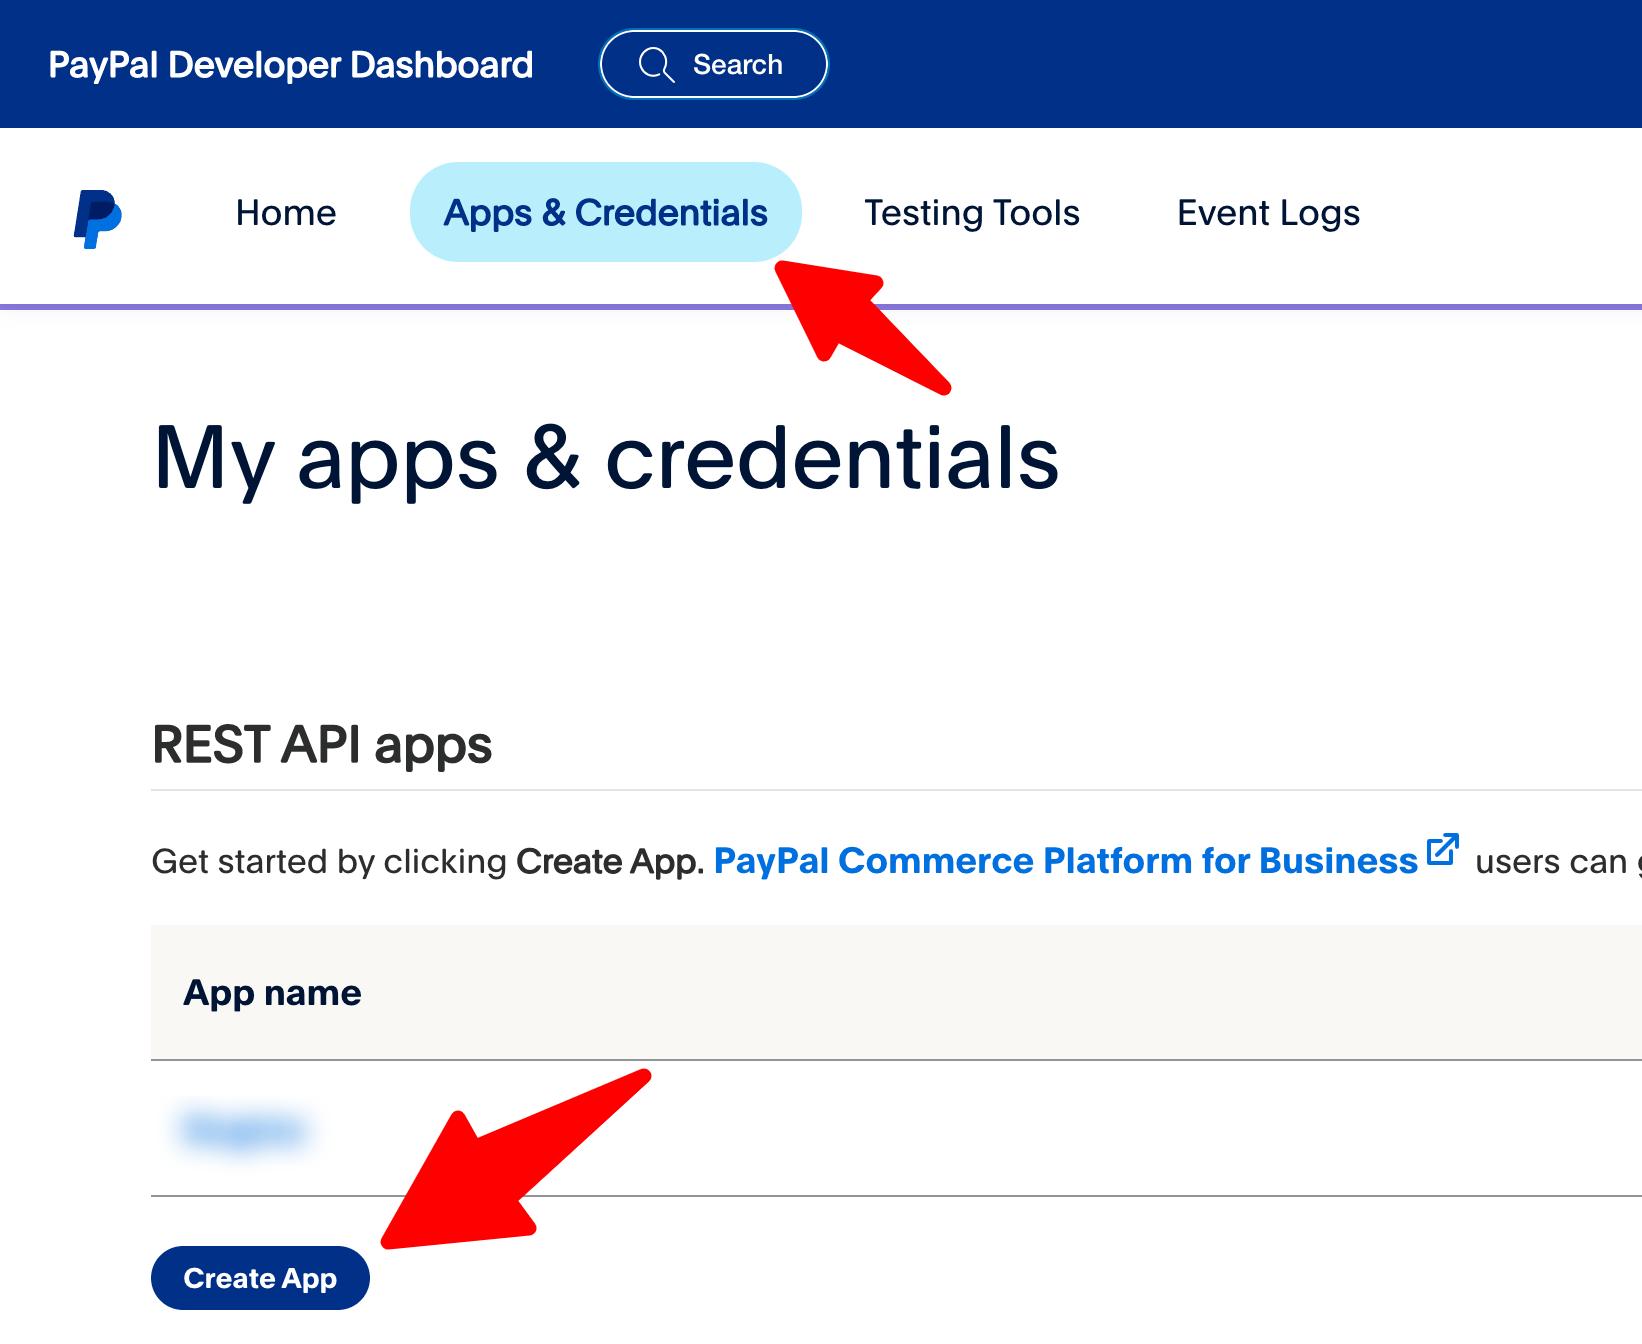
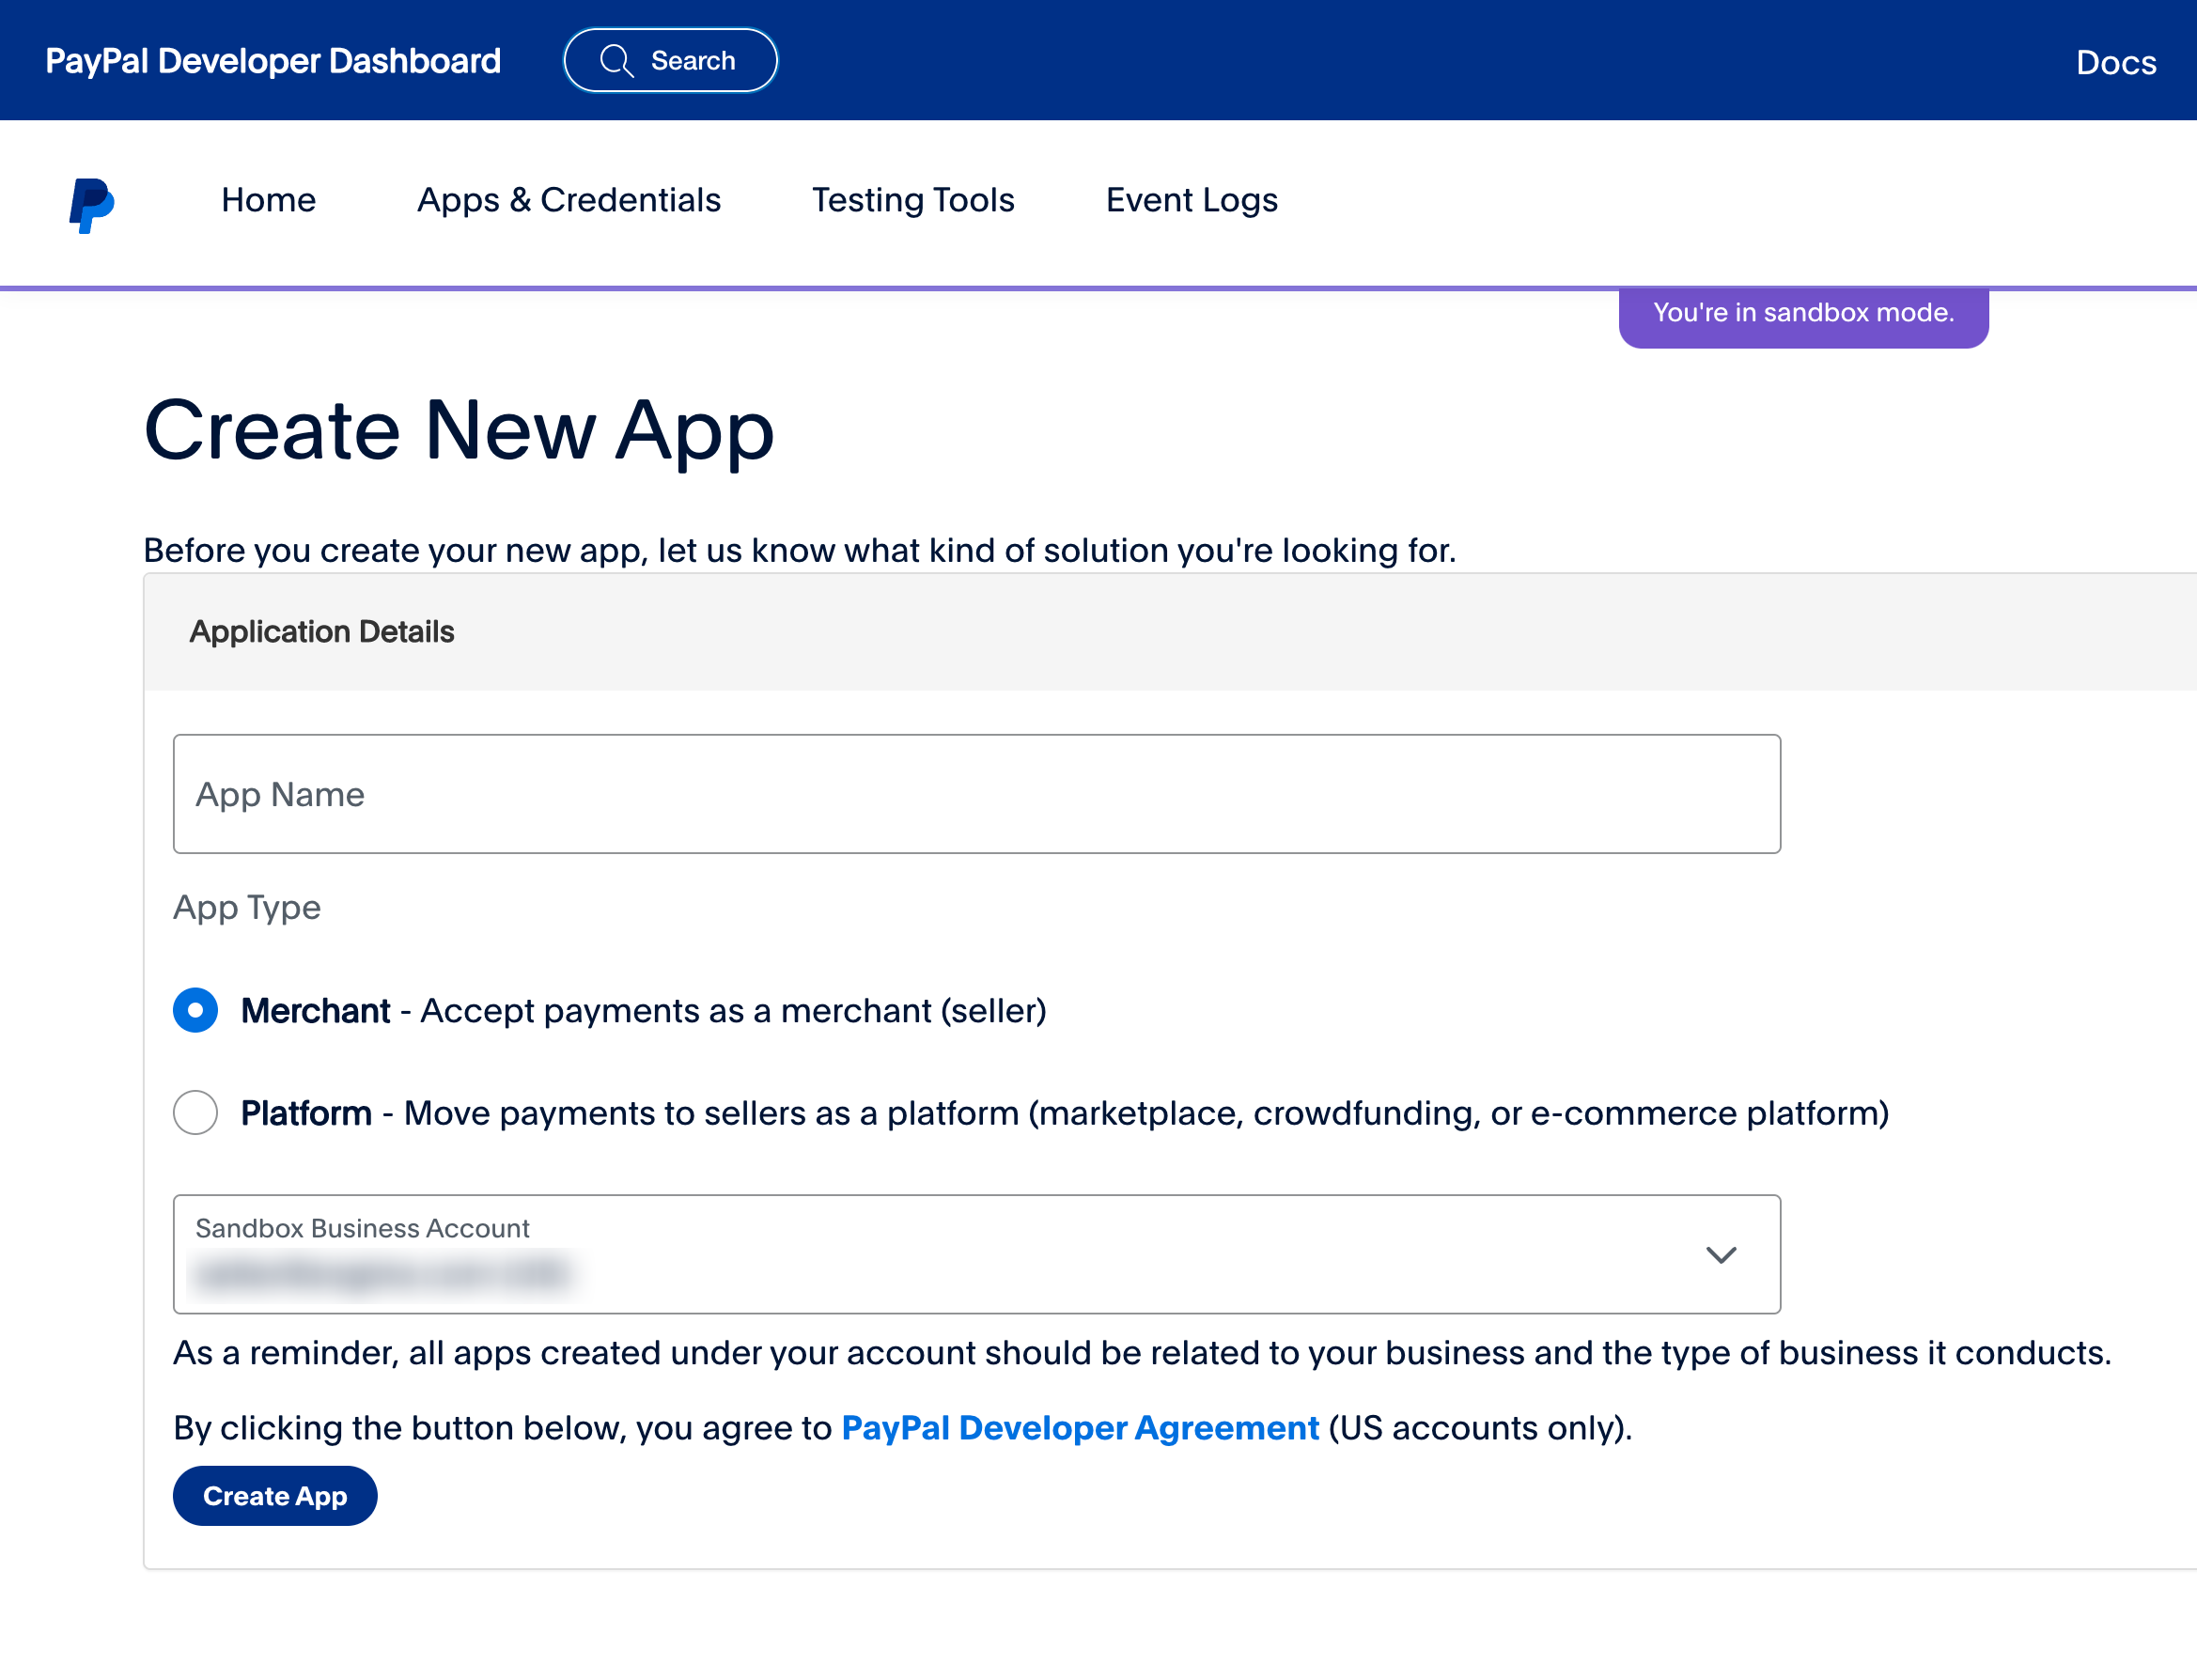
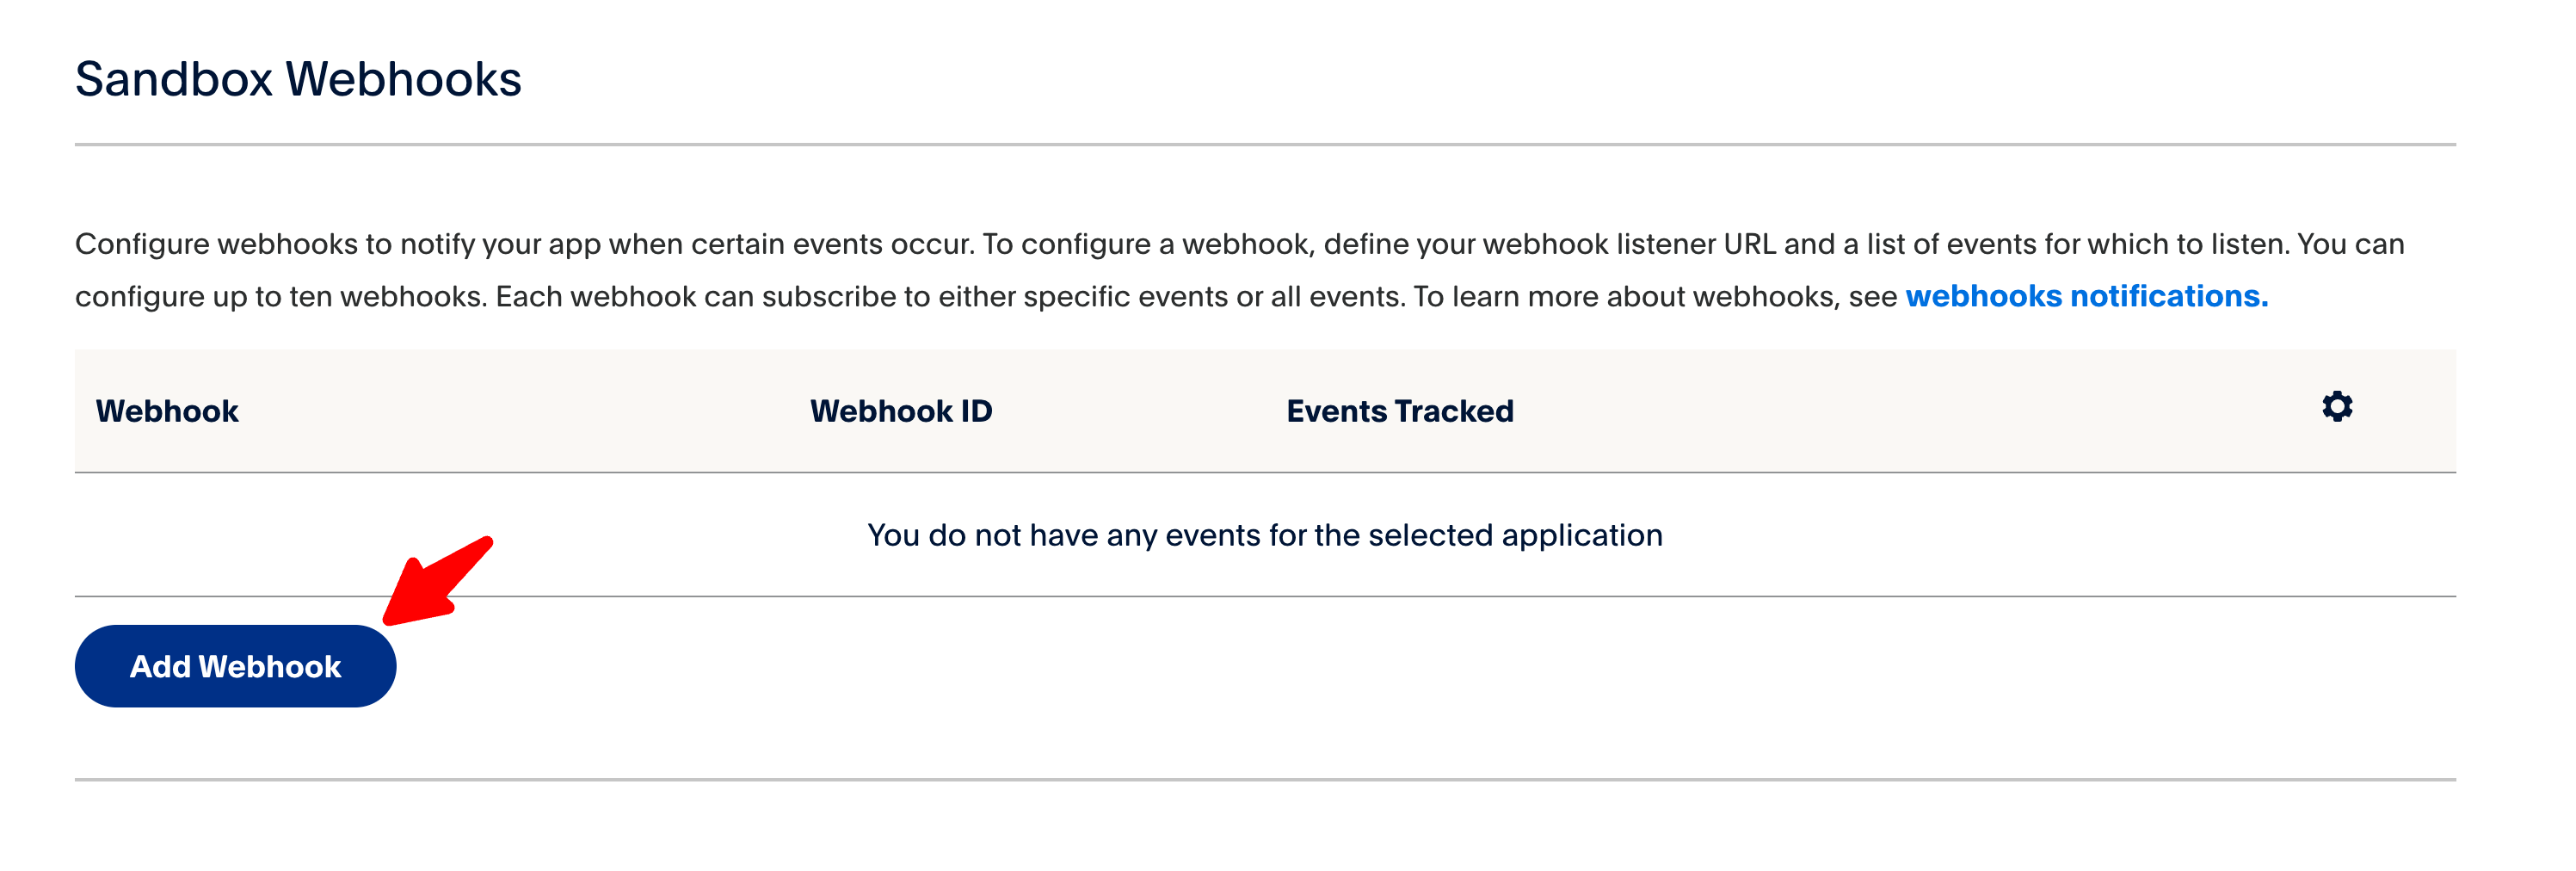
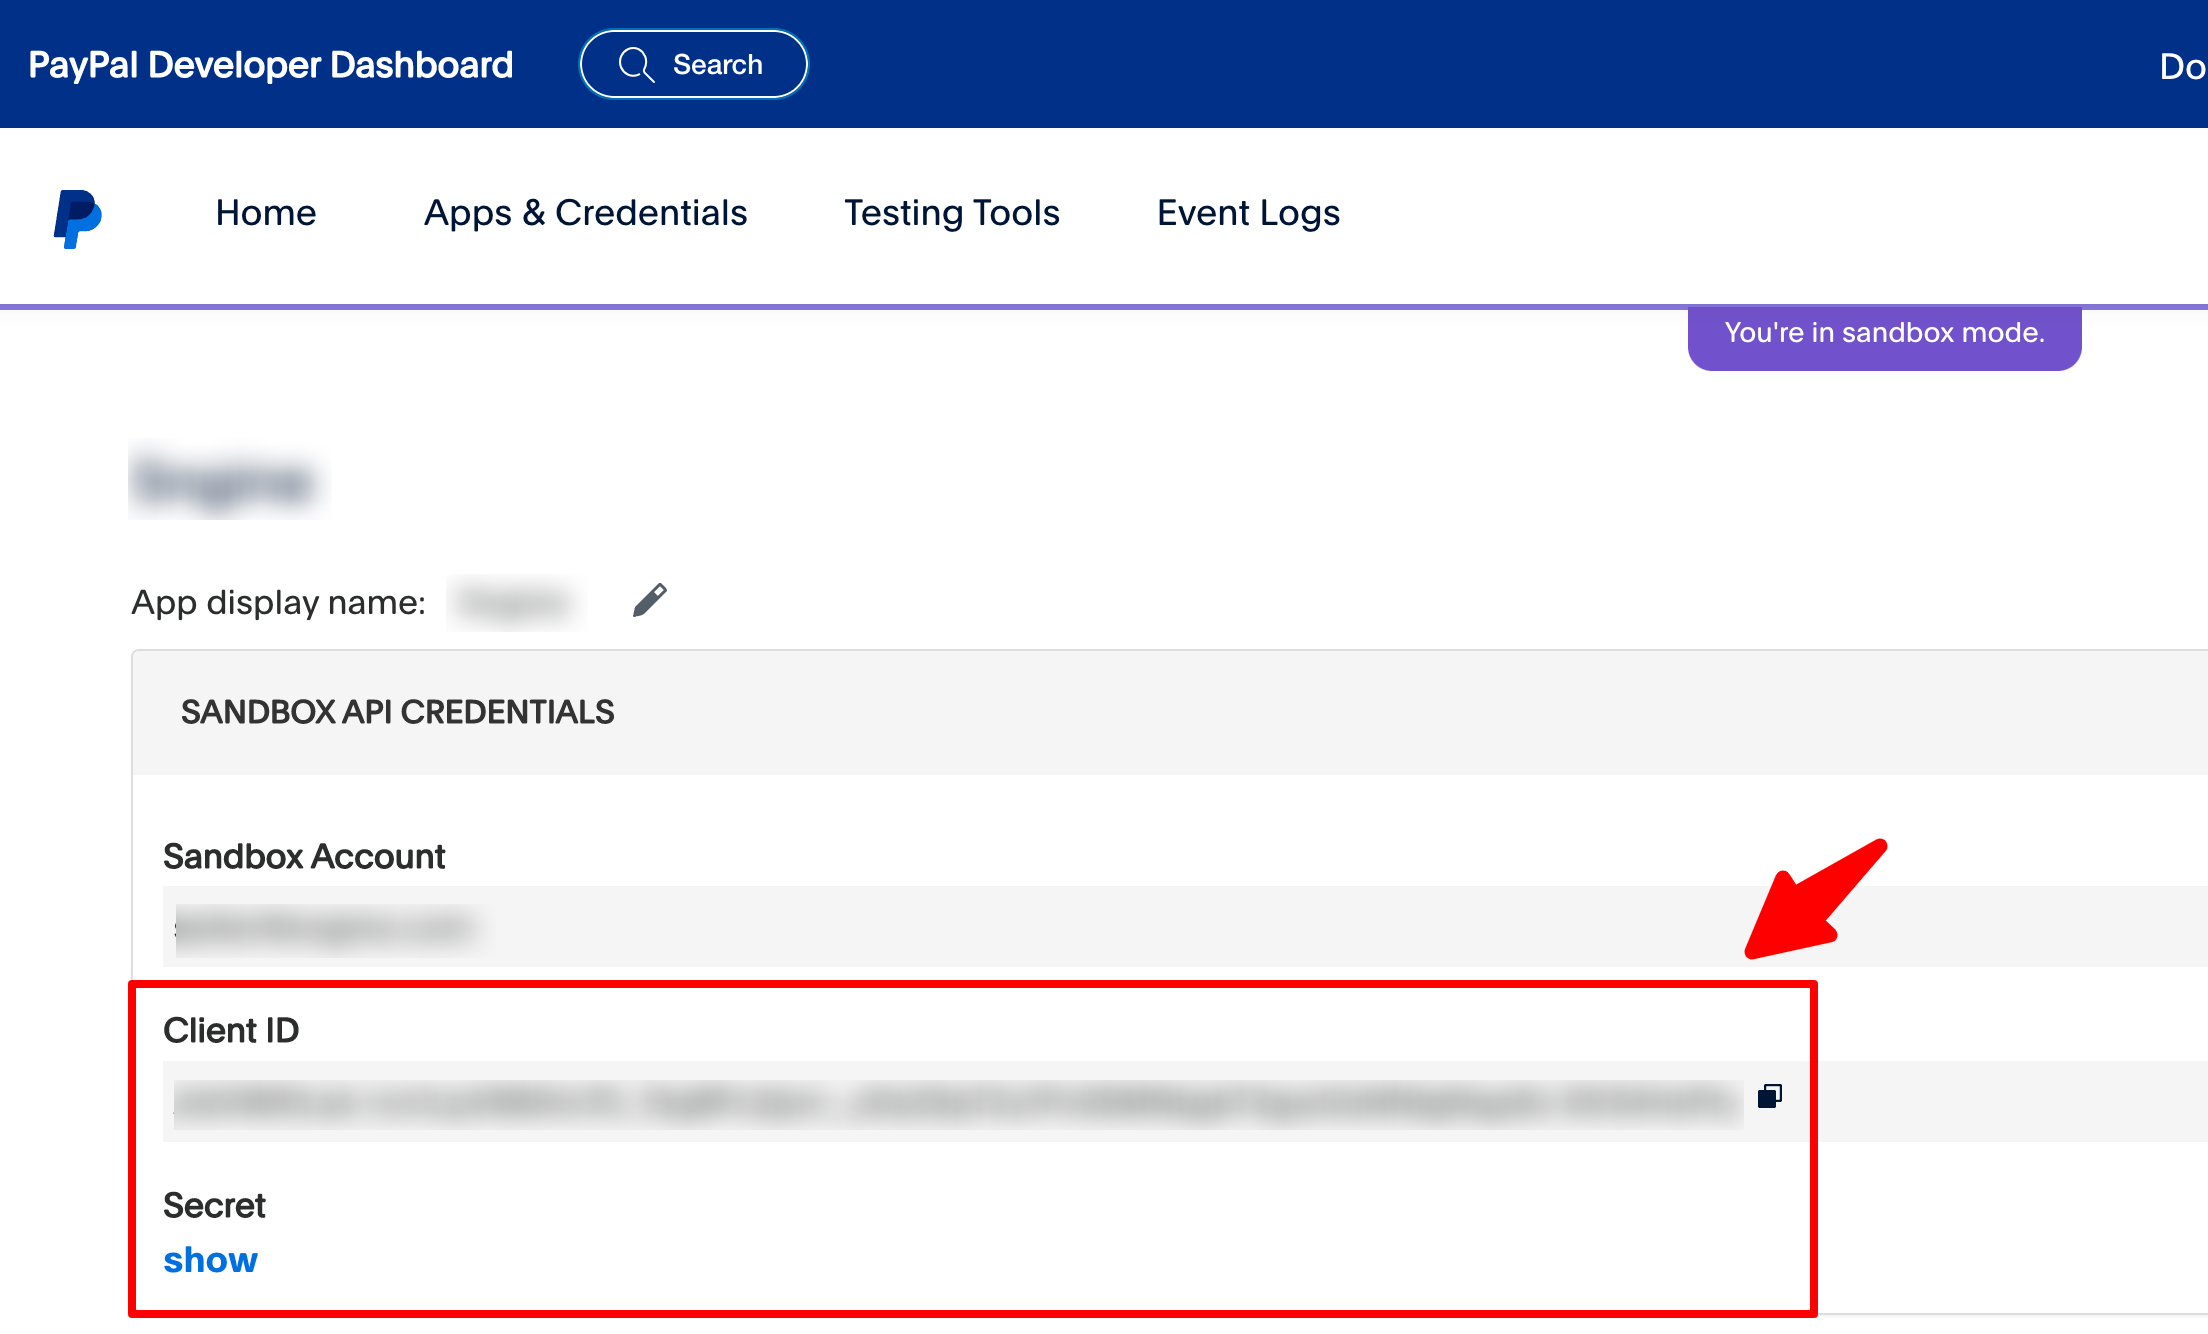
Now click My Apps & Credentials
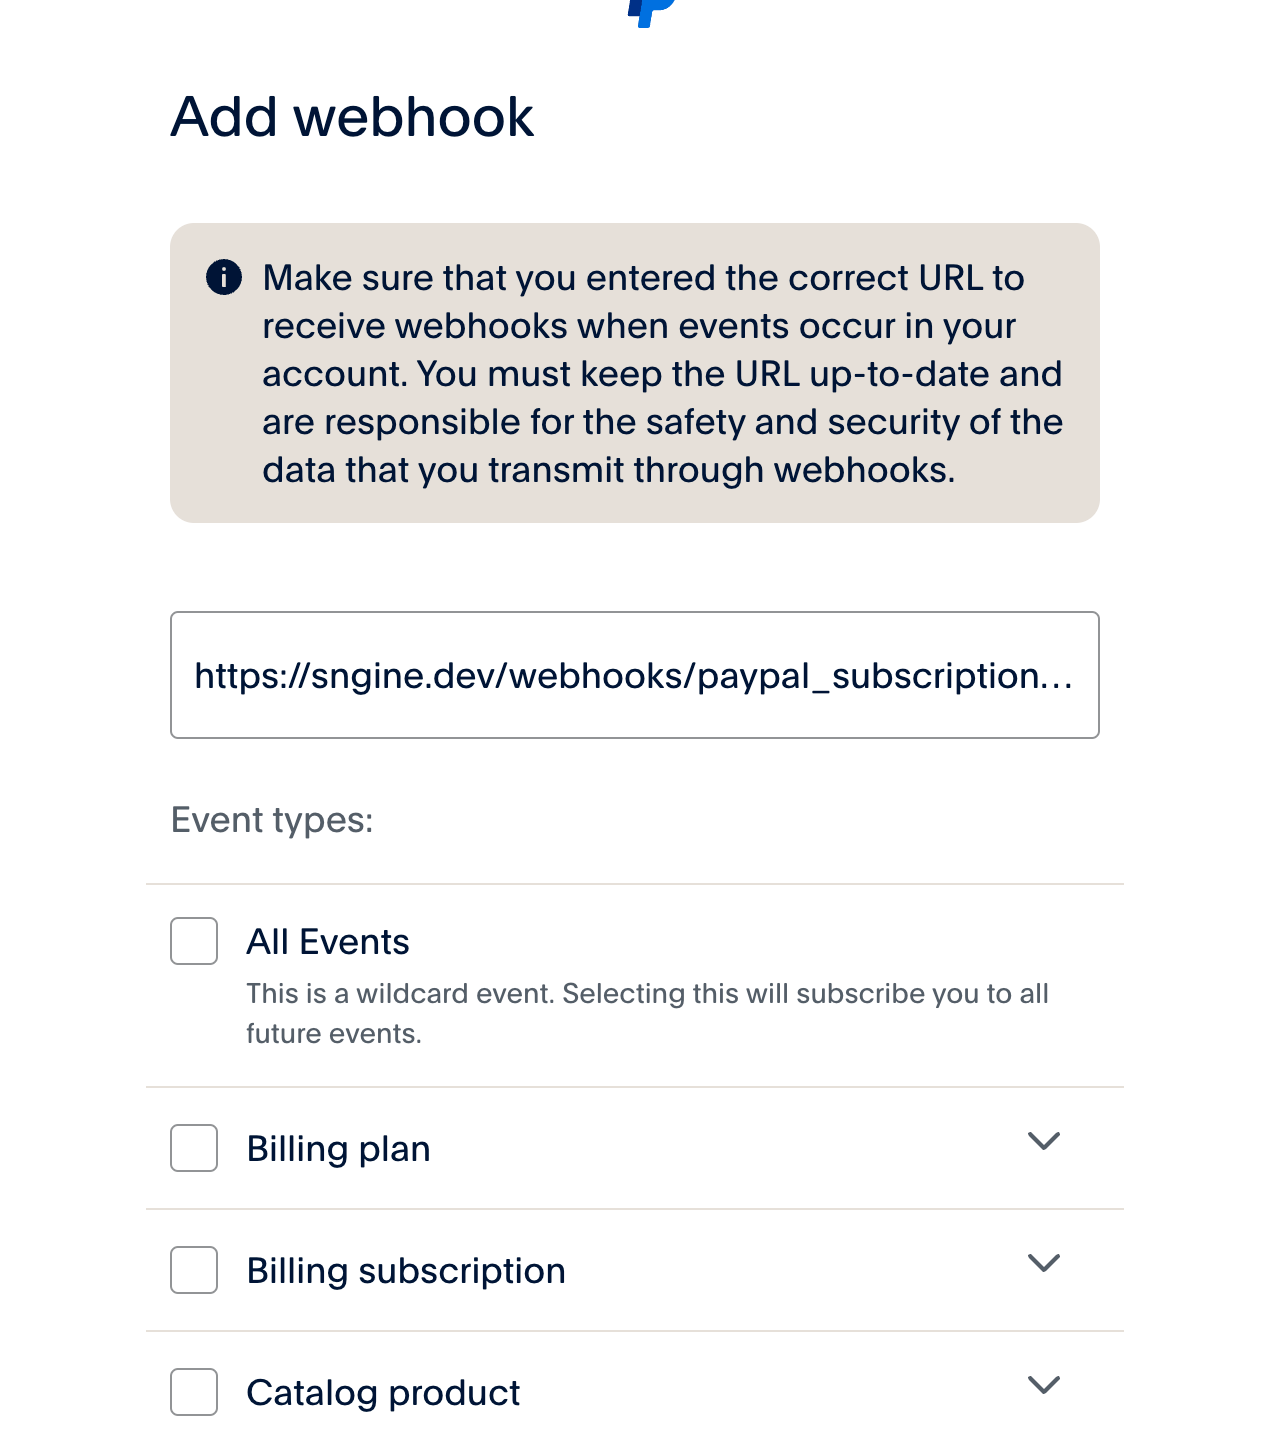
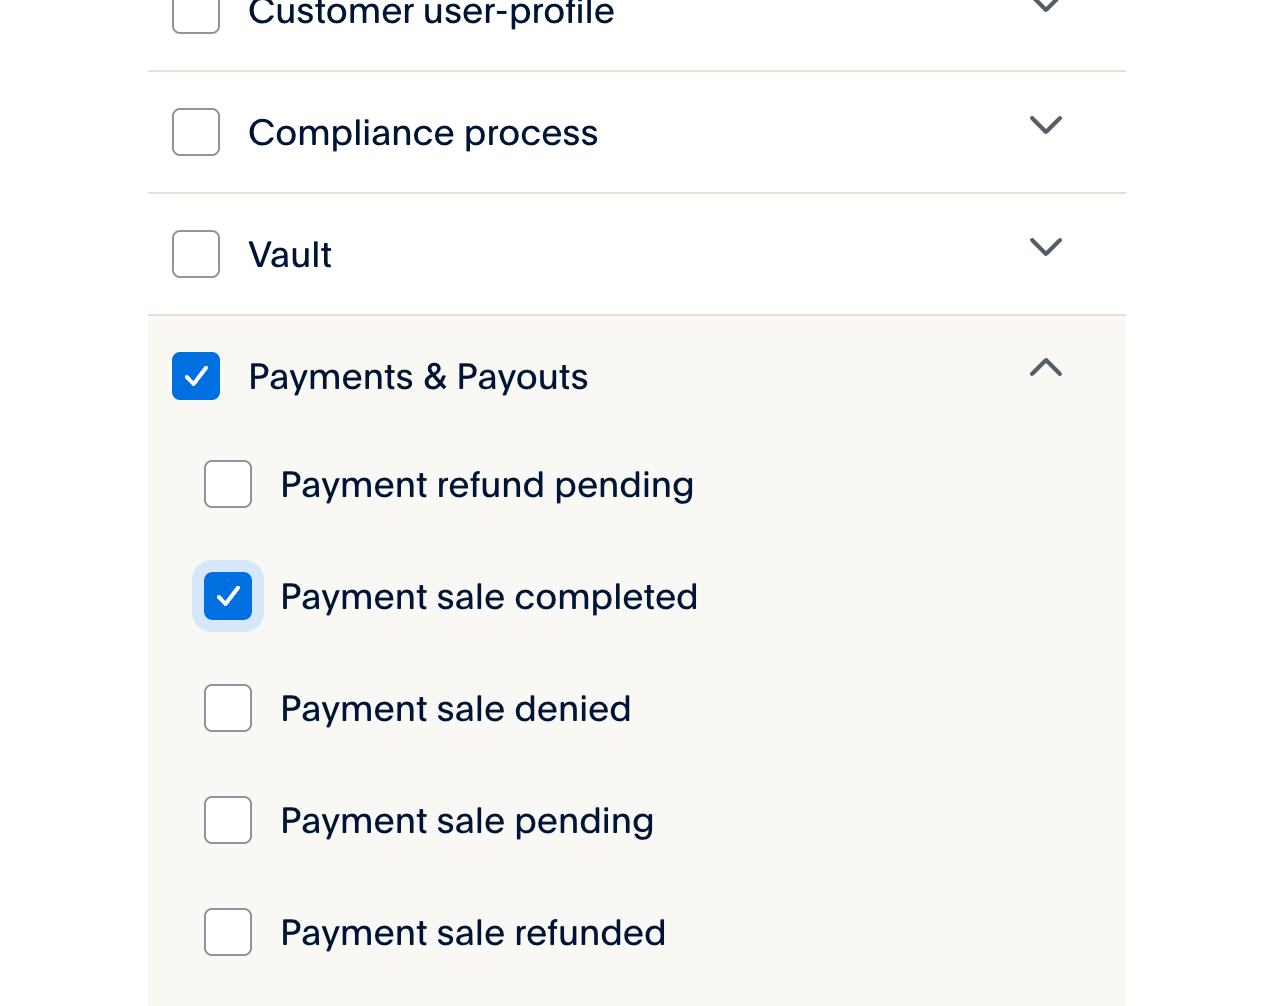
Now goto to your PayPal App and add new webhook, Webhook URL should be like this:
If you installed Sngine in your domain directly like www.domain.com the URI should
be like this: https://www.domain.com/webhooks/paypal_subscriptions.php
If you installed Sngine in your domain directly but without www like domain.com the URI should be like this: https://domain.com/webhooks/paypal_subscriptions.php
If you installed Sngine in sub-domain like sub.domain.com the URI should be like
this: https://sub.domain.com/webhooks/paypal_subscriptions.php
If you installed Sngine in a directory like domain.com/directory the URI should be
like this: https://www.domain.com/directory/webhooks/paypal_subscriptions.php
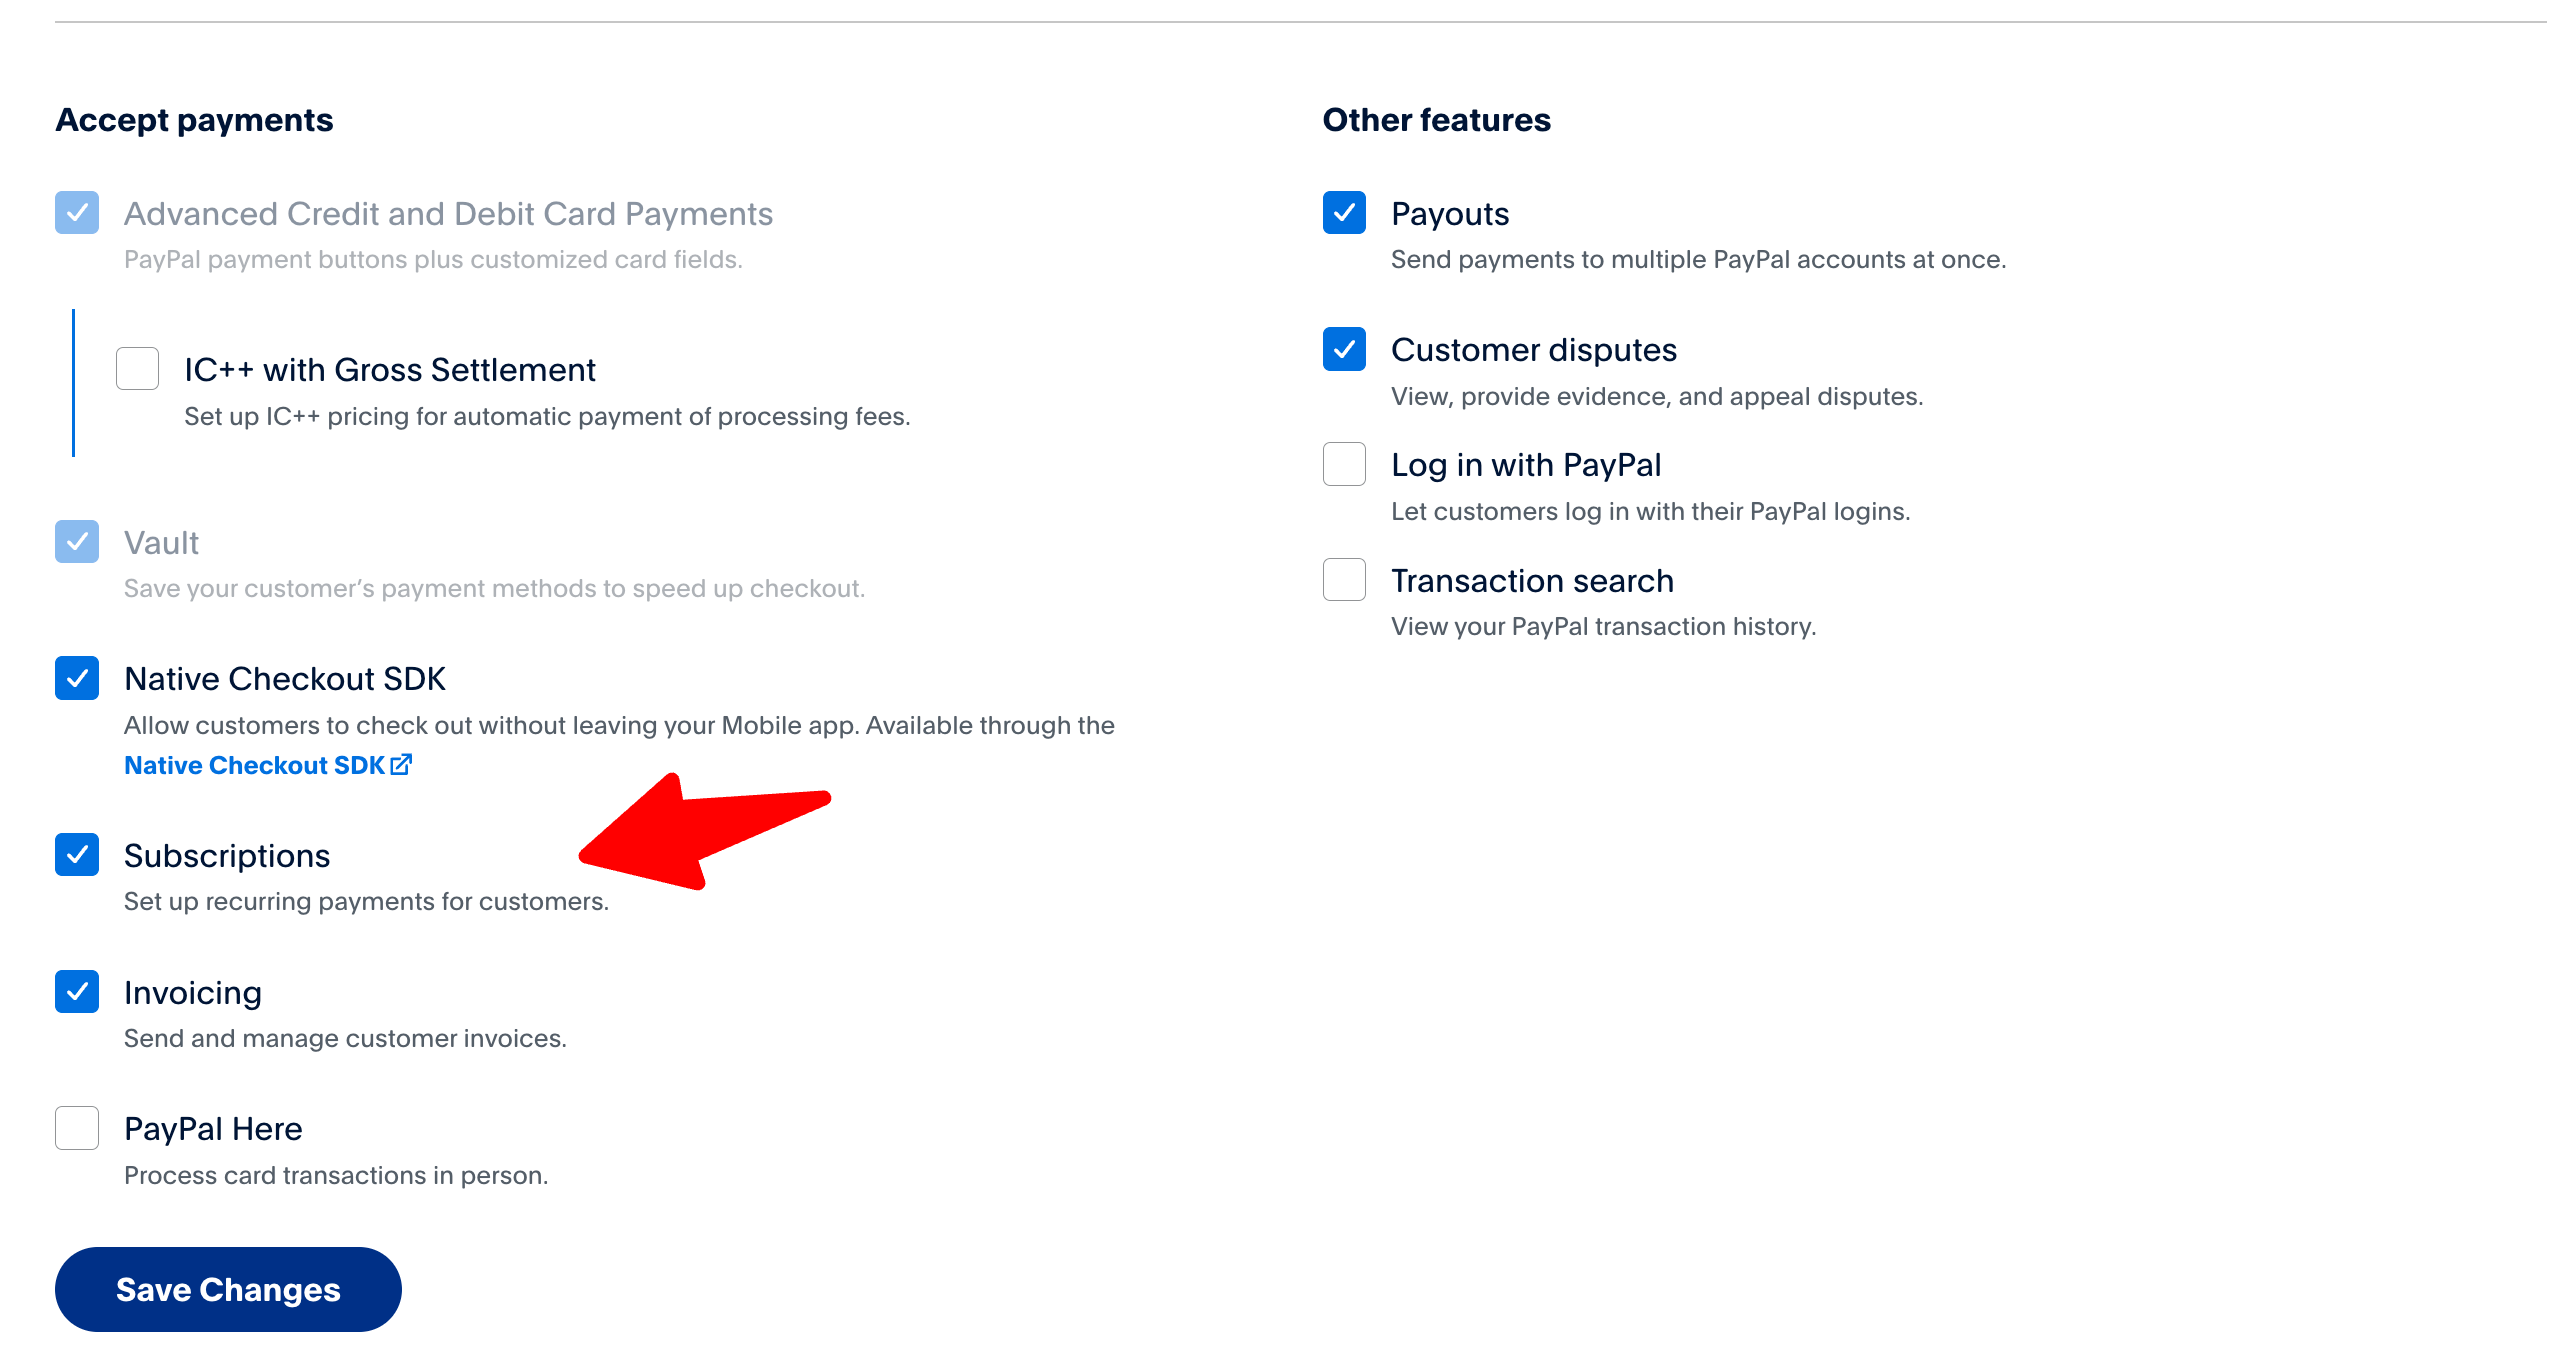
Also make sure that your app has subscriptions enabled
Now if you will use PayPal in SandBox (Test) Mode Copy Client
ID and Secret
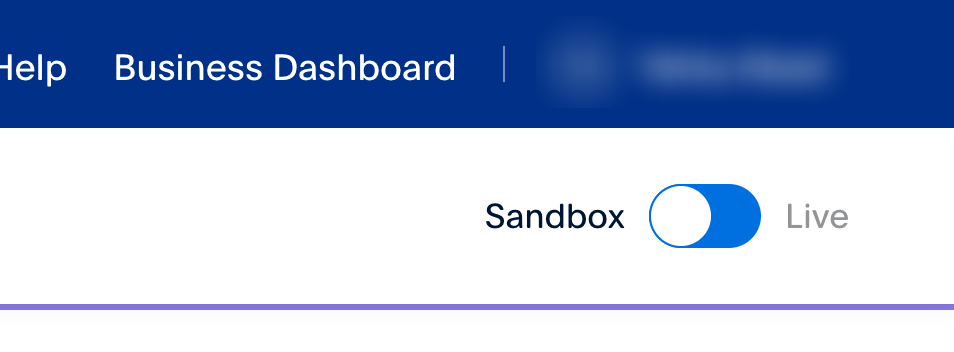
For Live Mode Copy Client ID and Secret from Live Tab
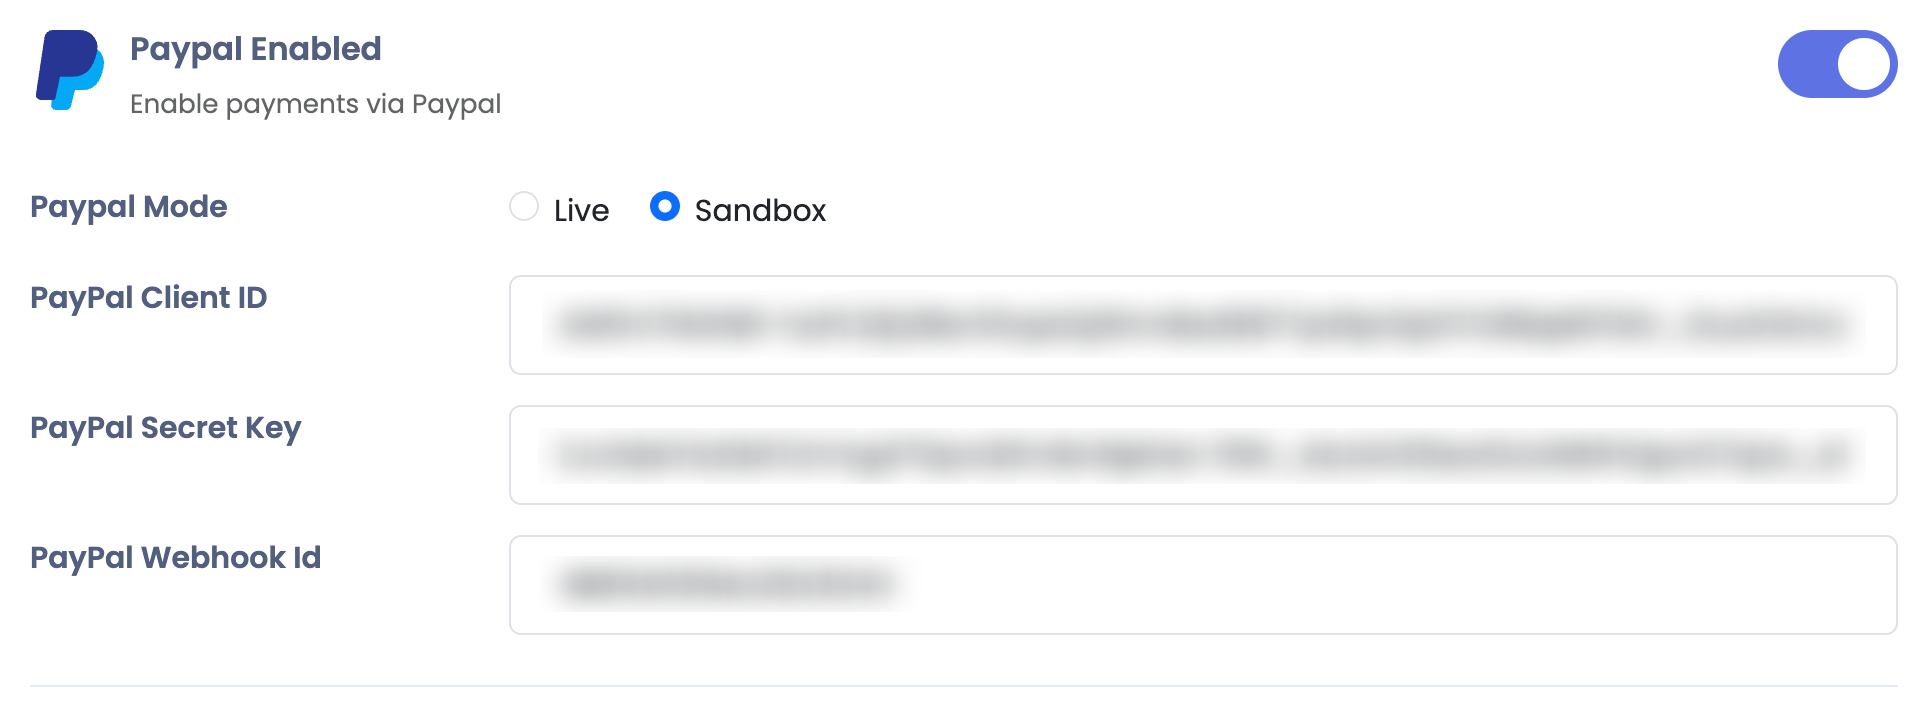
Now goto to your Sngine Admin panel -> Settings -> Payments Settings and paste both
Client ID and Secret and
select the mode you want Test or Live
That's all, Enjoy!
Paystack
After installing Sngine now you can in easy steps integrate Paystack with it to let your users use it
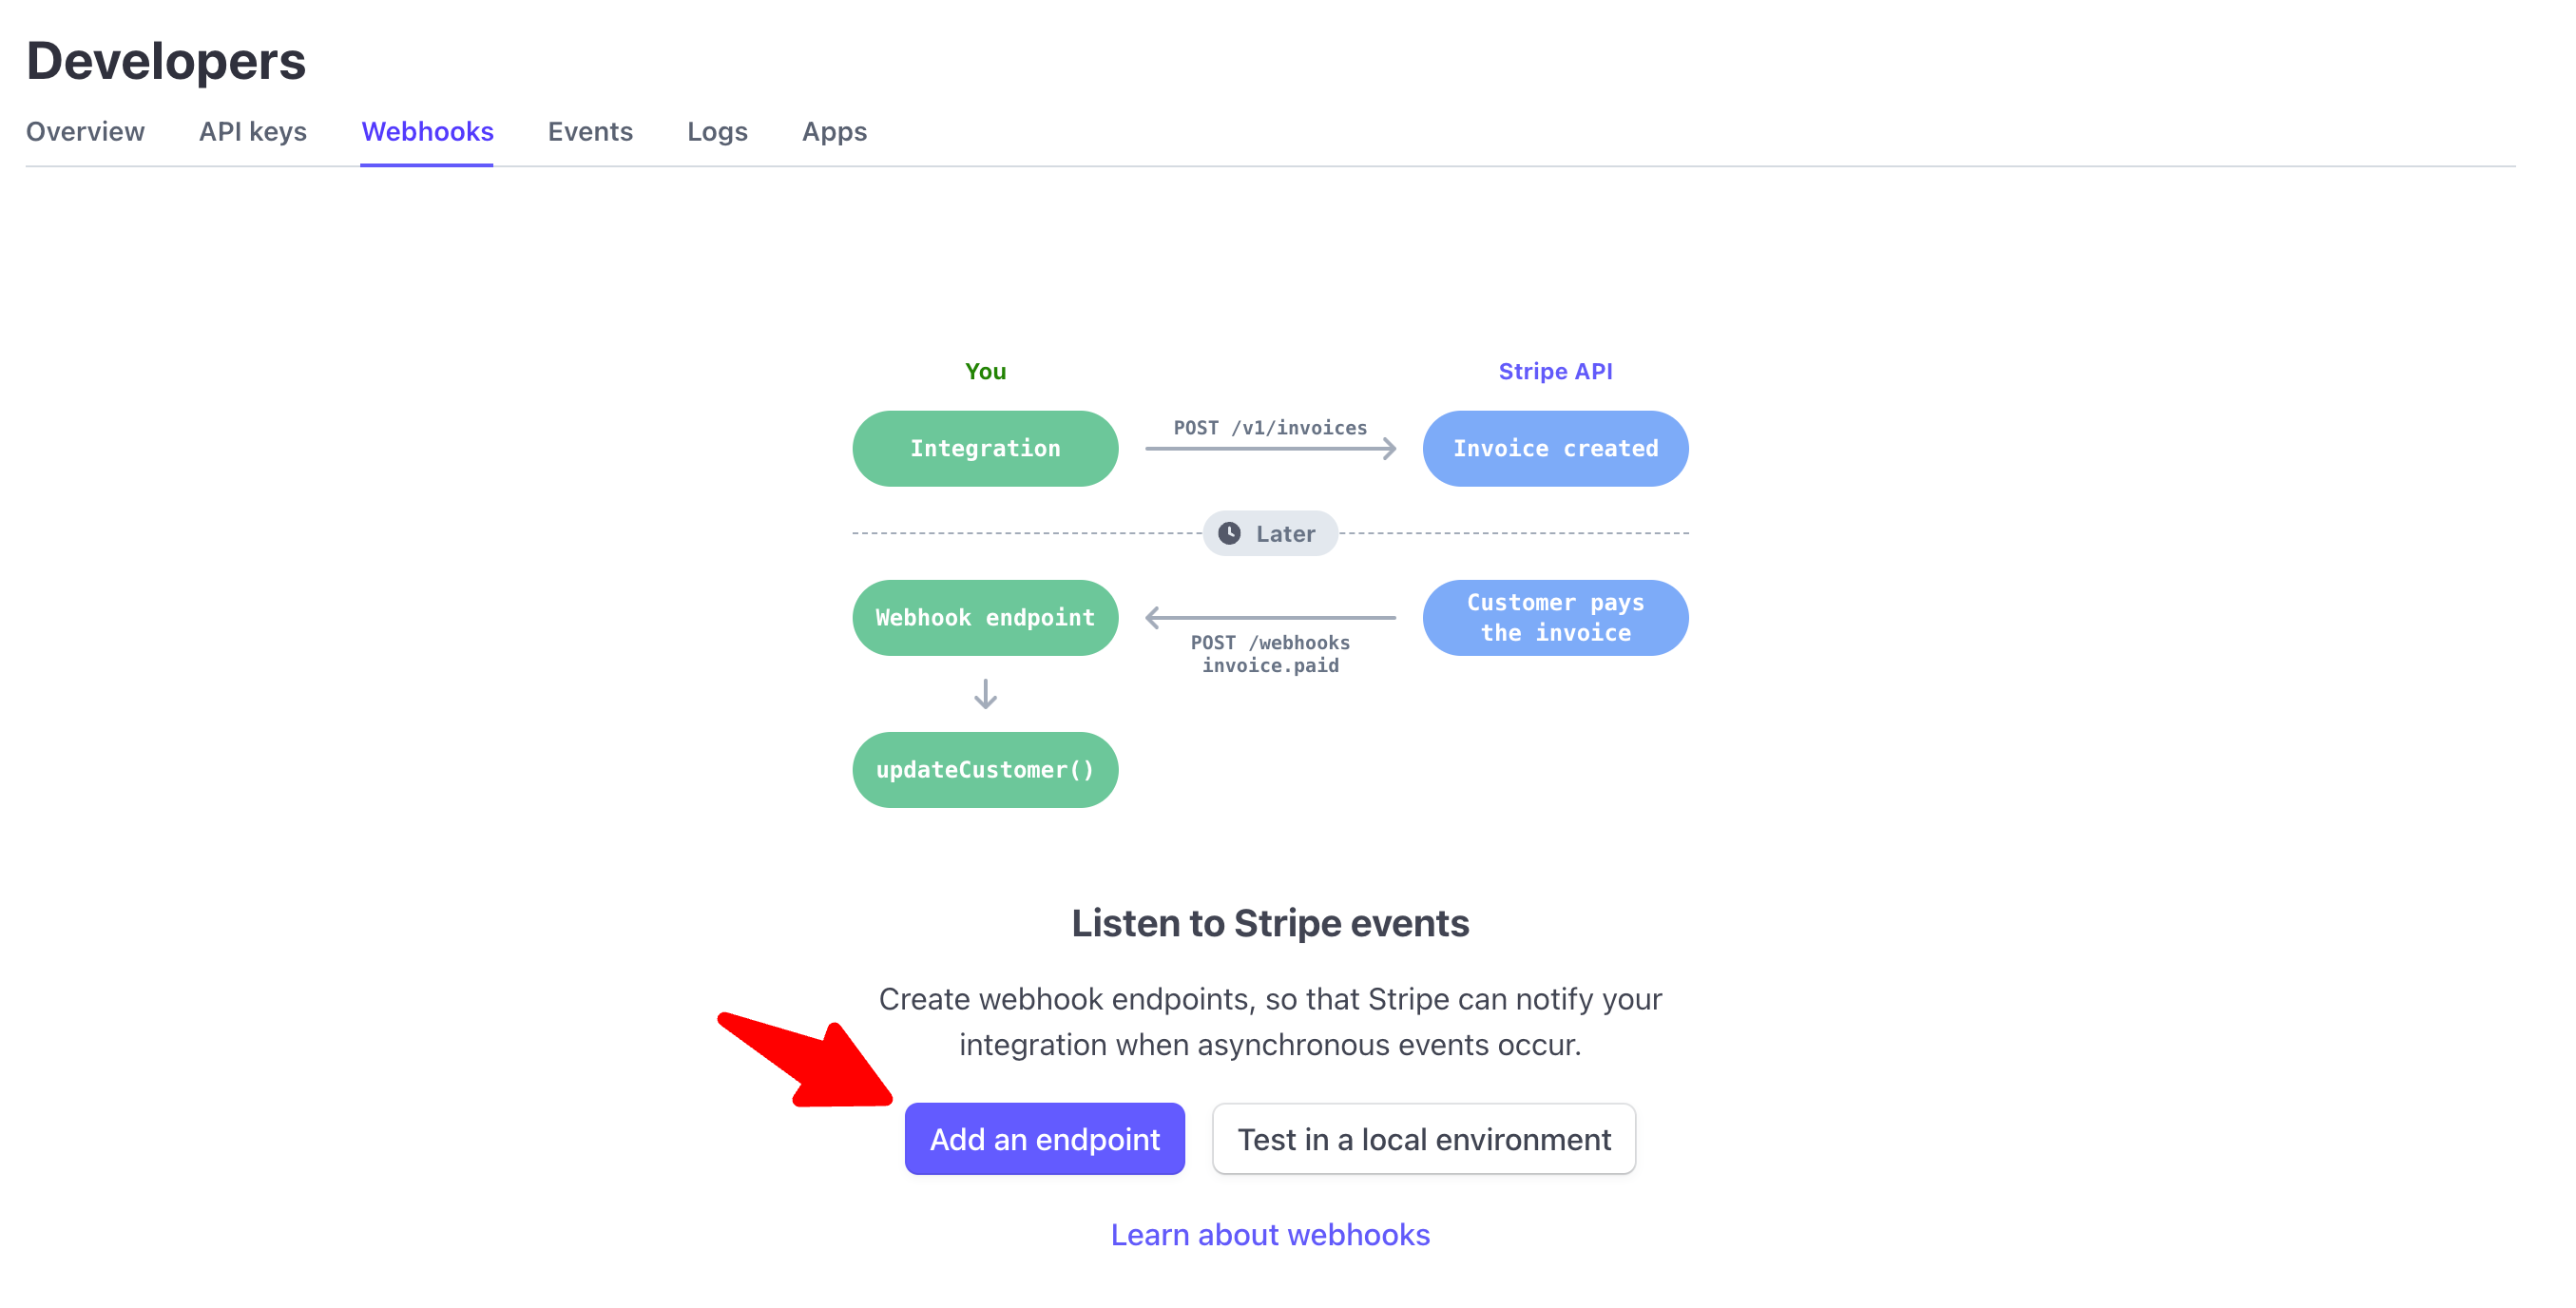
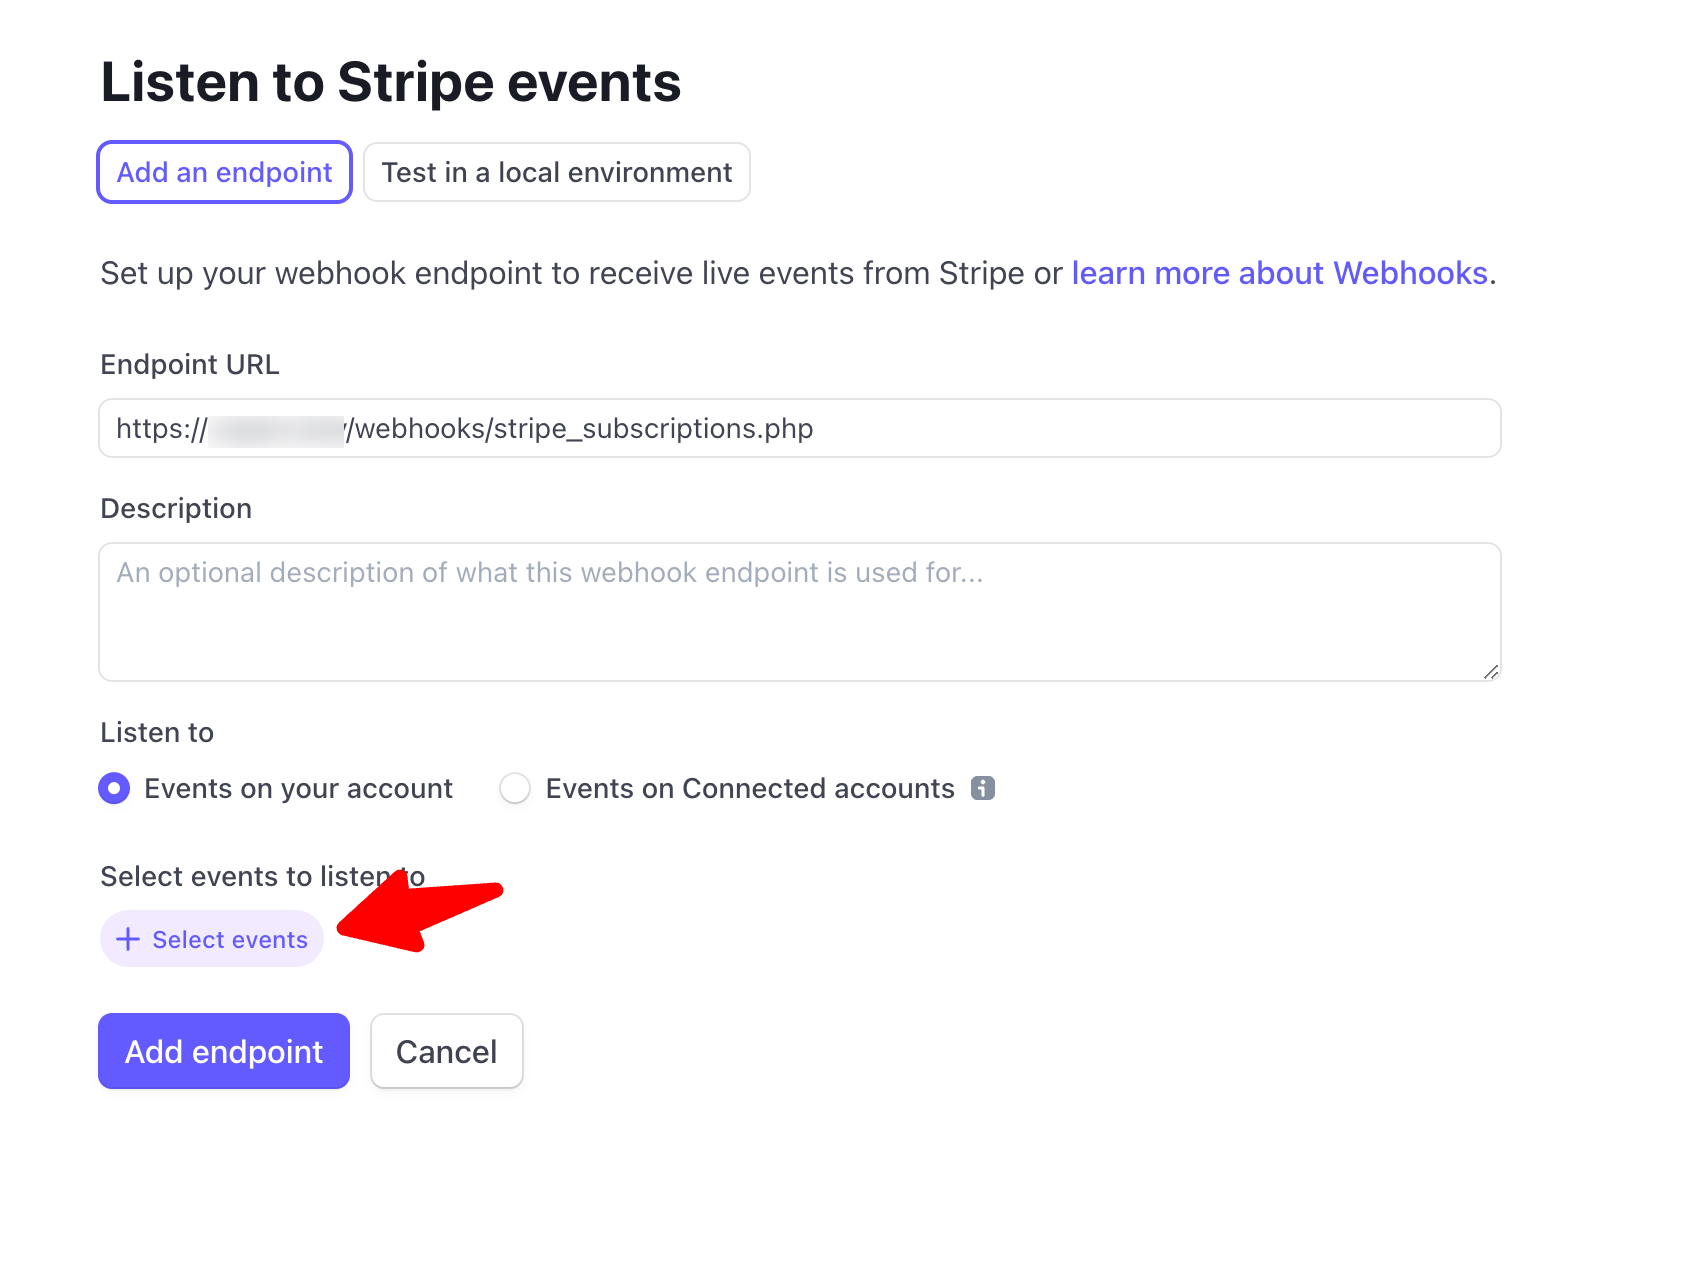
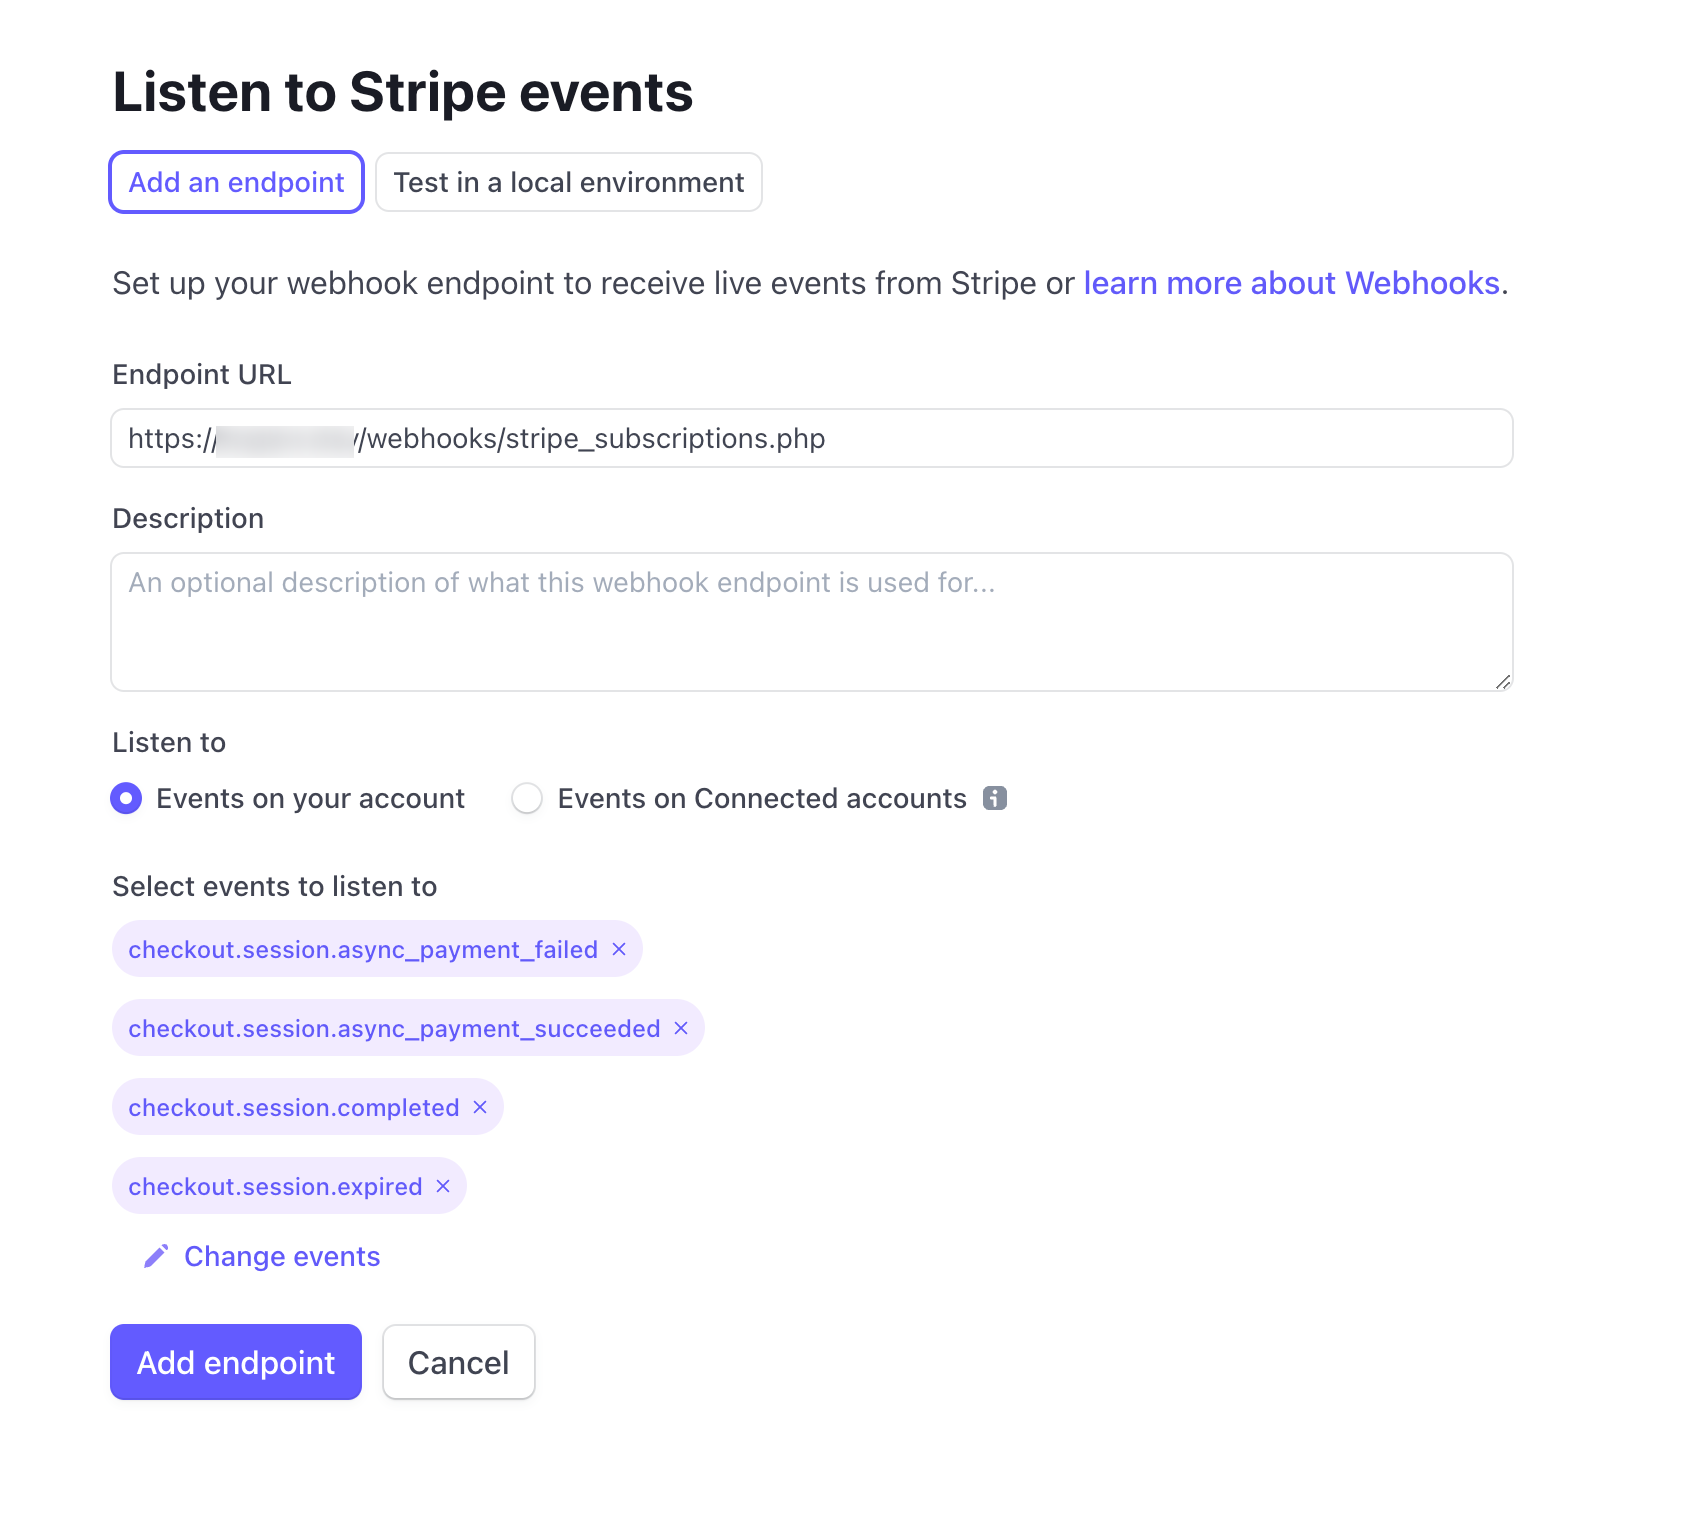
Now goto to Webhooks and add new webhook, Webhook URL should be like this:
If you installed Sngine in your domain directly like www.domain.com the URI should
be like this: https://www.domain.com/webhooks/stripe_subscriptions.php
If you installed Sngine in your domain directly but without www like domain.com the URI should be like this: https://domain.com/webhooks/stripe_subscriptions.php
If you installed Sngine in sub-domain like sub.domain.com the URI should be like
this: https://sub.domain.com/webhooks/stripe_subscriptions.php
If you installed Sngine in a directory like domain.com/directory the URI should be
like this: https://www.domain.com/directory/webhooks/stripe_subscriptions.php
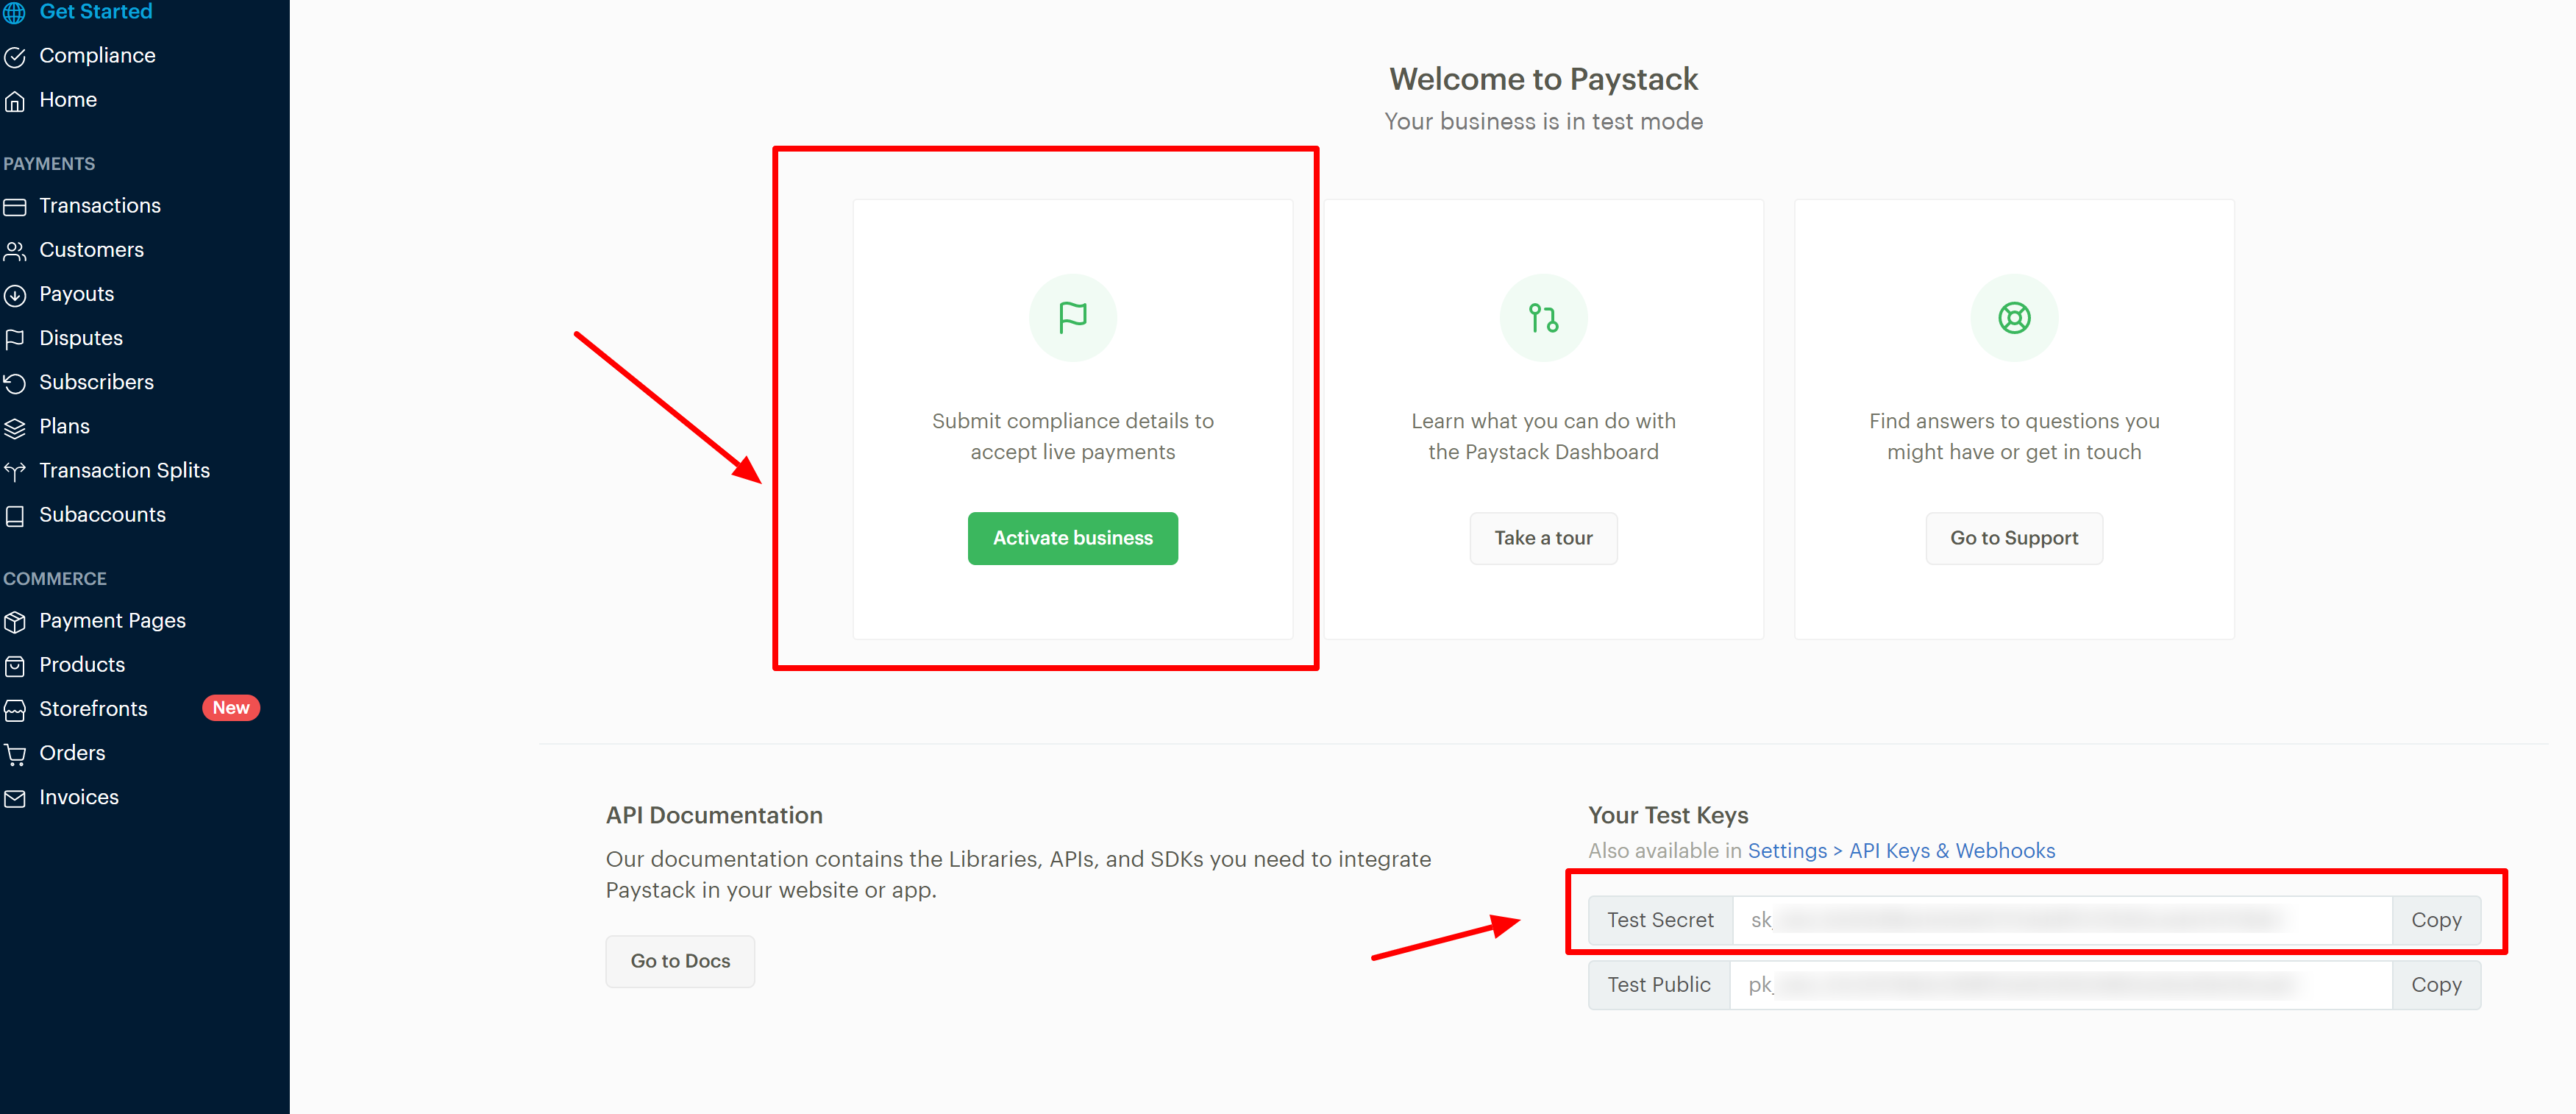
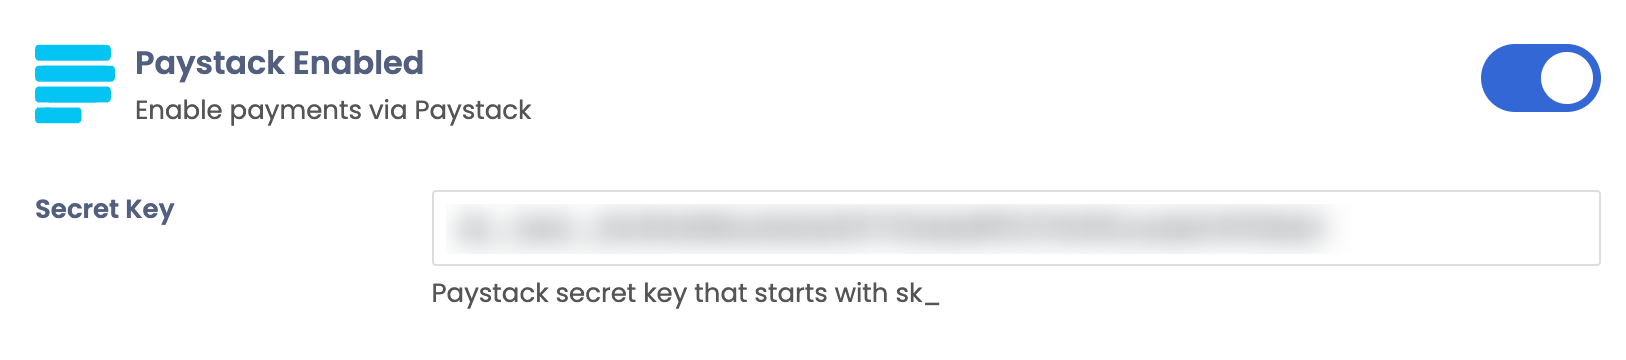
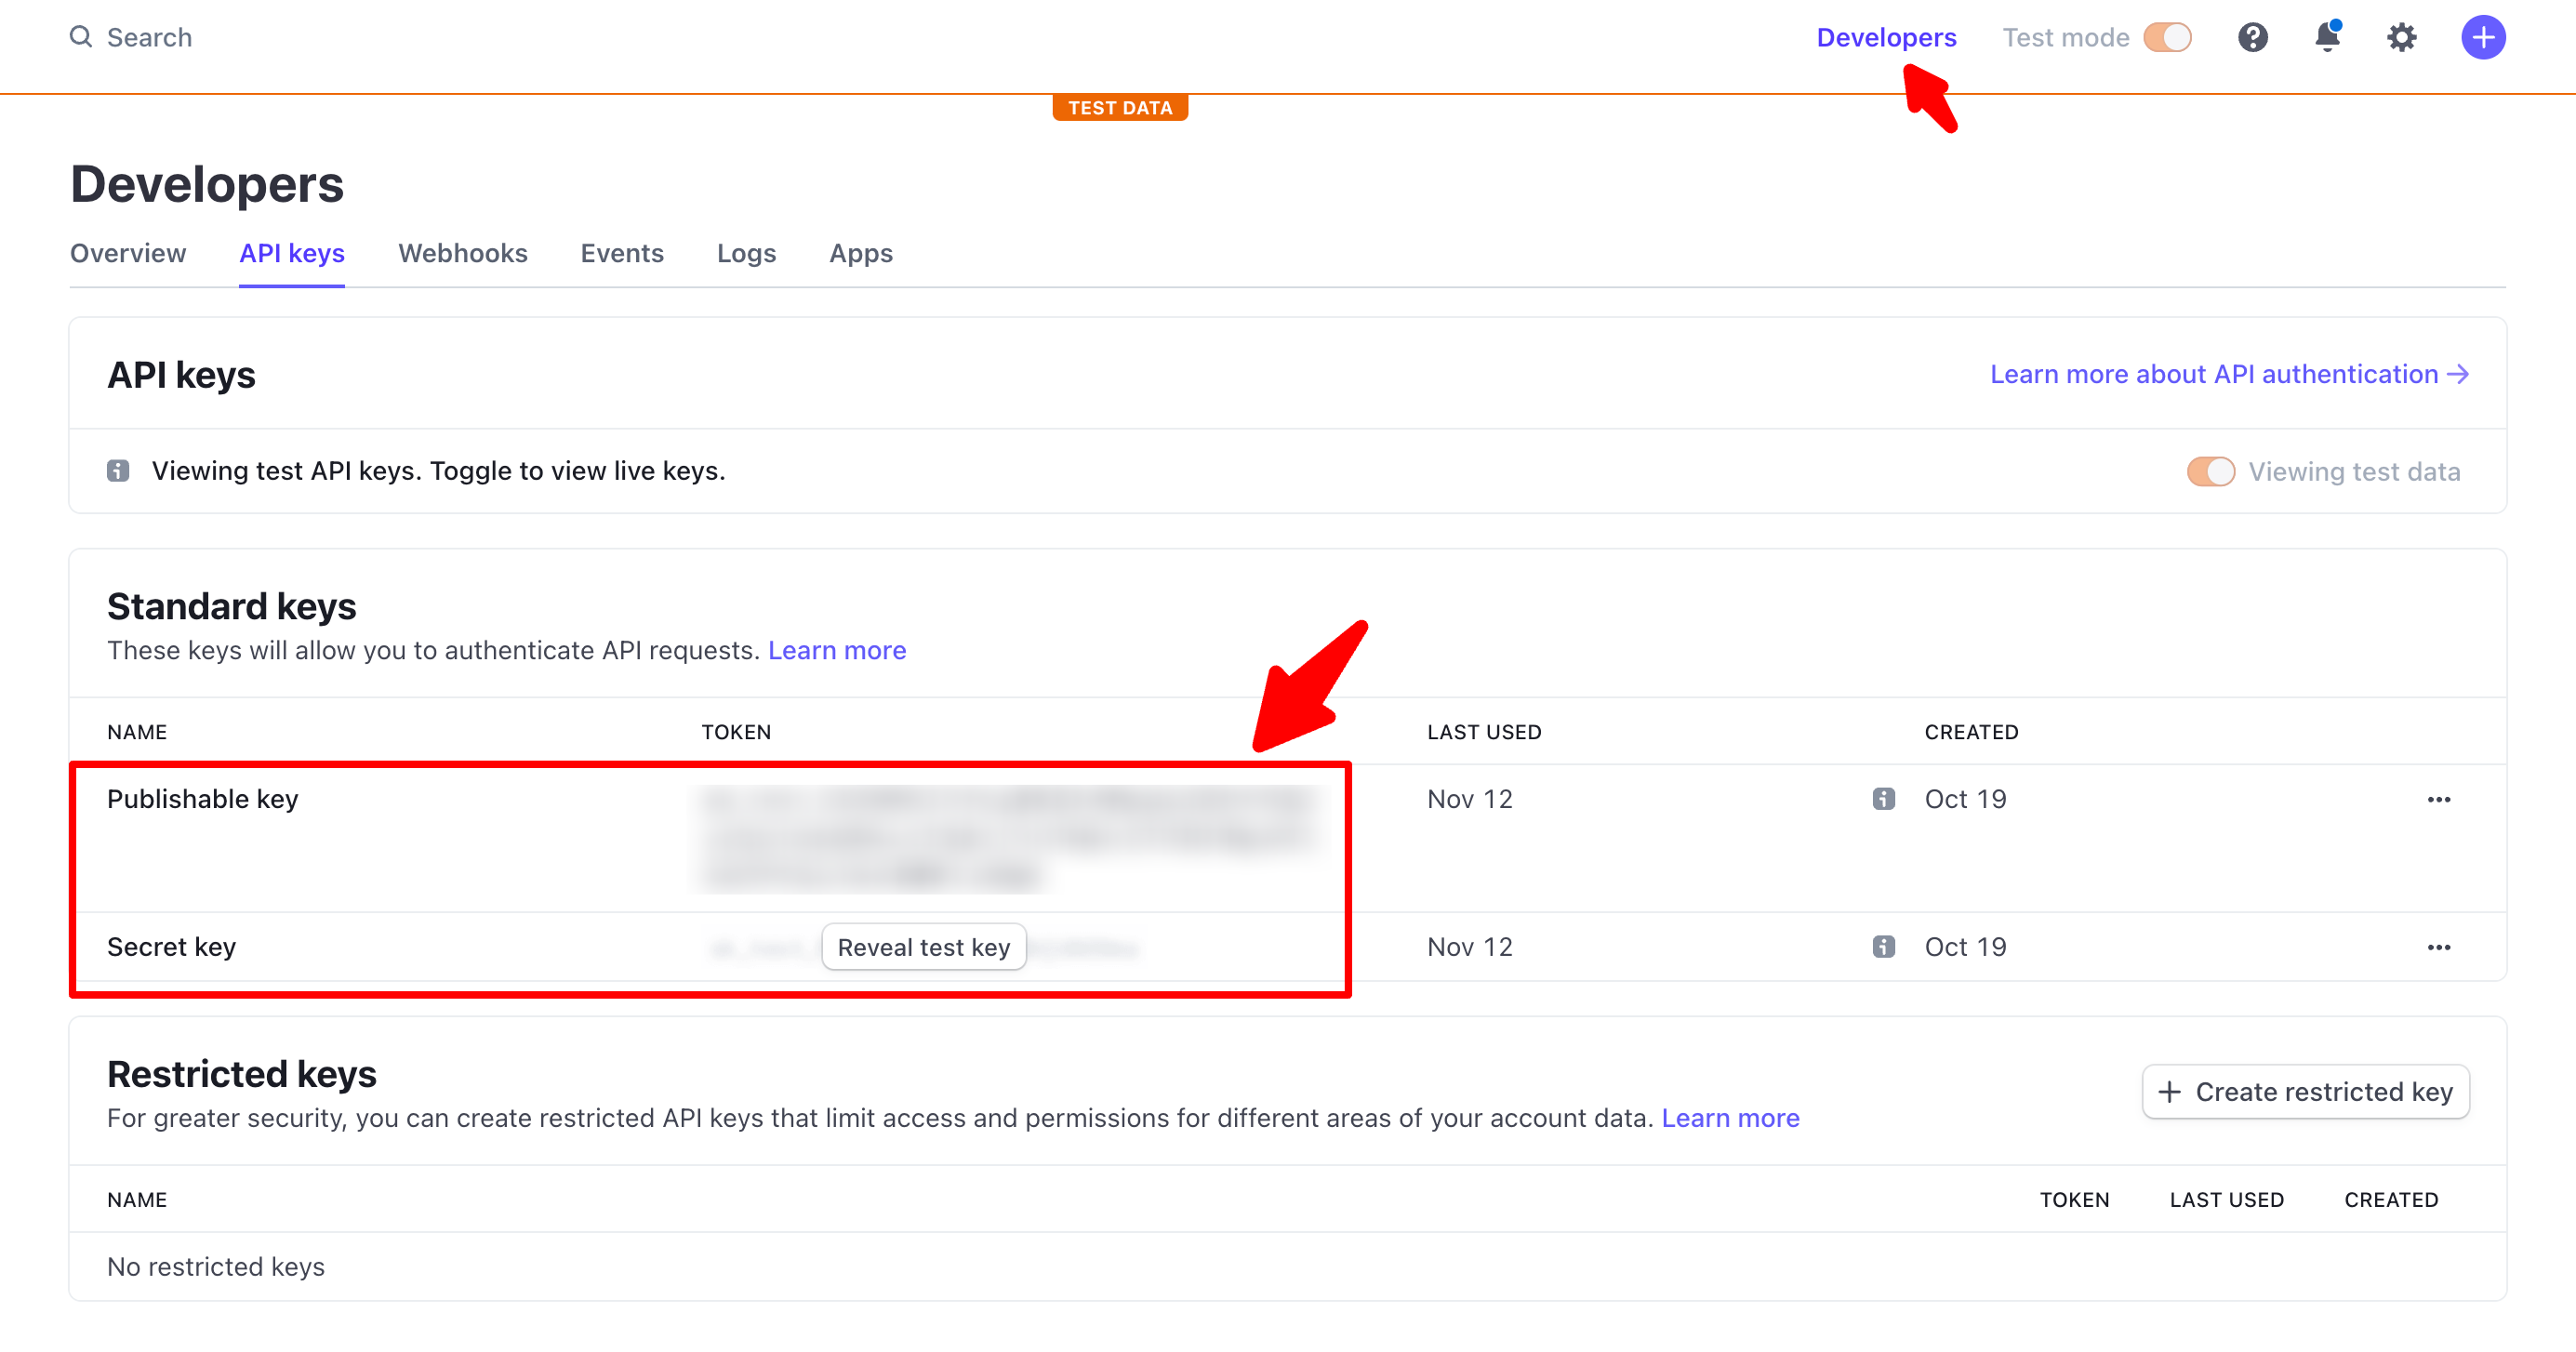
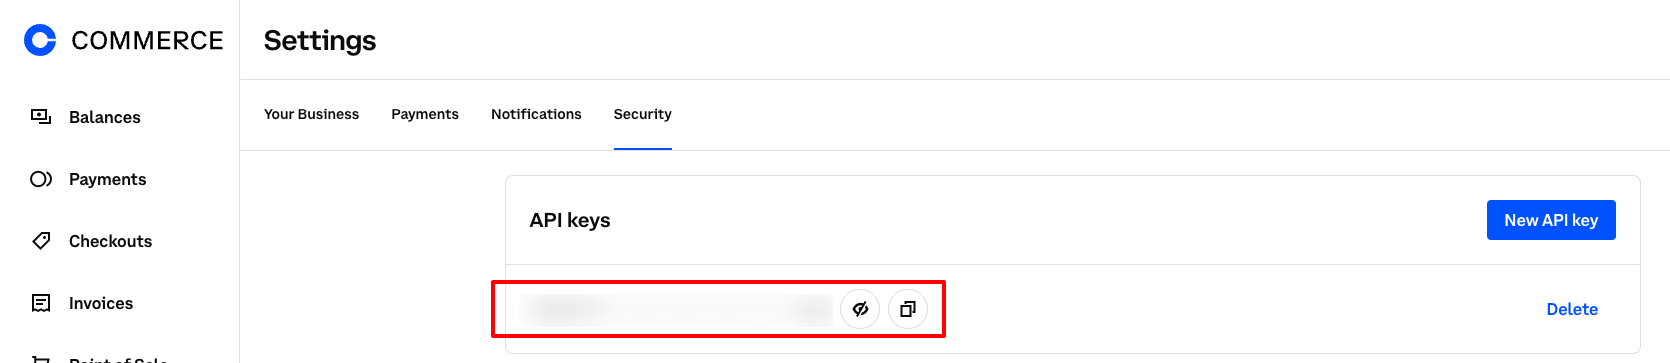
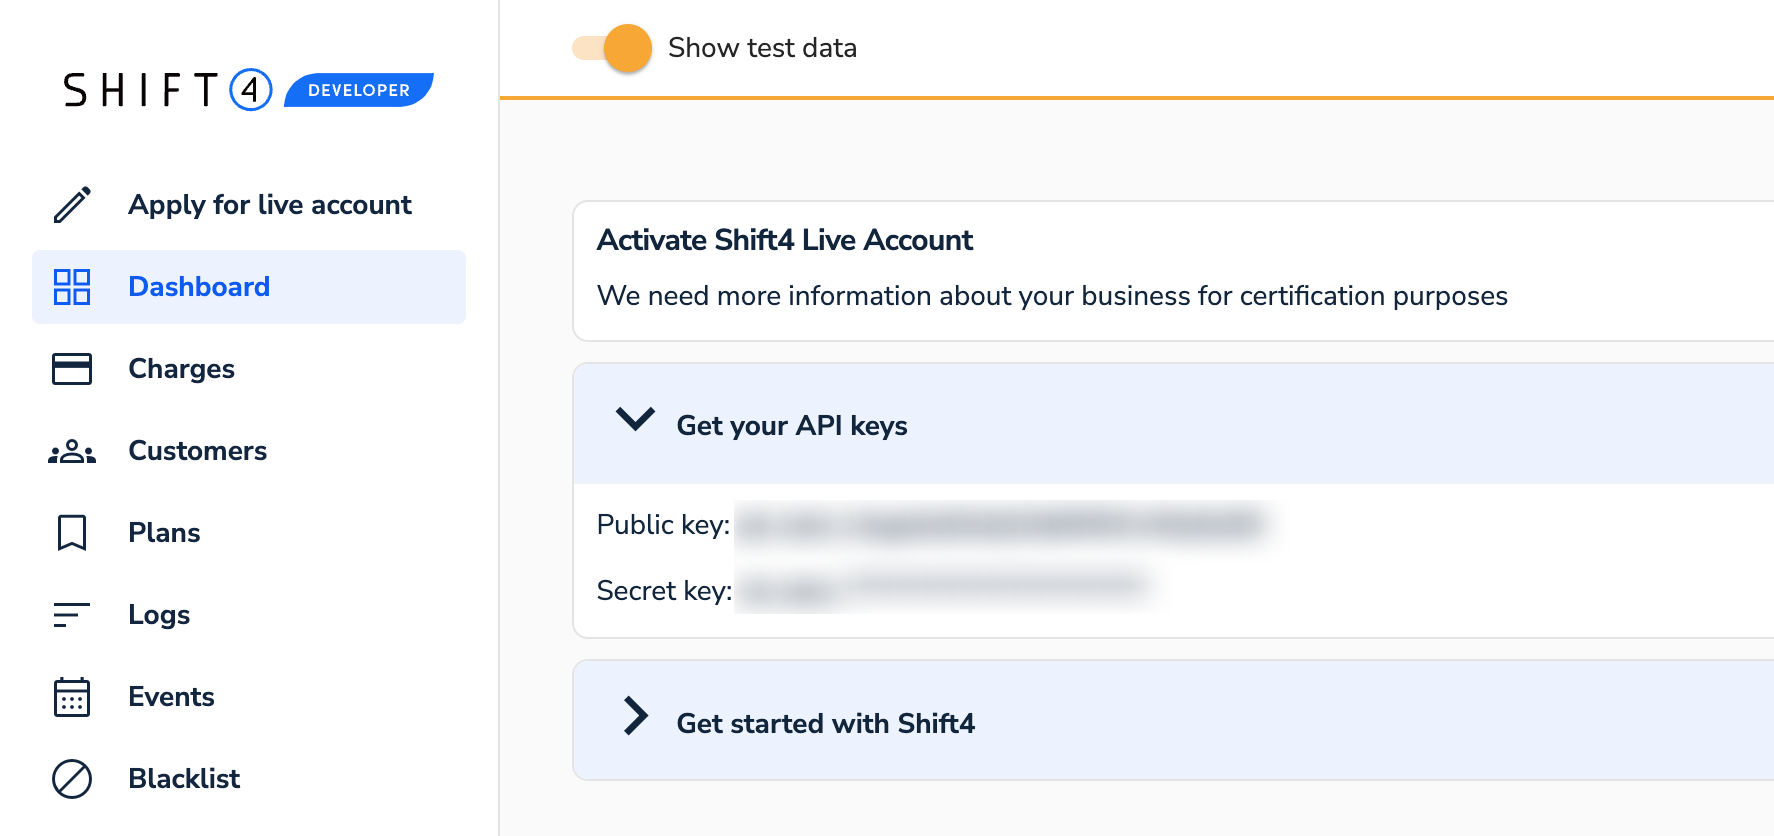
Copy API Keys and your Webhook Signing Secret then goto to your Sngine Admin panel ->
Settings -> Payments Settings and paste all and select the mode you want Test or Live
For Live you will need to activate your account first
That's all, Enjoy!
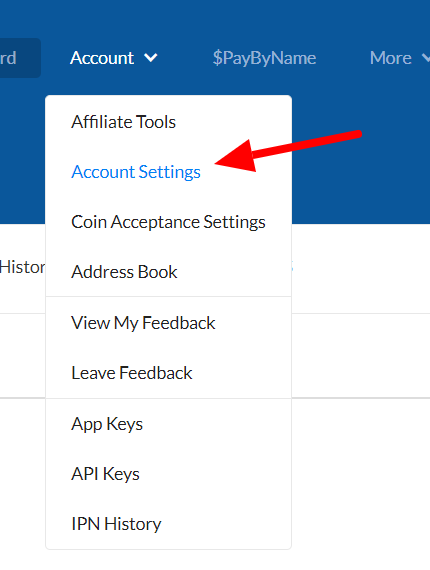
CoinPayments
After installing Sngine now you can in easy steps integrate CoinPayments with it to let your users use it
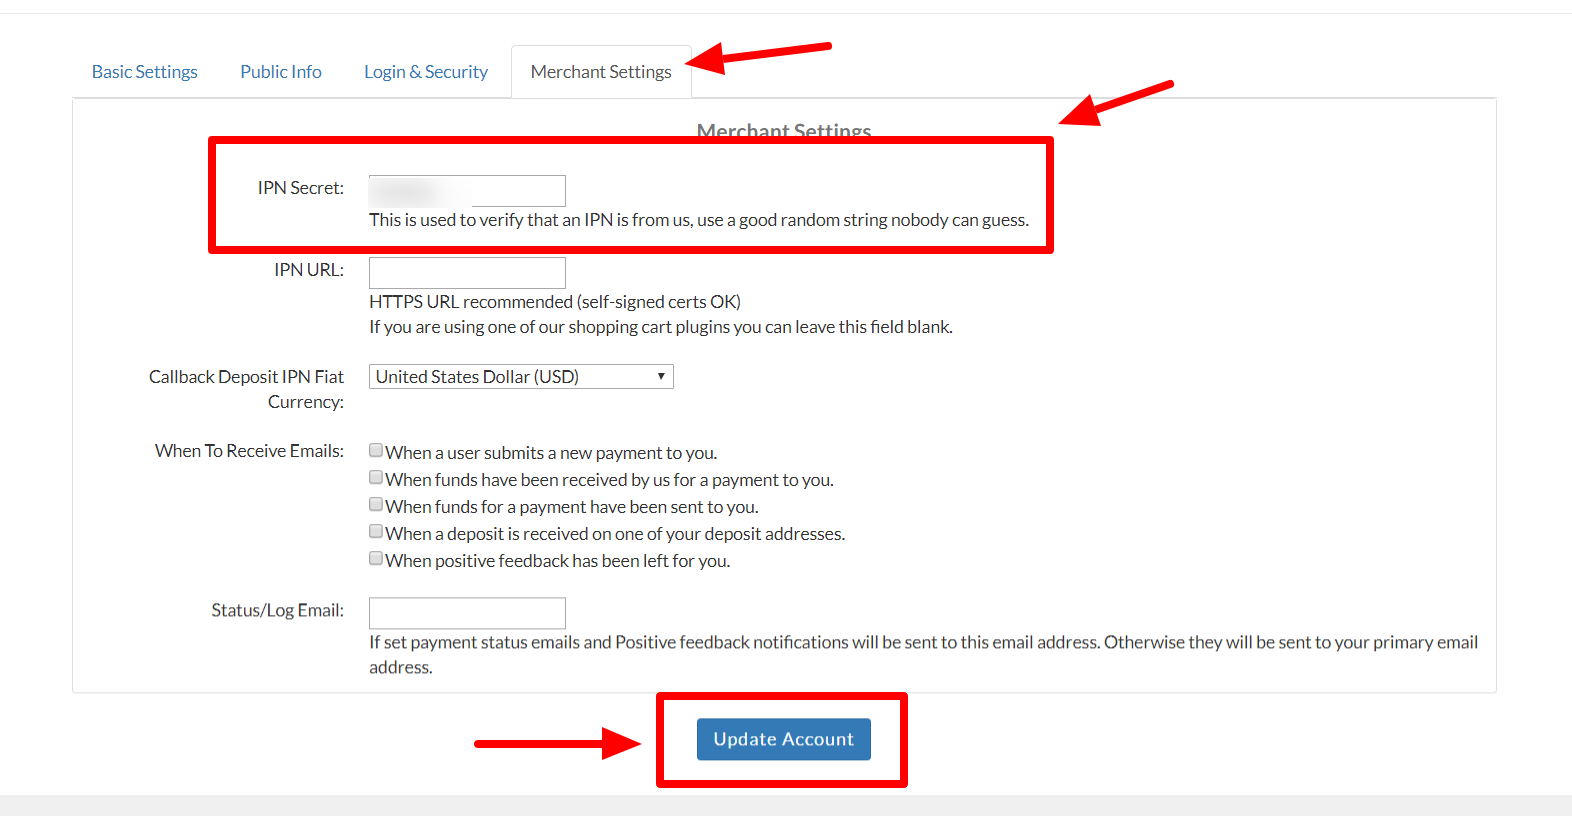
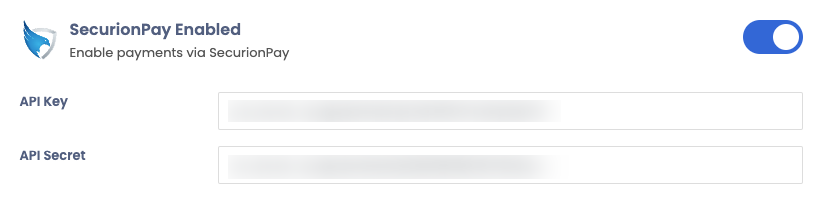
Click on Merchant Settings tab and enter IPN Secert You can enter any string you want but try to
make it difficult like a password
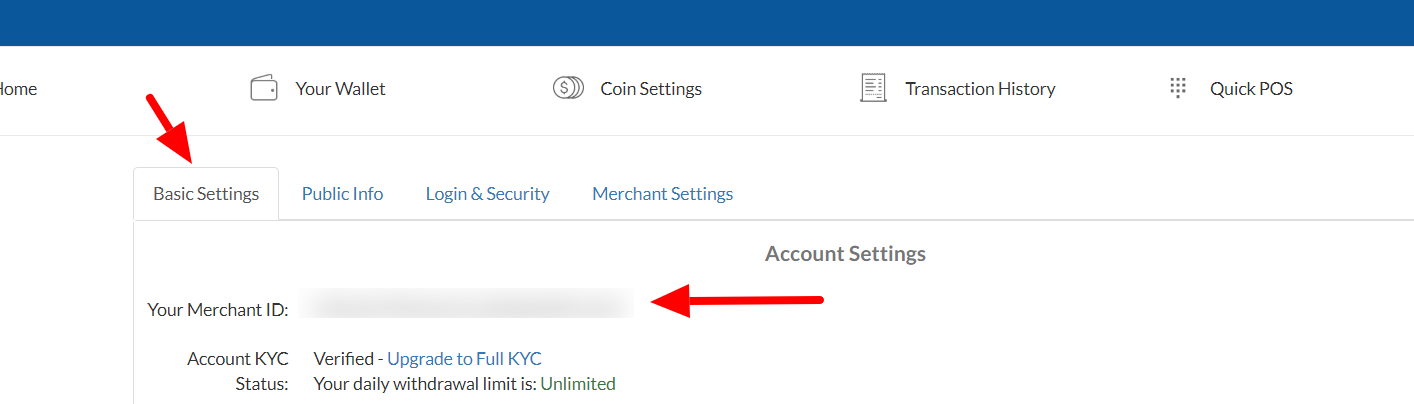
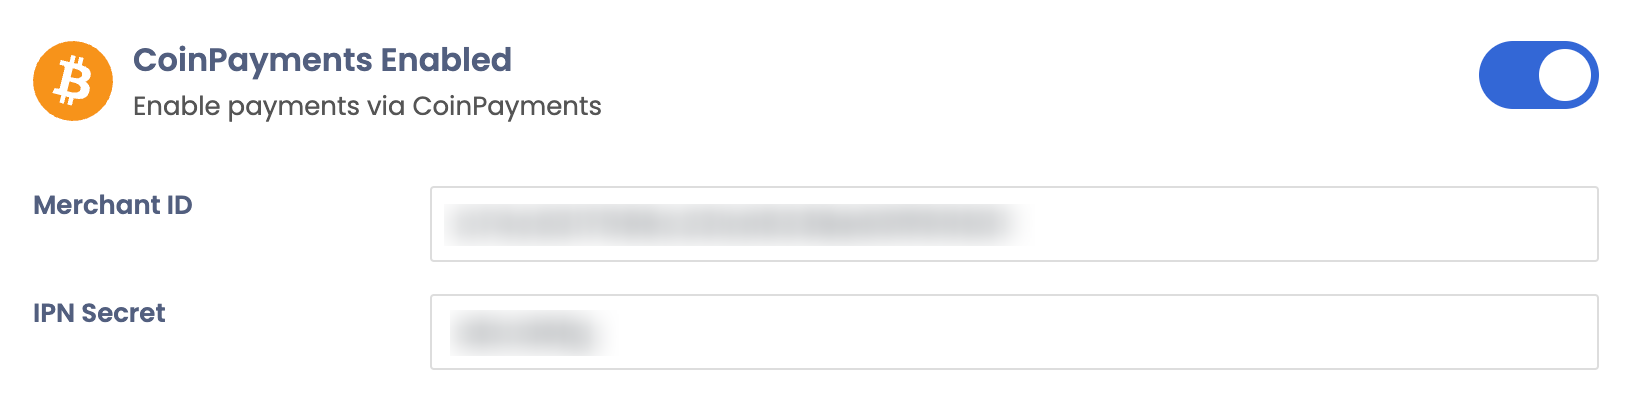
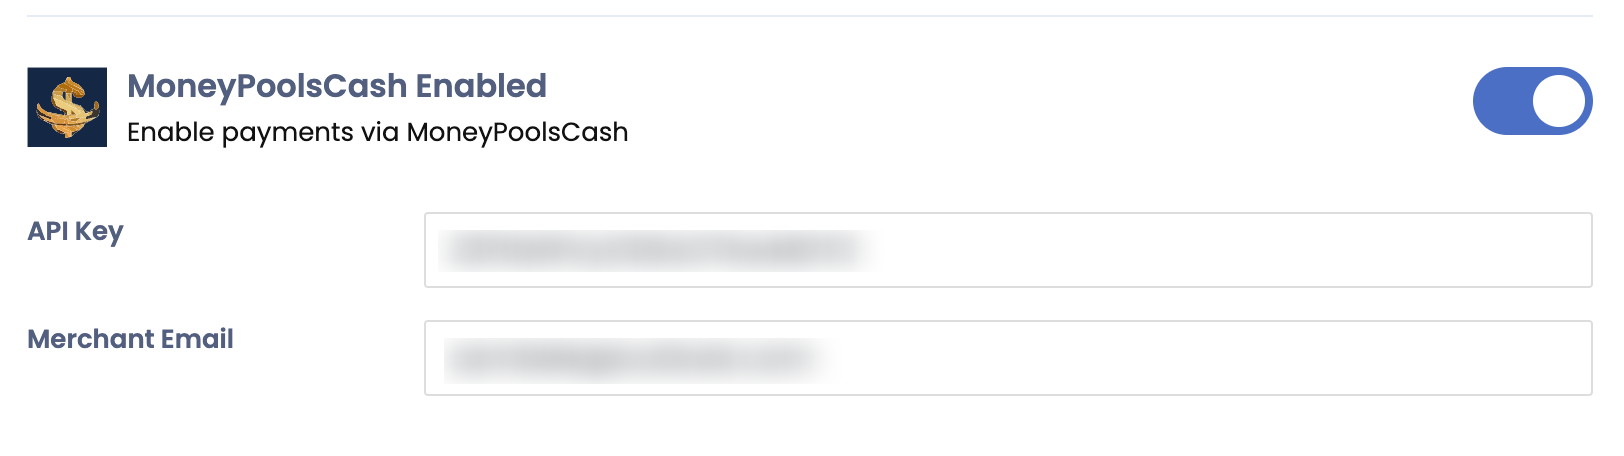
Now Click on Basic Settings tab and copy your Merchant ID then goto to your Sngine Admin panel ->
Settings -> Payments Settings and paste both Merchant ID and IPN Secret and enable the
CoinPayments and click Save
That's all, Enjoy!
Verifone (2Checkout Previously)
After installing Sngine now you can in easy steps integrate 2Checkout with it to let your users use it
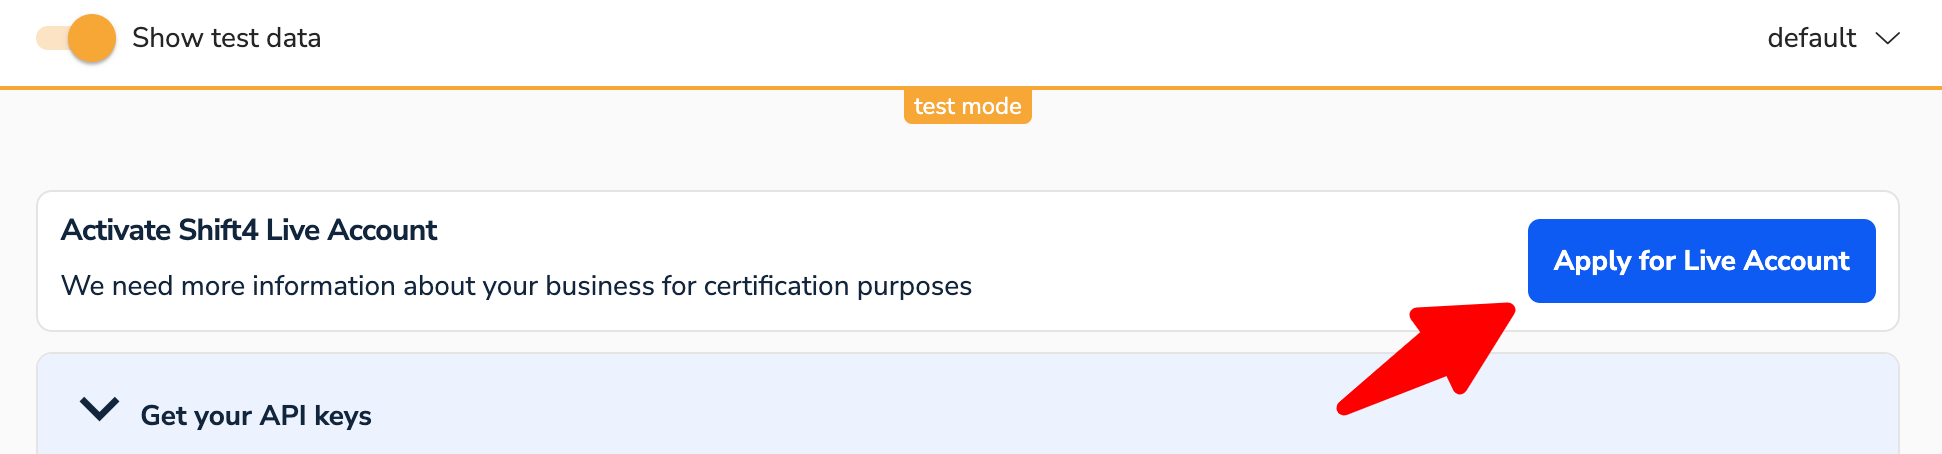
Your 2Checkout live account need to be activated to start using the live
mode
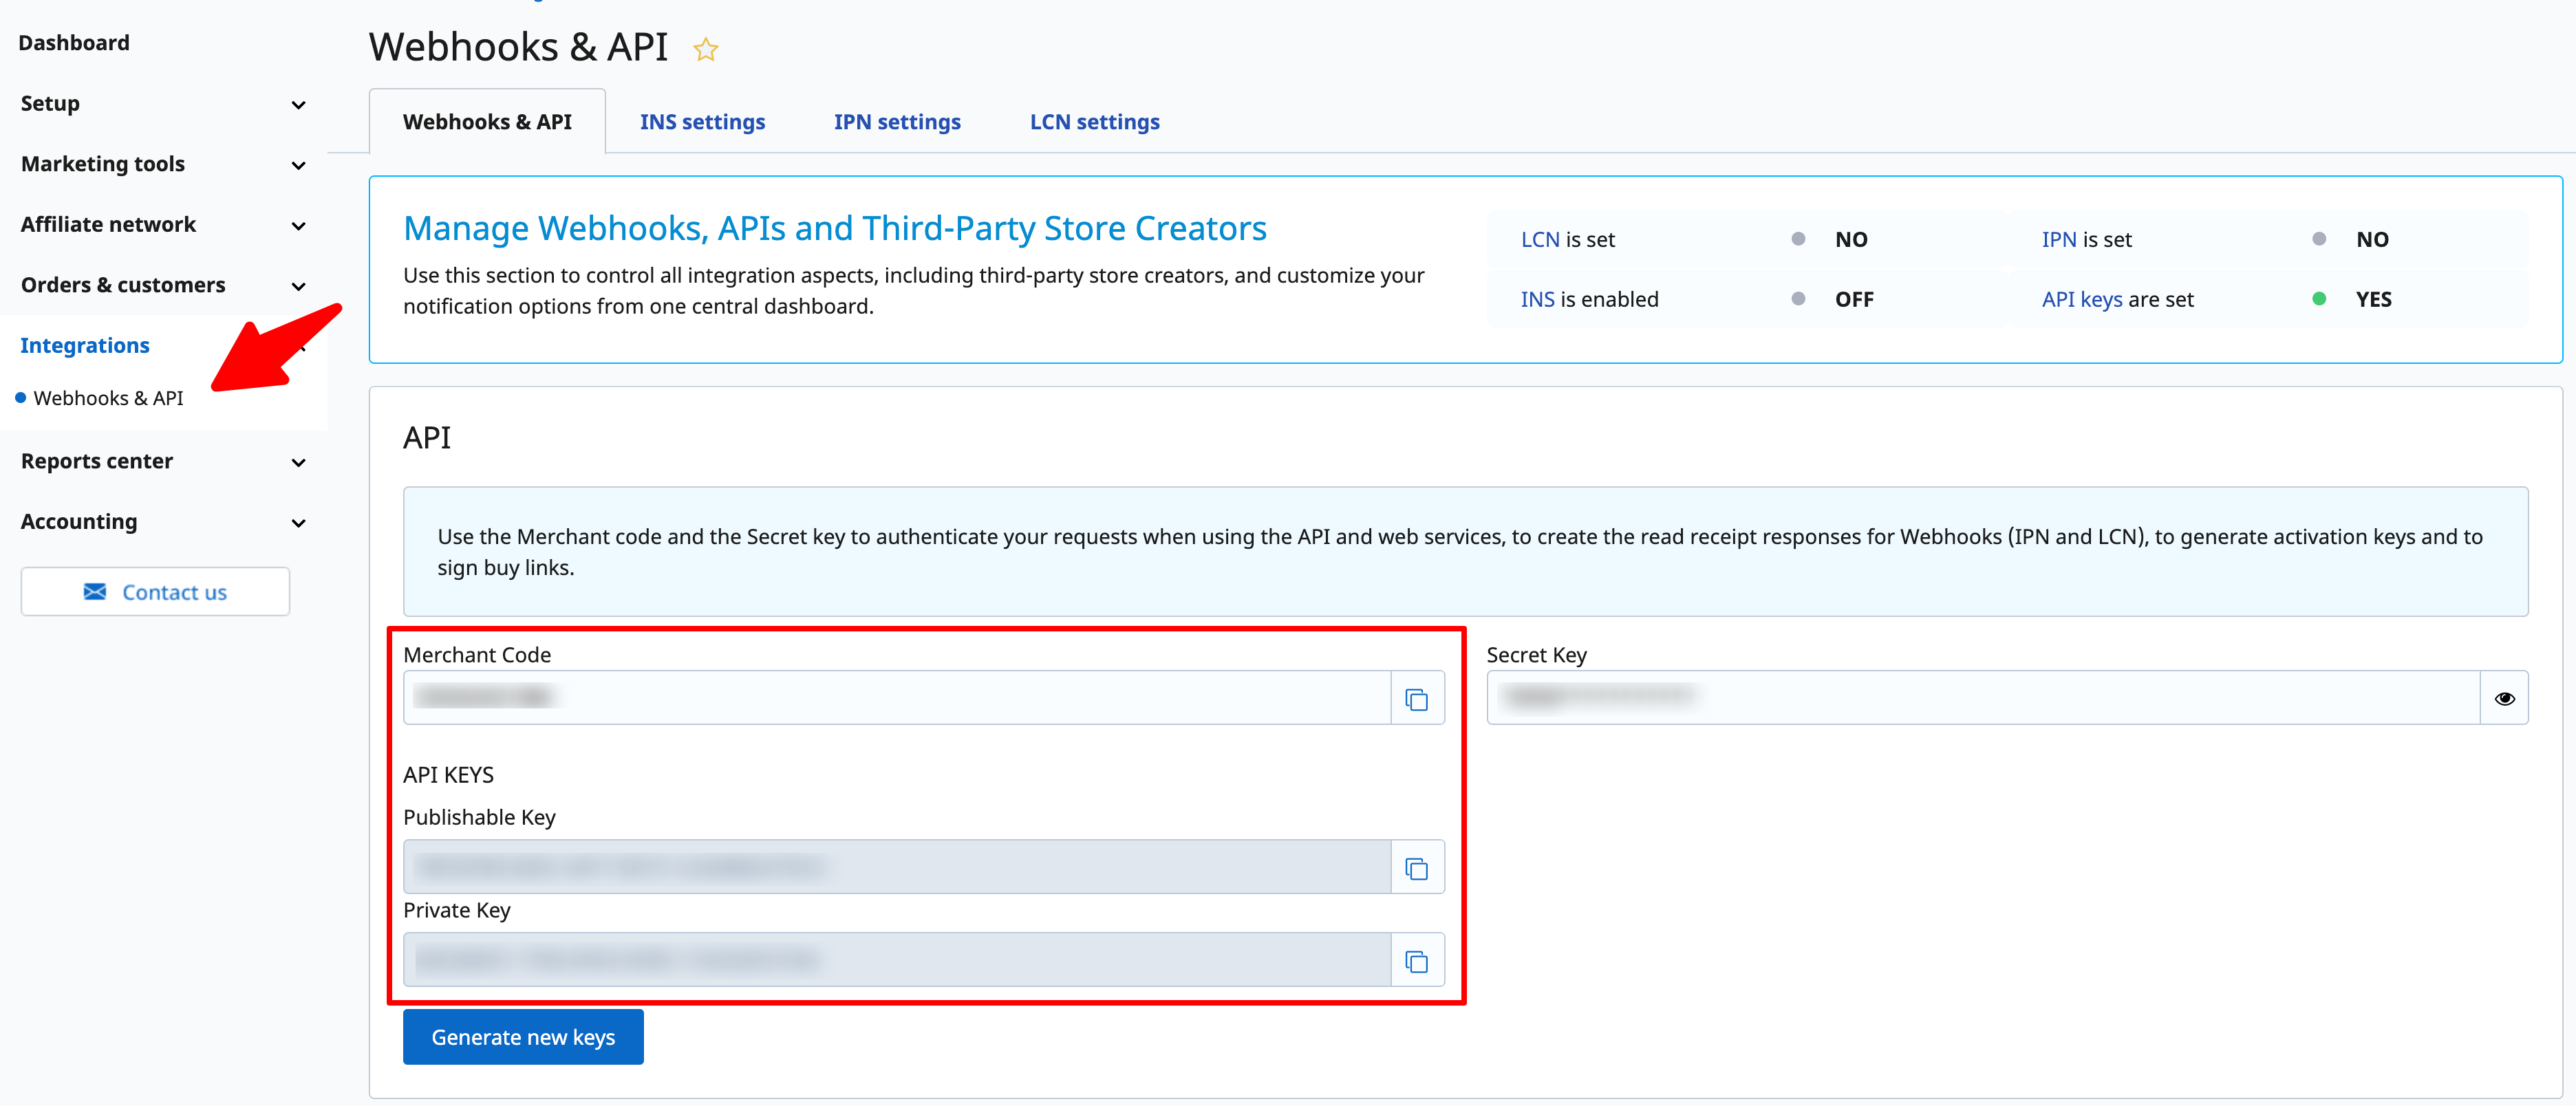
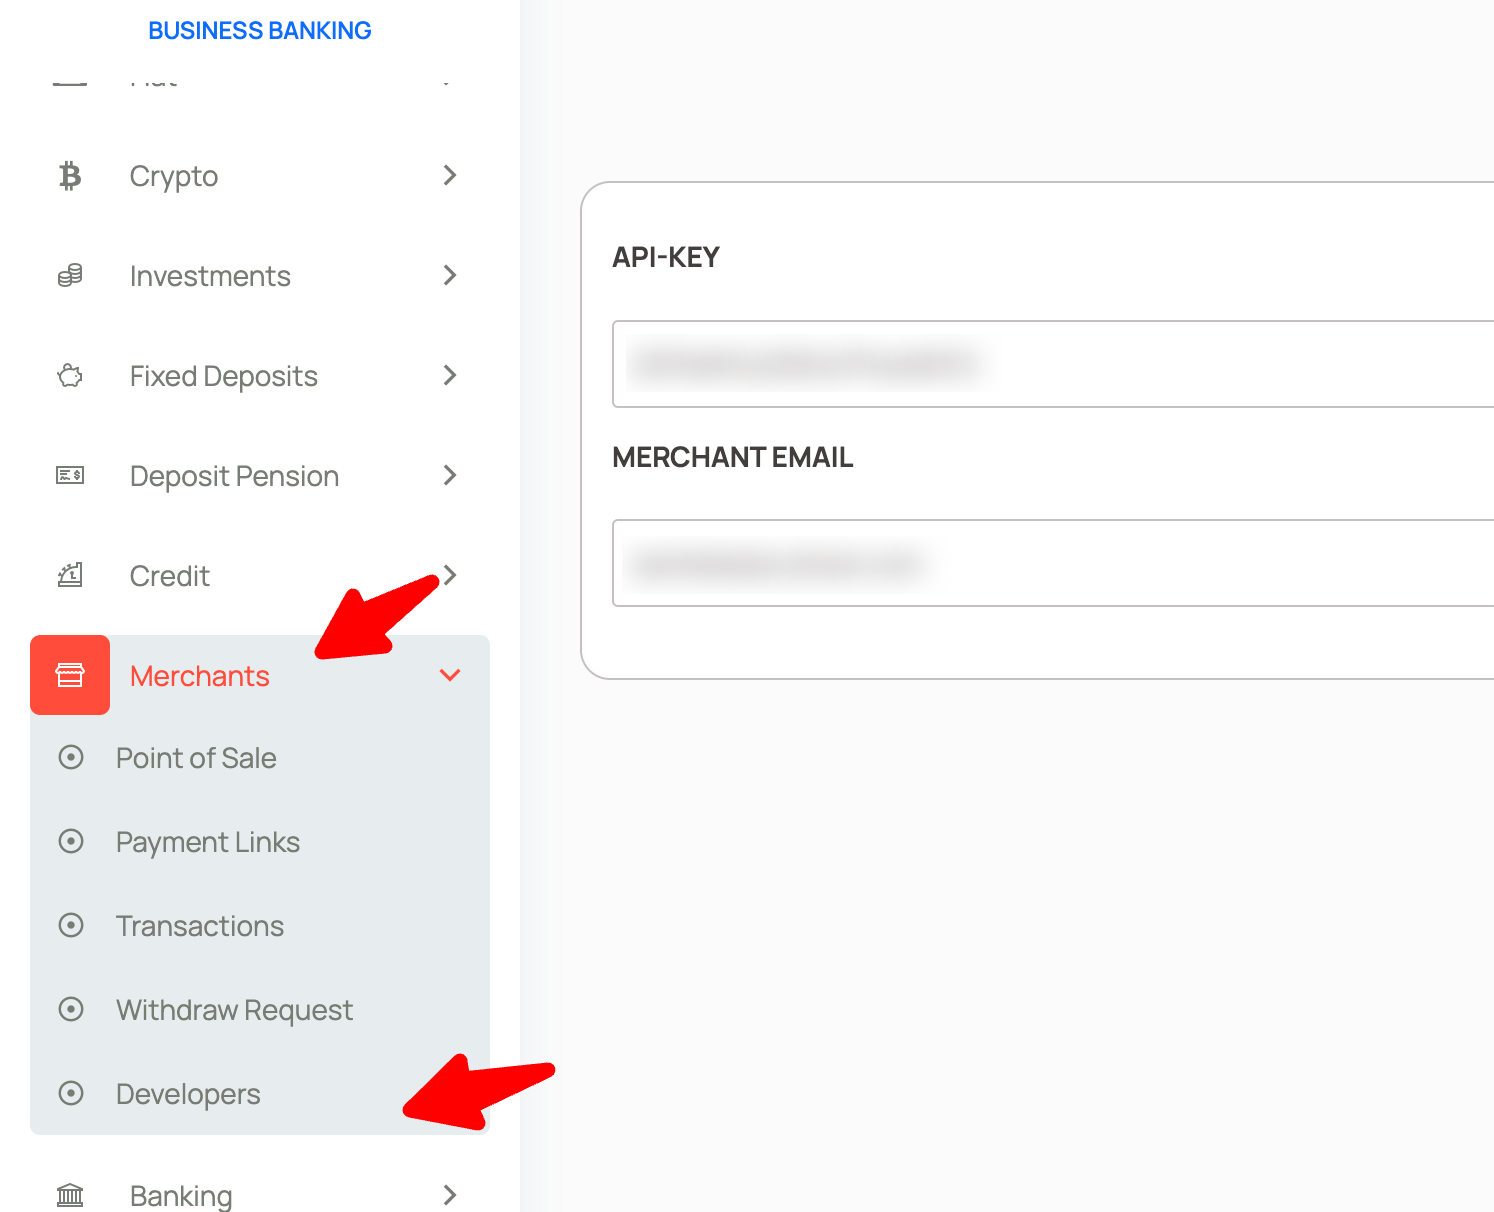
Now click Integrations and from API sections you will
copy both APIs Keys and Merchant Code
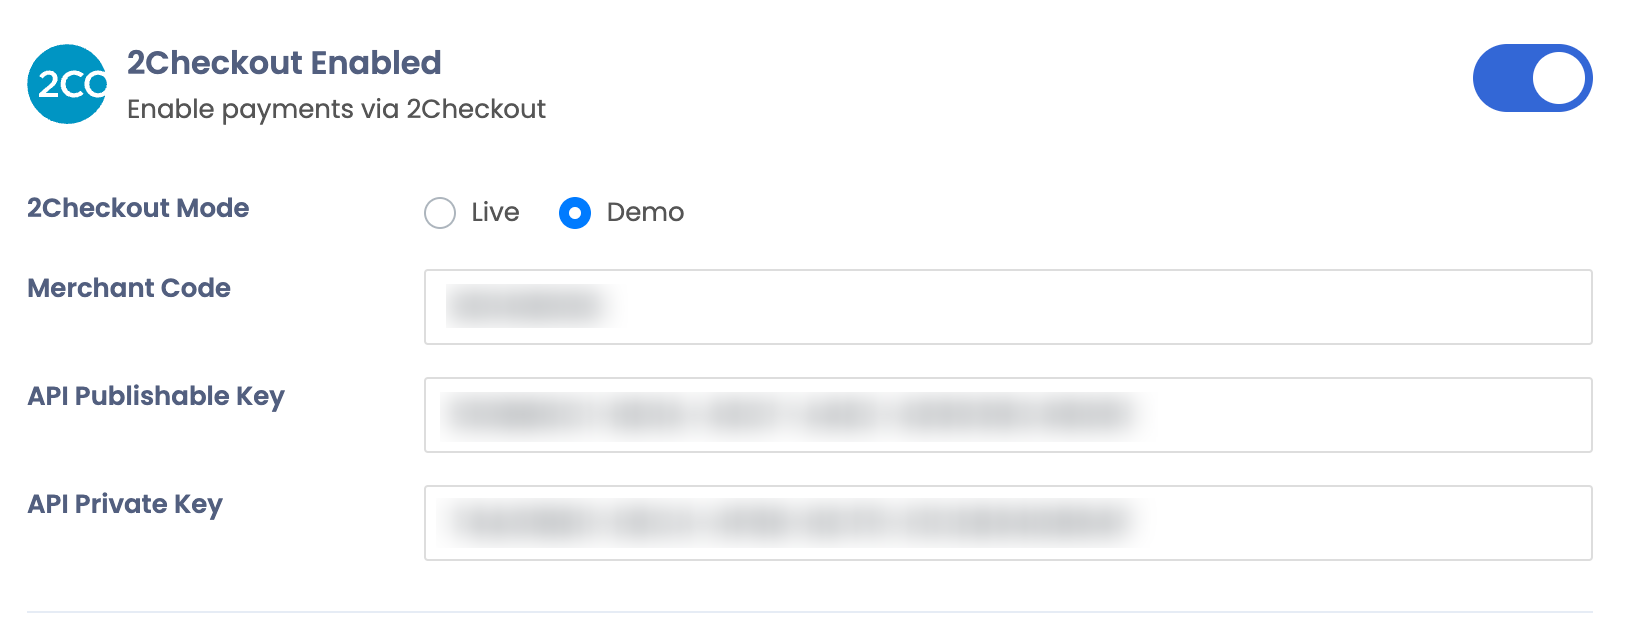
Now goto to your Sngine Admin panel -> Settings -> Payments Settings and paste both APIs
Keys and Merchant Code and enable the 2Checkout on Live mode and click Save
That's all, Enjoy!
Authorize.net
After installing Sngine now you can in easy steps integrate Authorize.net with it to let your users use it
Your Authorize.net live account need to be activated to start using the live
mode
Now click API Credentials & Keys and from API sections you will
copy both API Login ID and Transaction Key
For Live mode you can change it from "Test Mode"
Now goto to your Sngine Admin panel -> Settings -> Payments Settings and paste both API Login ID and Transaction Key and enable the Authorize.net on Live mode and click Save
That's all, Enjoy!
Razorpay
After installing Sngine now you can in easy steps integrate Razorpay with it to let your users use it
First goto: https://razorpay.com/
and Sign in with your Razorpay account or create a new one
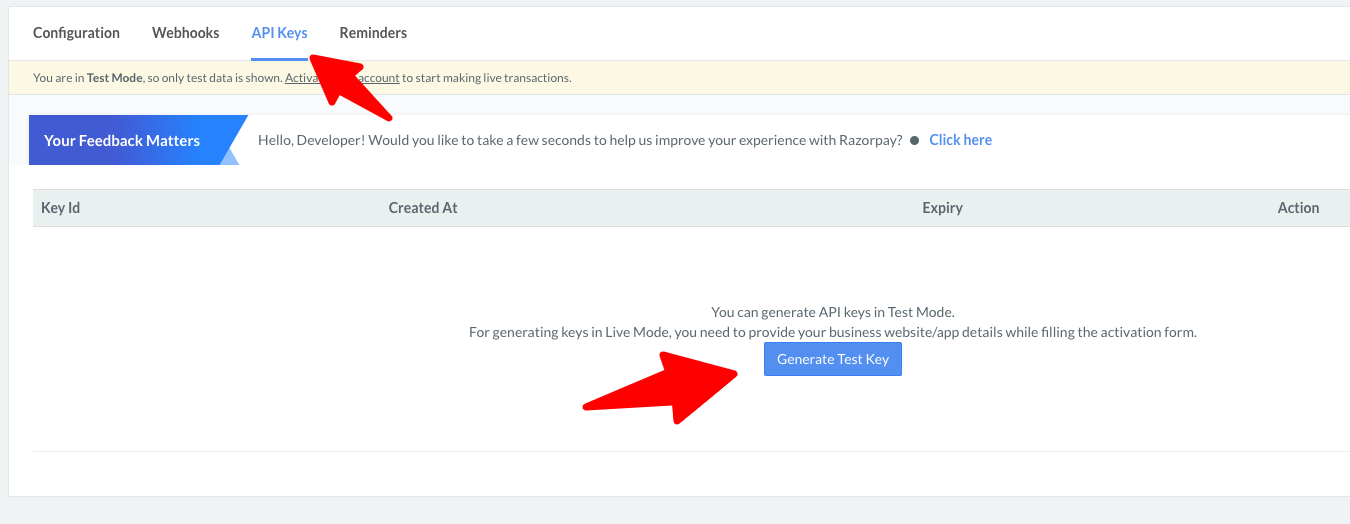
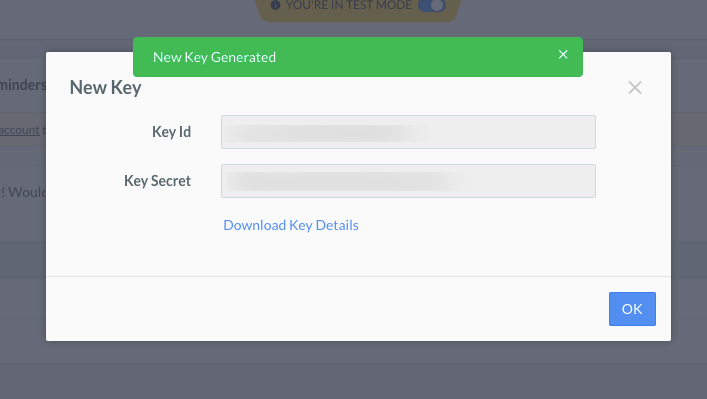
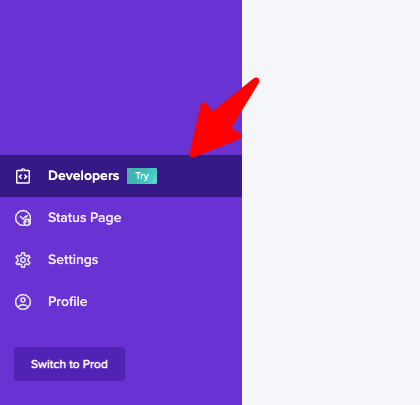
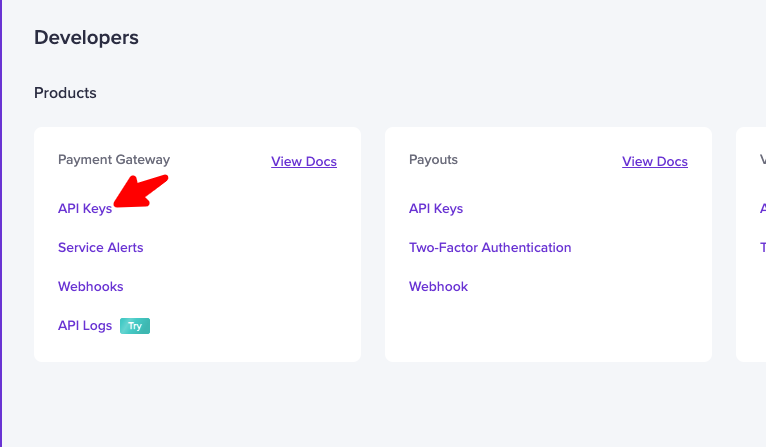
Now go to Settings and select API Keys
and generate new Keys
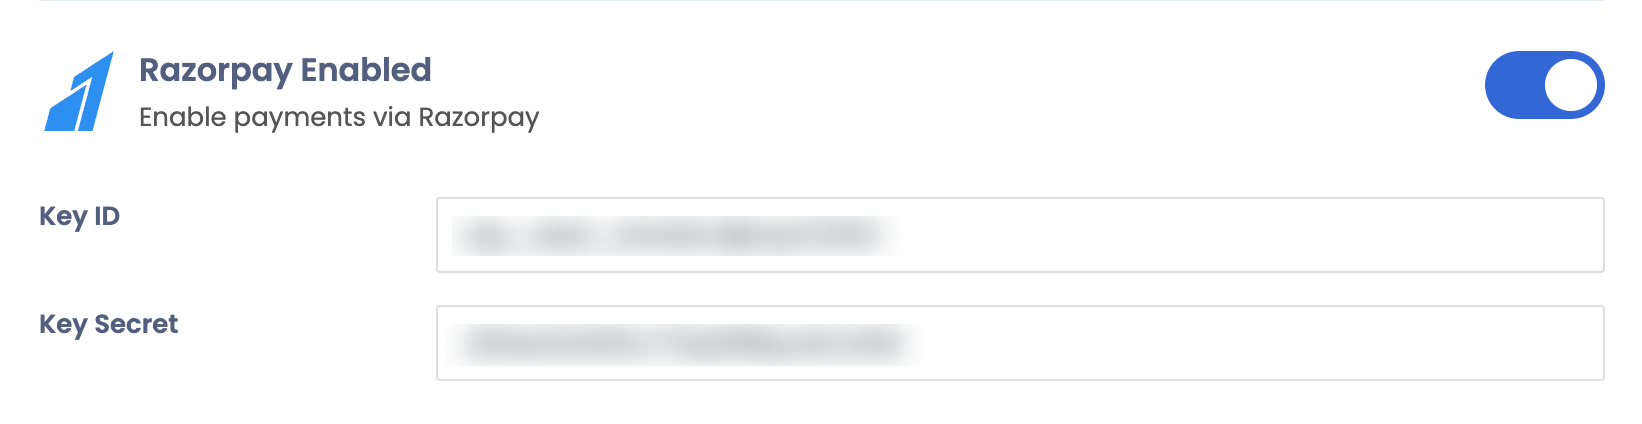
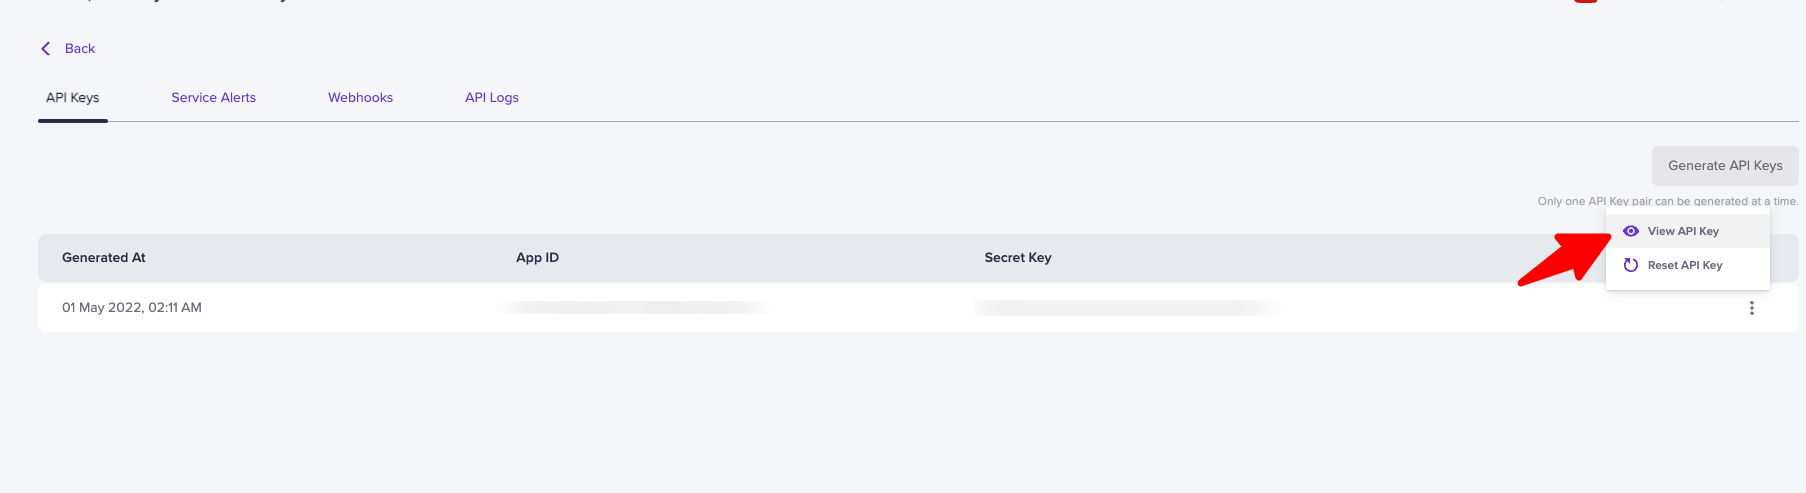
Now goto to your Sngine Admin panel -> Settings -> Payments Settings and paste both Keys ID and Secret
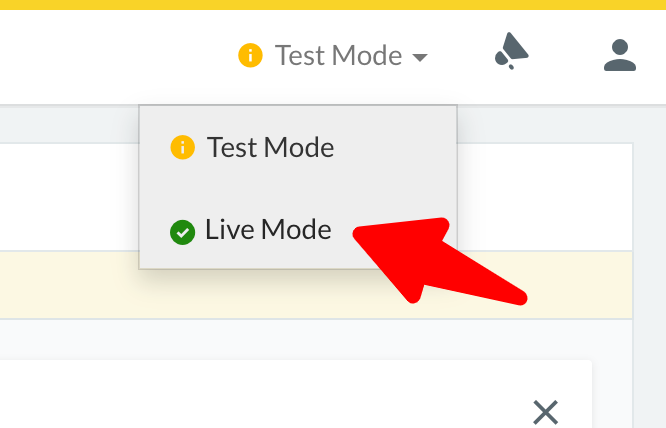
For Live Mode you will need to chaneg the mode then re-generate the keys
That's all, Enjoy!
Cashfree
After installing Sngine now you can in easy steps integrate Cashfree with it to let your users use it
Now setup your website details and Your Success URL should be like this:
If you installed Sngine in your domain directly like www.domain.com the URI should
be like this: https://www.domain.com/webhooks/verotel.php?state=success
If you installed Sngine in your domain directly but without www like domain.com the URI should be like this: https://domain.com/webhooks/verotel.php?state=success
If you installed Sngine in sub-domain like sub.domain.com the URI should be like
this: https://sub.domain.com/webhooks/verotel.php?state=success
If you installed Sngine in a directory like domain.com/directory the URI should be
like this: https://www.domain.com/directory/webhooks/verotel.php?state=success
Decline URL is the same as your website URL
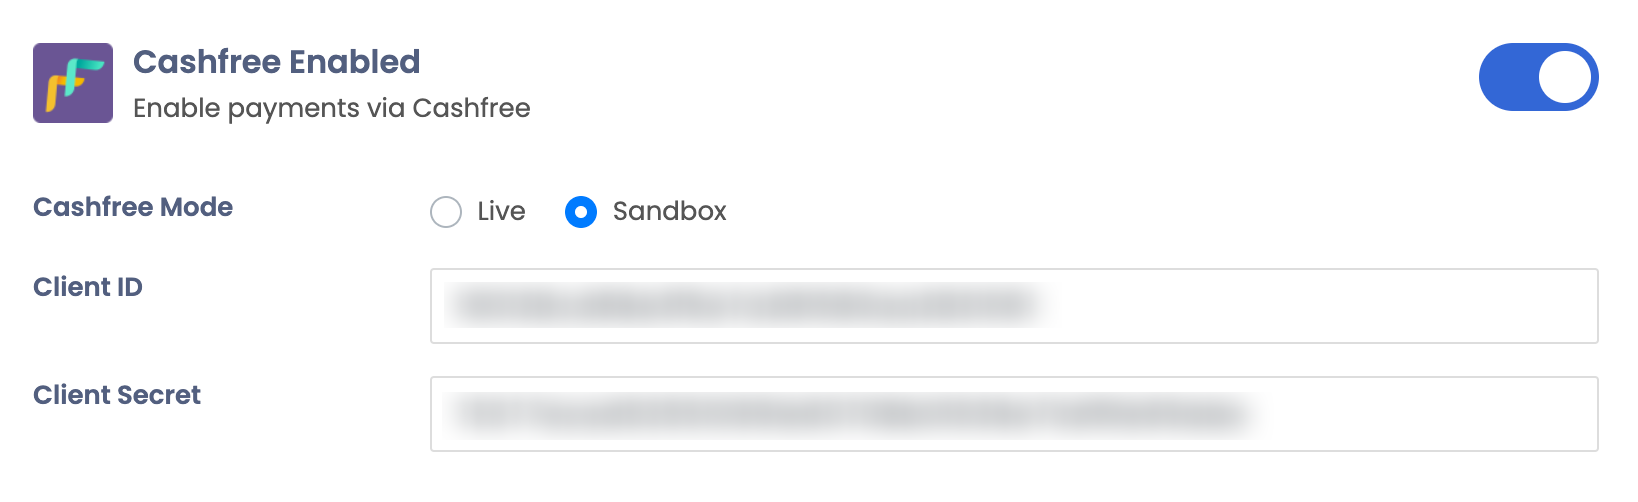
Now you need to copy both Shop ID and Signature Key
Now goto to your Sngine Admin panel -> Settings -> Payments Settings and paste both Shop ID and Signature Key
That's all, Enjoy!
Cloud Storage
Learn how to integrate Sngine with the different cloud storage providers supported by
Sngine like AWS S3, DigitalOcean, Wasabi and Remote FTP.
Amazon S3
After installing Sngine now you can in easy steps integrate Amazon
S3 with it to let your users use it
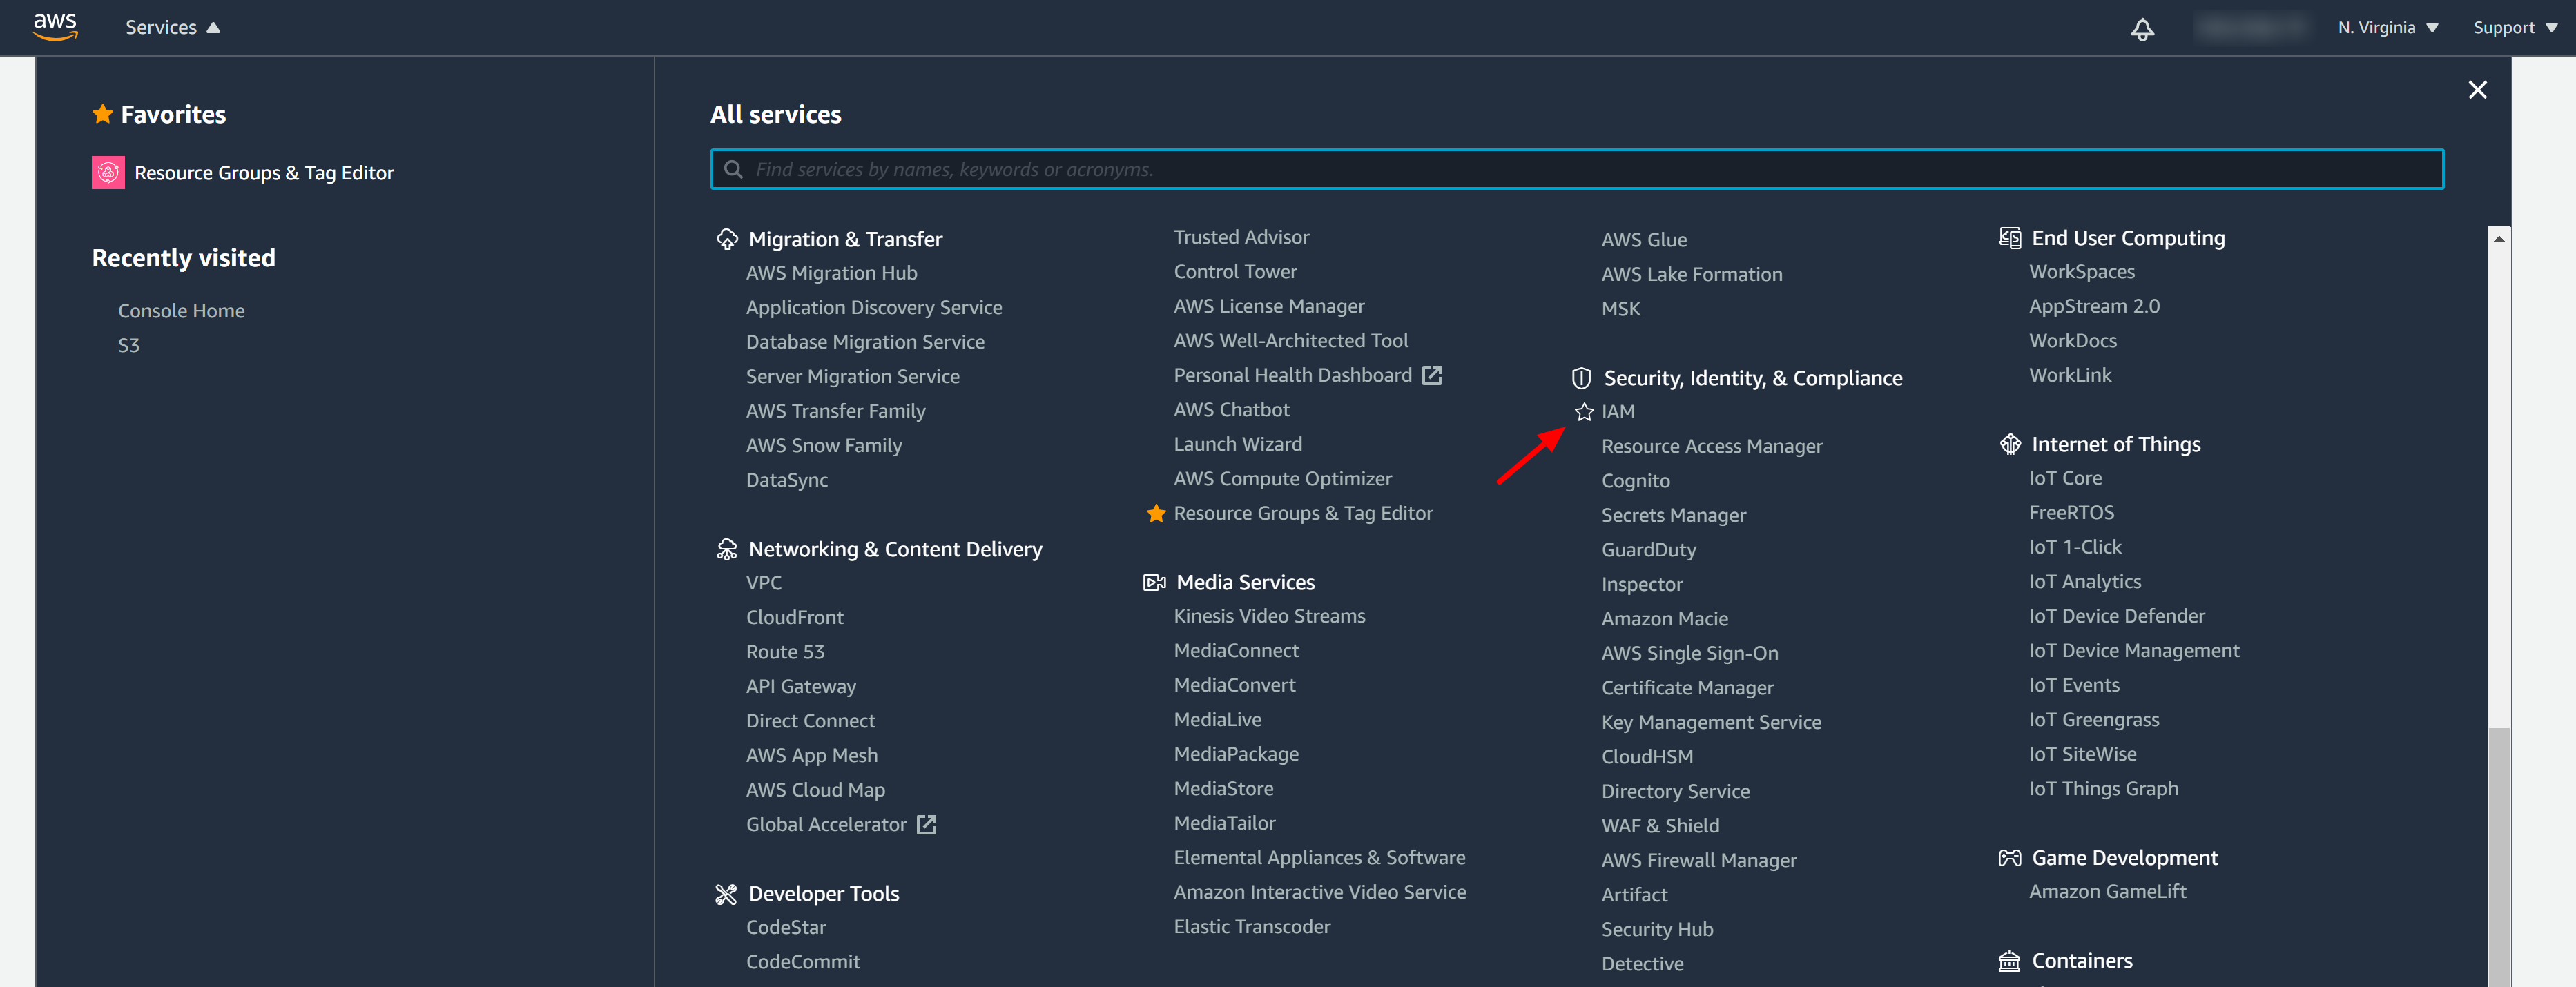
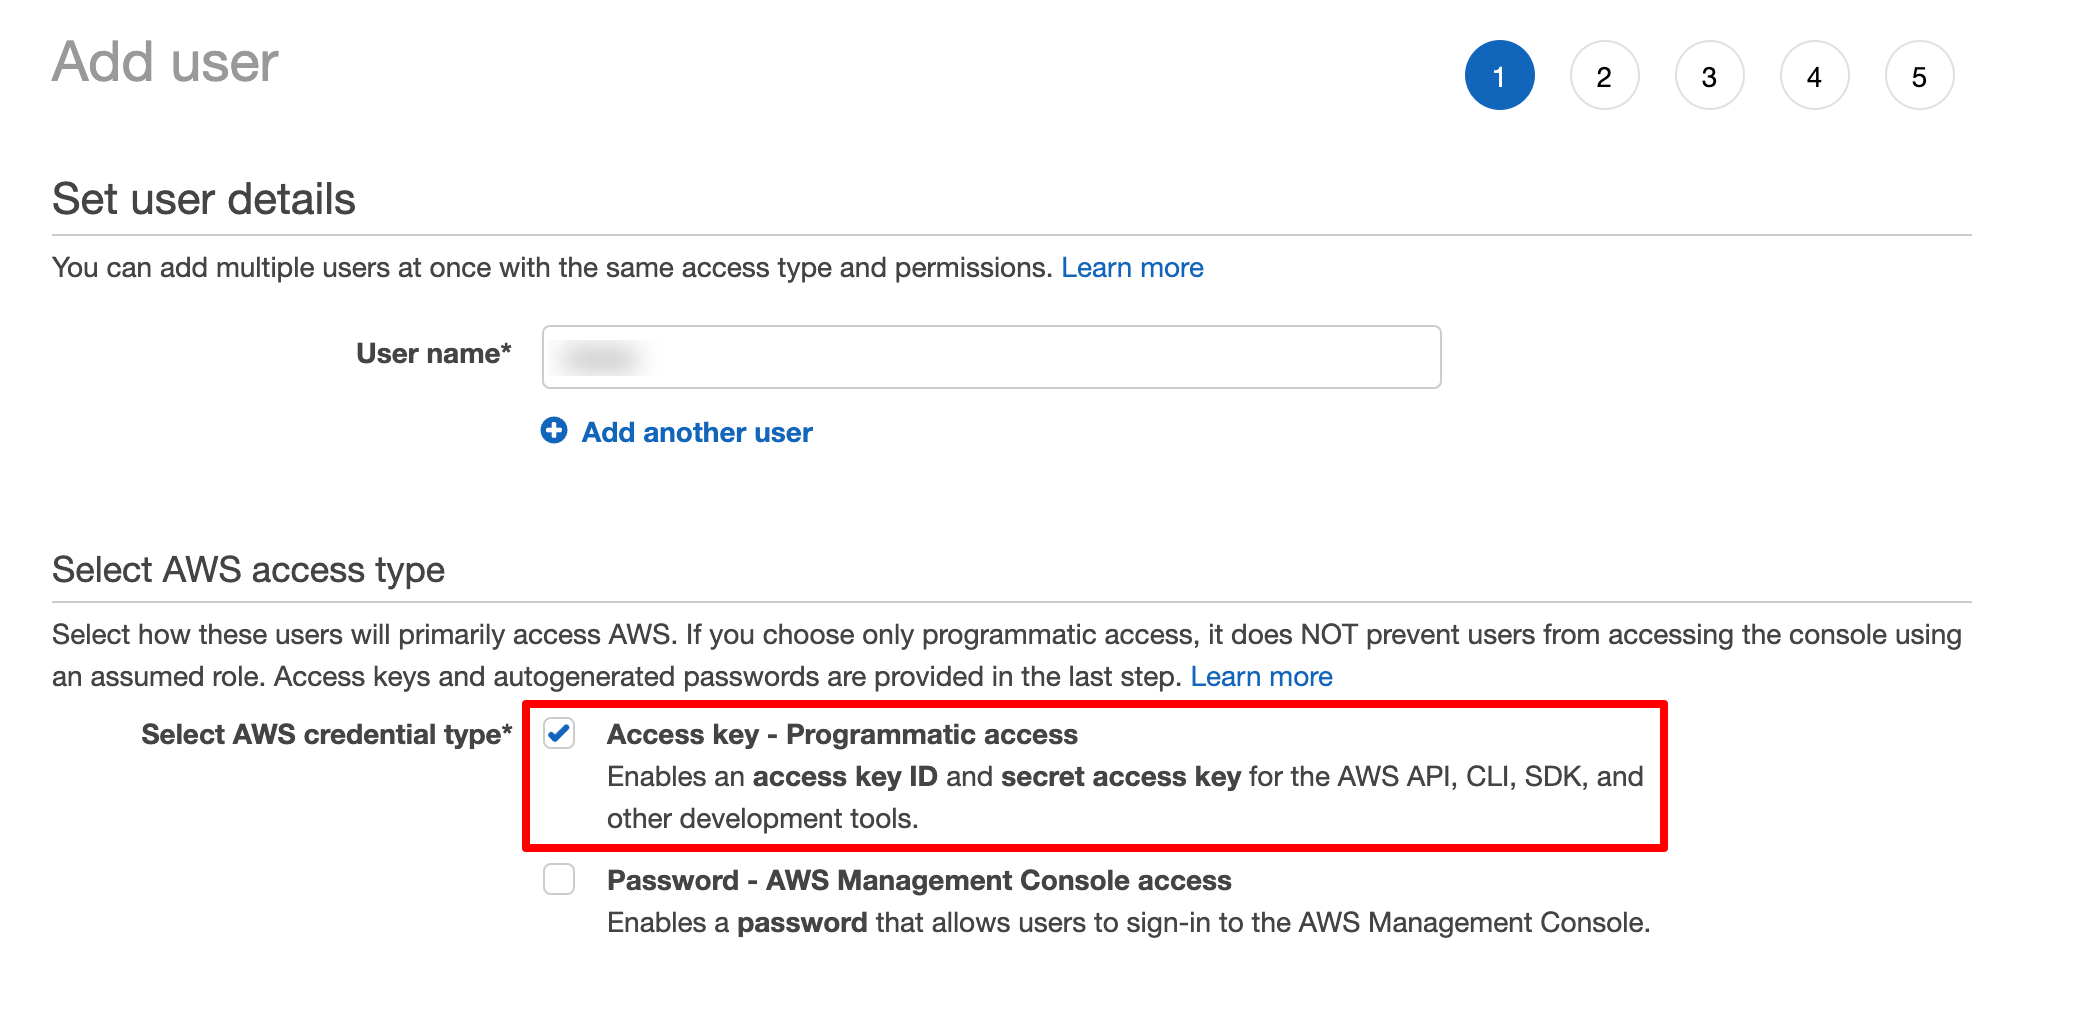
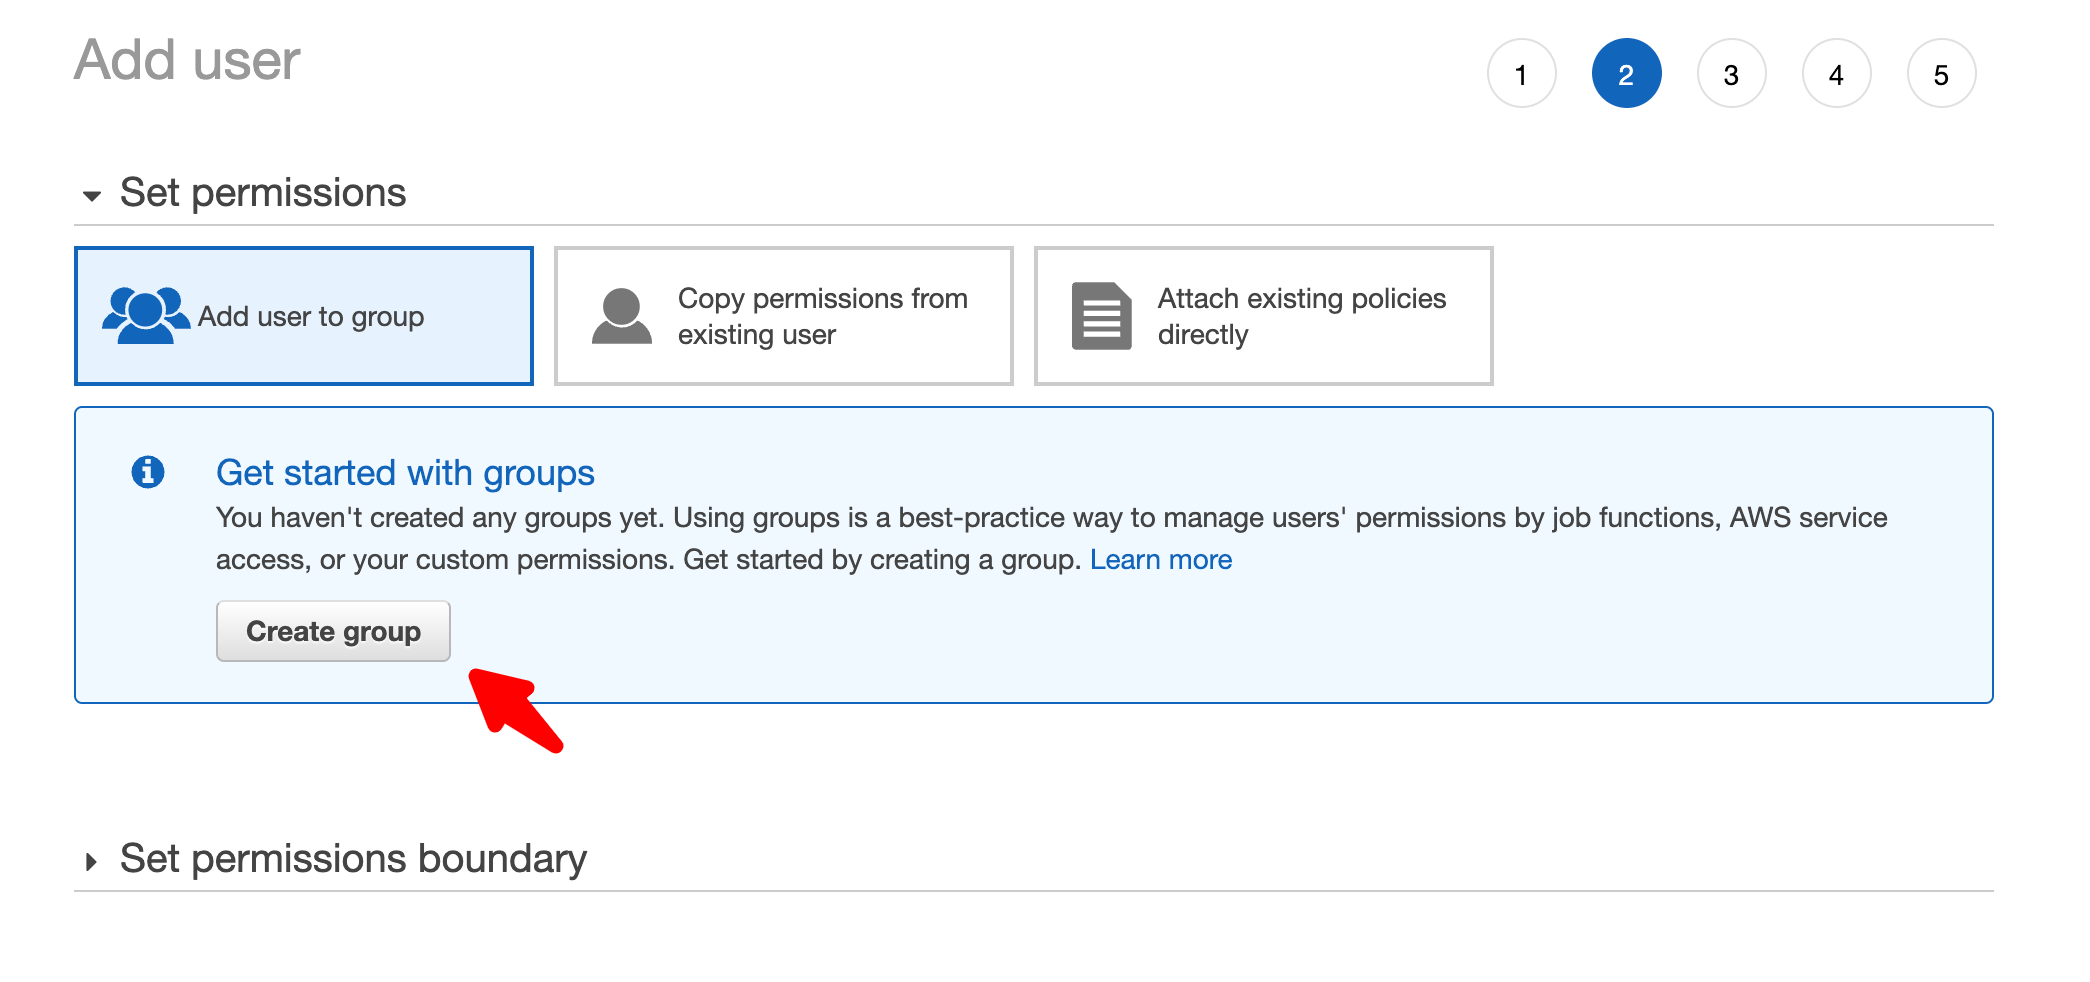
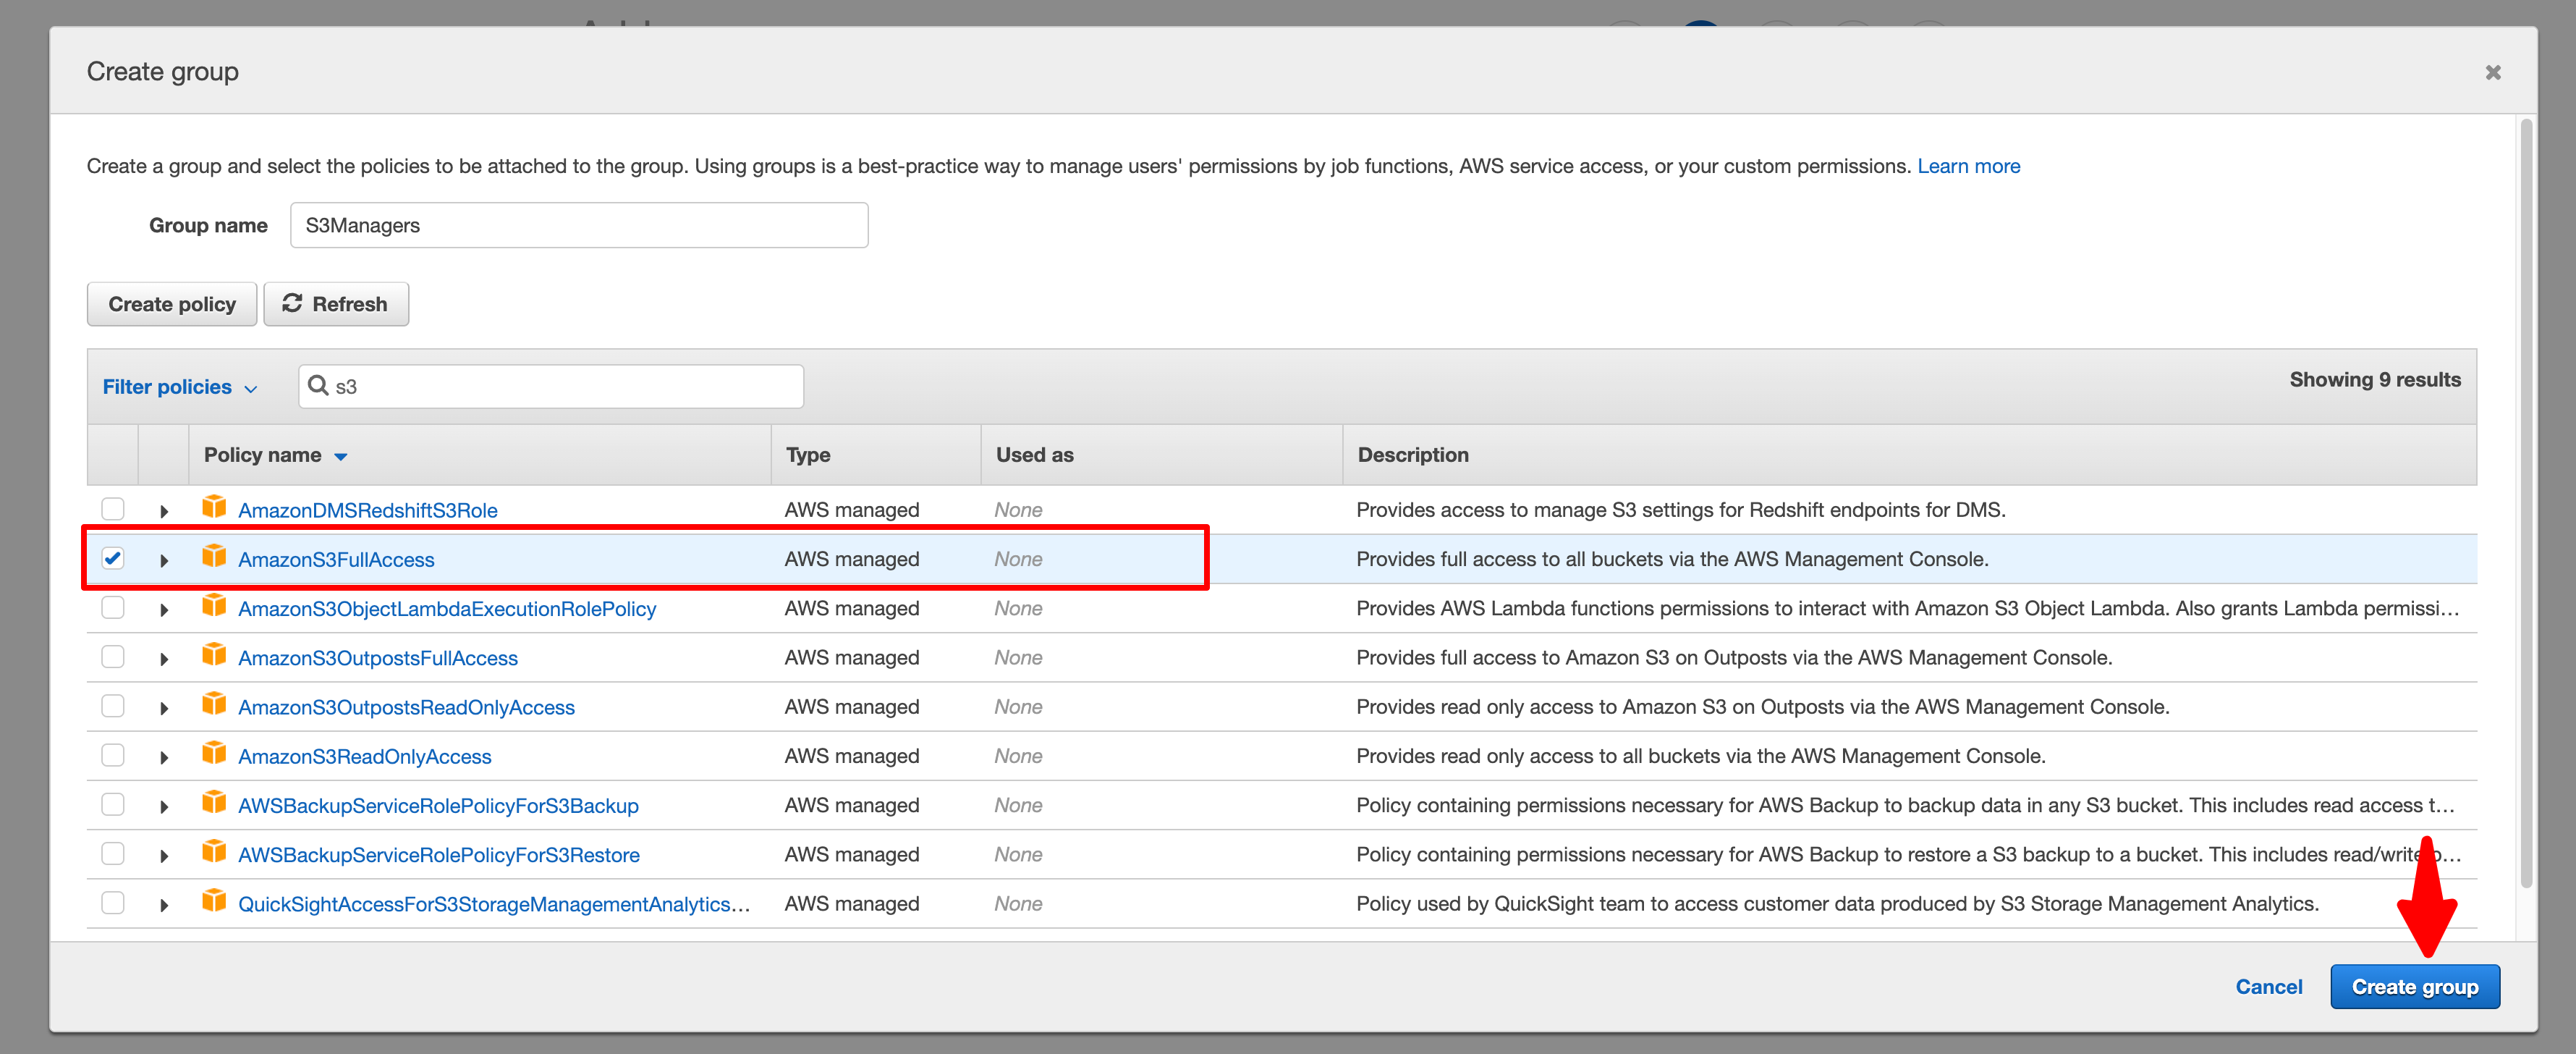
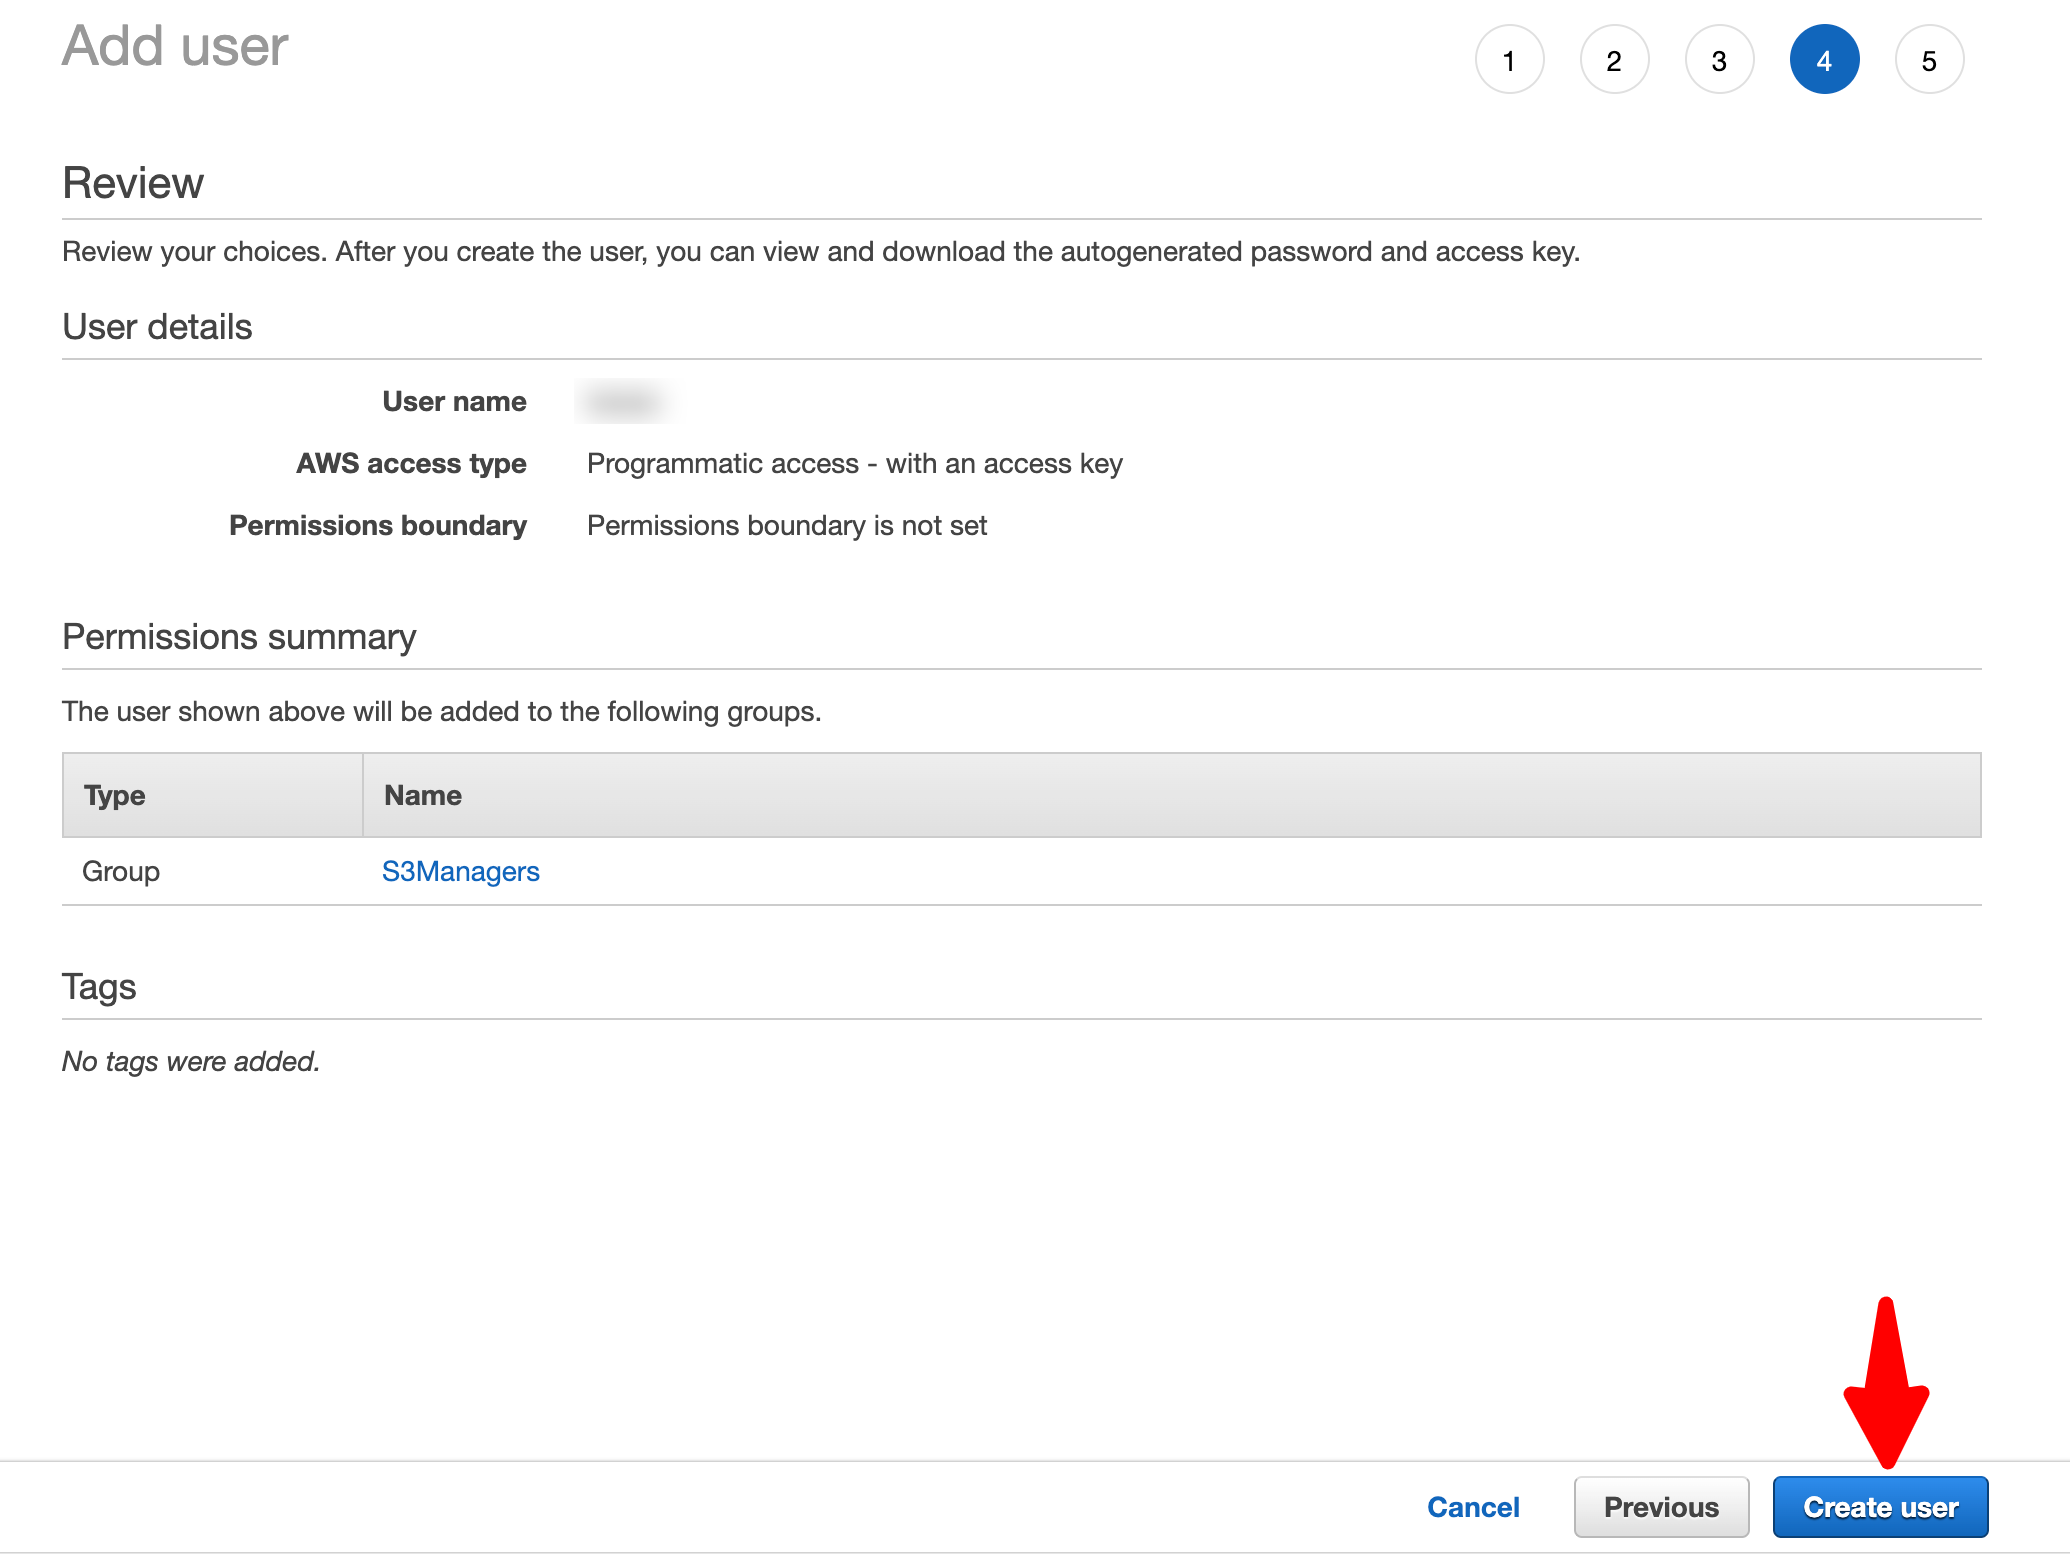
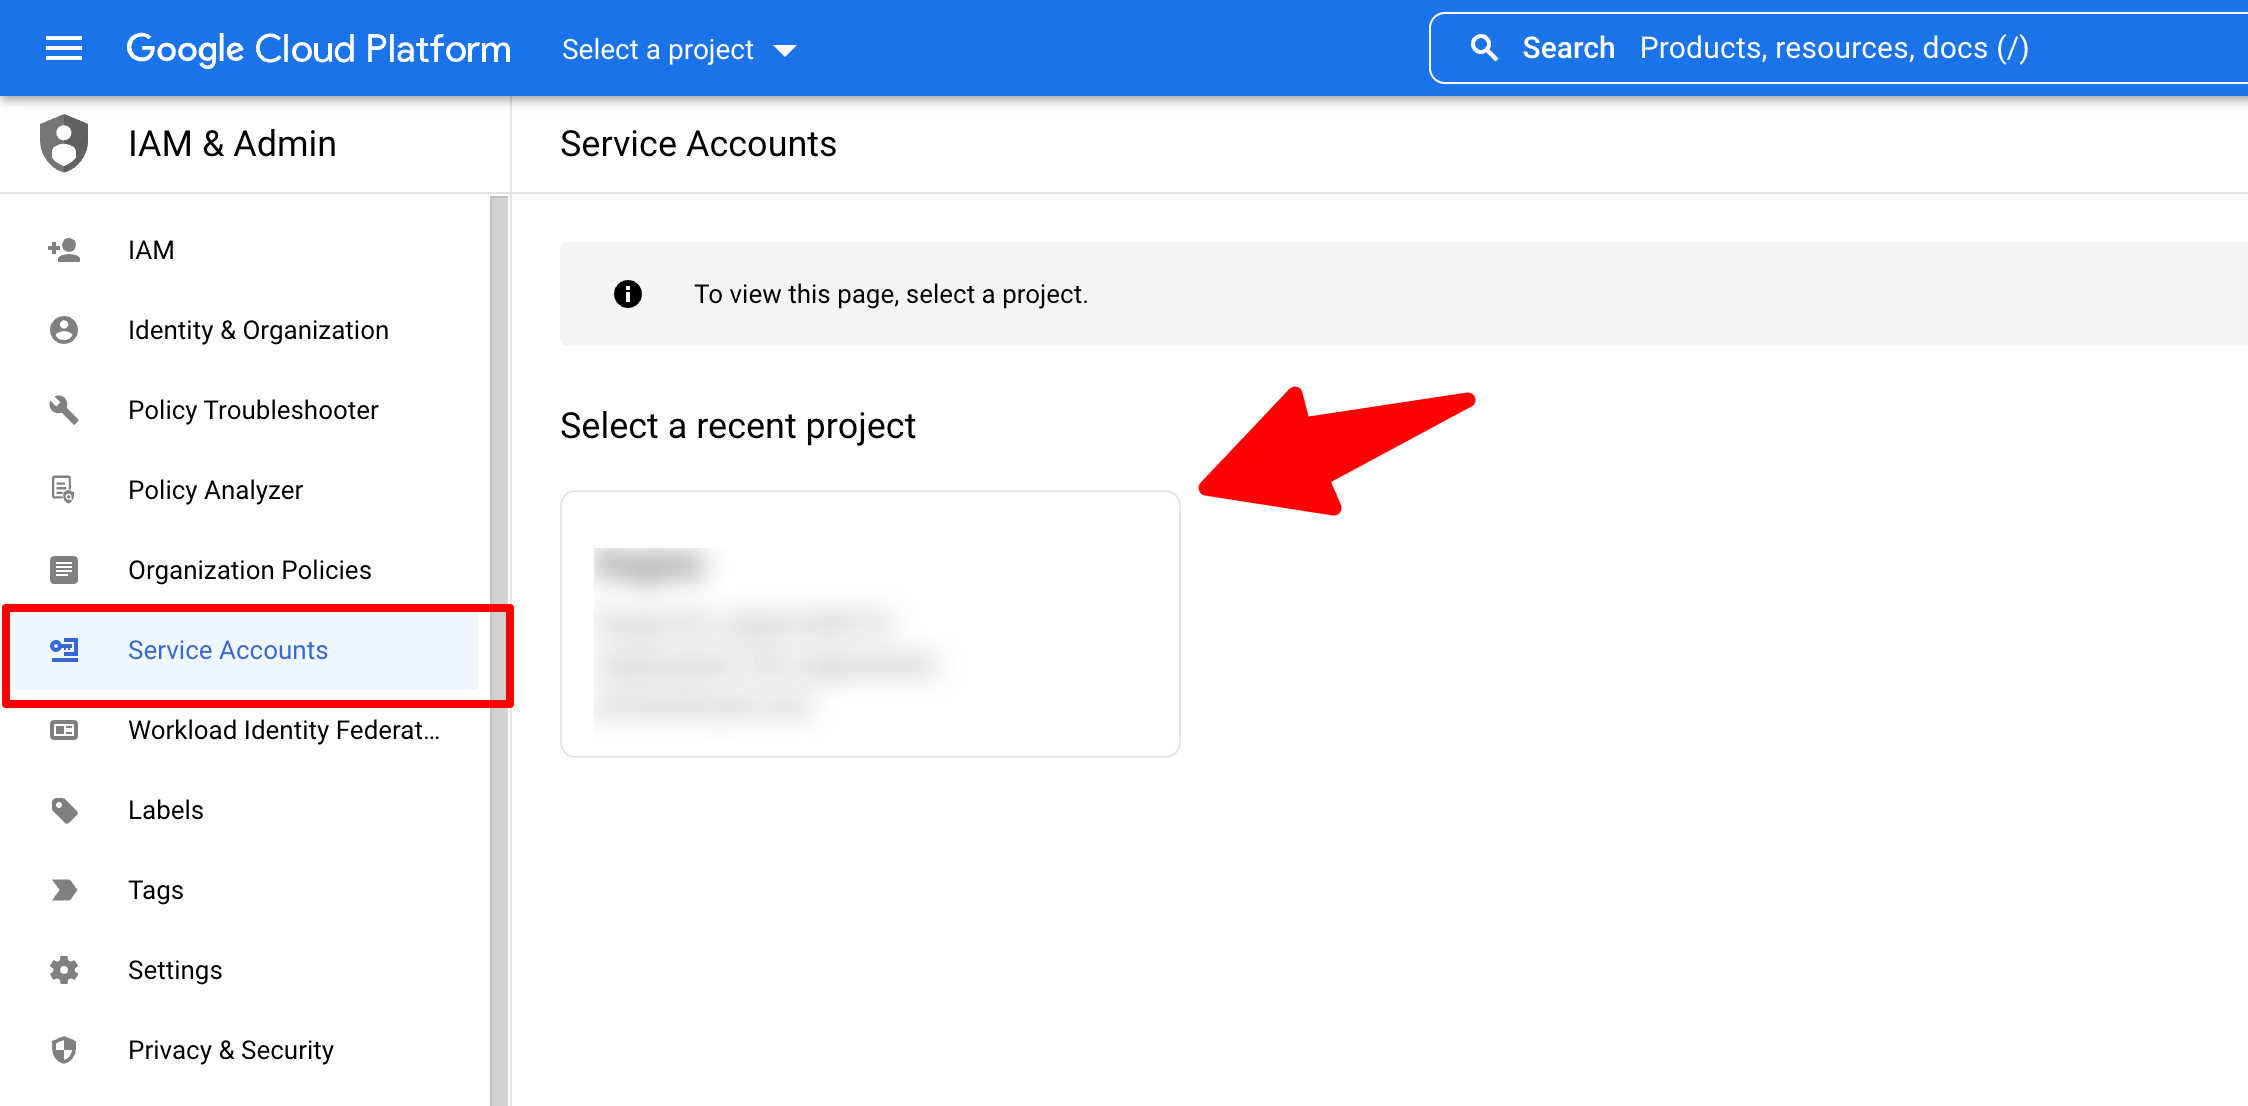
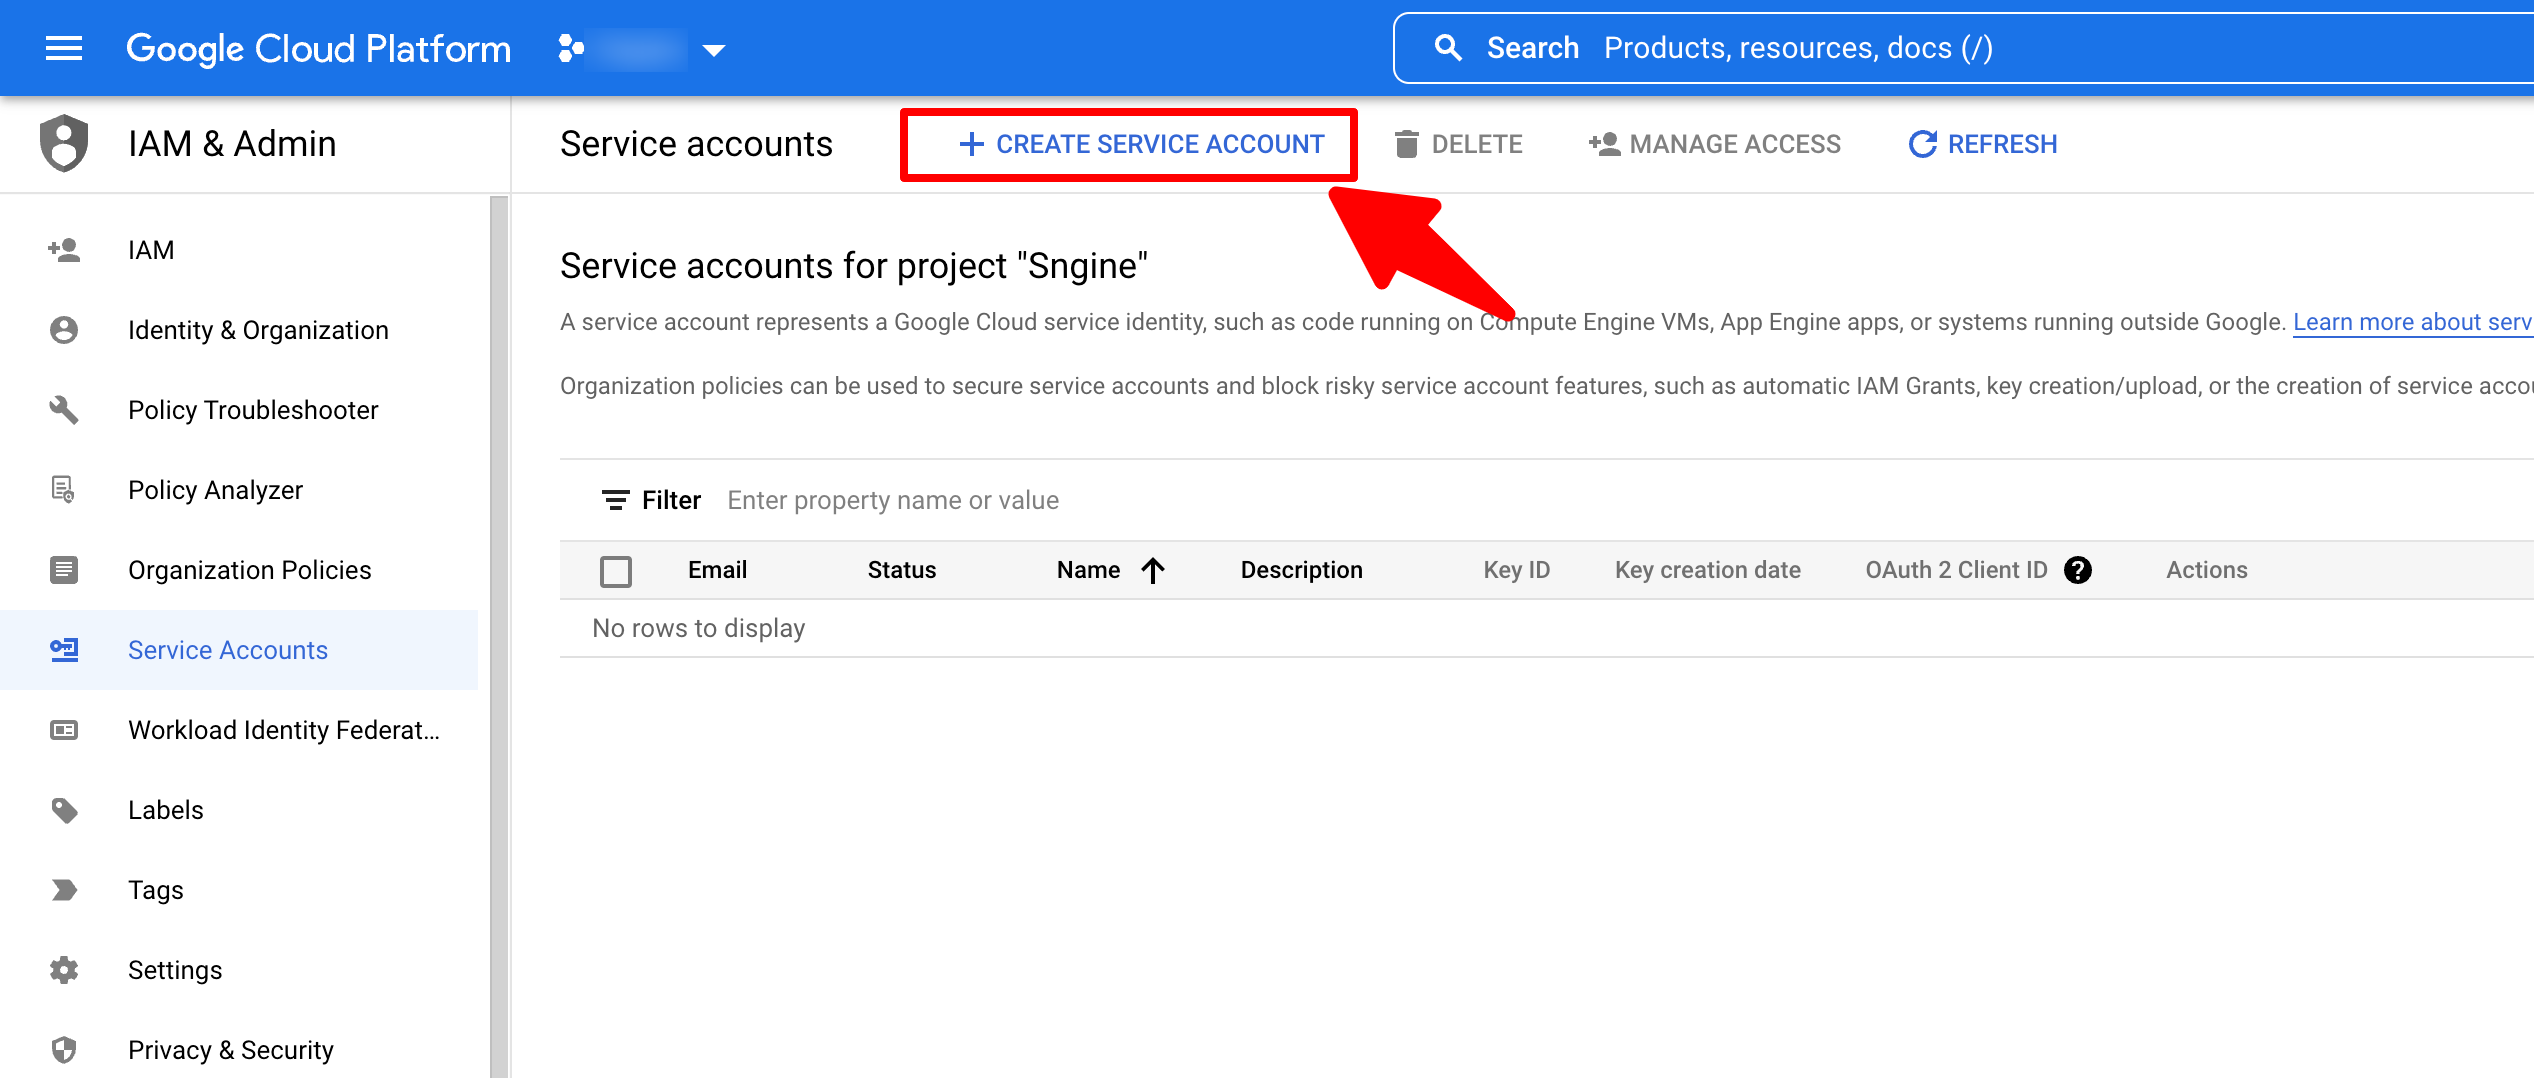
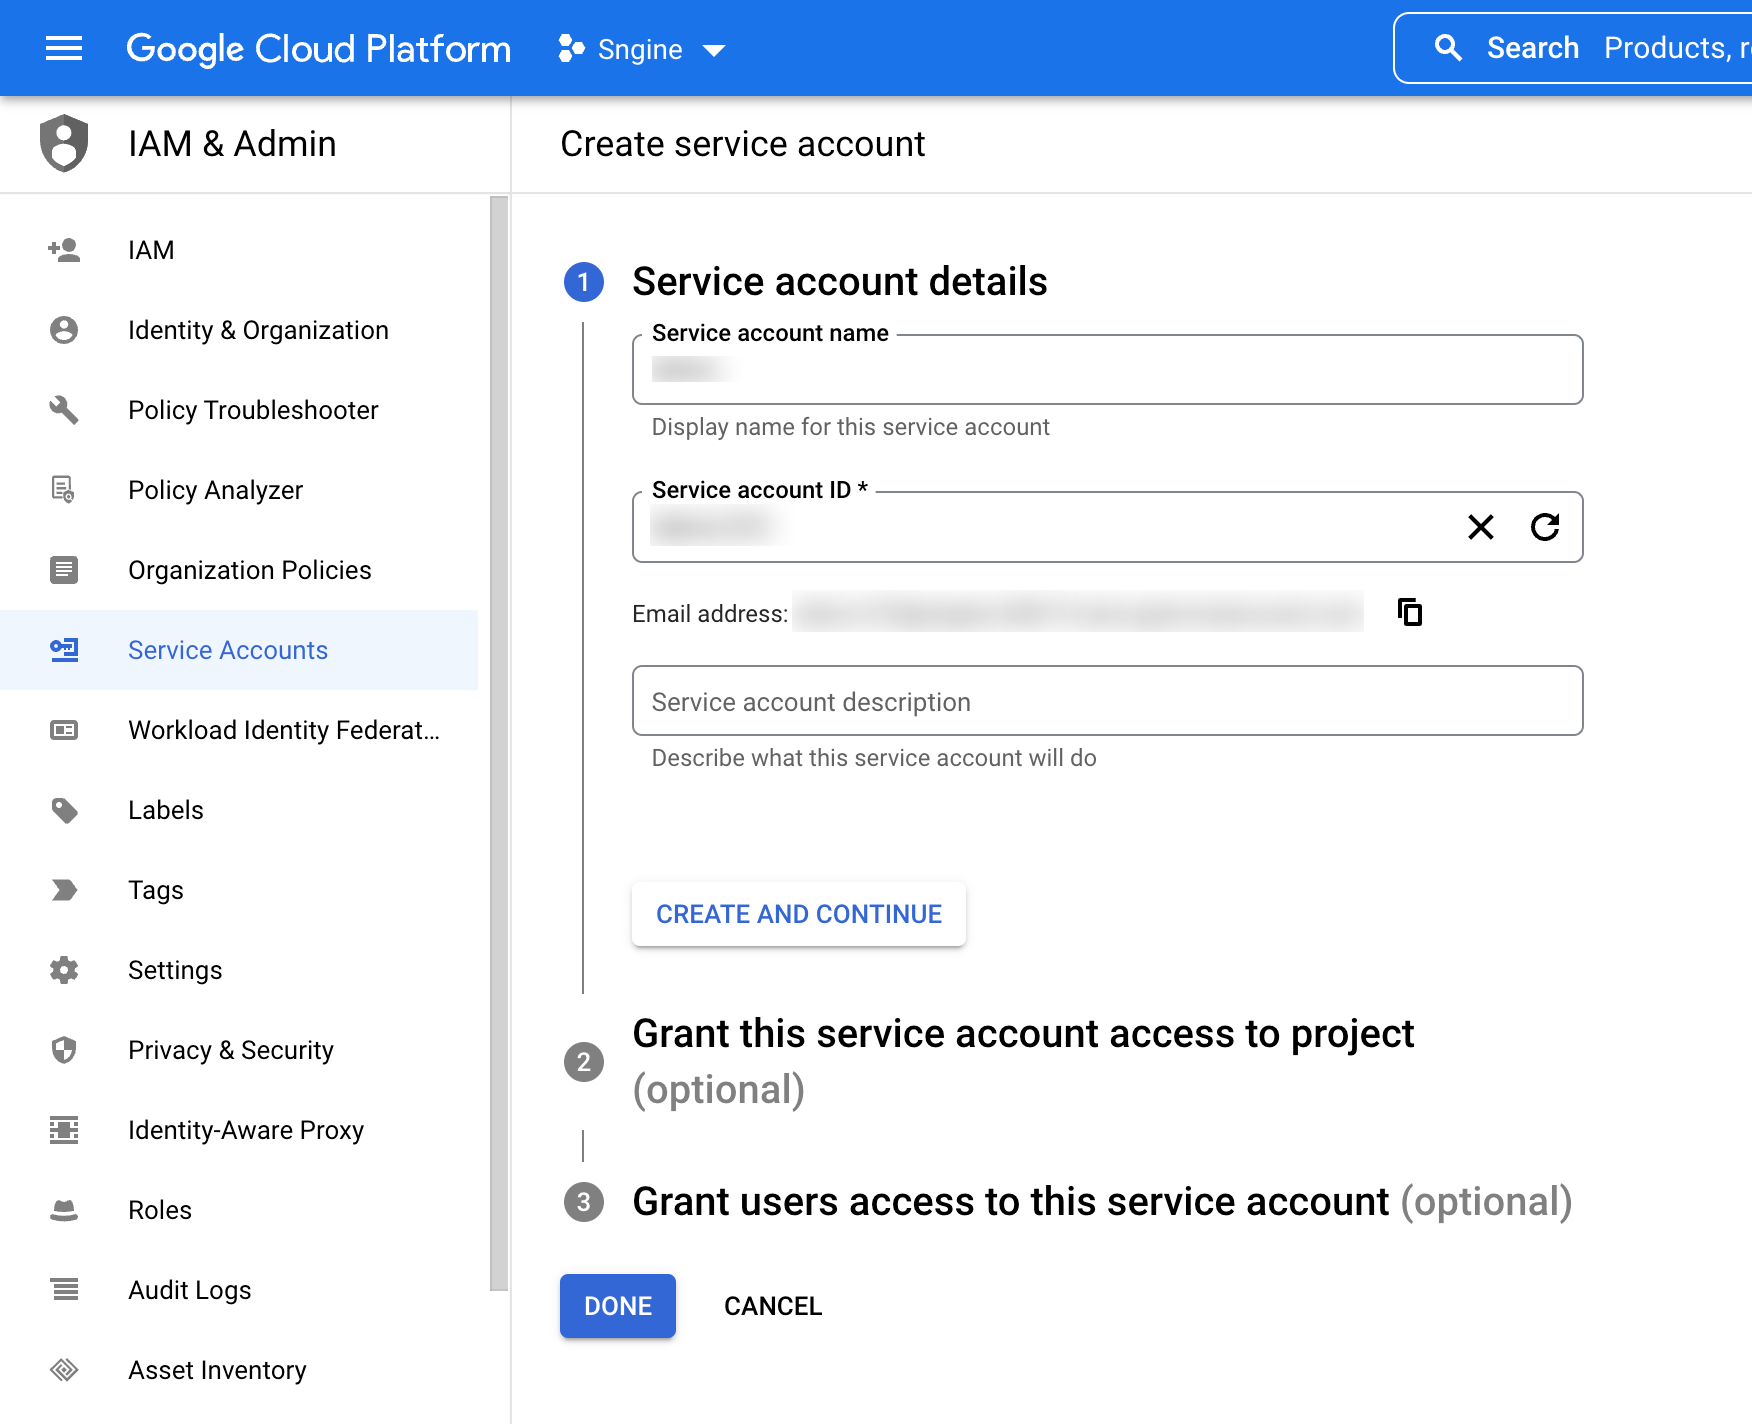
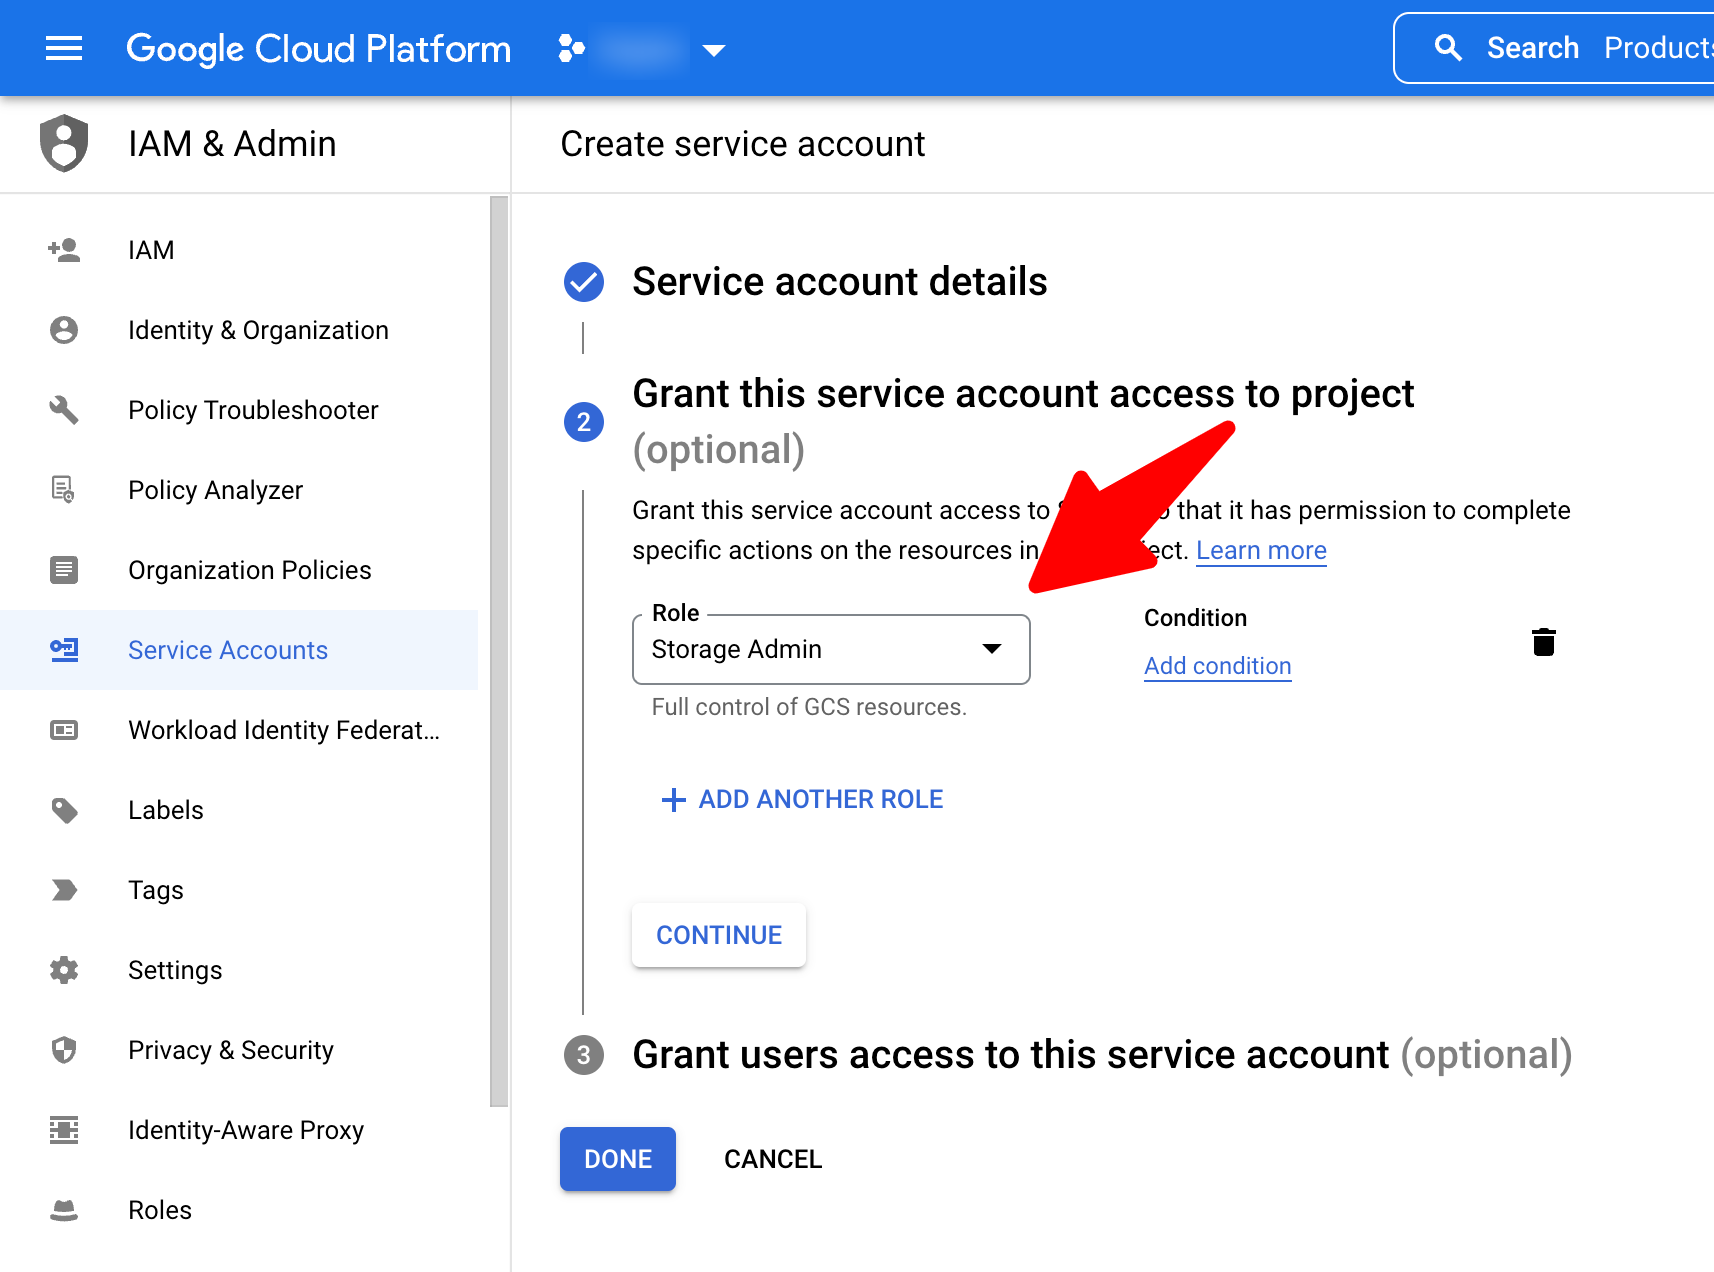
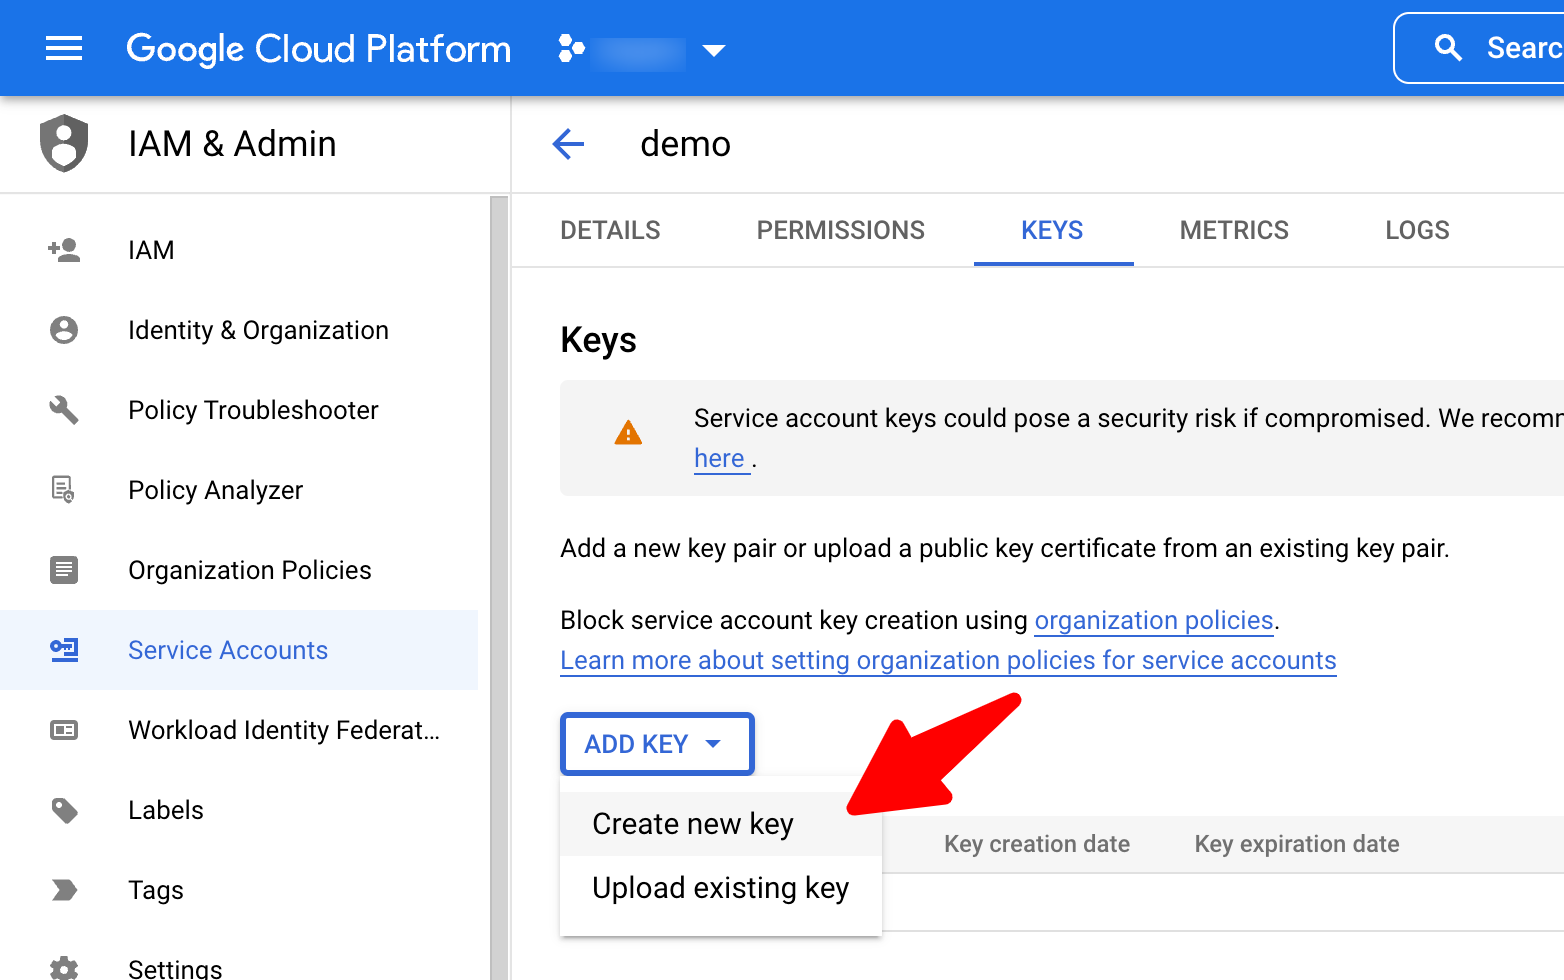
Now click Services And Select IAM under Security, Identity &
Compliance and create a new user as the followings
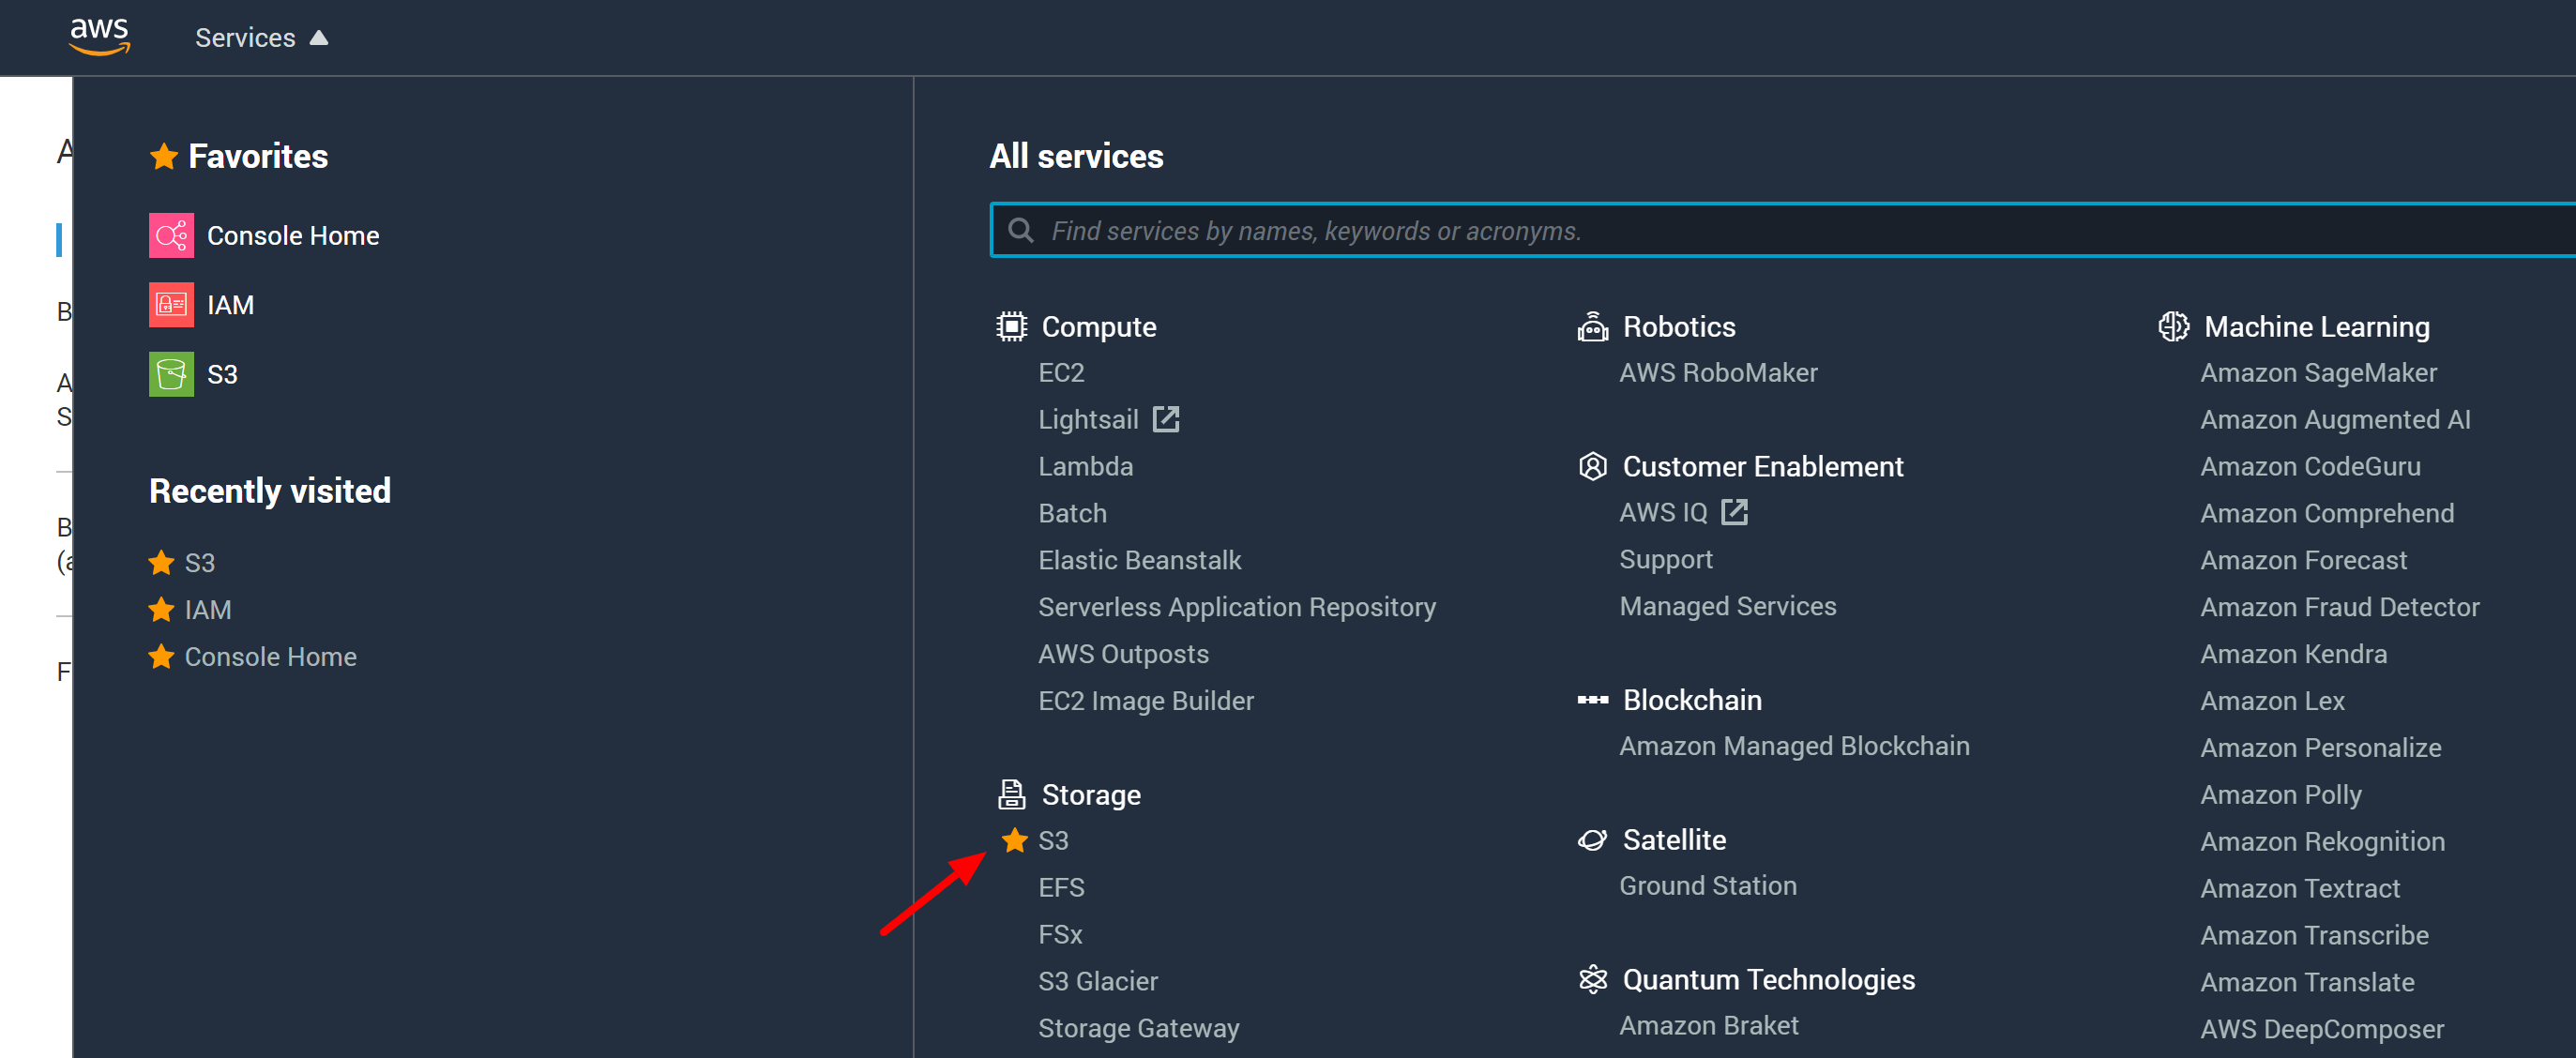
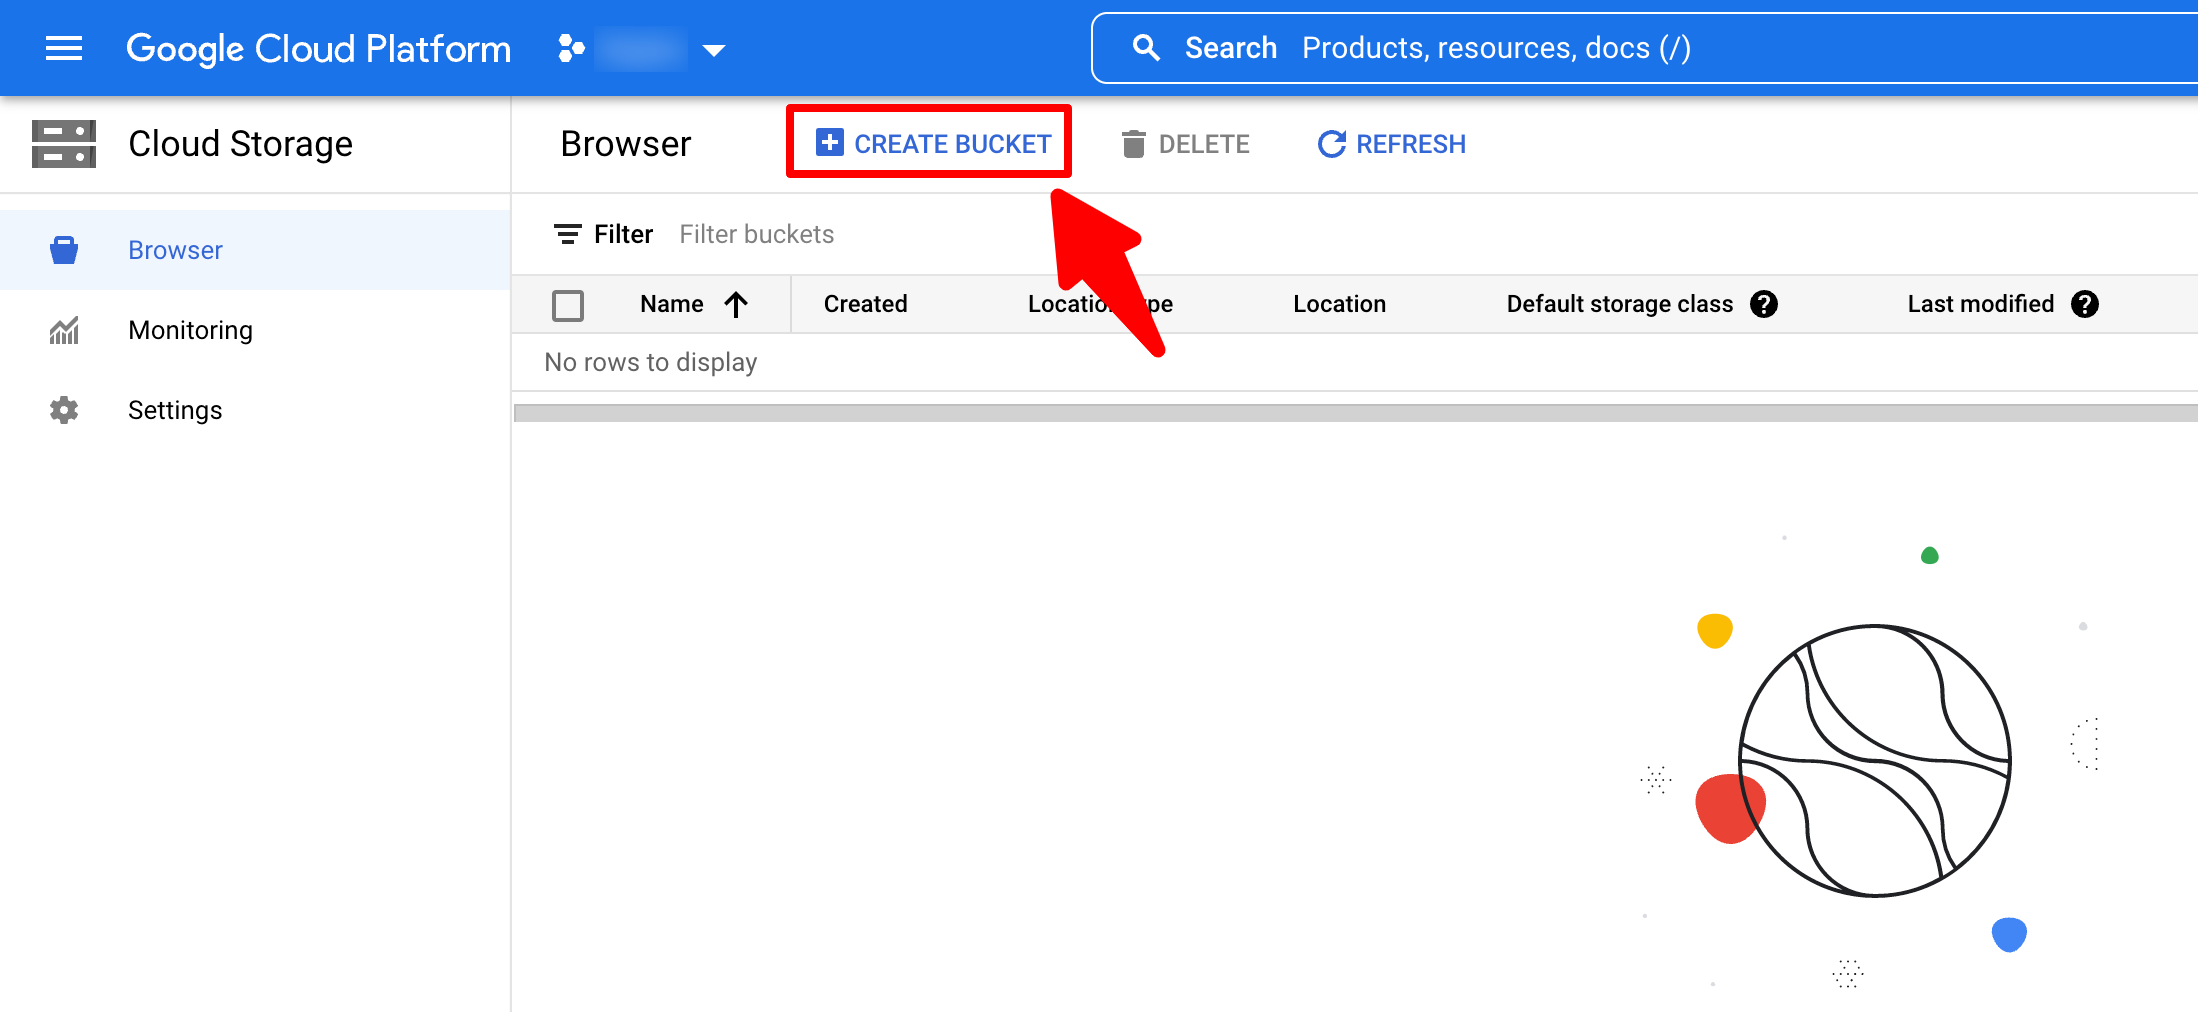
Now click Services And Select S3 under Storage
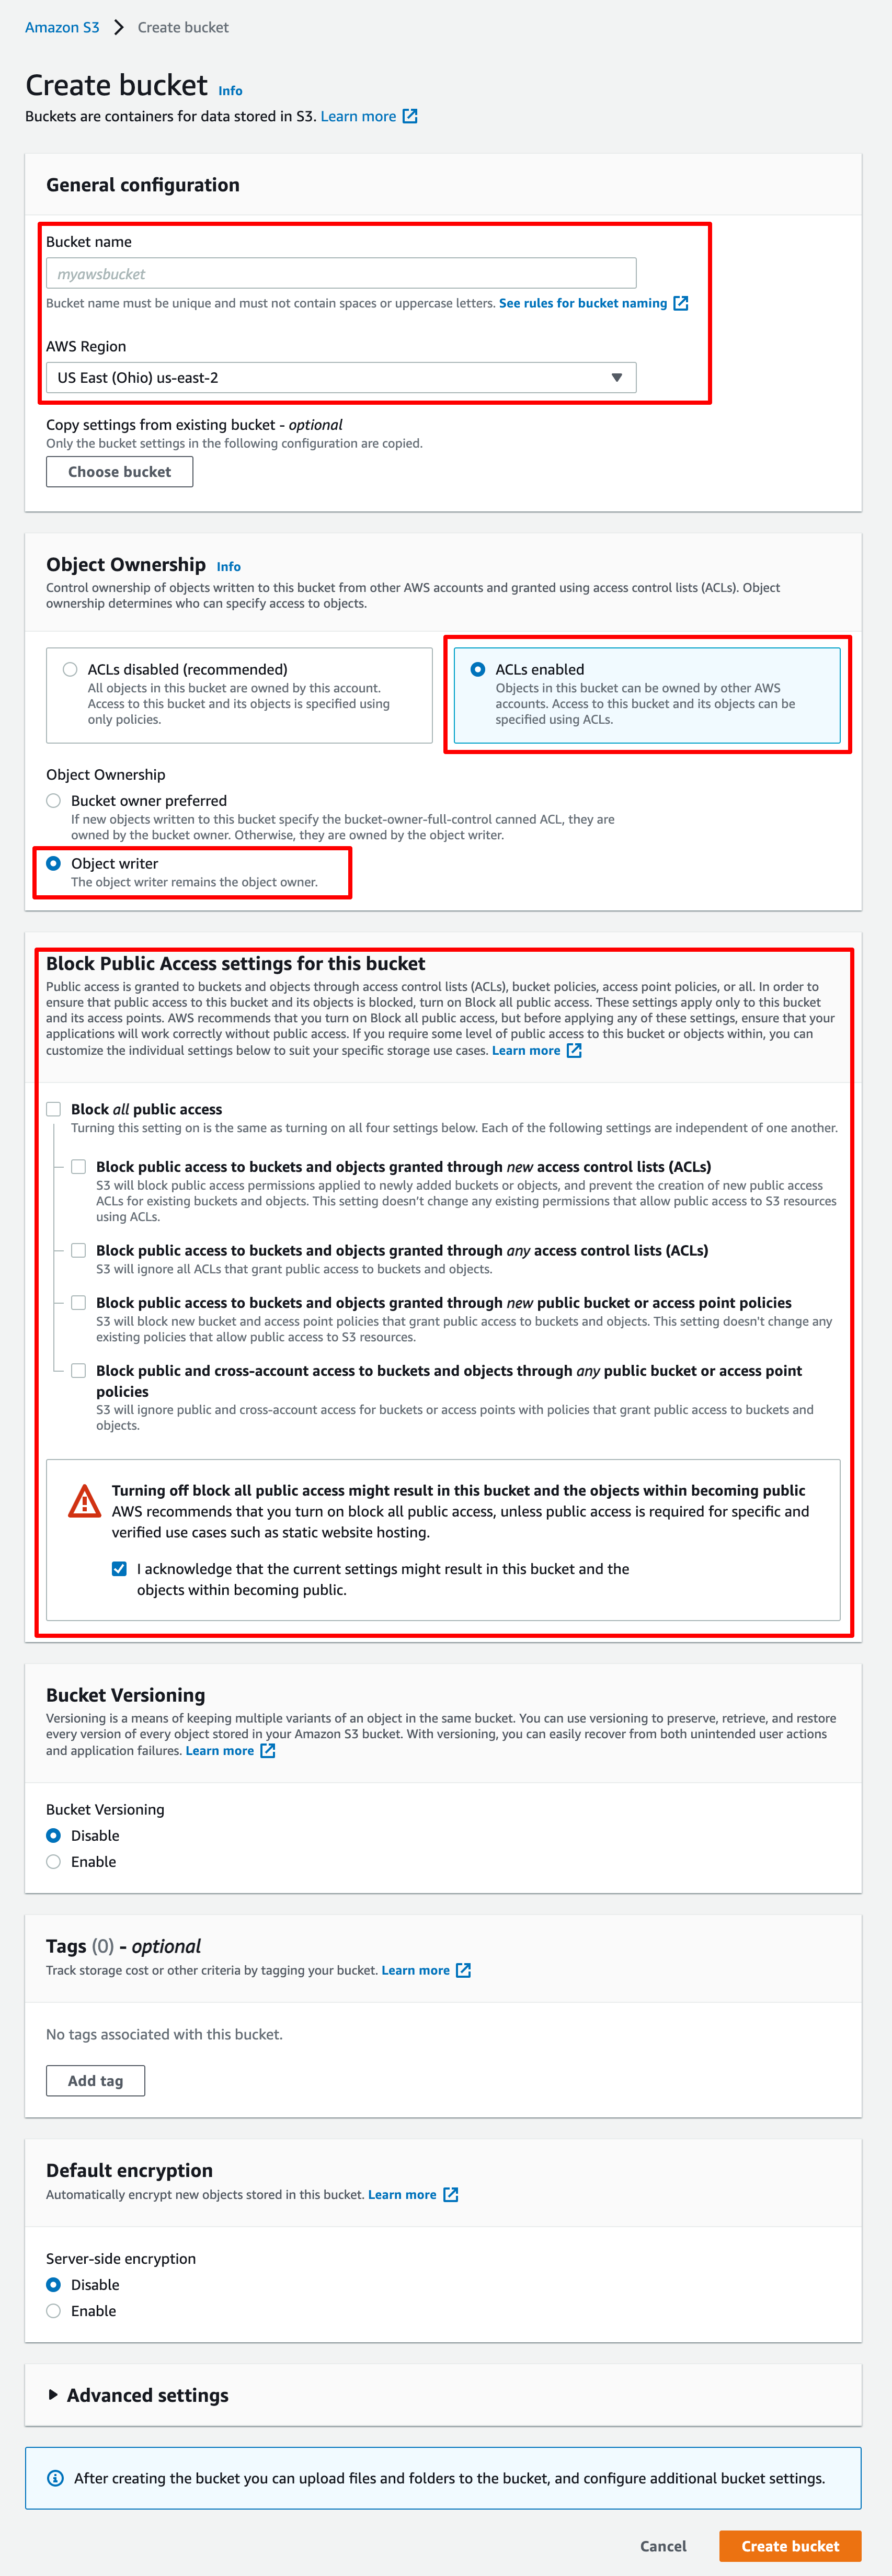
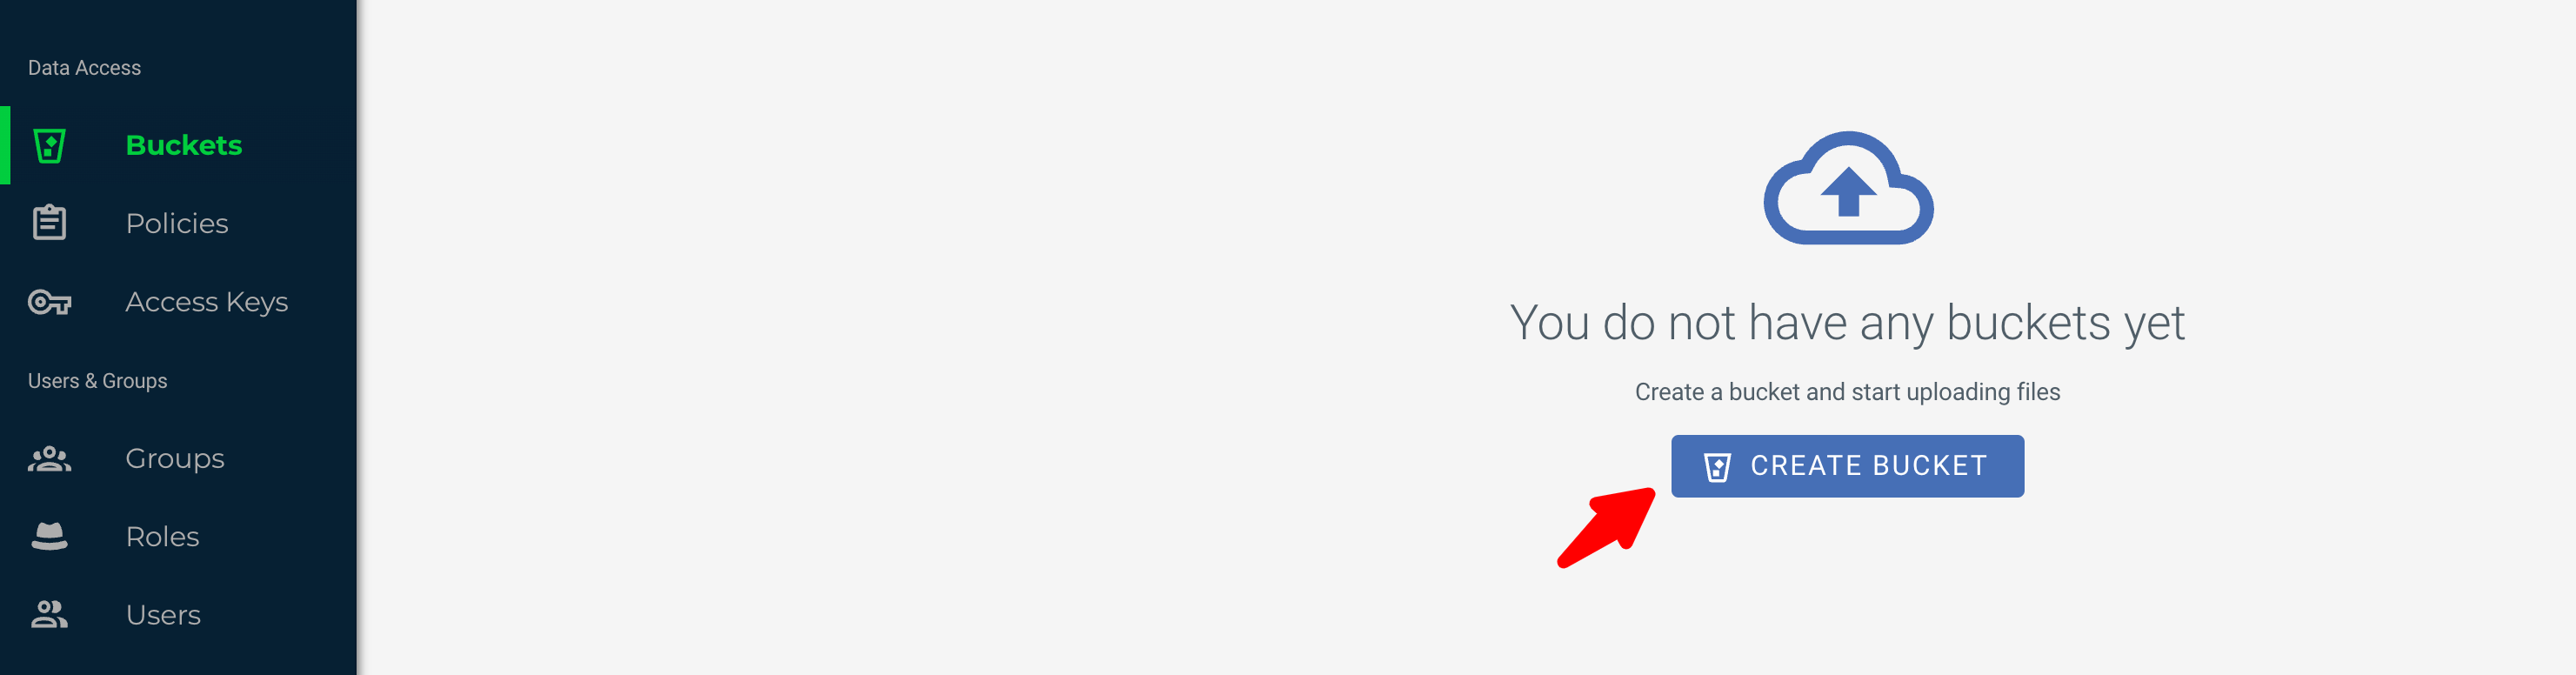
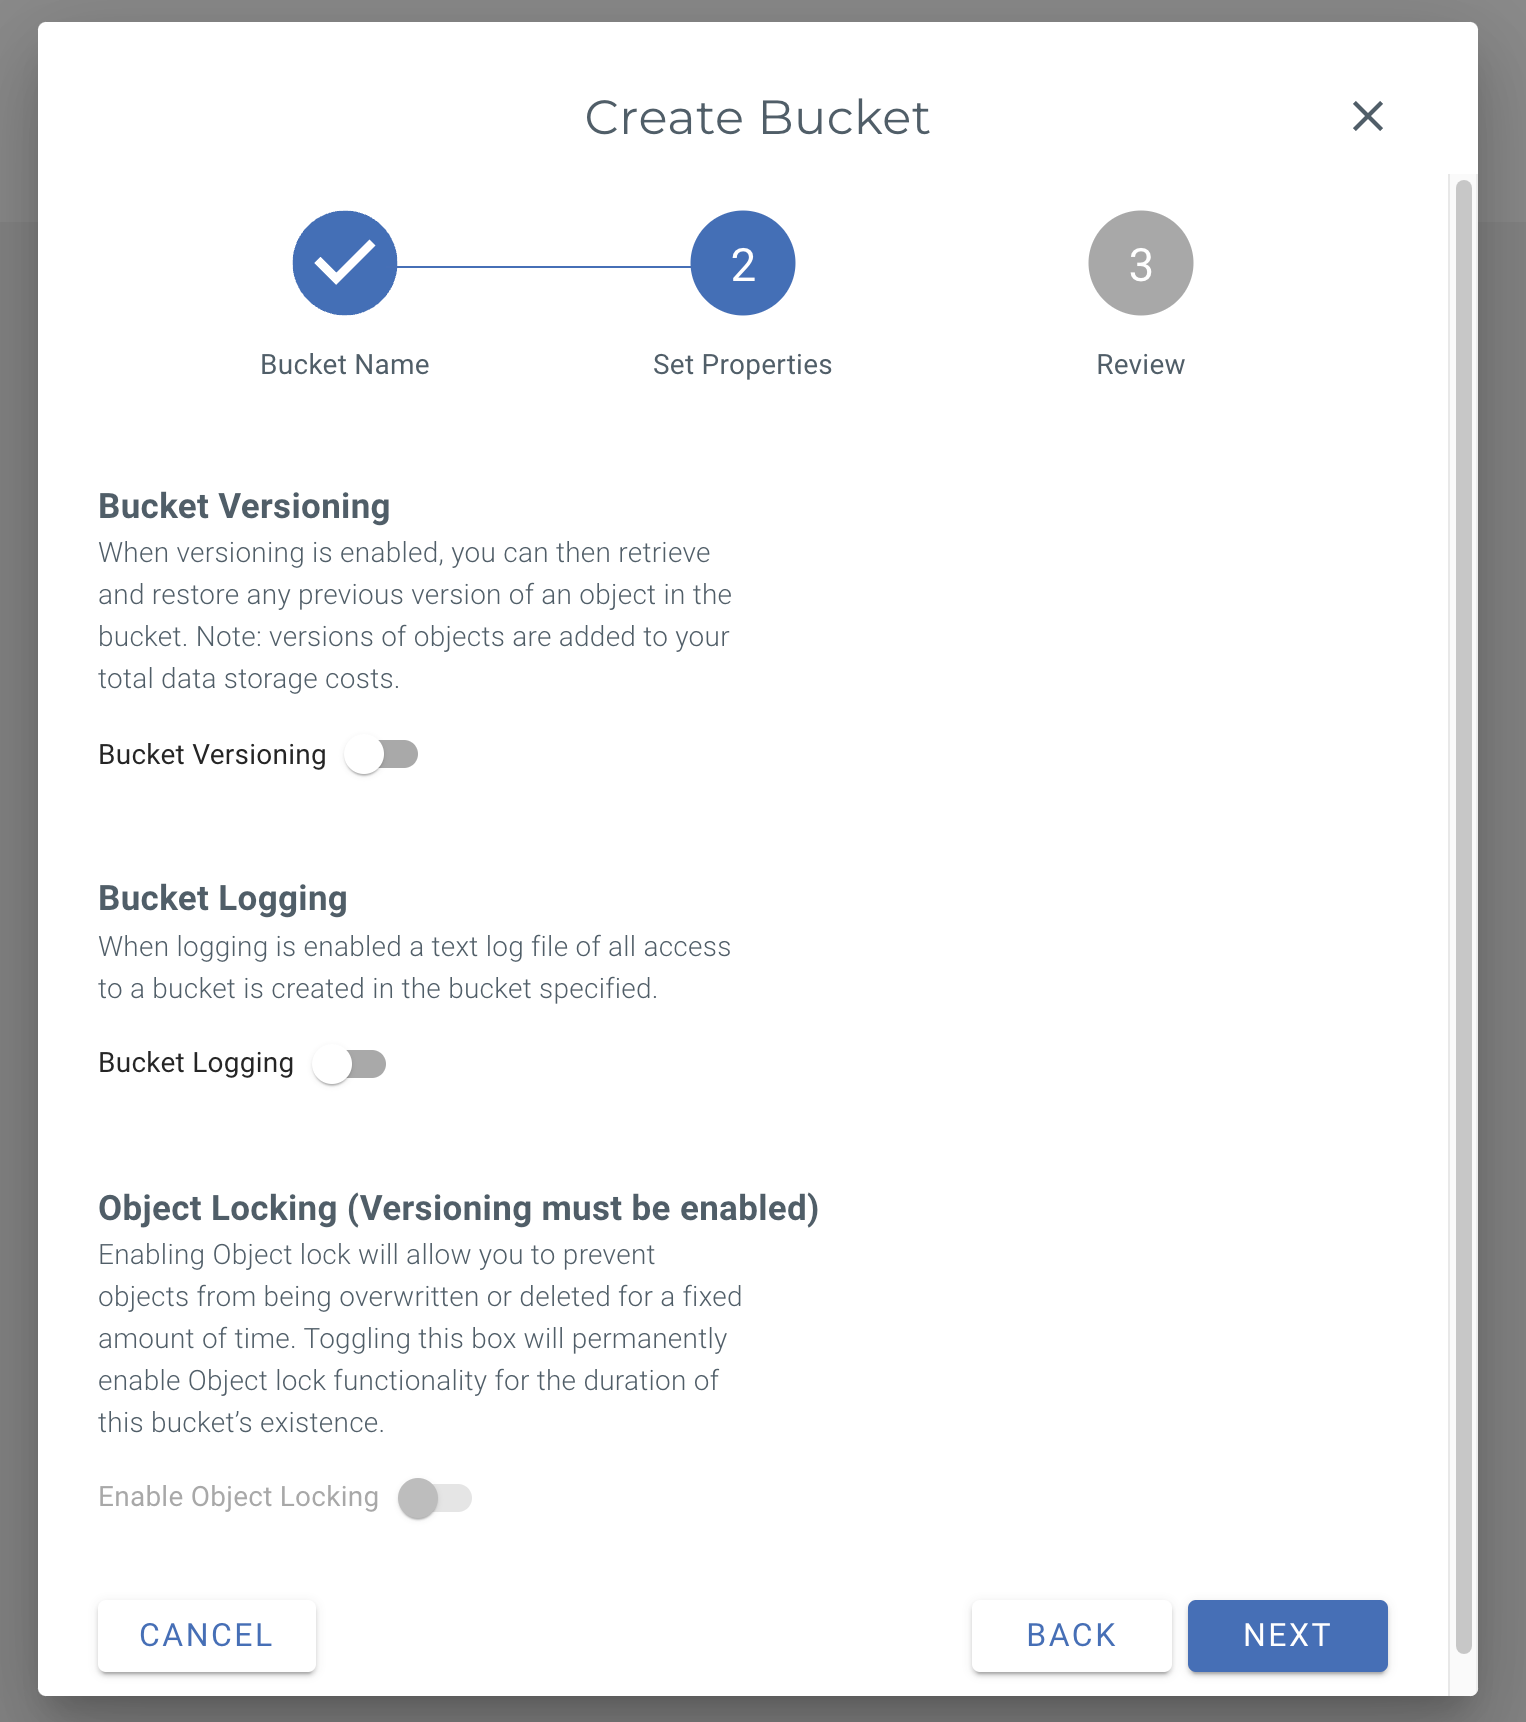
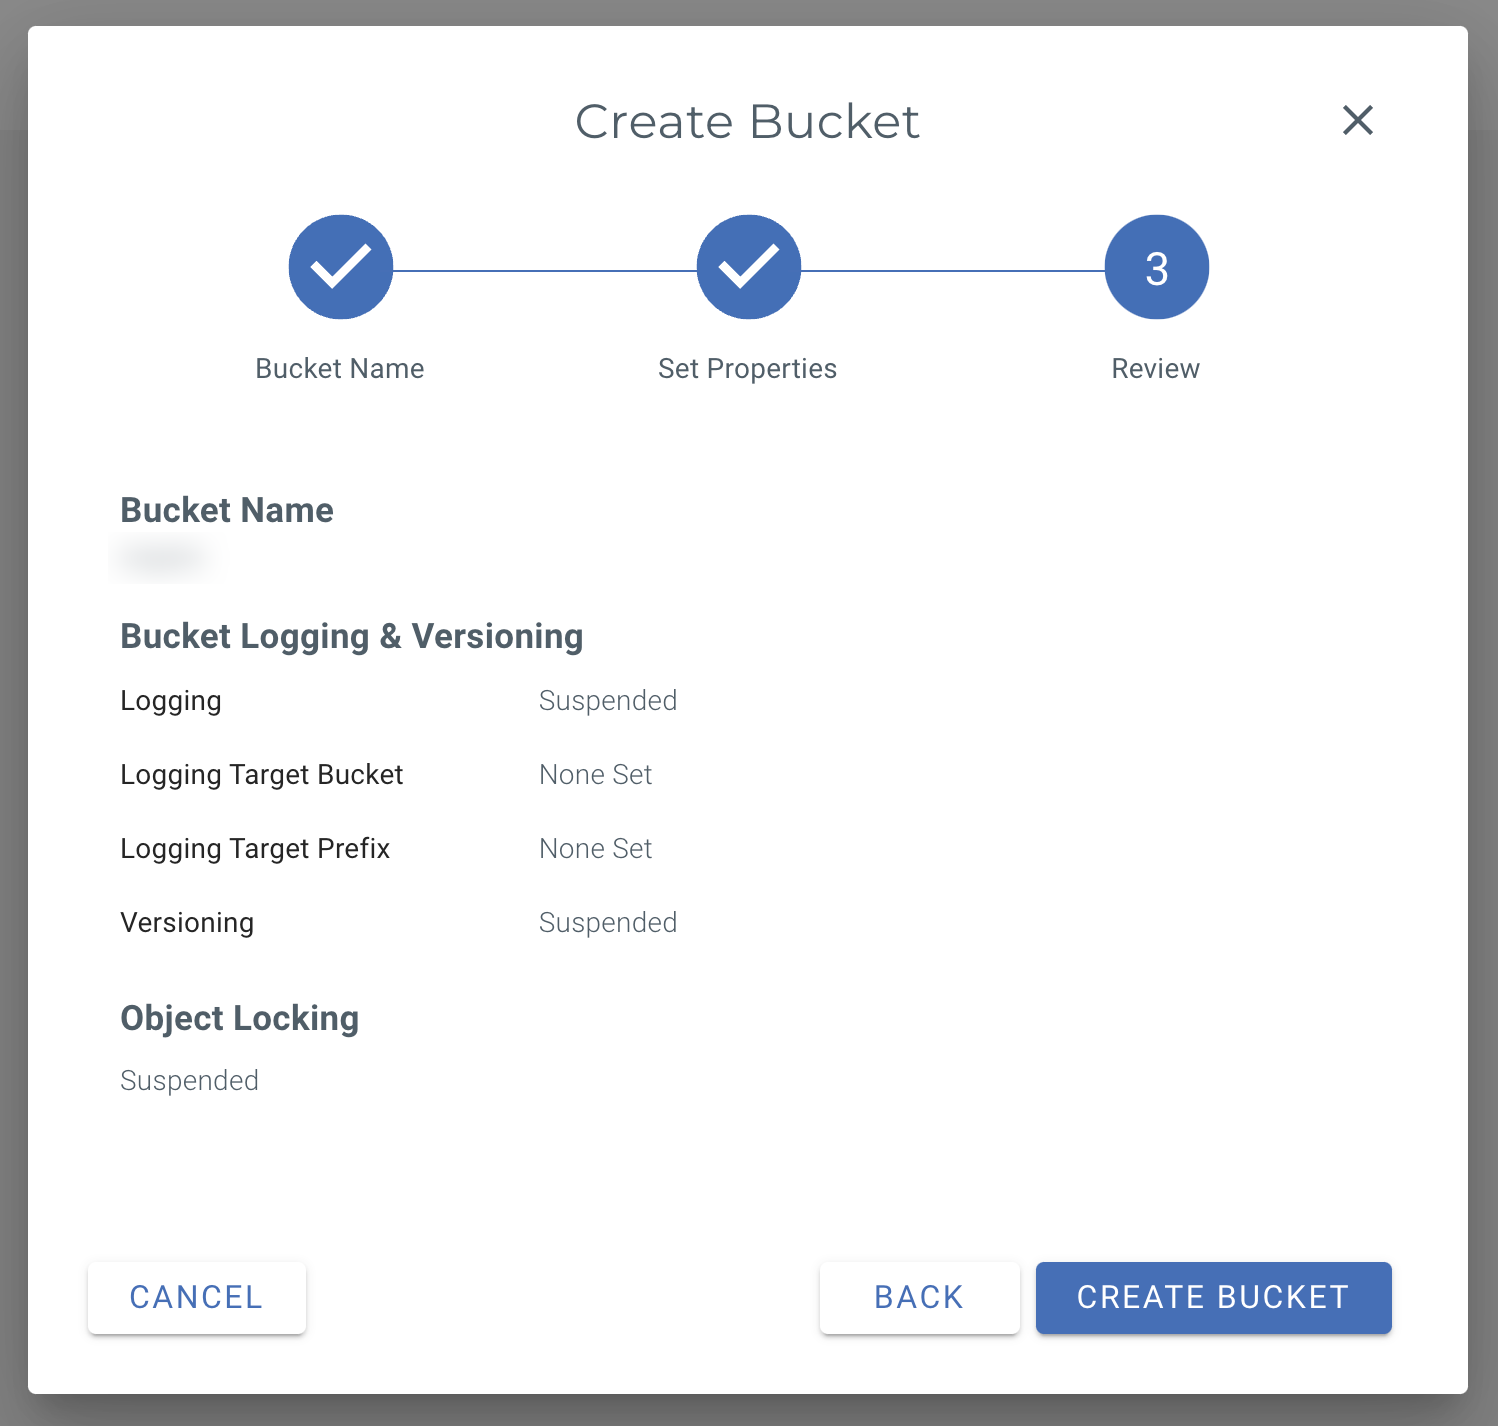
Now click Create bucket
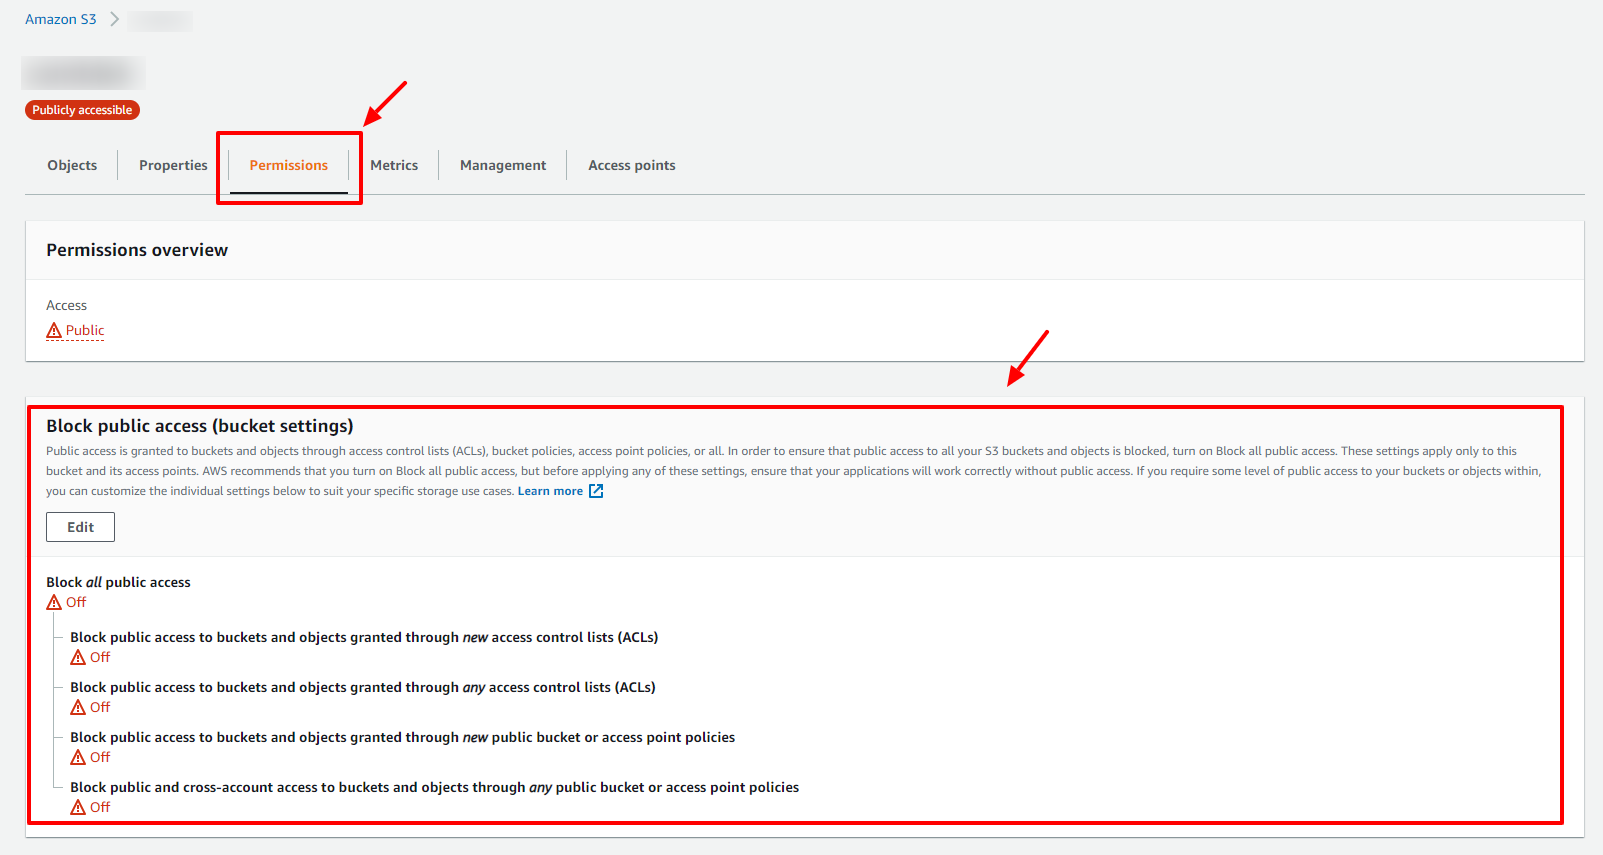
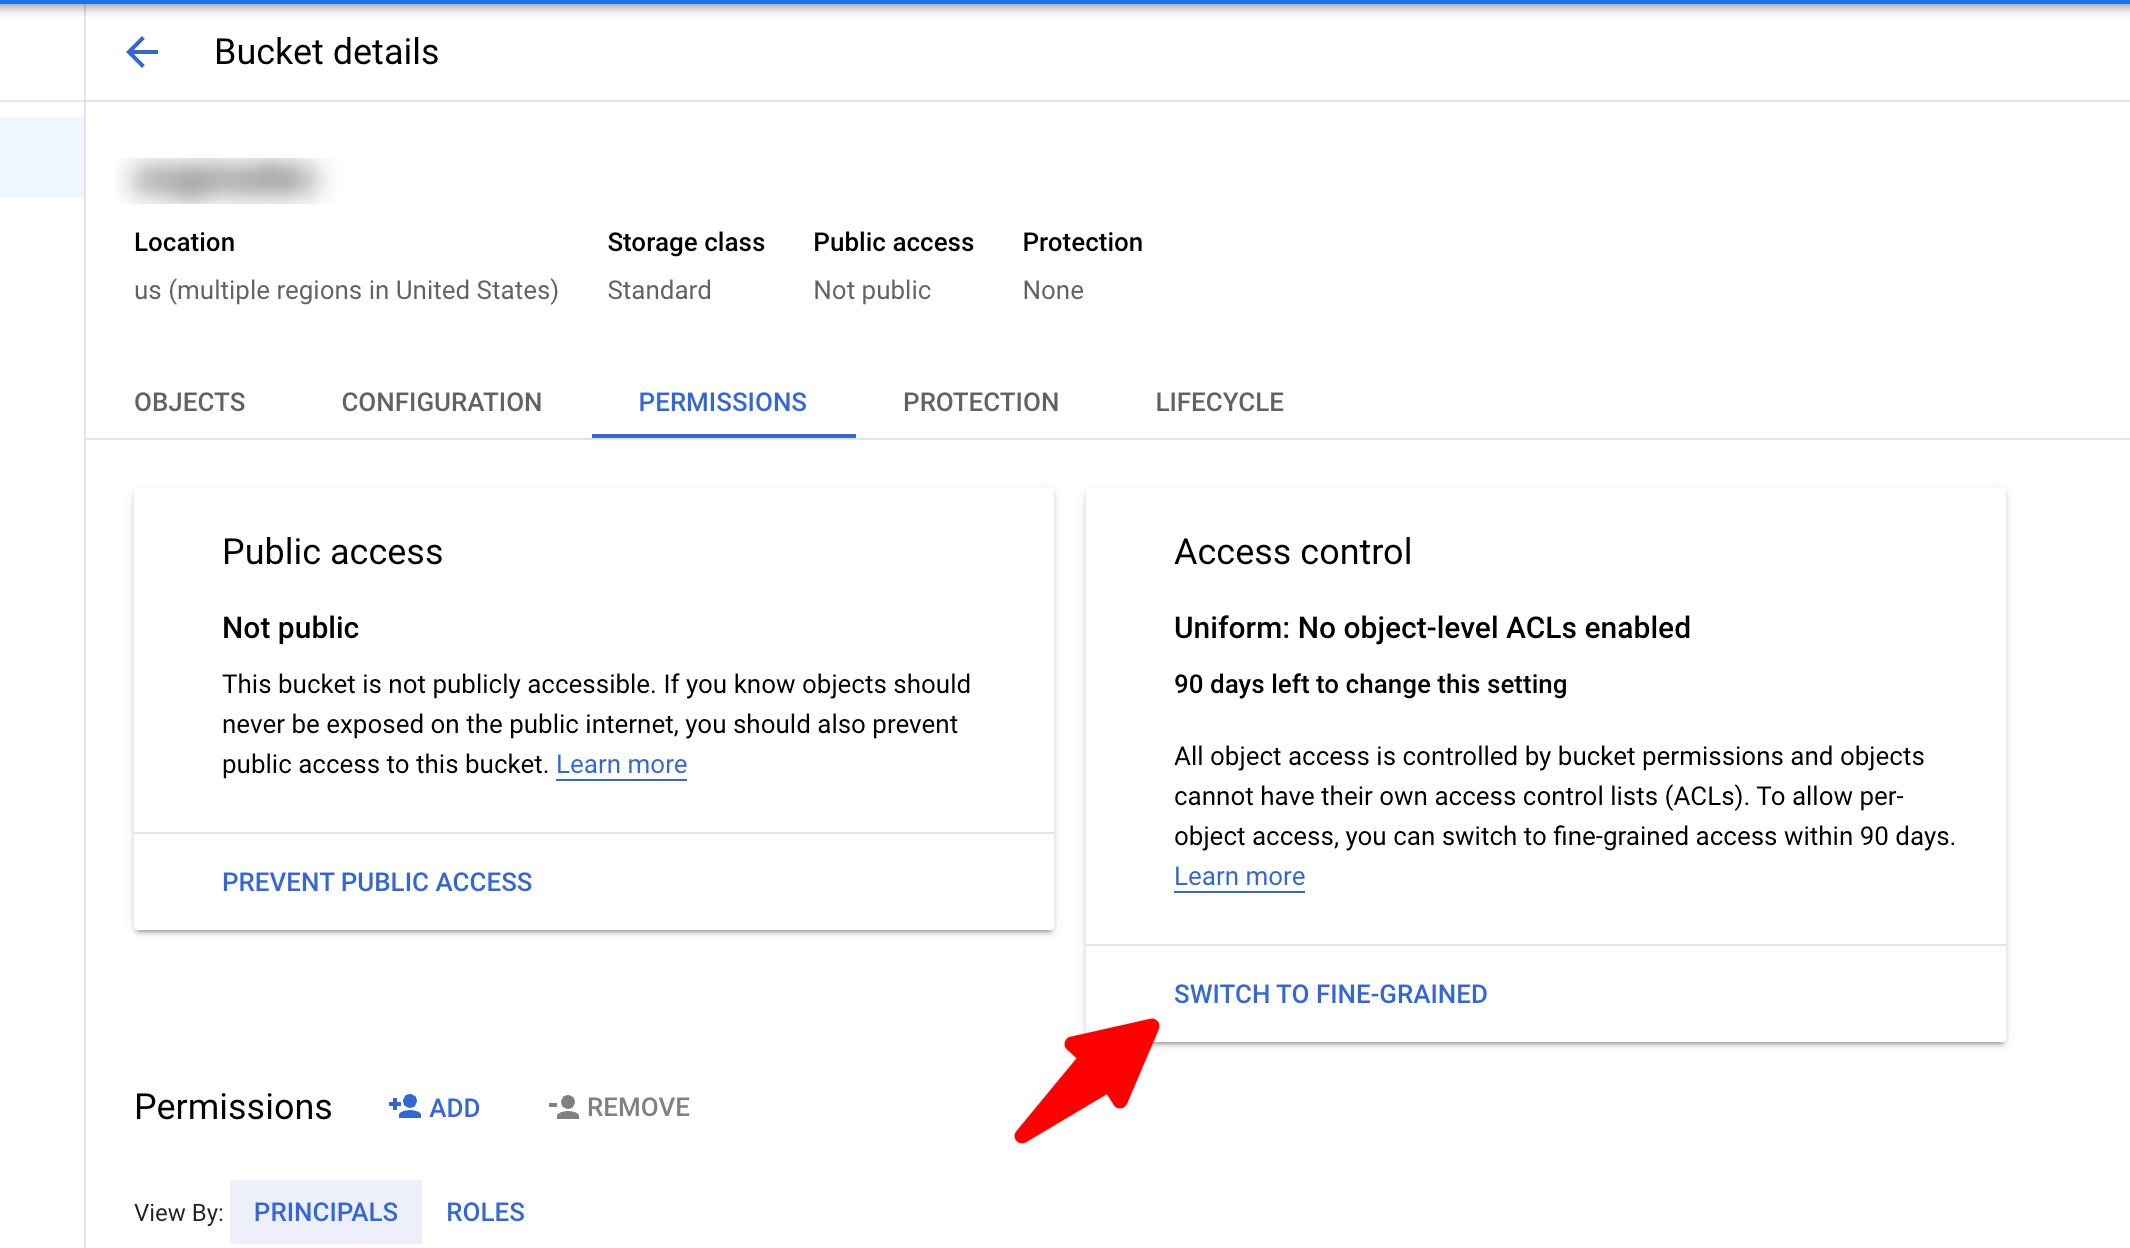
Now Make sure you have gave public access to your bucket
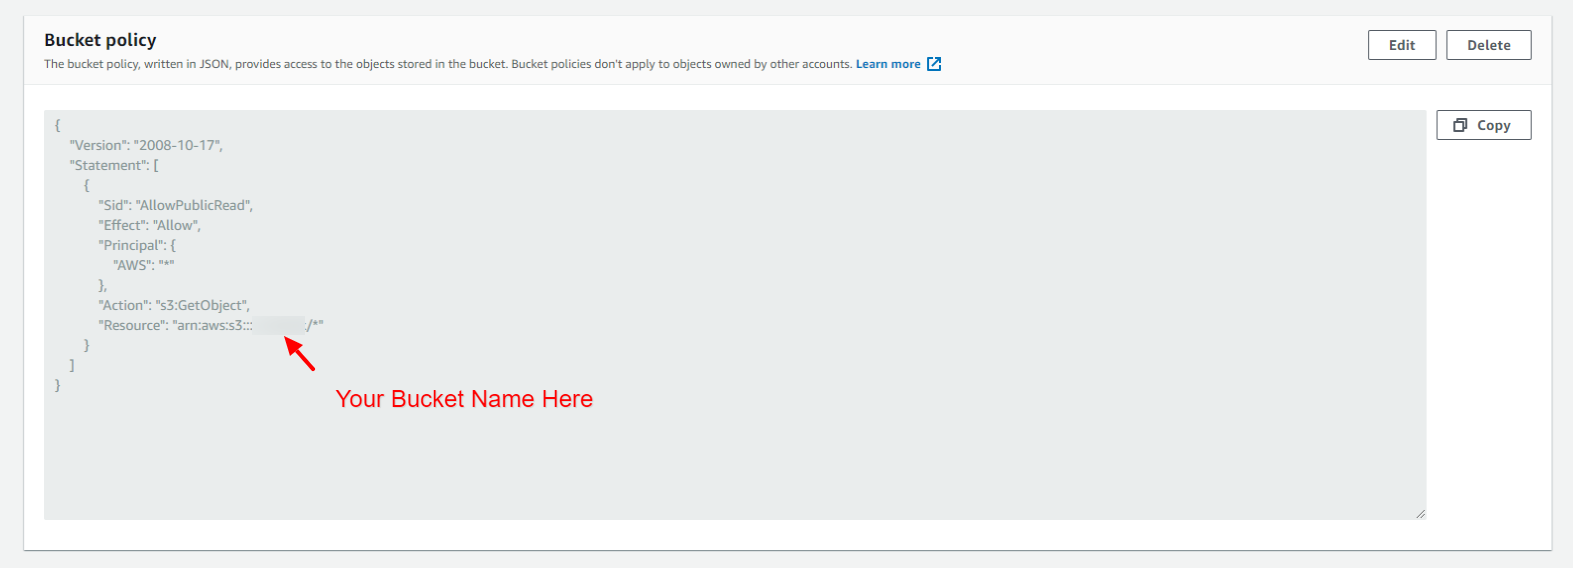
Also make sure you added the Bucket Policy by adding
this JSON code in Bucket Policy, You’ll need to replace “YOUR-BUCKET-NAME” with your full bucket name
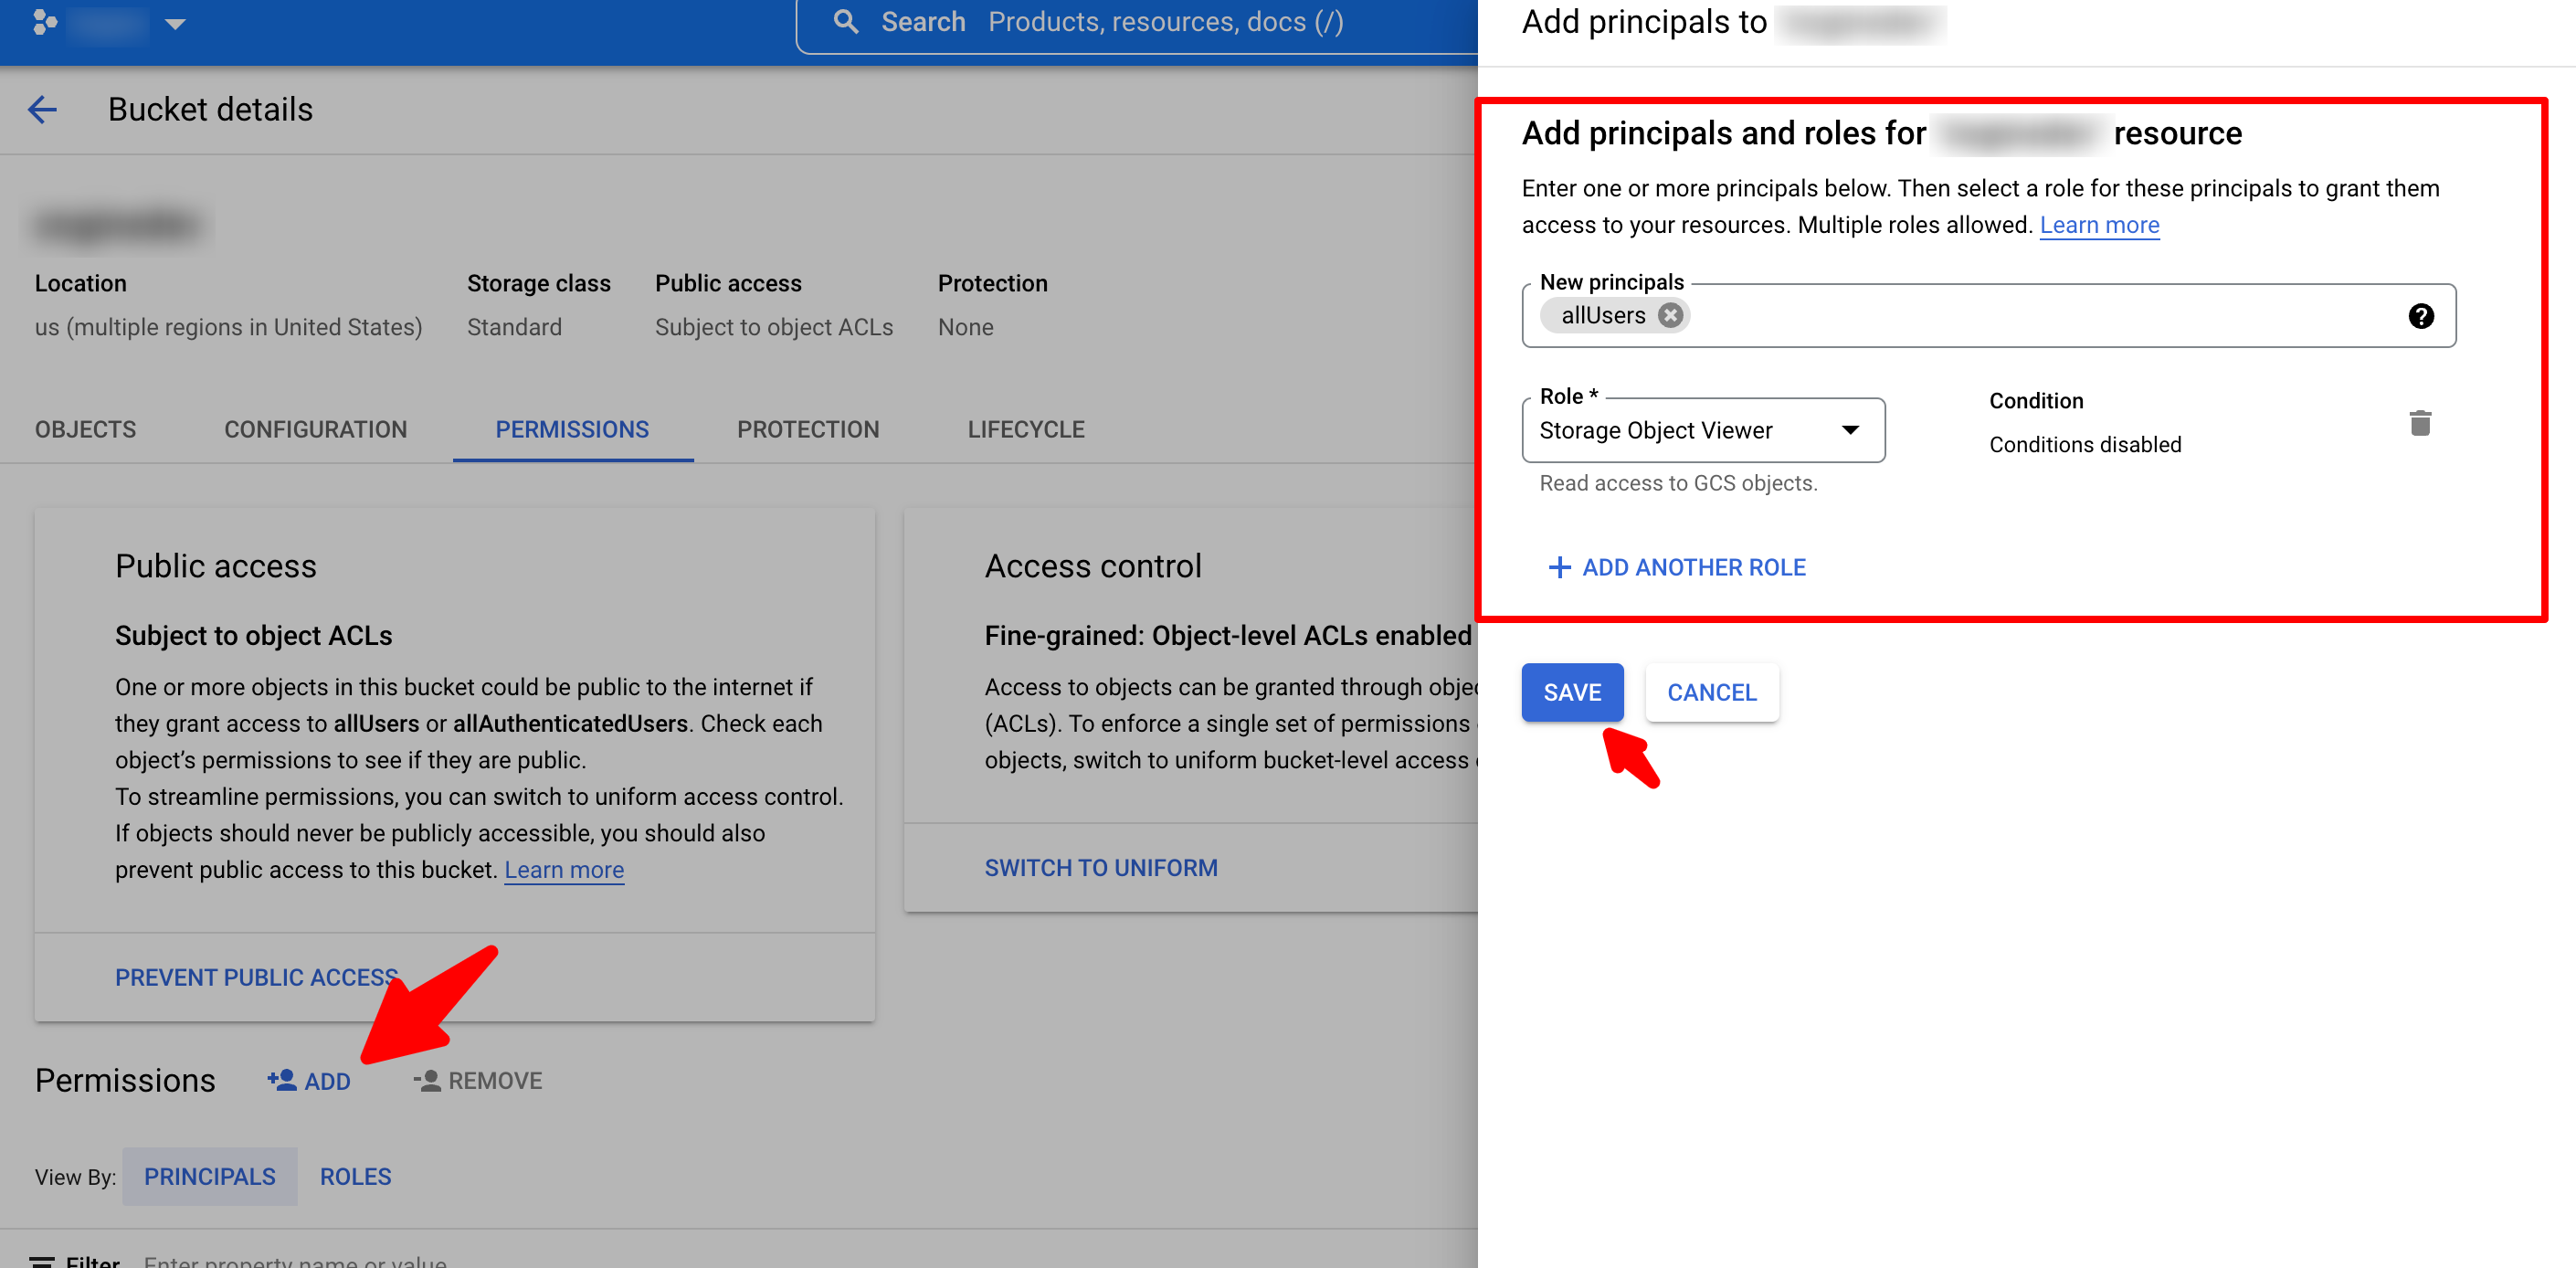
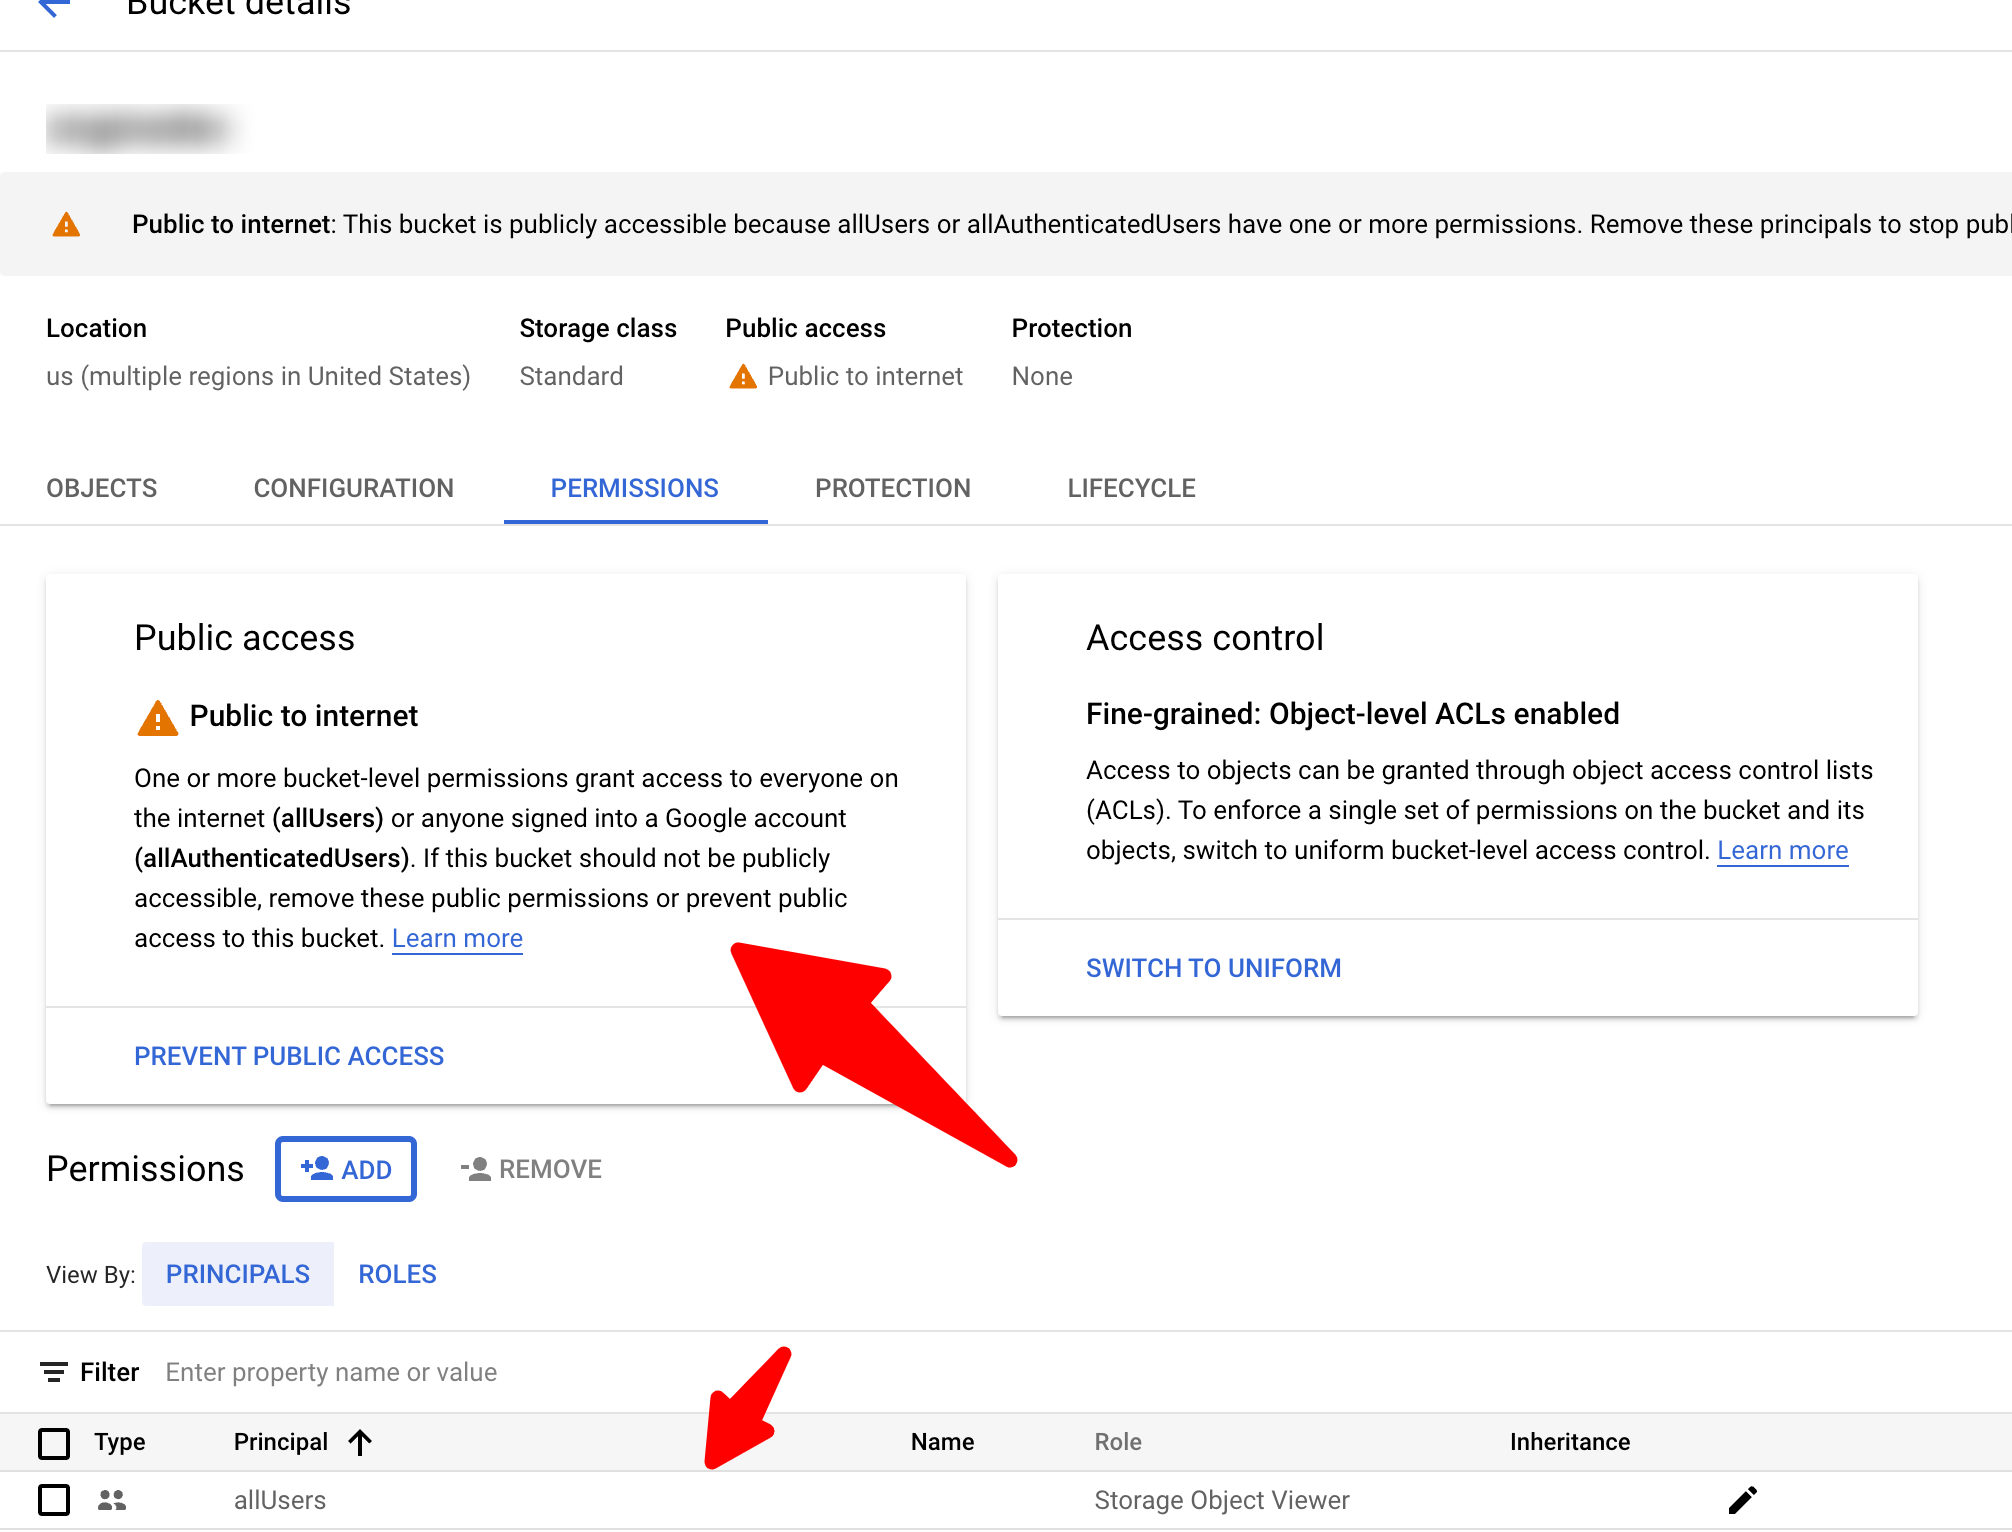
Now we need to make sure your bucket is public, So follow the followings
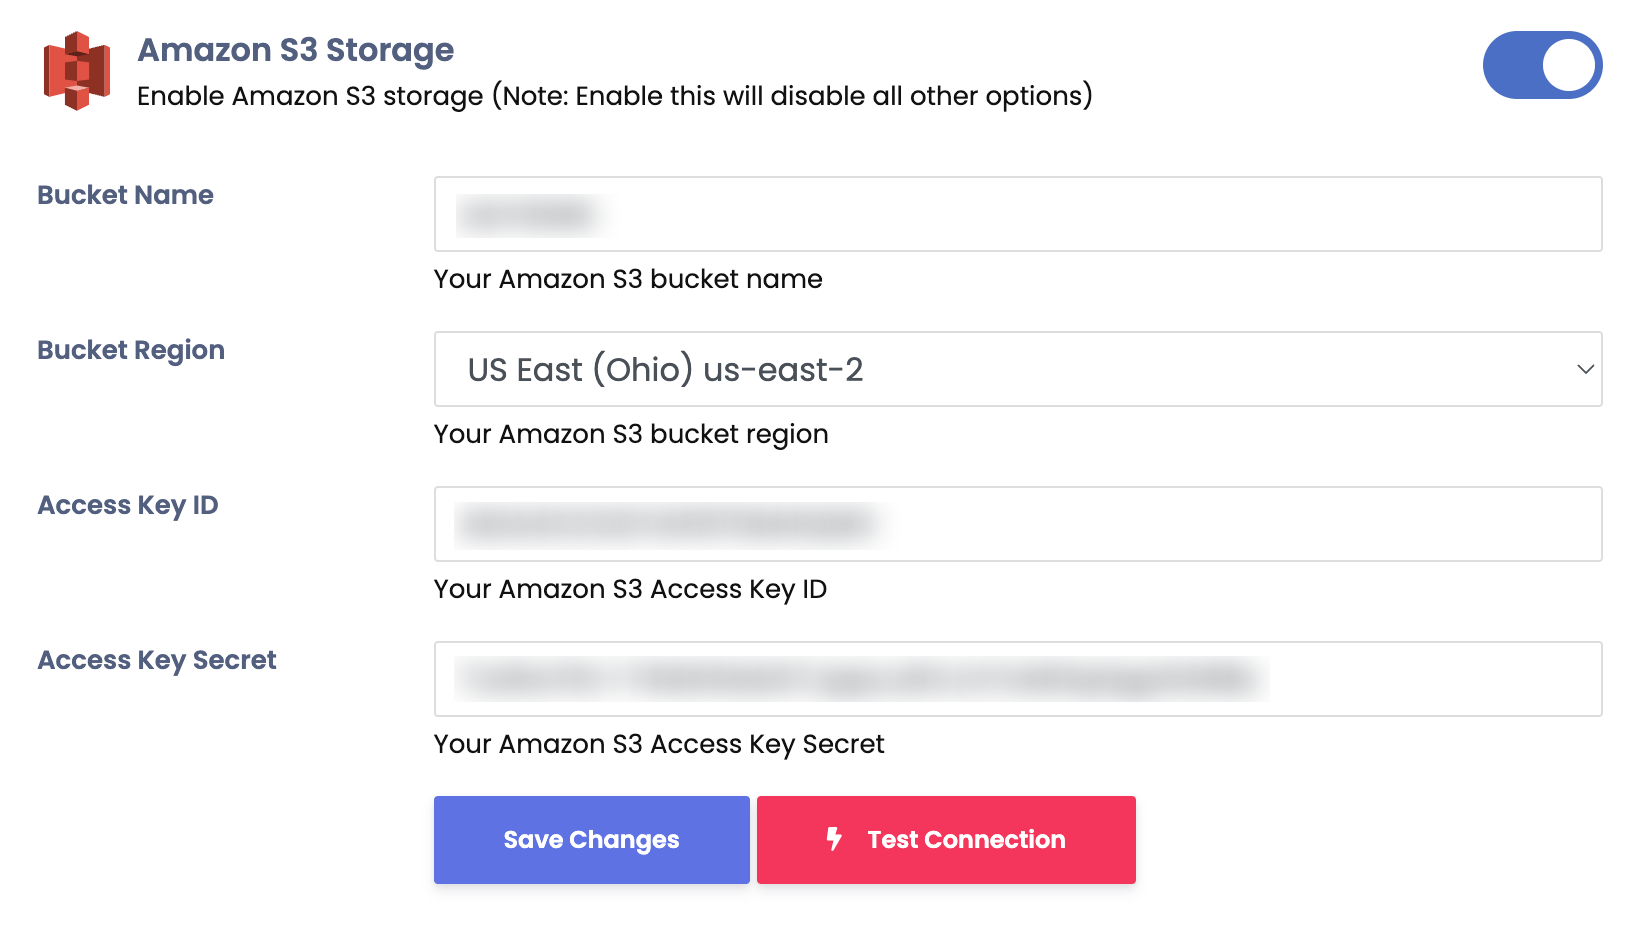
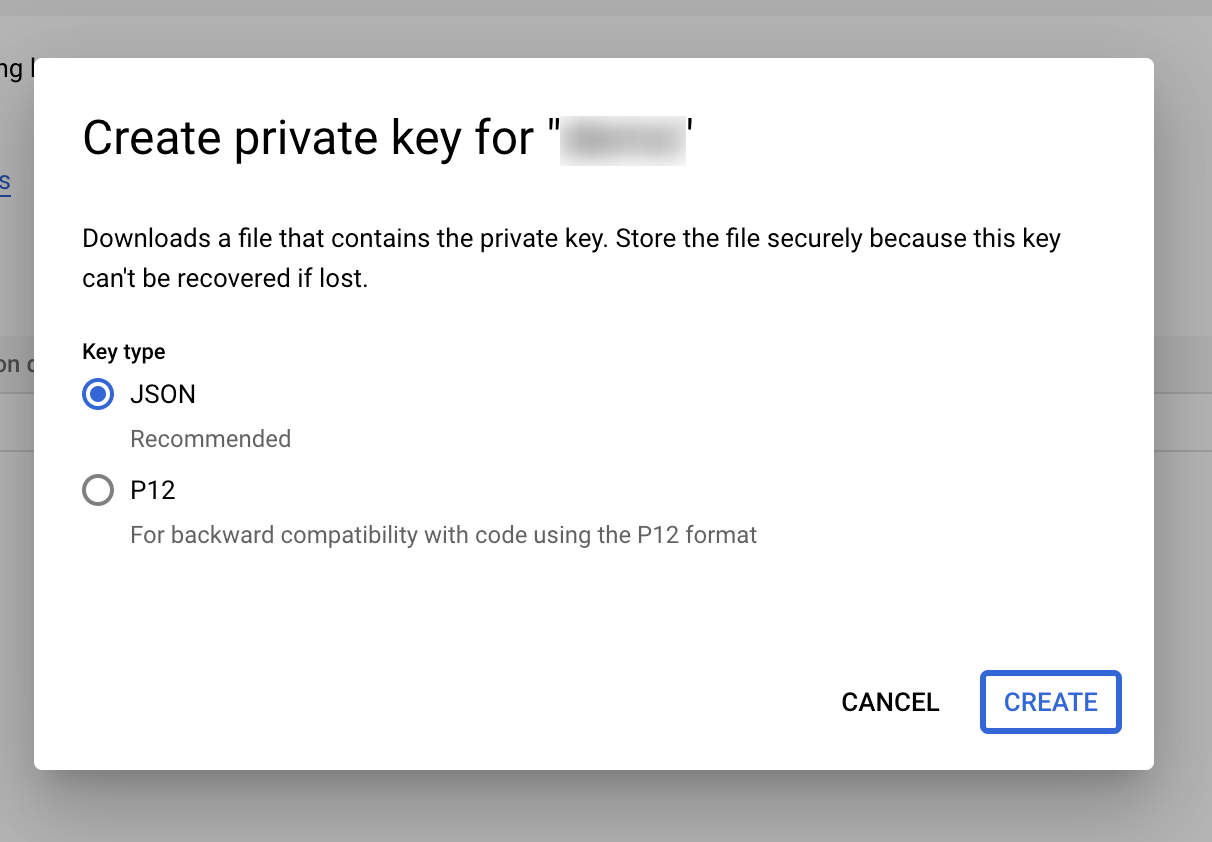
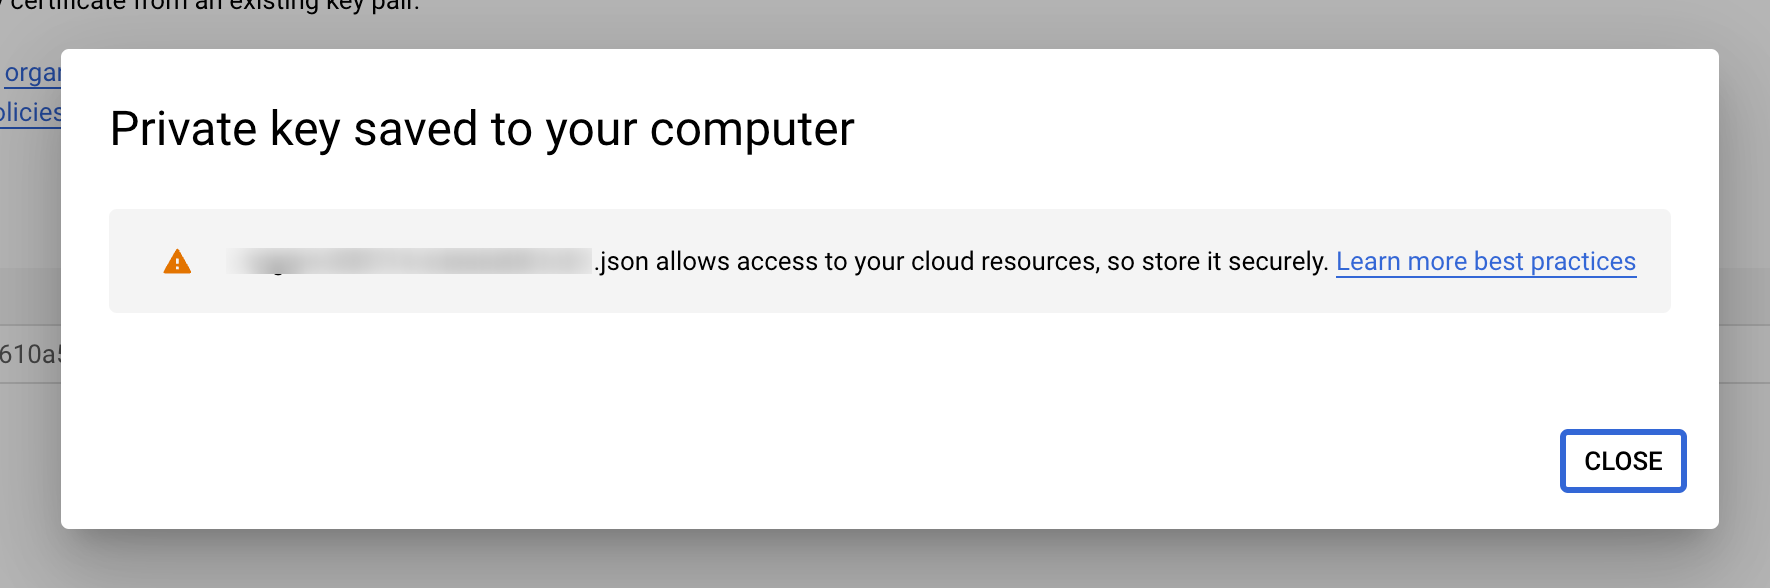
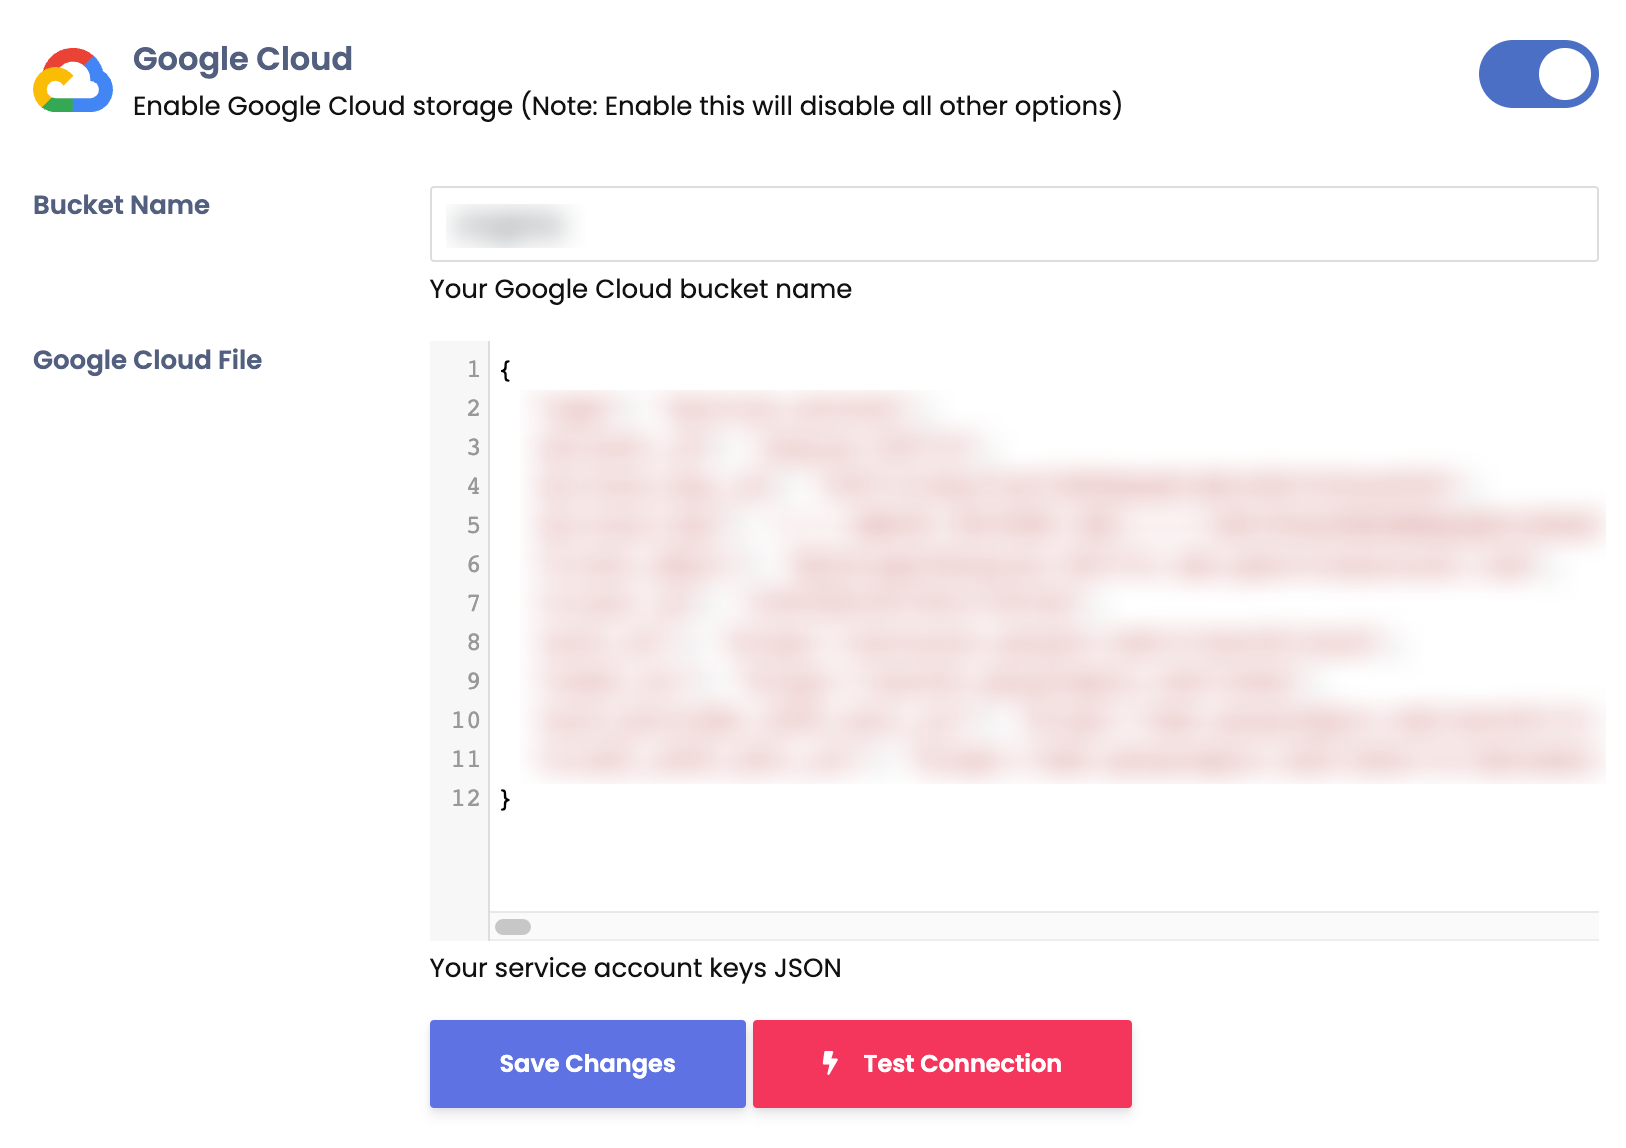
Now goto to your Sngine Admin panel -> Settings -> Upload Settings and paste both bucket name
and your JSON Key file content and after click Save
Changes click Test Connection
That's all, Enjoy!
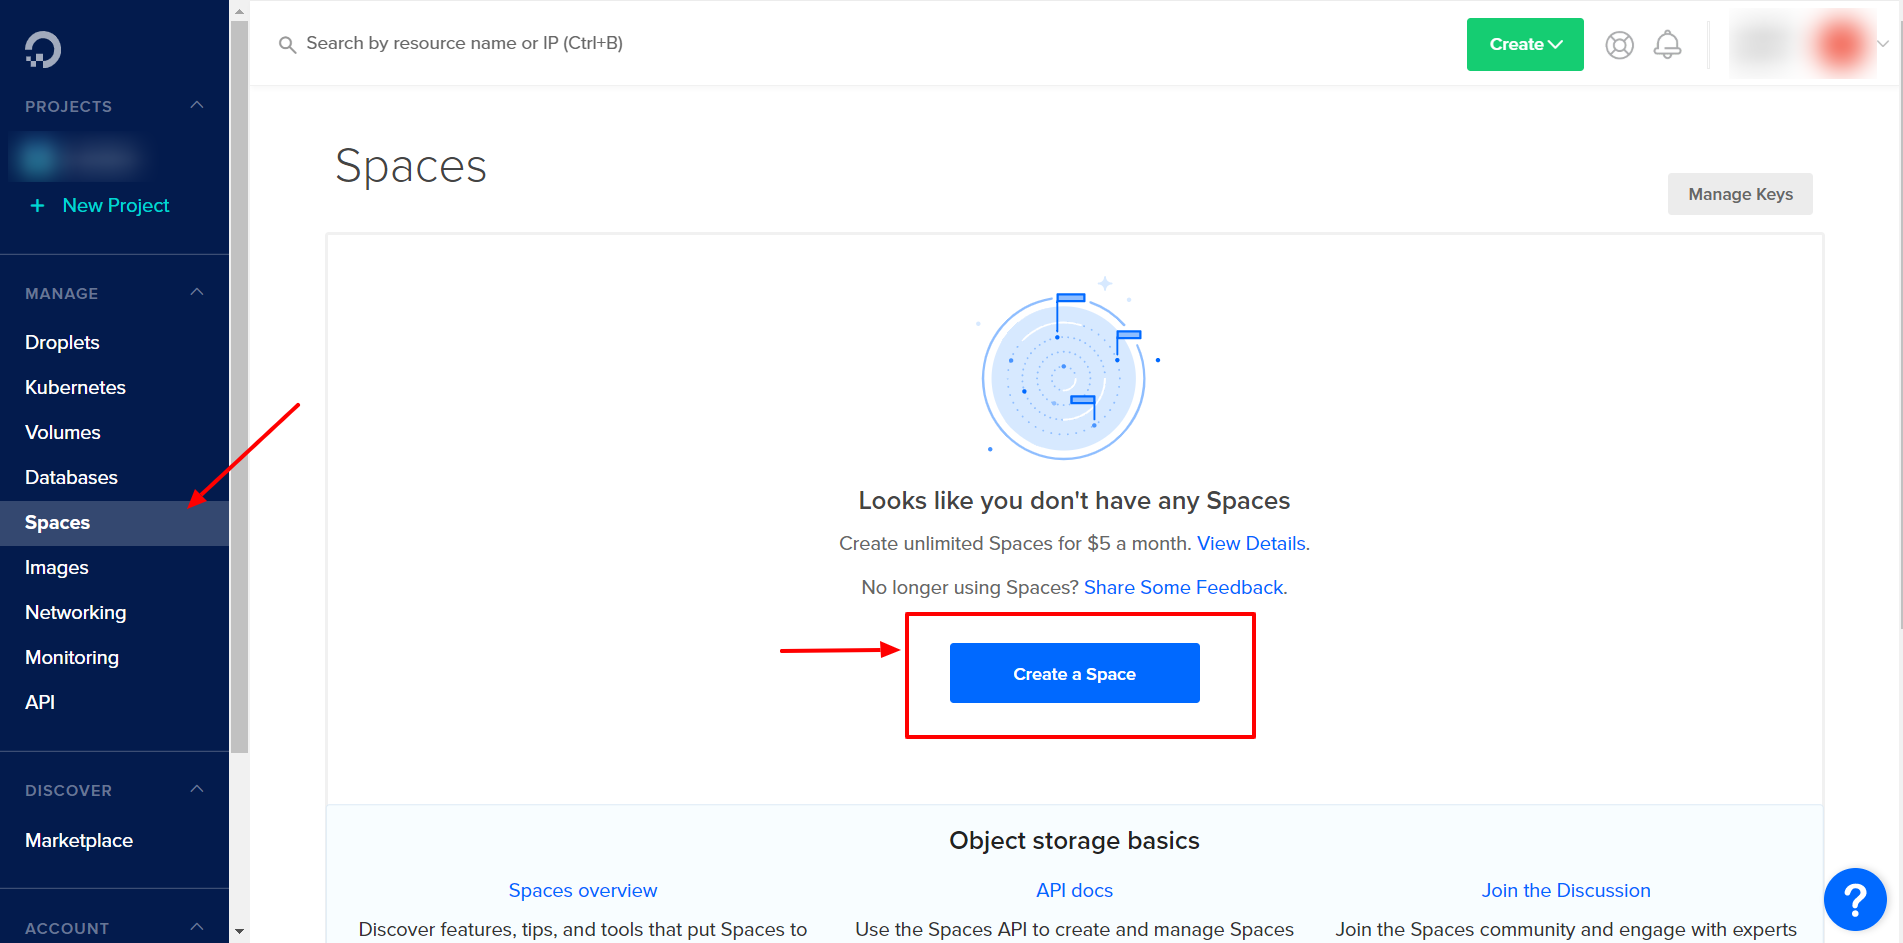
DigitalOcean Spaces
After installing Sngine now you can in easy steps integrate DigitalOcean Spaces with it to let your users use it
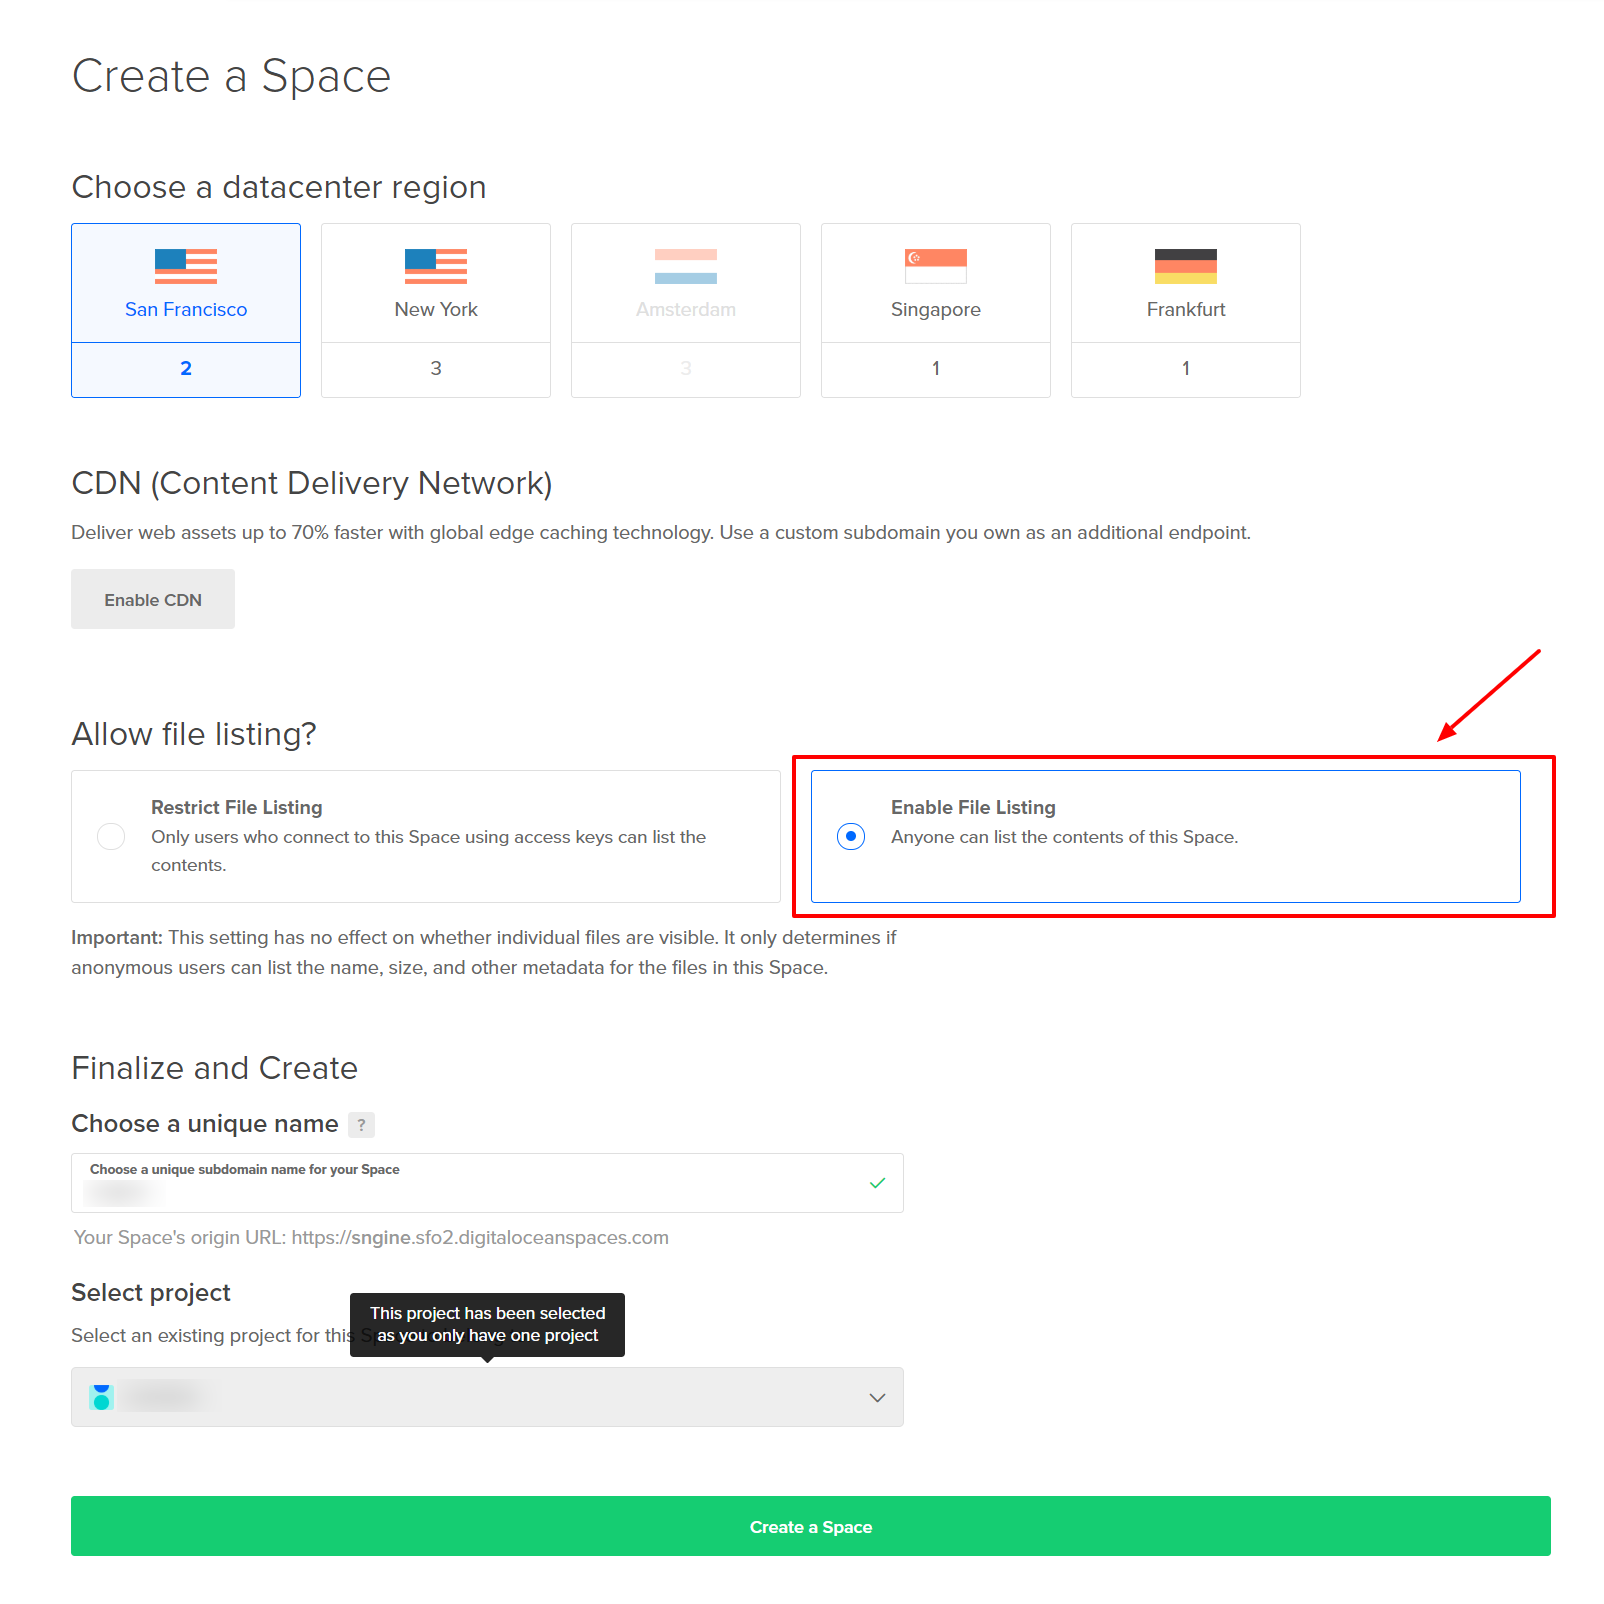
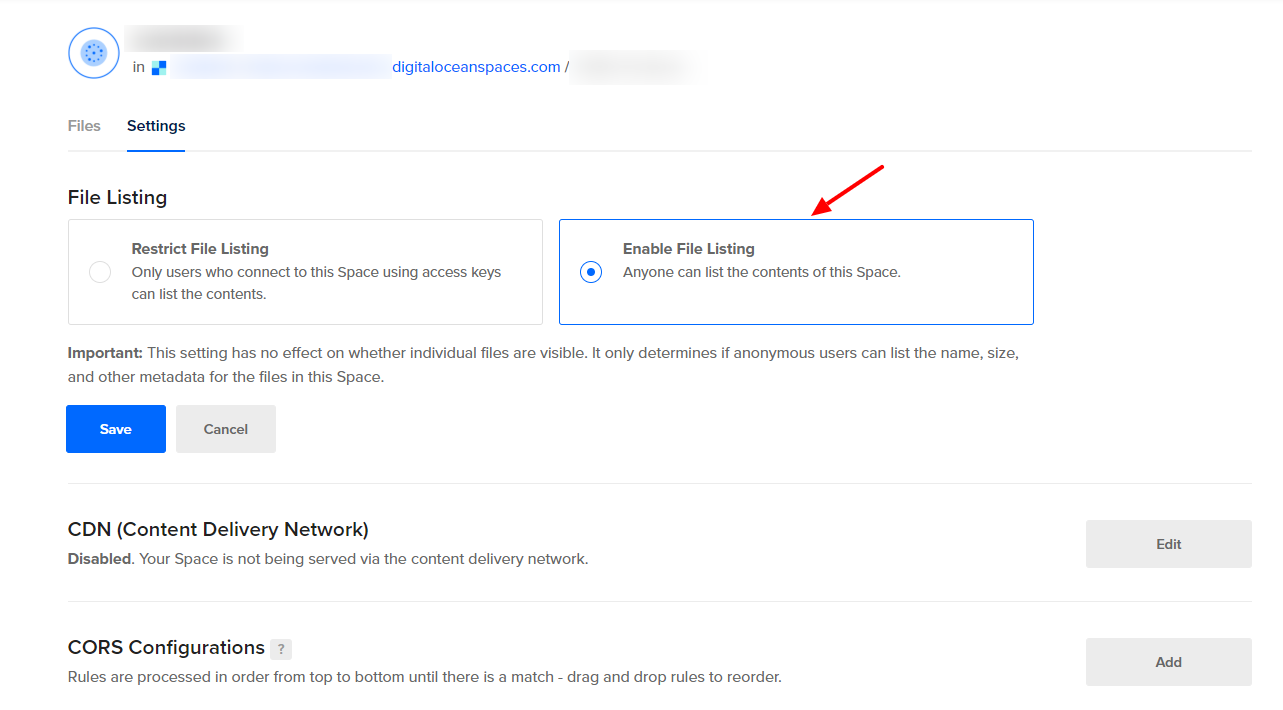
Now make sure from space settings page that Everyone can list the space files
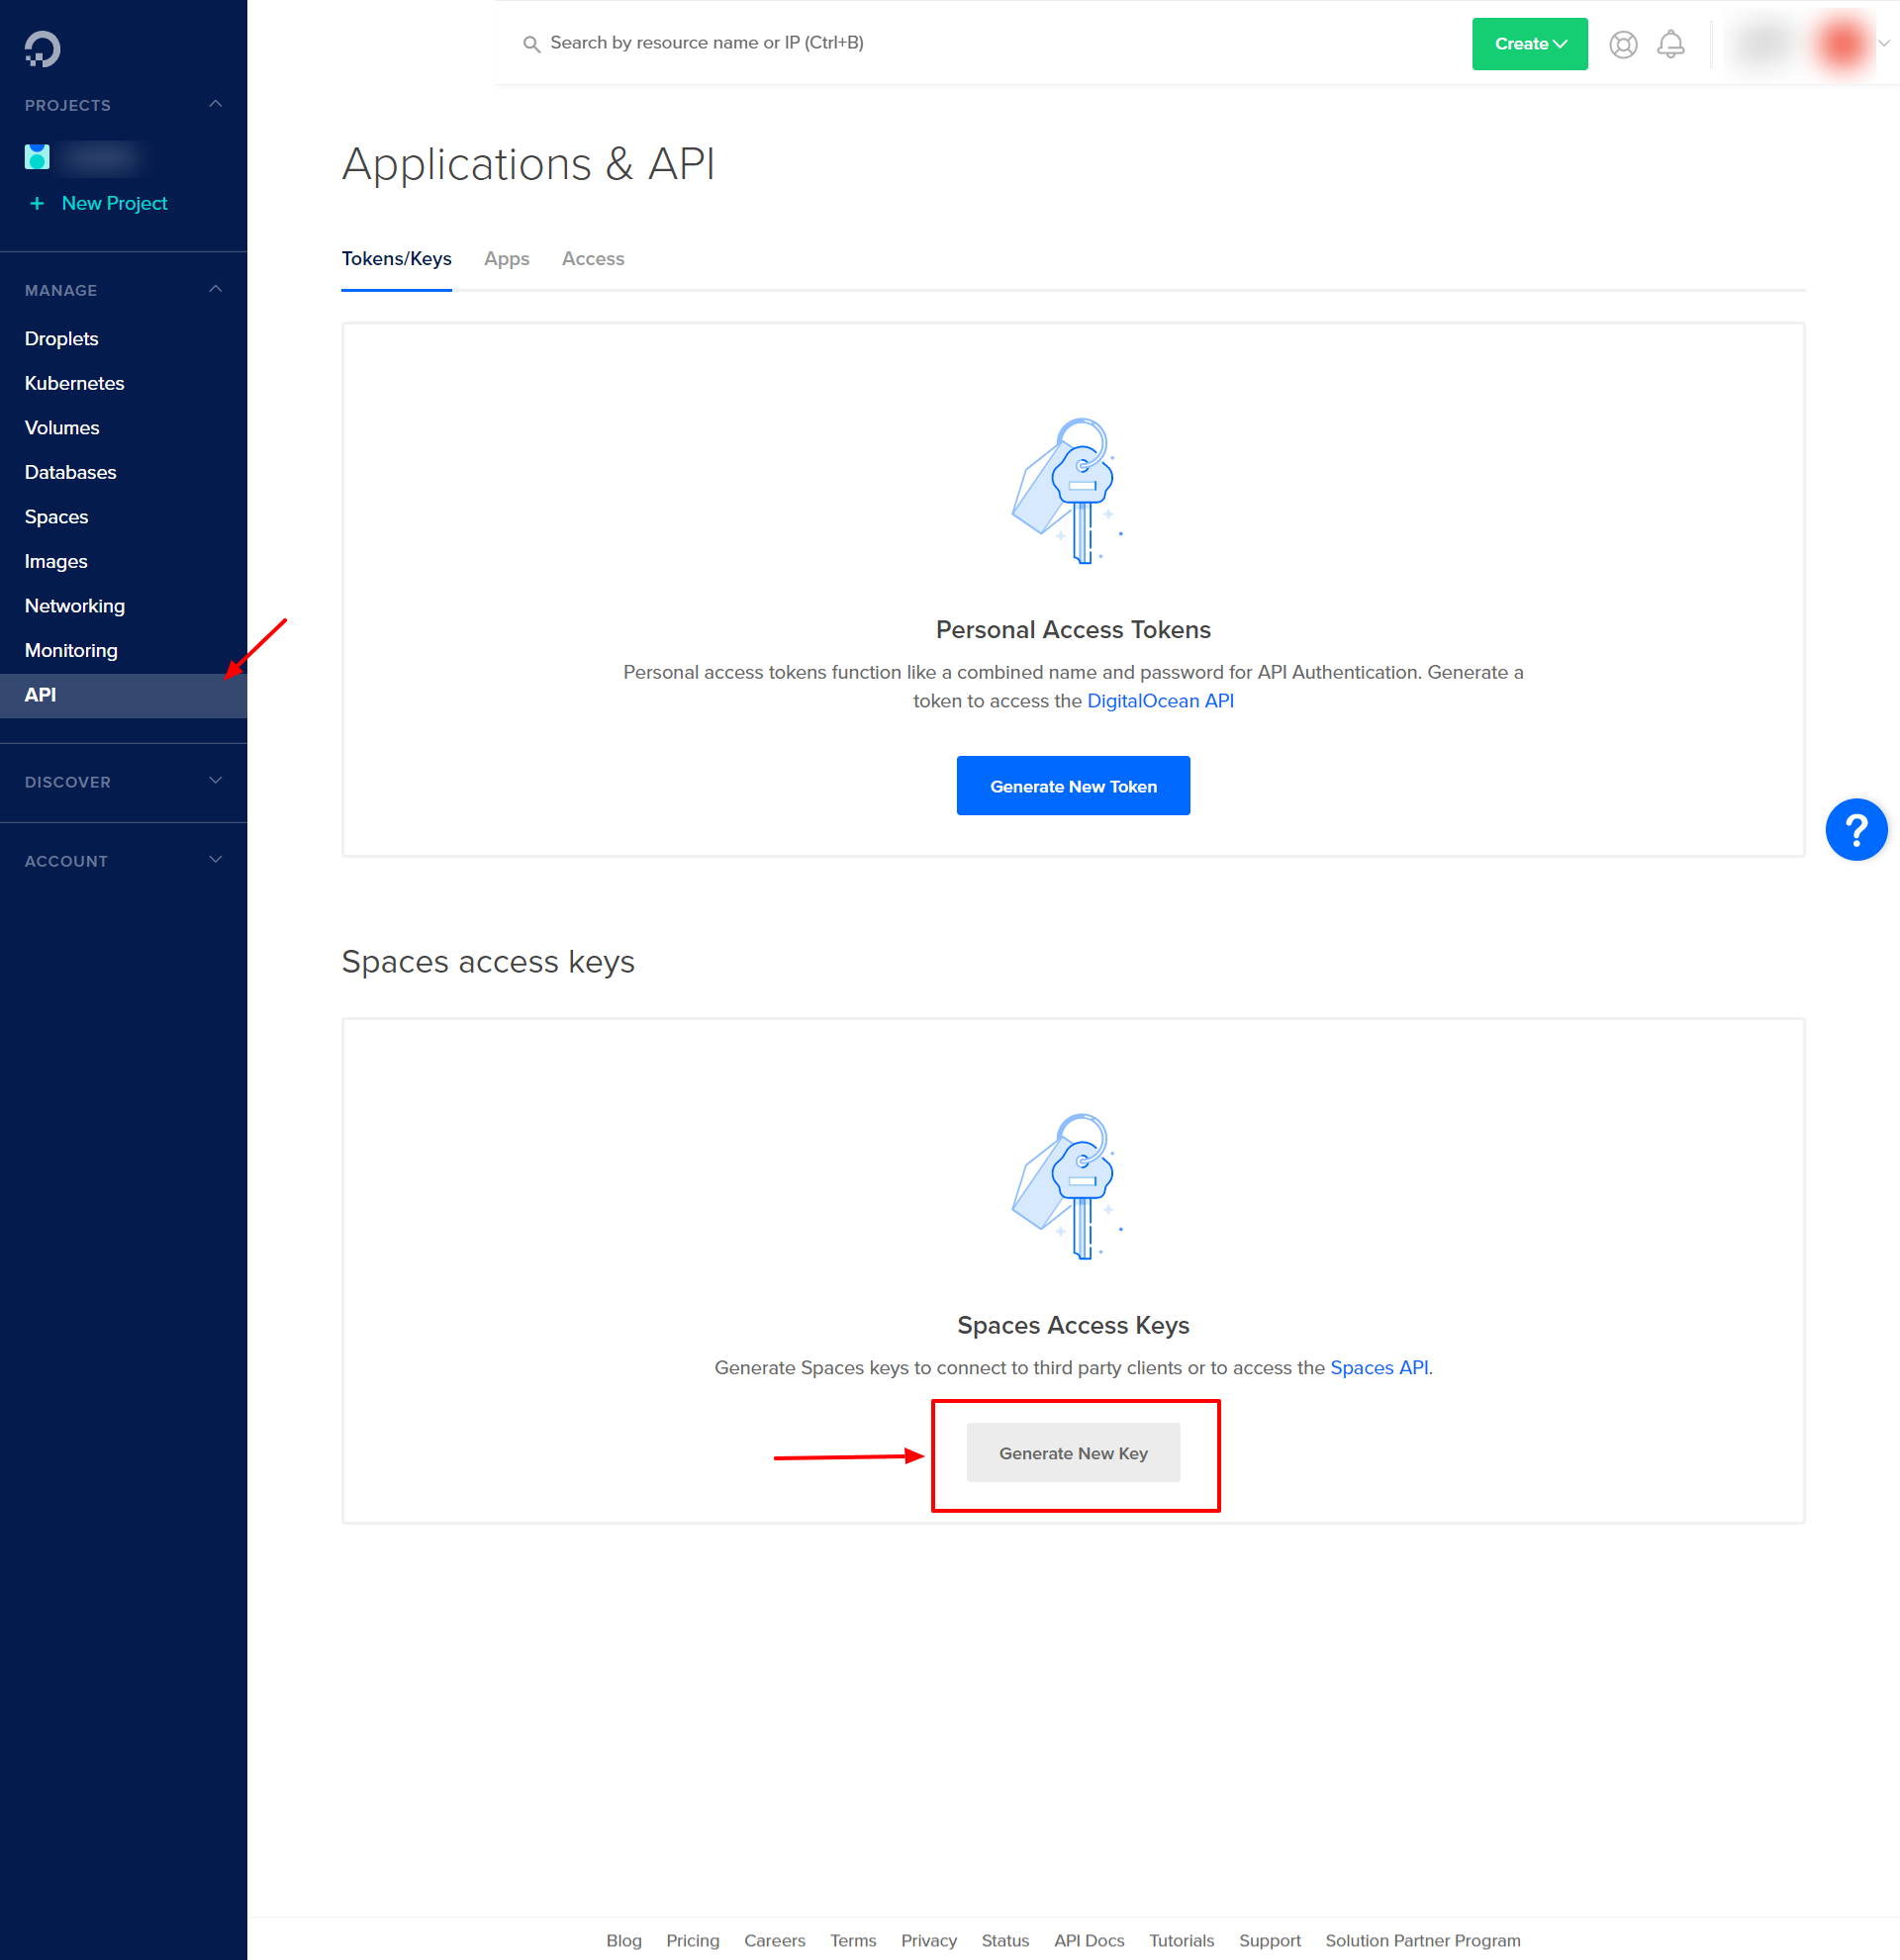
Now click API And Click Generate New Key and copy both Key & Secret
Now goto to your Sngine Admin panel -> Settings -> Upload Settings and paste both Keys
and your space name and location and after click Save
Changes click Test Connection
That's all, Enjoy!
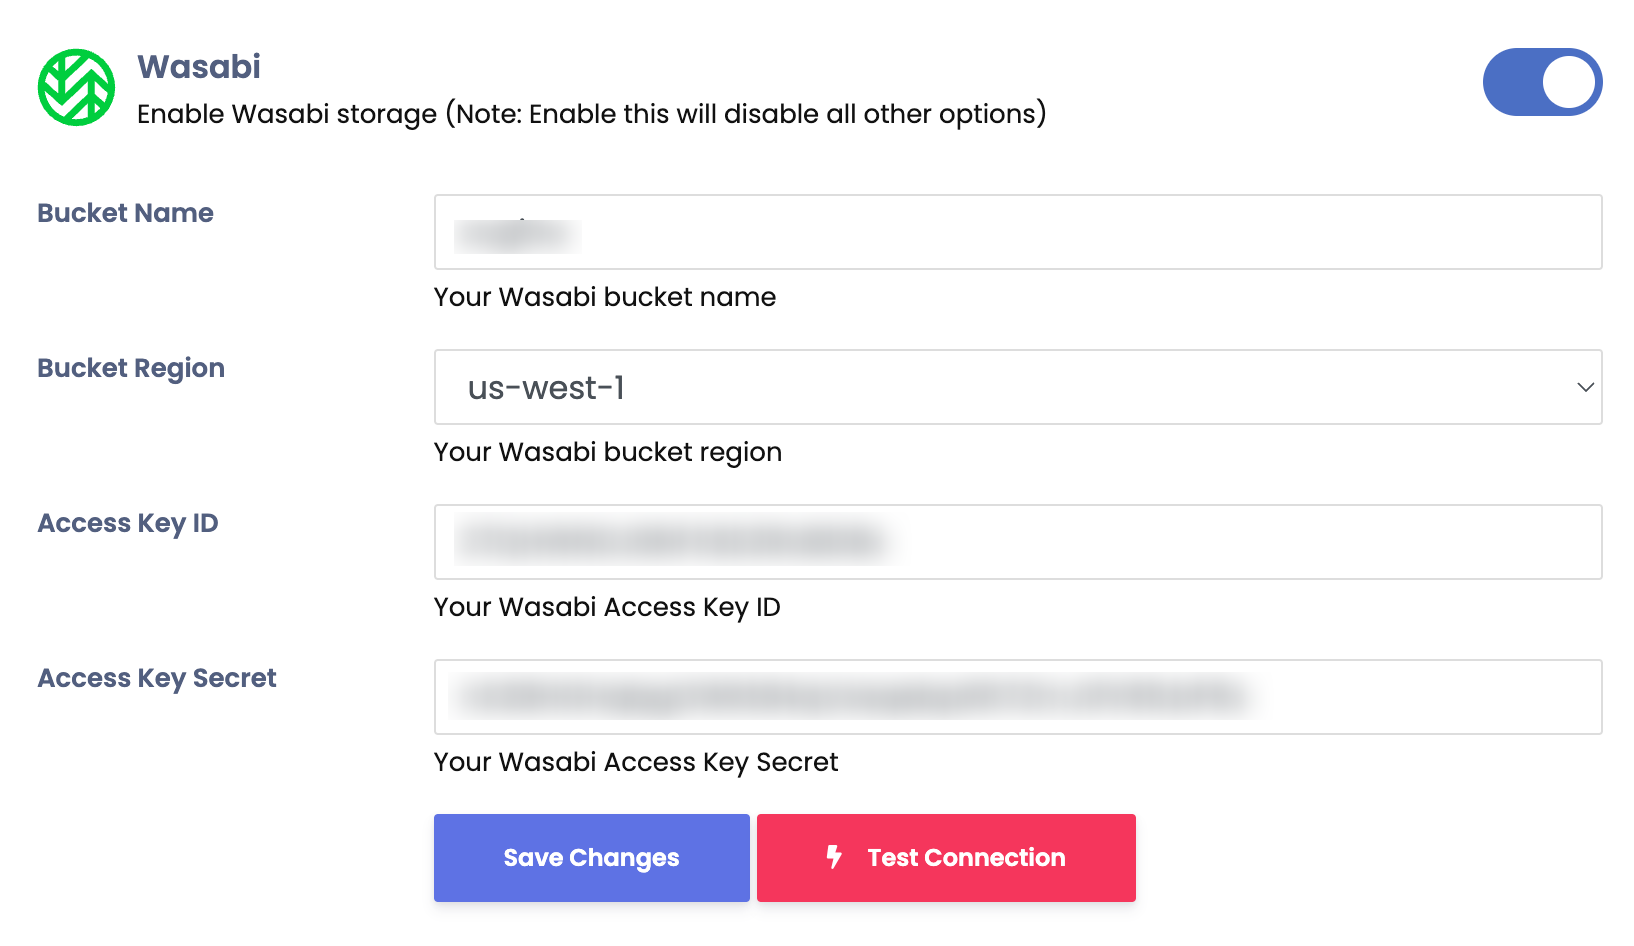
Wasabi
After installing Sngine now you can in easy steps integrate Wasabi with it to let your users use it
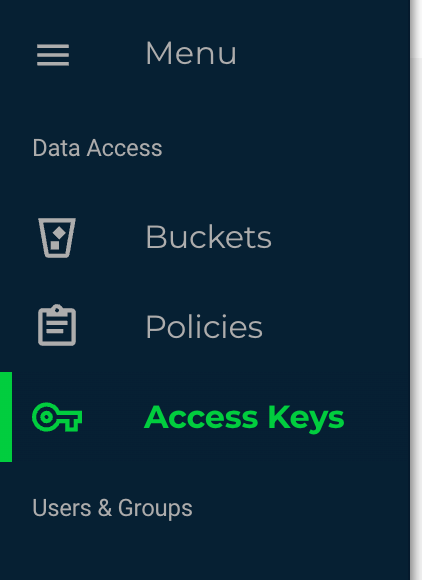
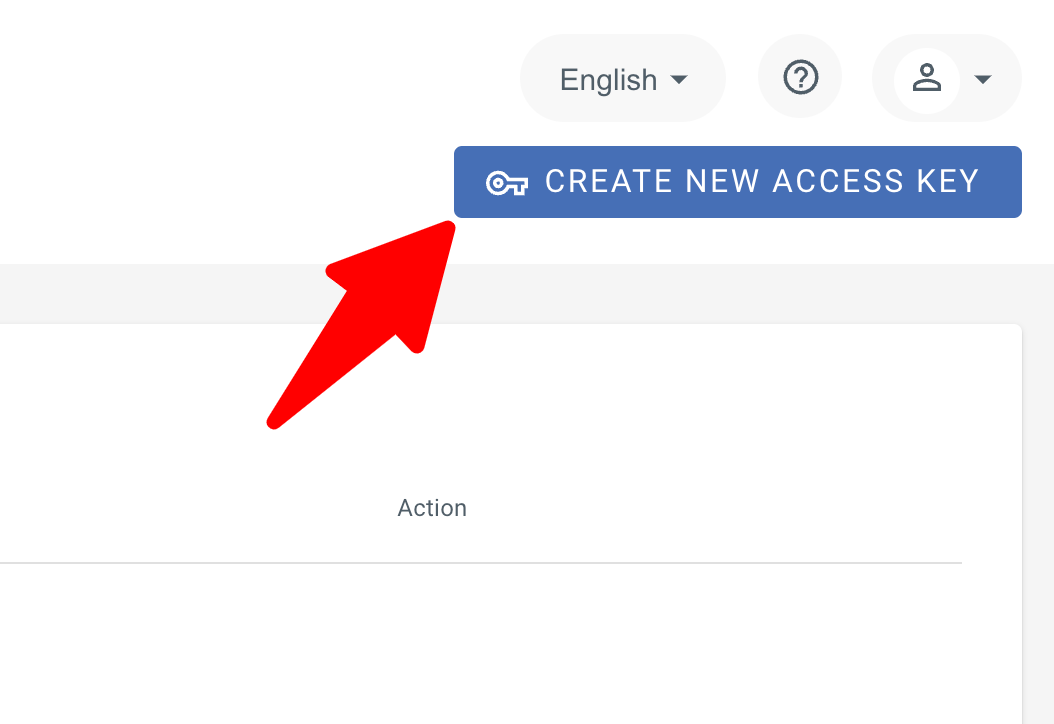
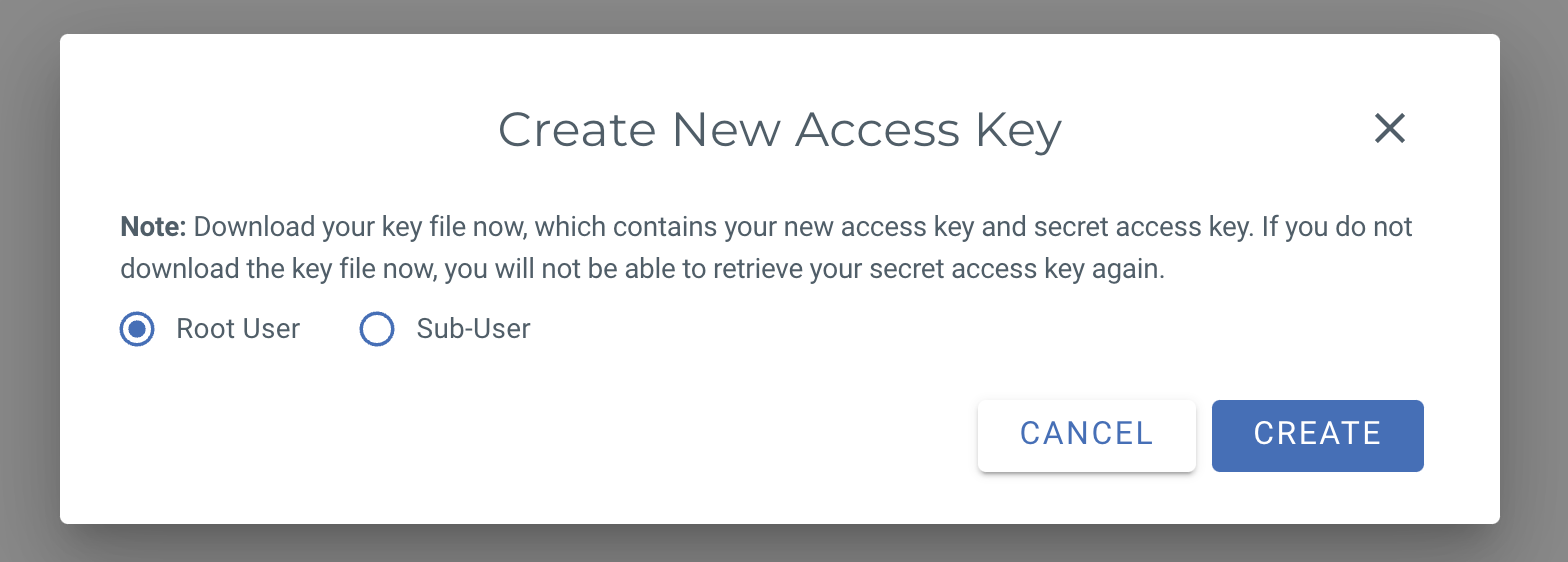
Now go to Acccess Keys and Create a new Access Key
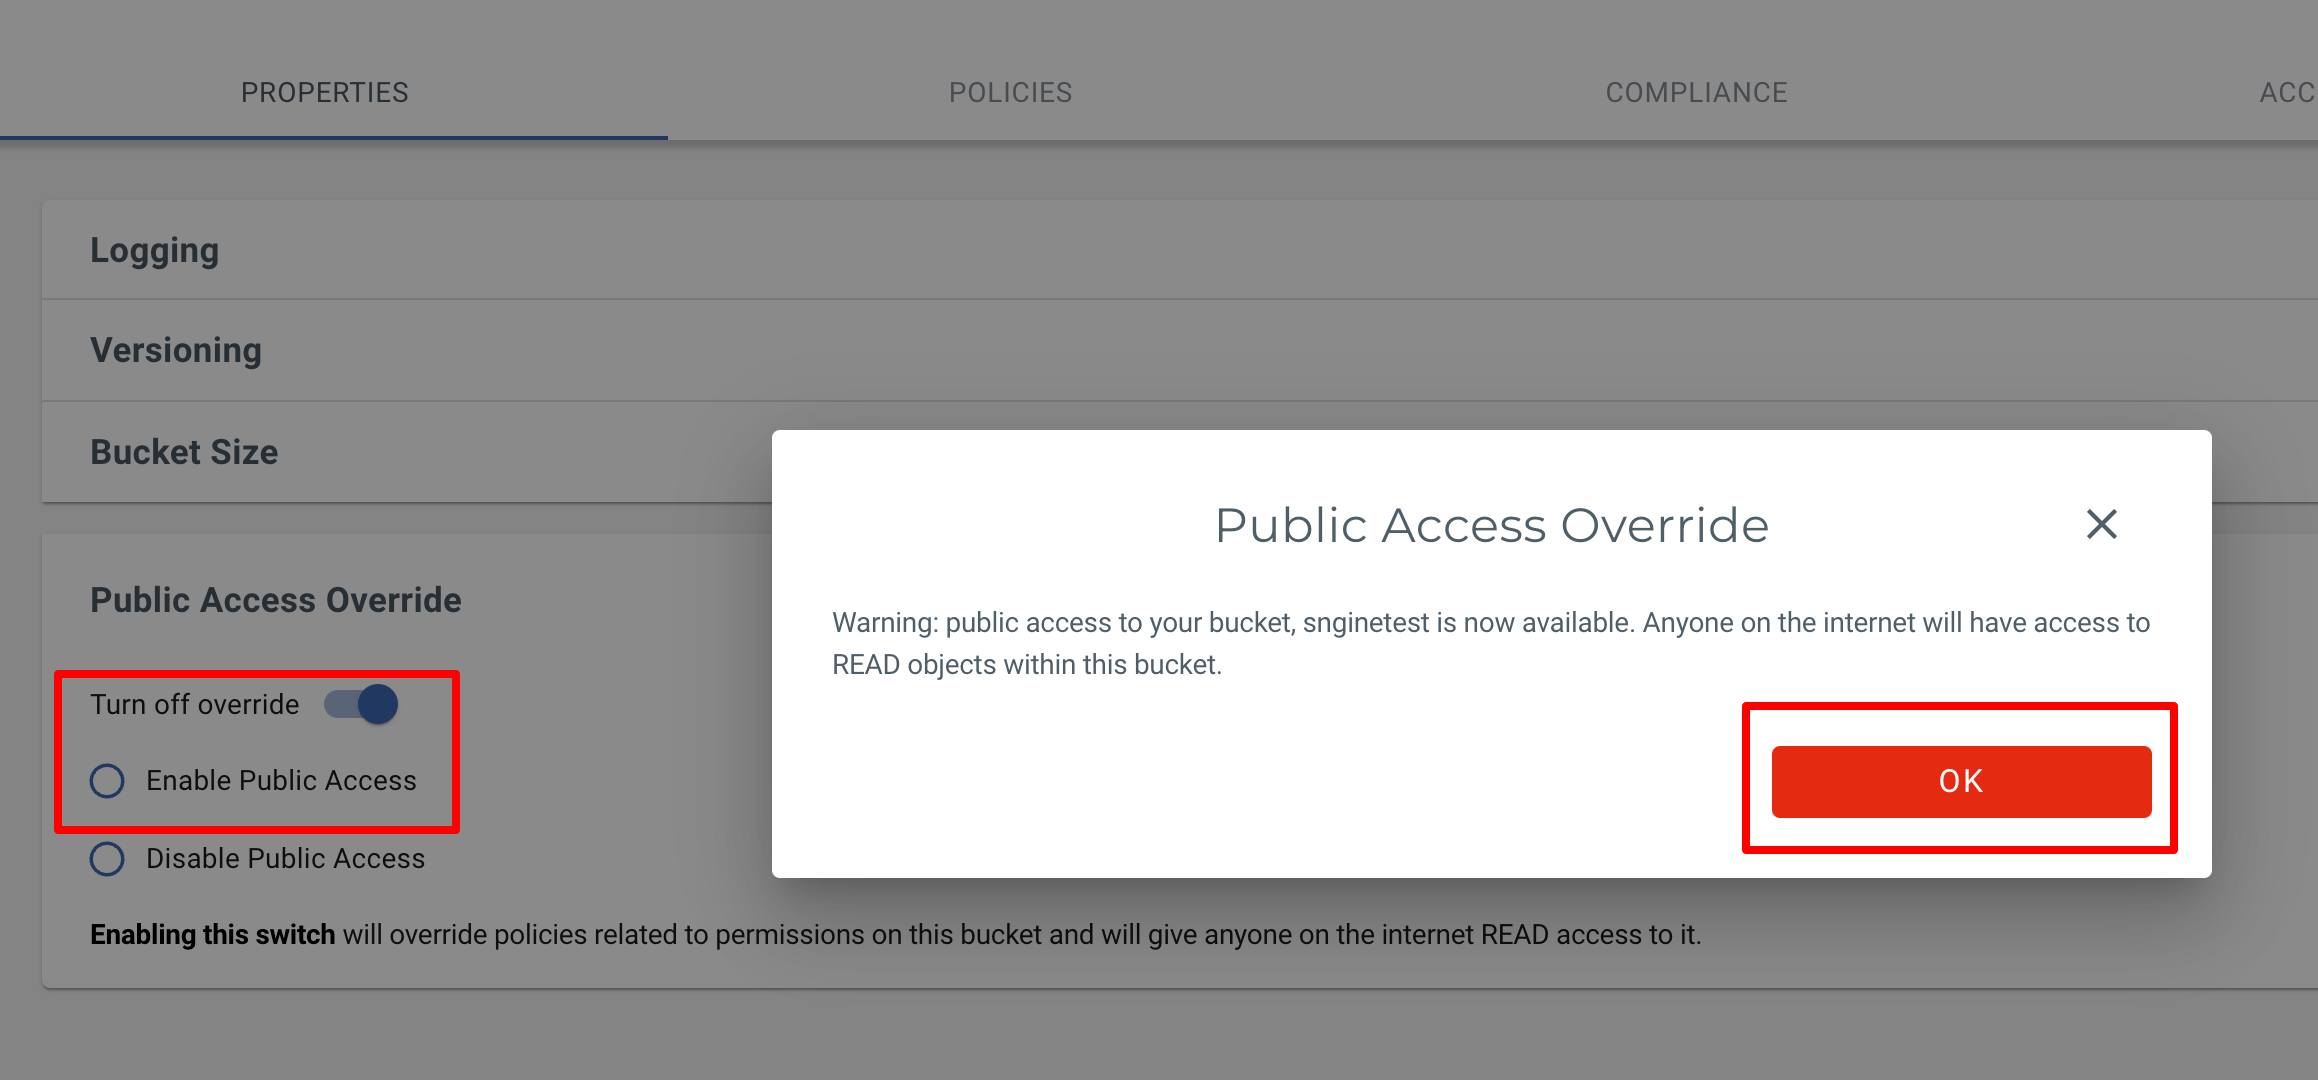
Now you need to make sure that your bucket is public so go to buckets and click settings
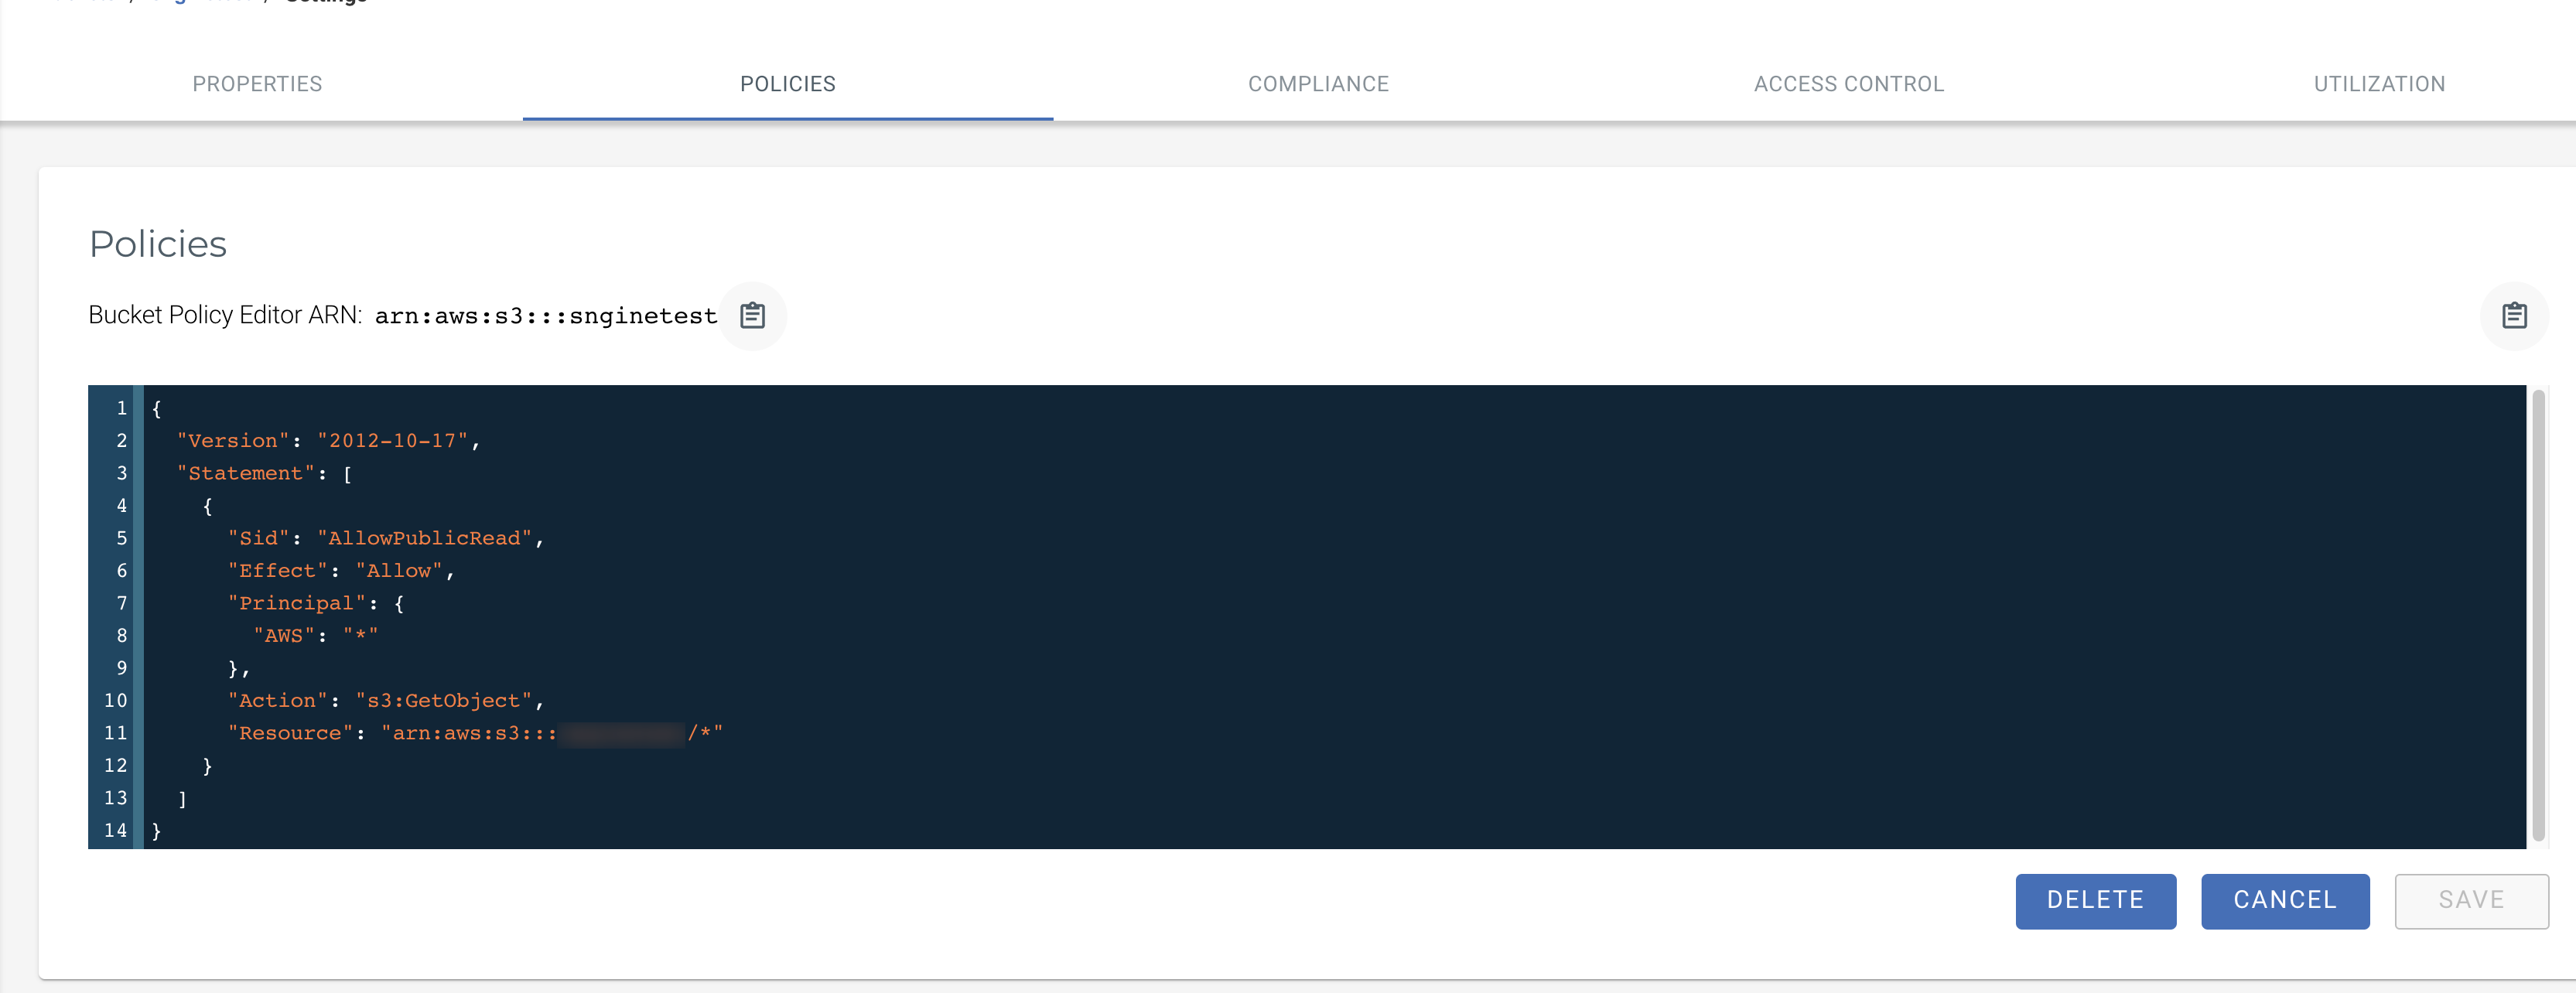
Also make sure you added the Bucket Policy by adding
this JSON code in Bucket Policy, You’ll need to replace “YOUR-BUCKET-NAME” with your full bucket name
Now goto to your Sngine Admin panel -> Settings -> Upload Settings and paste both Keys
and your bucket name and location and after click Save
Changes click Test Connection
That's all, Enjoy!
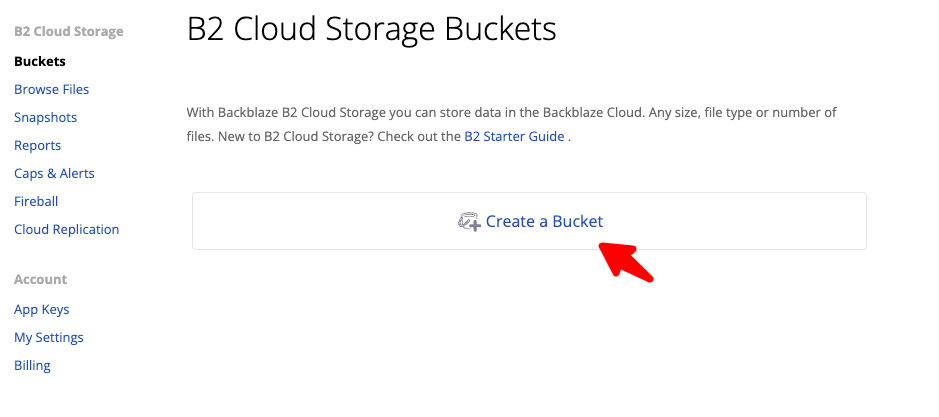
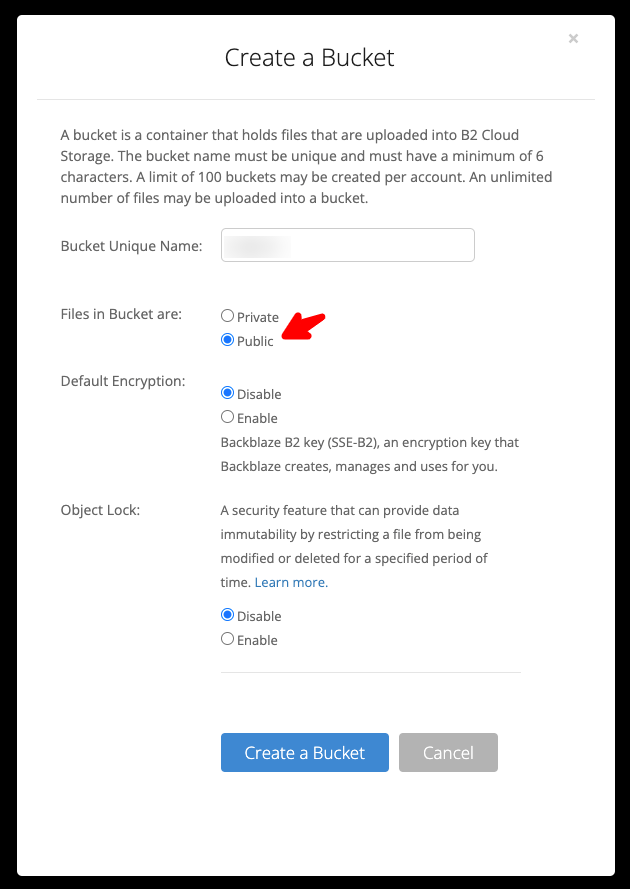
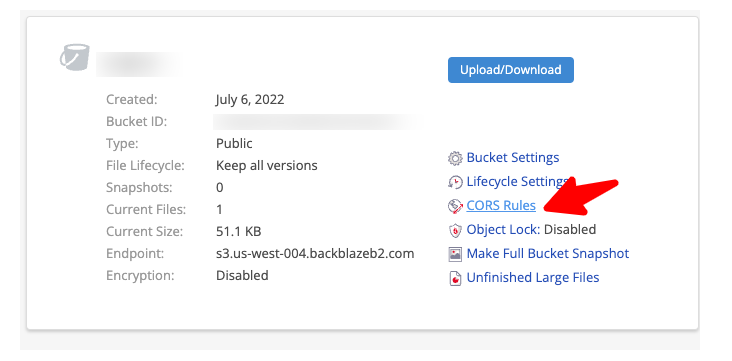
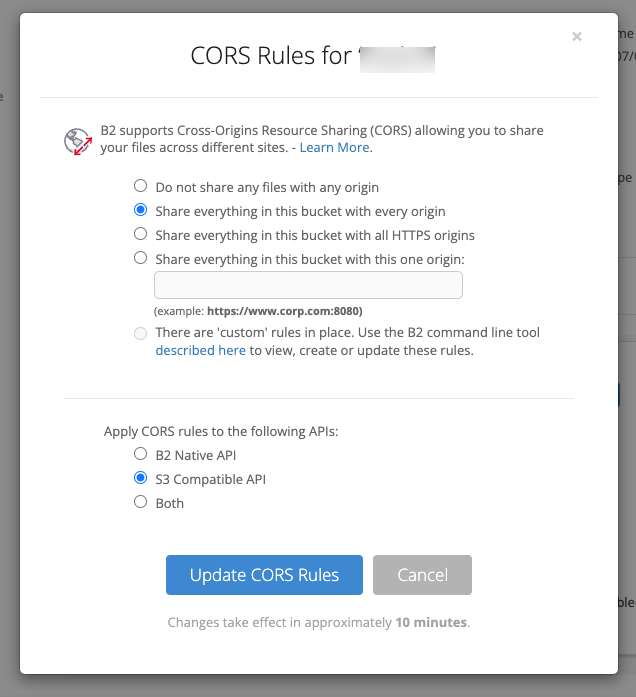
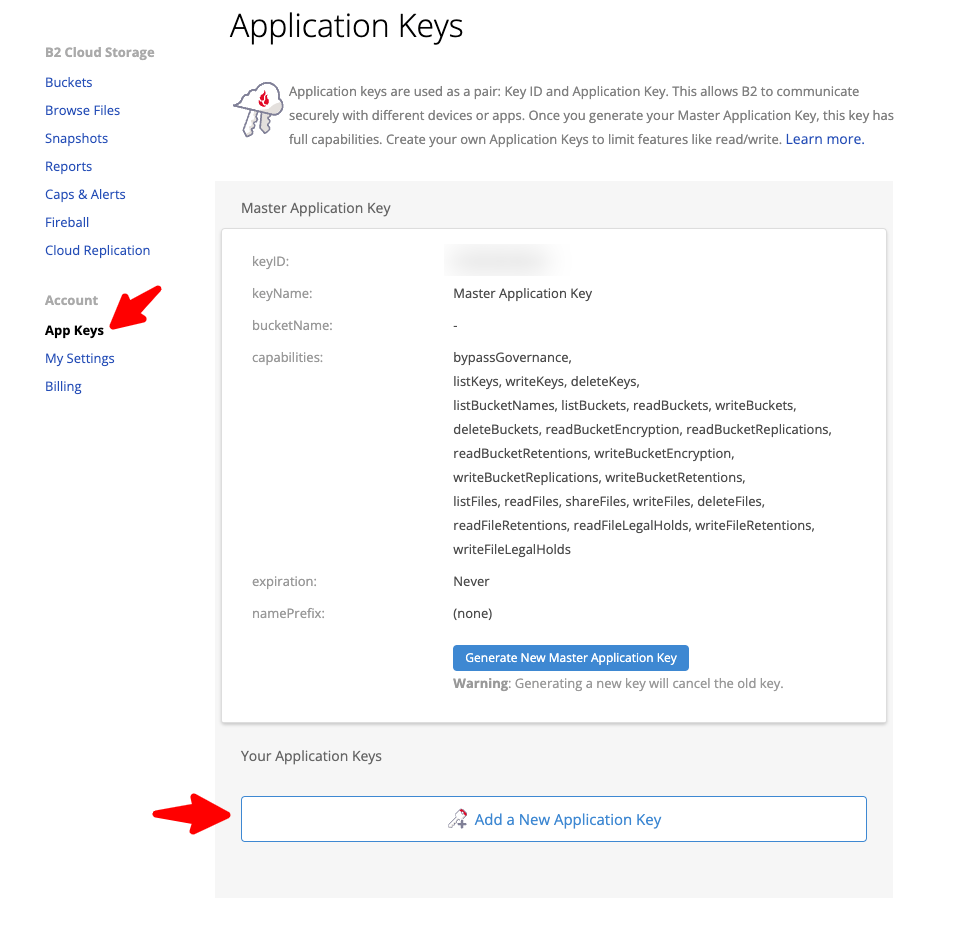
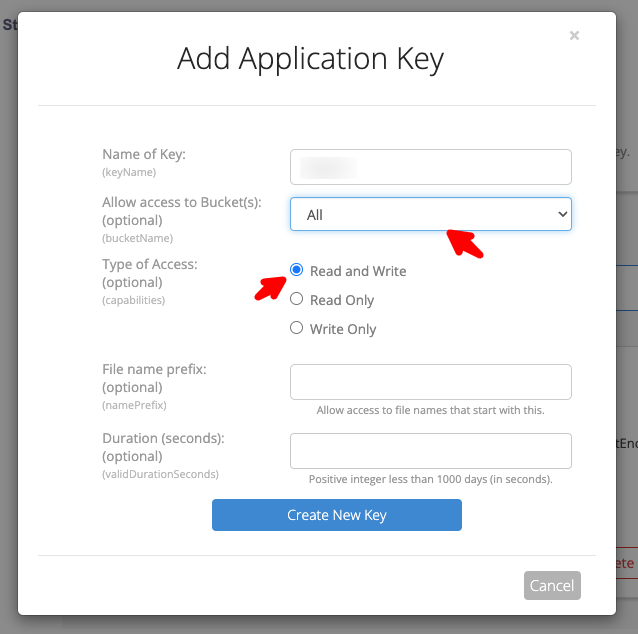
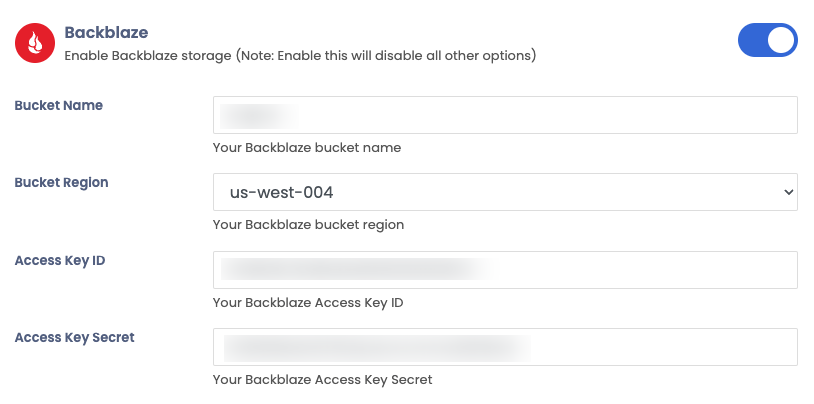
Backblaze
After installing Sngine now you can in easy steps integrate Backblaze with it to let your users use it
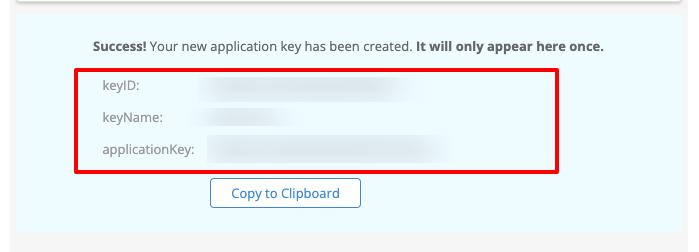
Now goto to your Sngine Admin panel -> Settings -> Upload Settings and paste both Keys
and your bucket name and location and after click Save
Changes click Test Connection
That's all, Enjoy!
Yandex Cloud
After installing Sngine now you can in easy steps integrate Yandex Cloud with it to let your users use it
Now goto to your Sngine Admin panel -> Settings -> Upload Settings and paste both Keys
and your bucket name and location and after click Save
Changes click Test Connection
That's all, Enjoy!
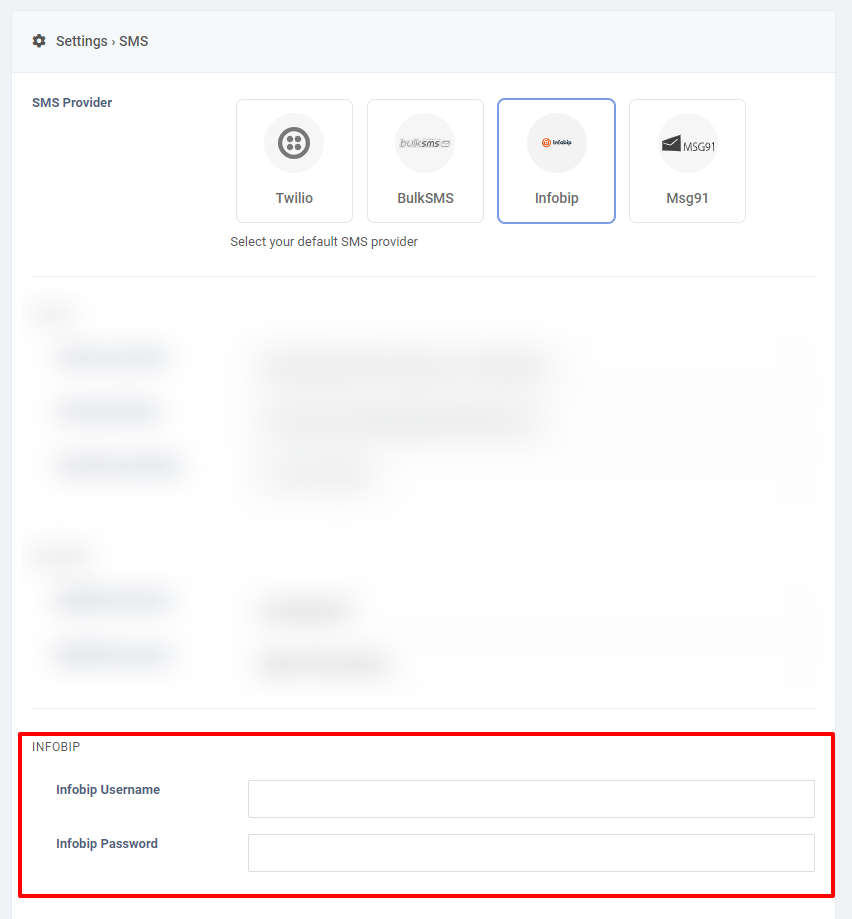
SMS
Learn how to integrate Sngine with the different SMS providers supported by Sngine like
Twilio SMS, BulkSMS and Infobip.
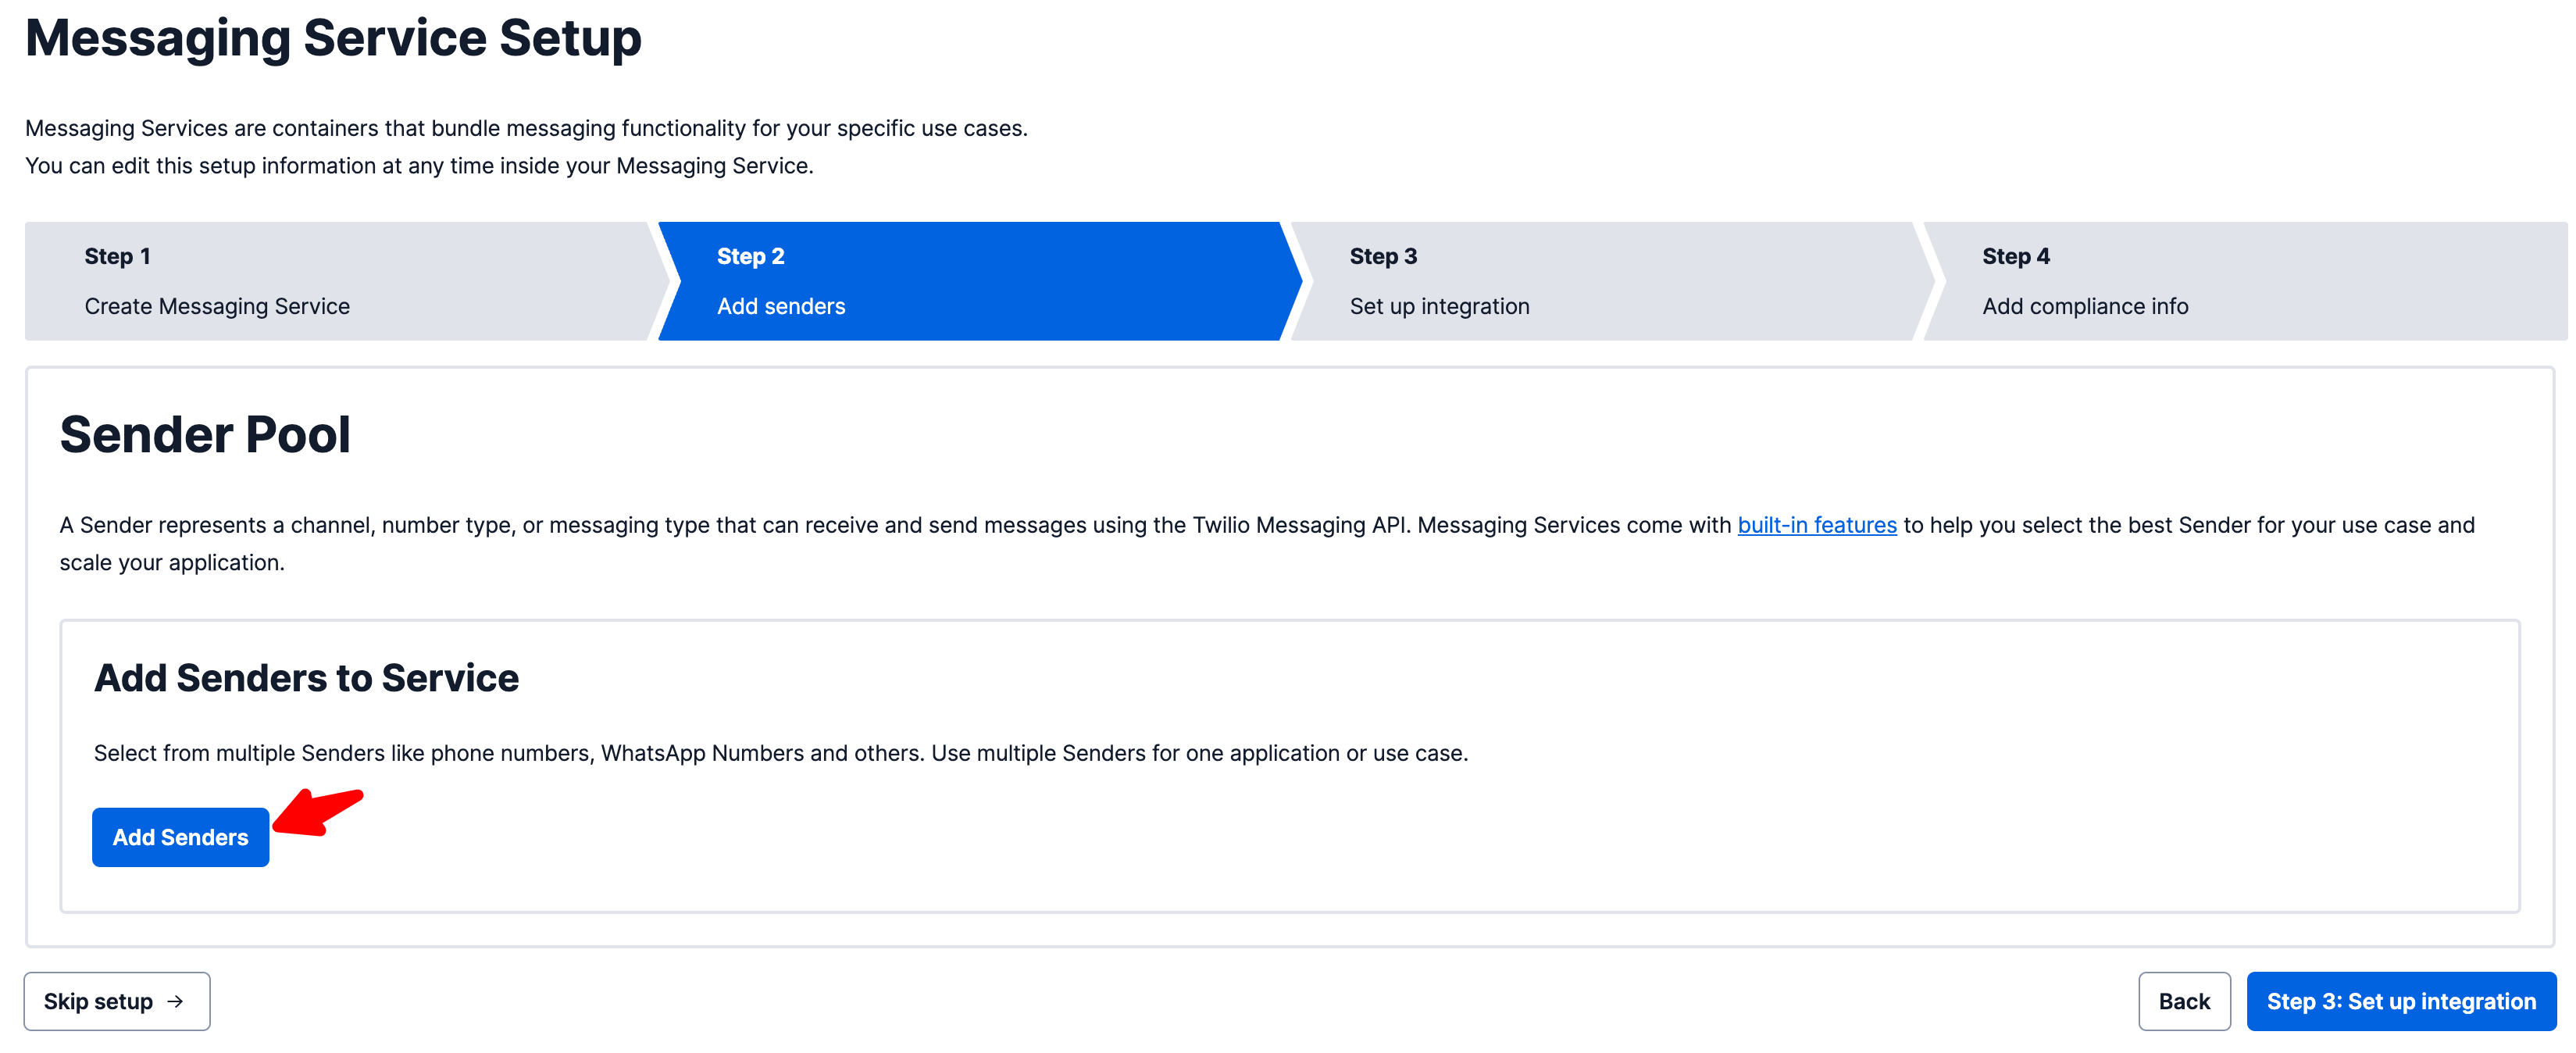
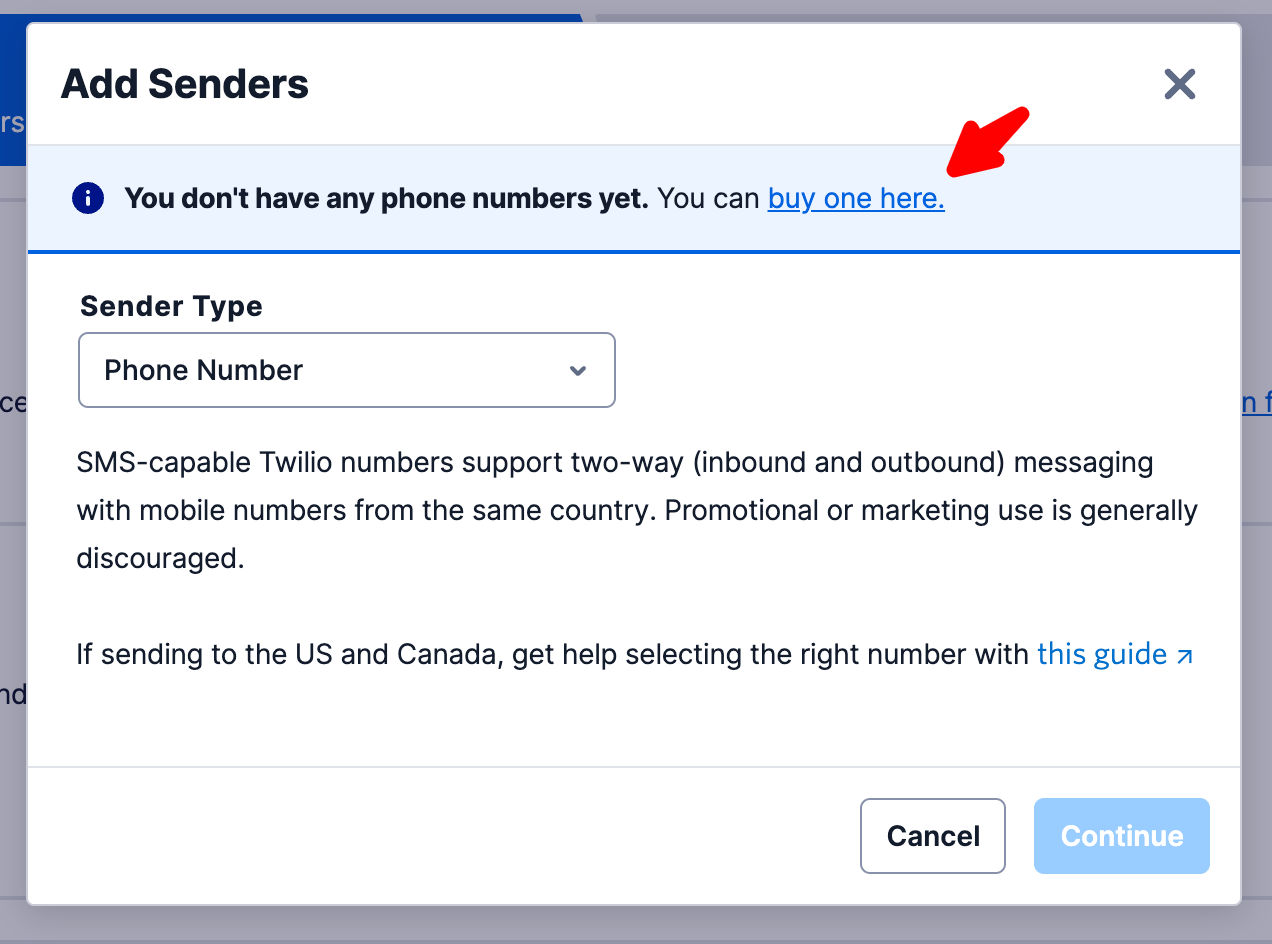
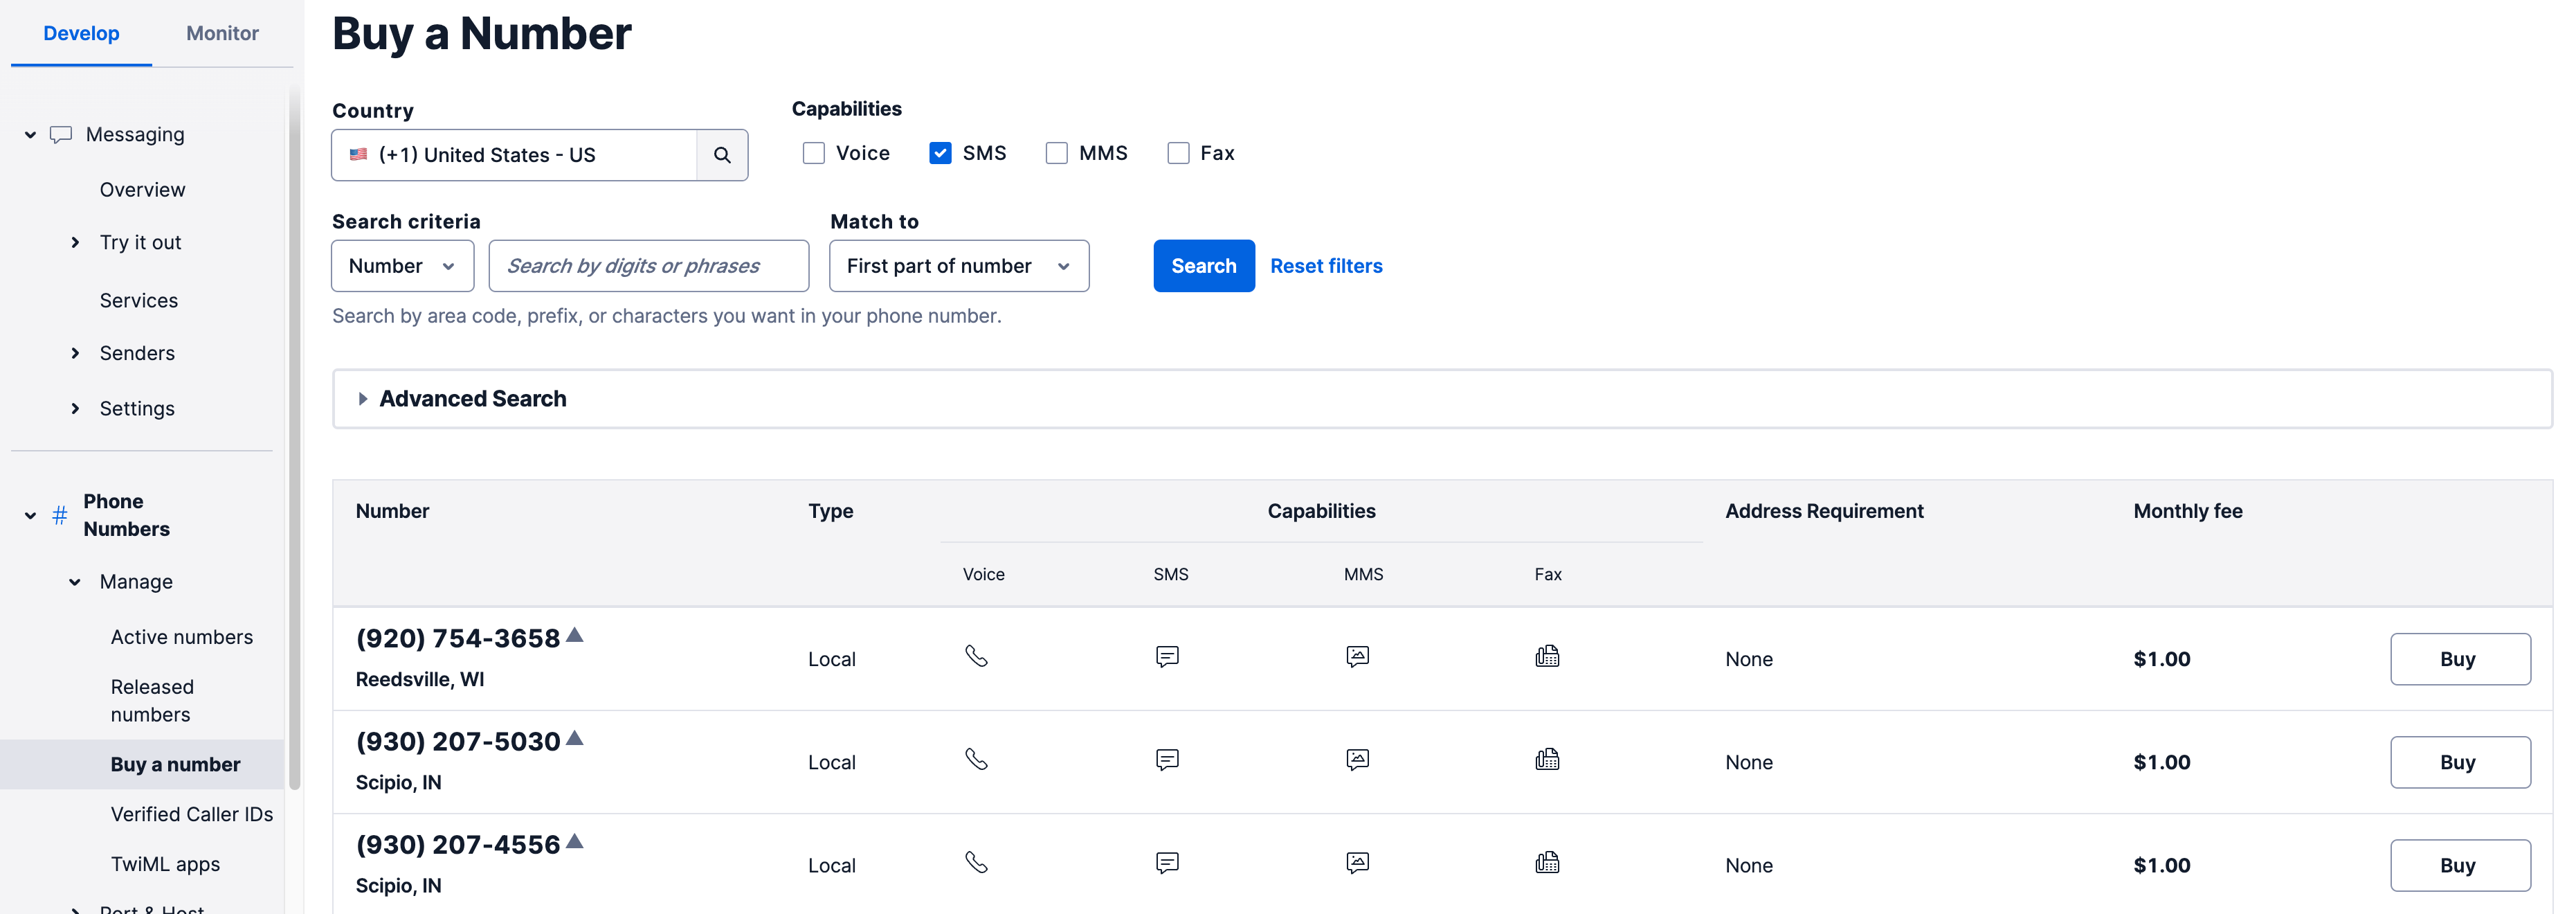
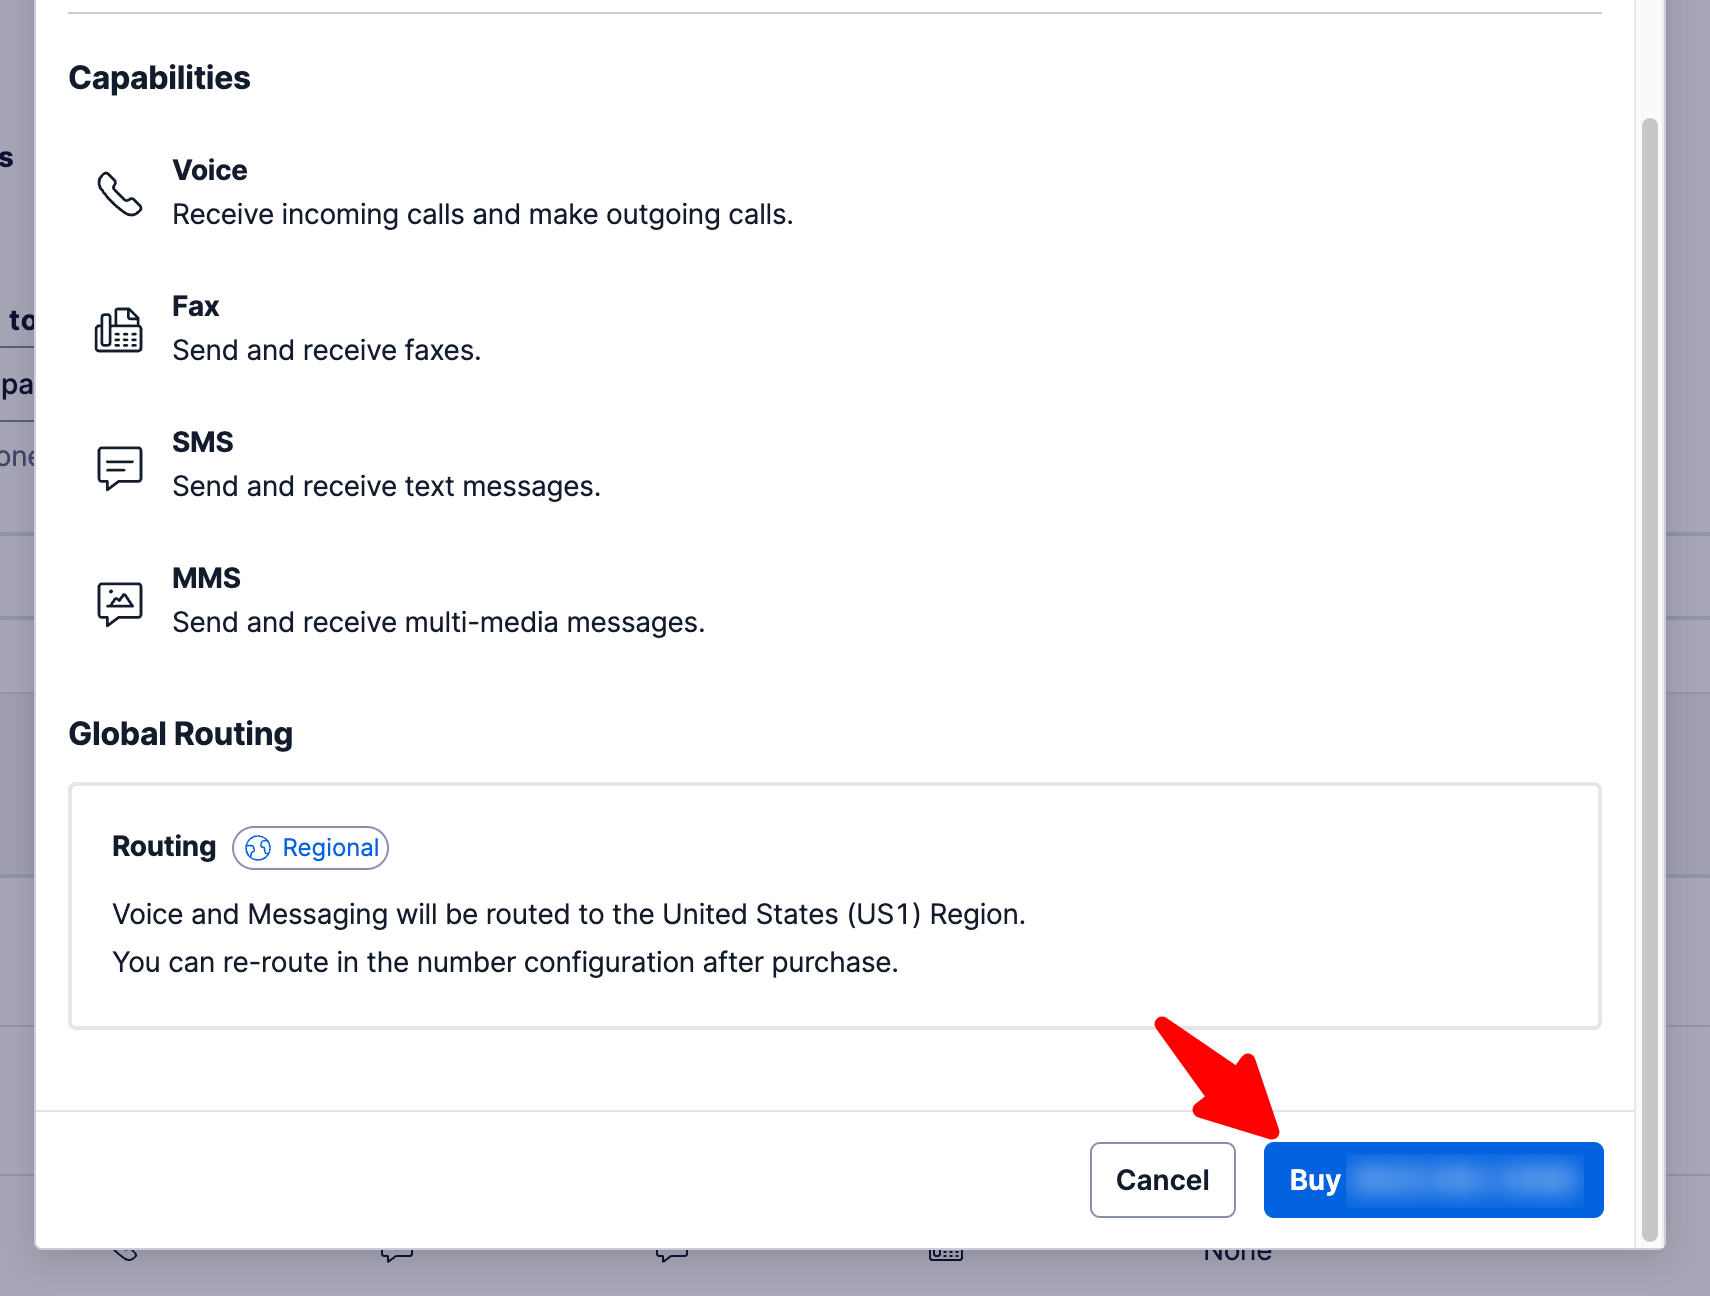
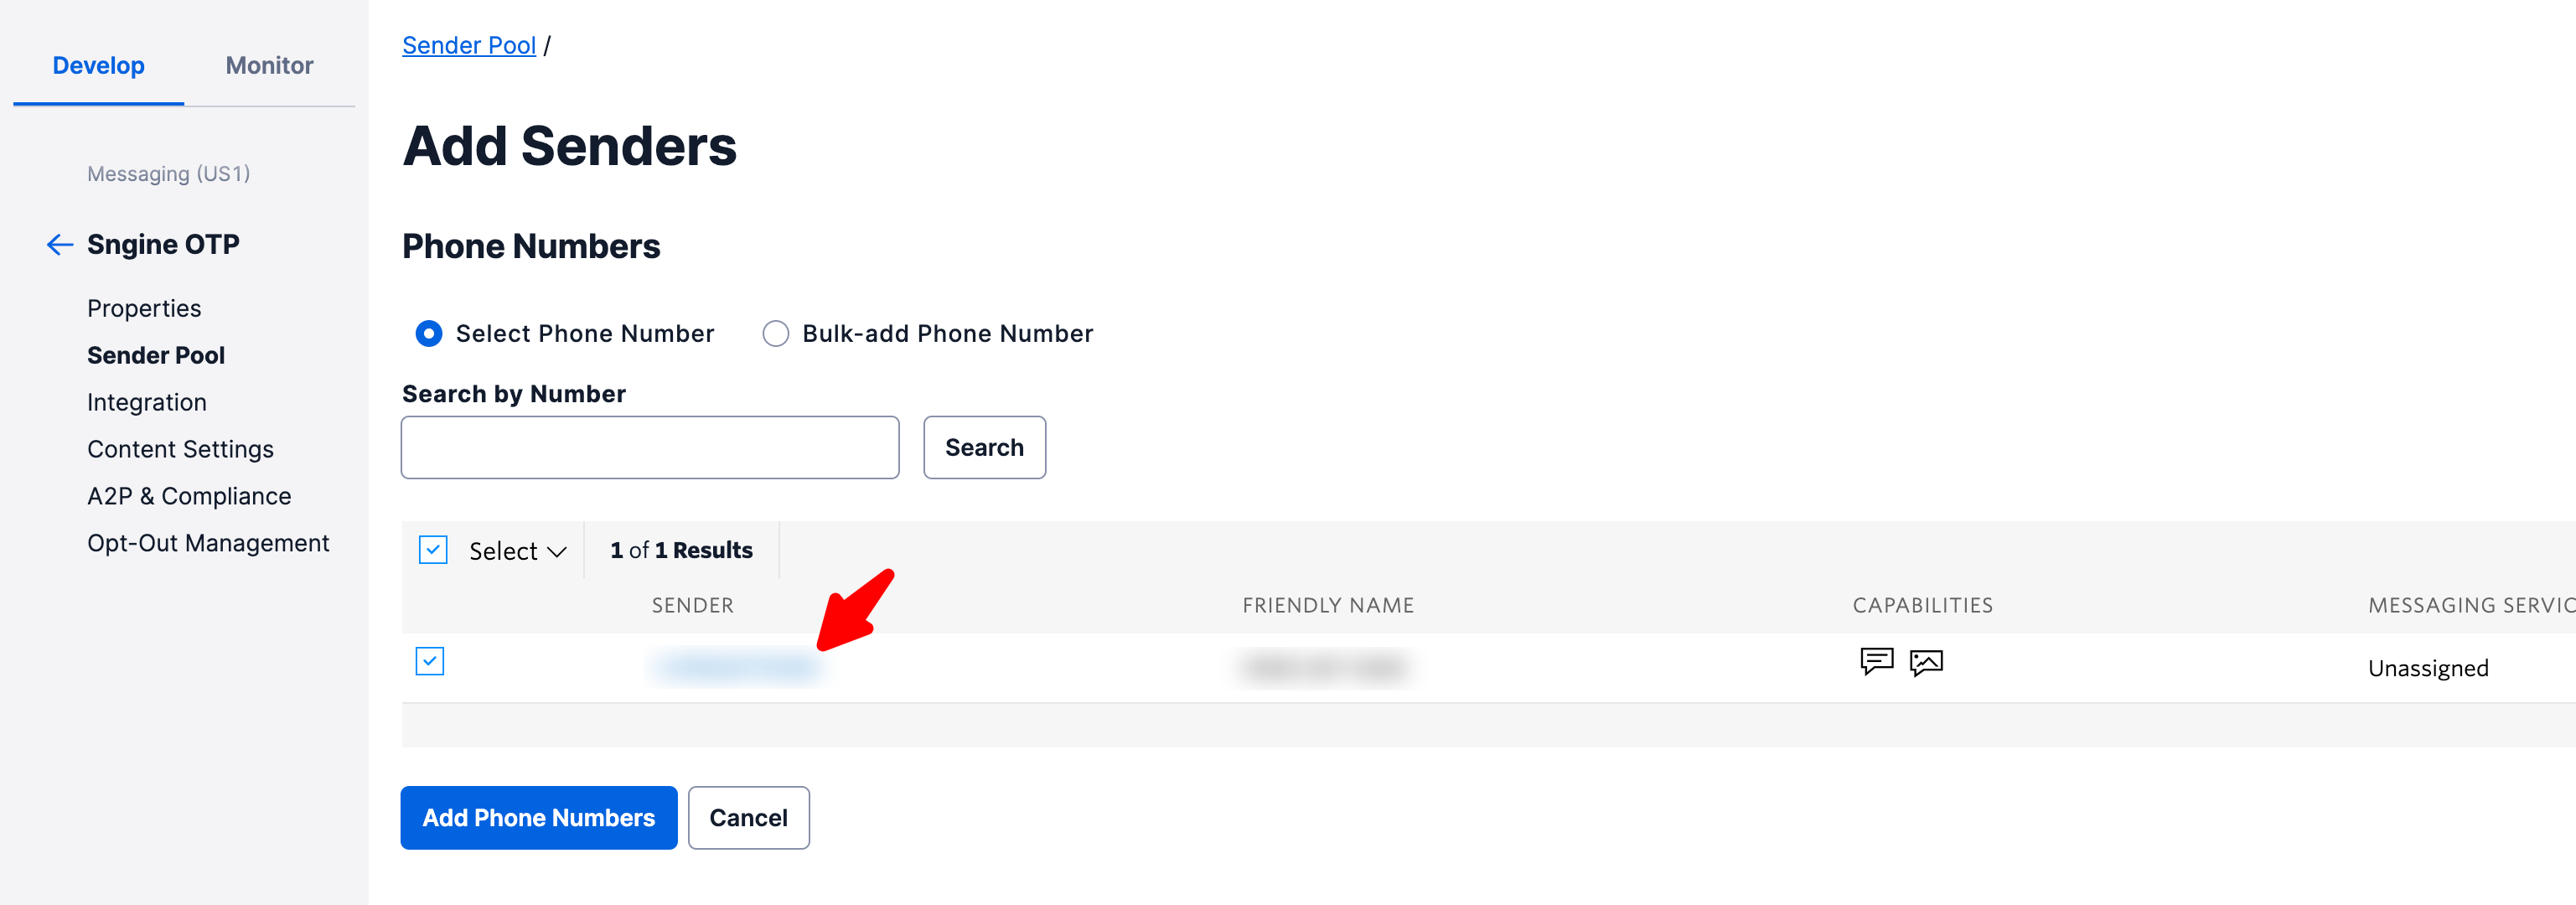
Twilio SMS
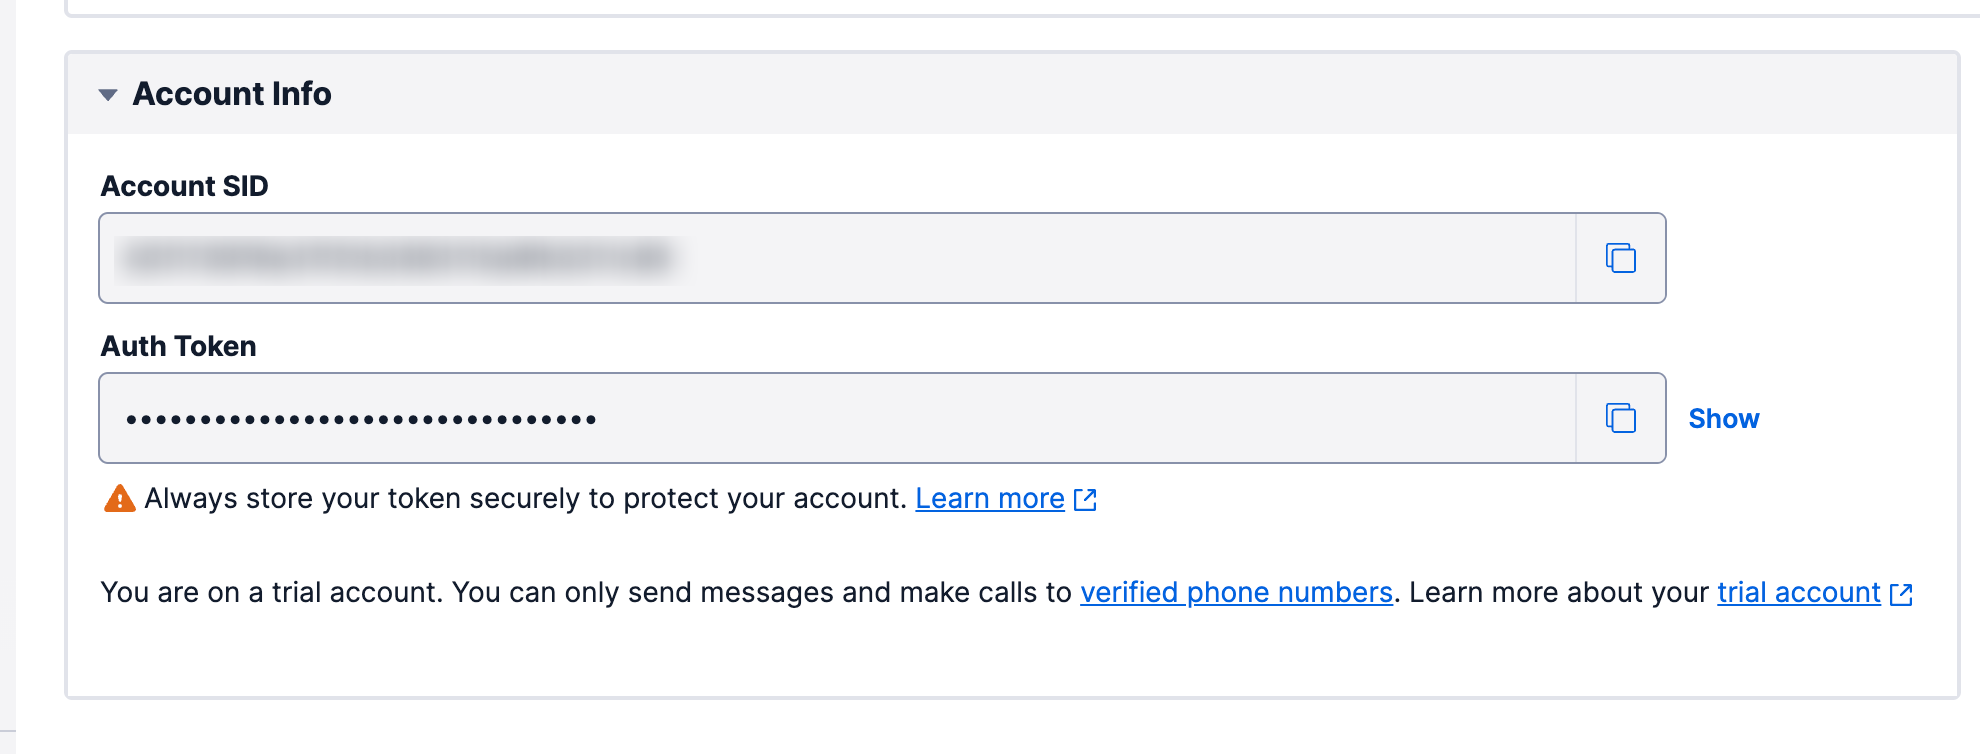
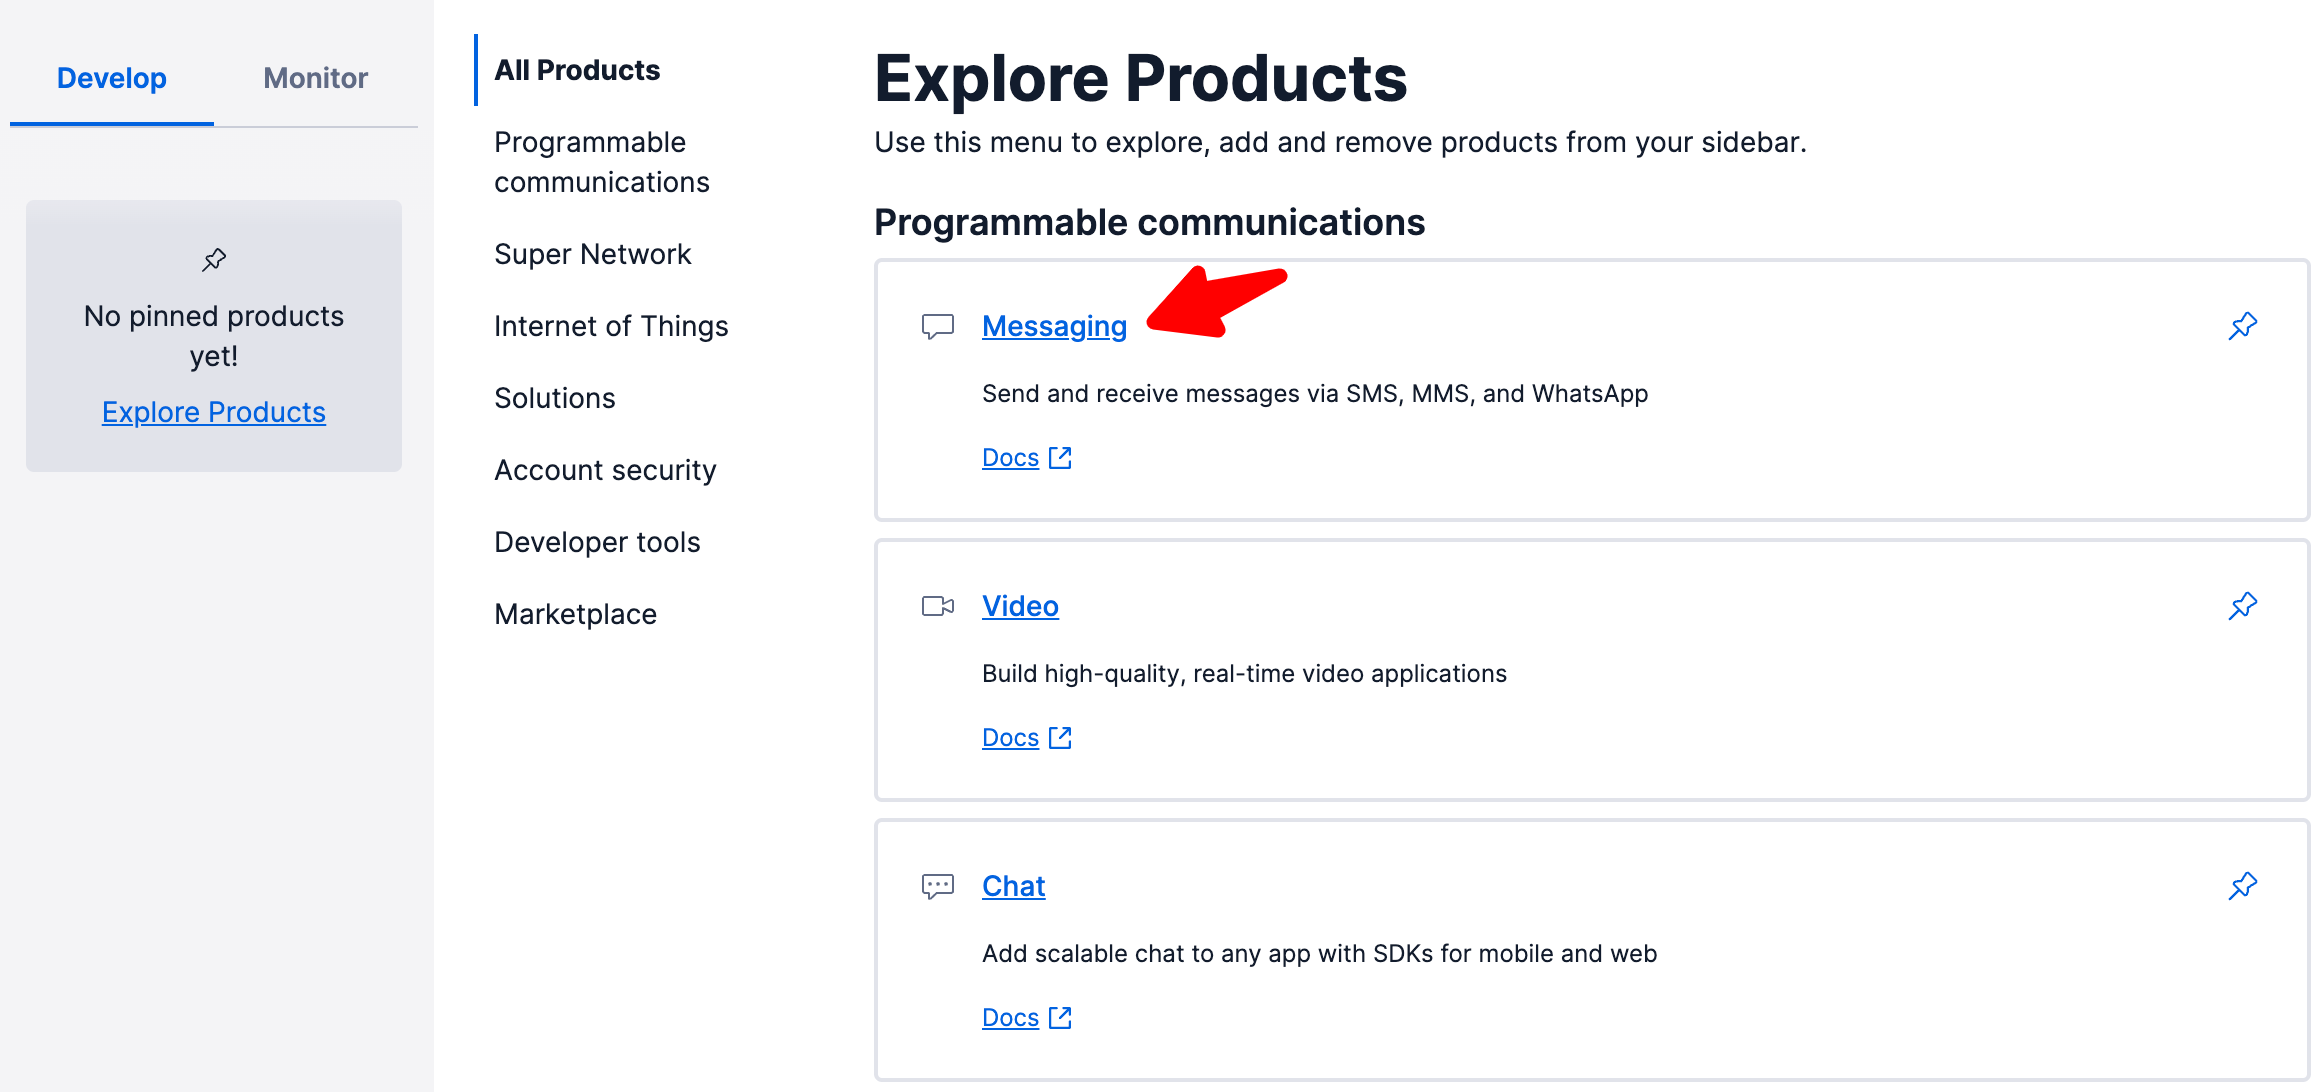
After installing Sngine now you can in easy steps integrate Twilio
SMS with it to use SMS it for account activation and for the two-way verification
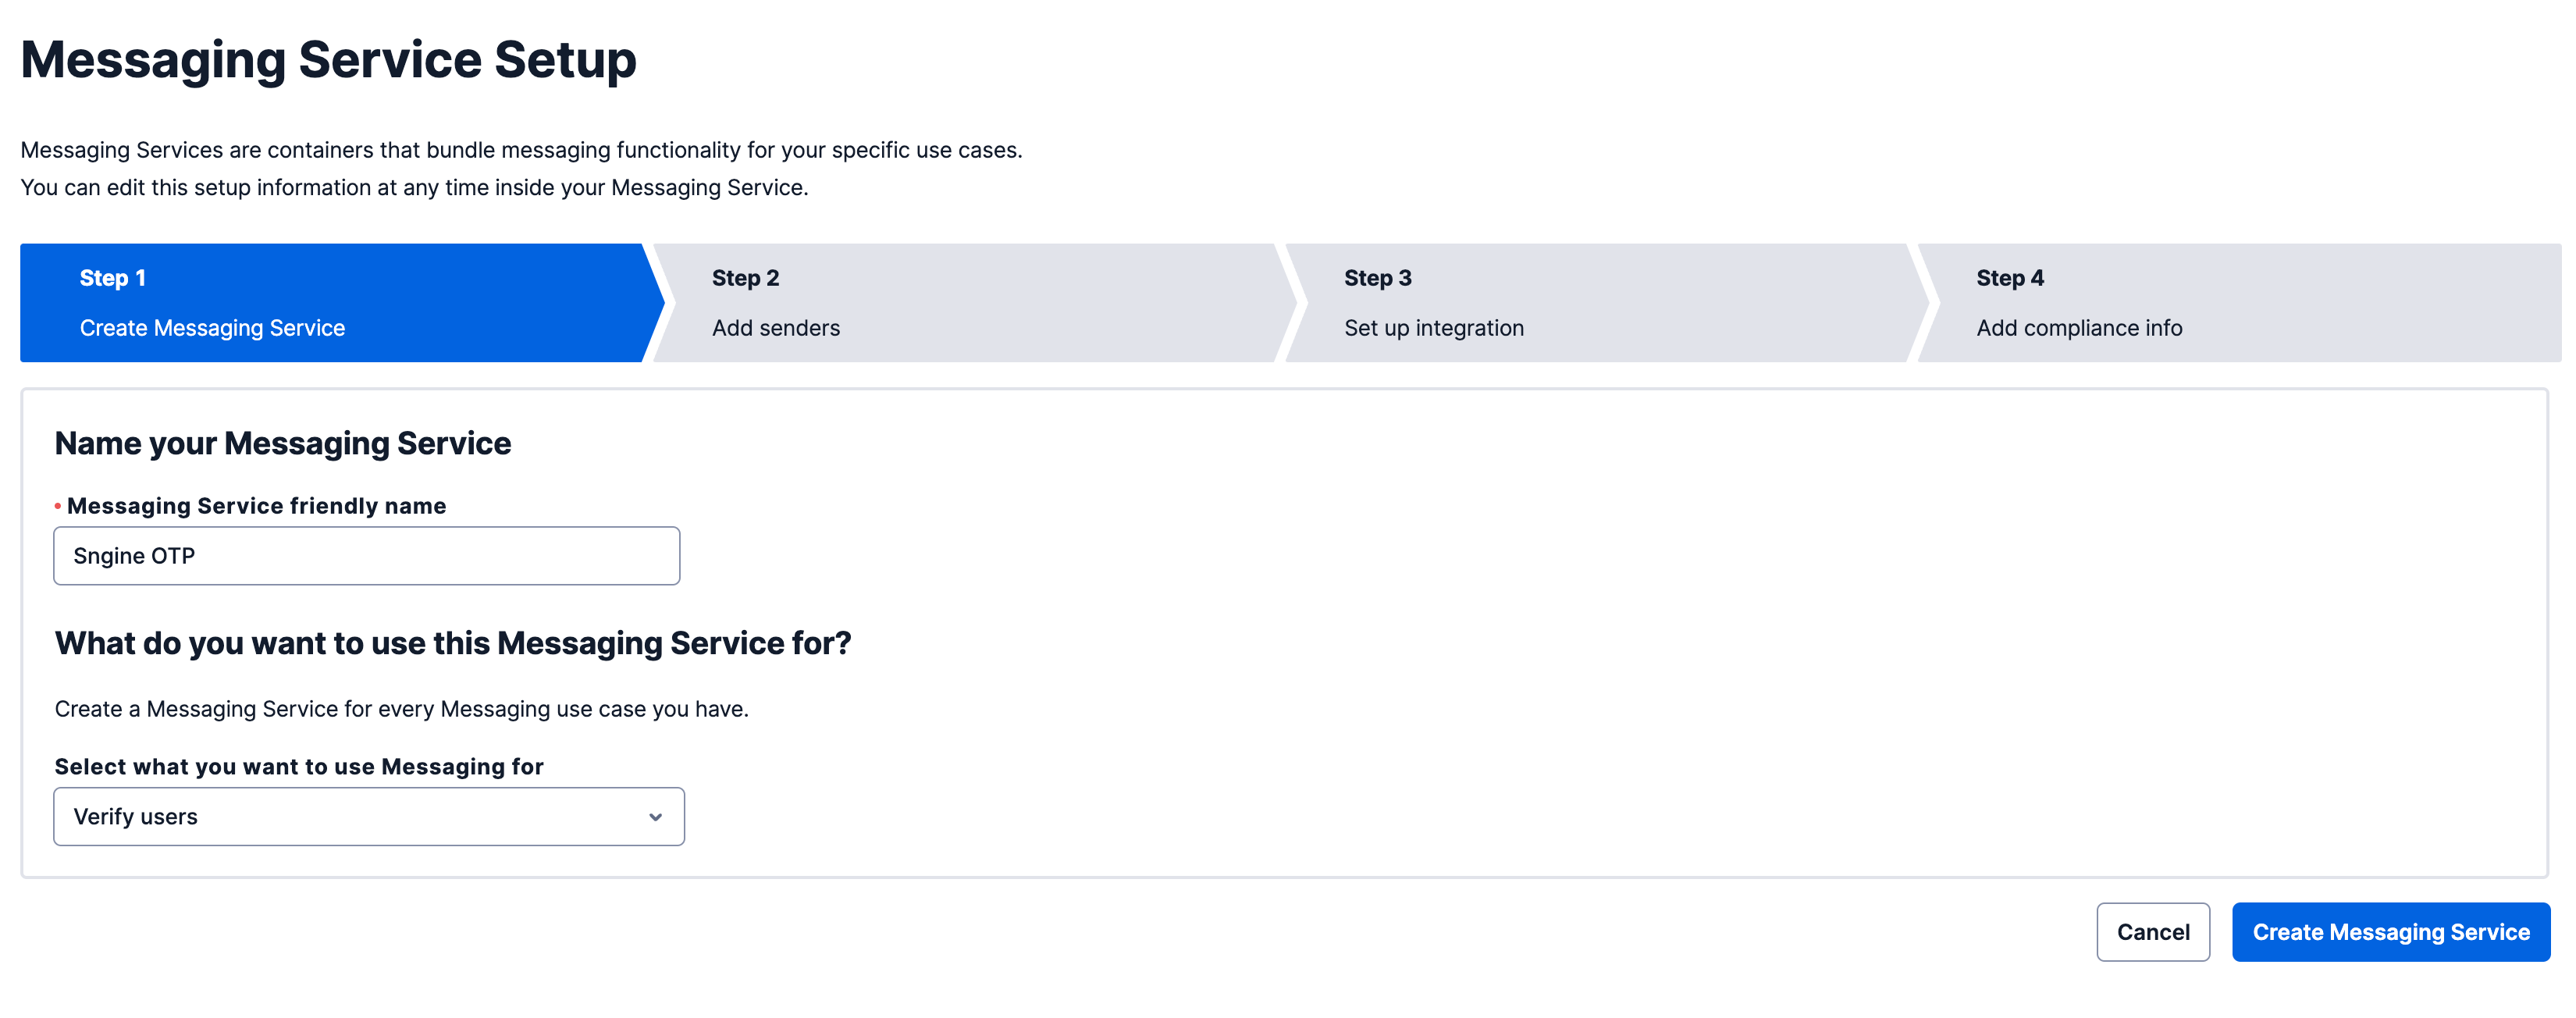
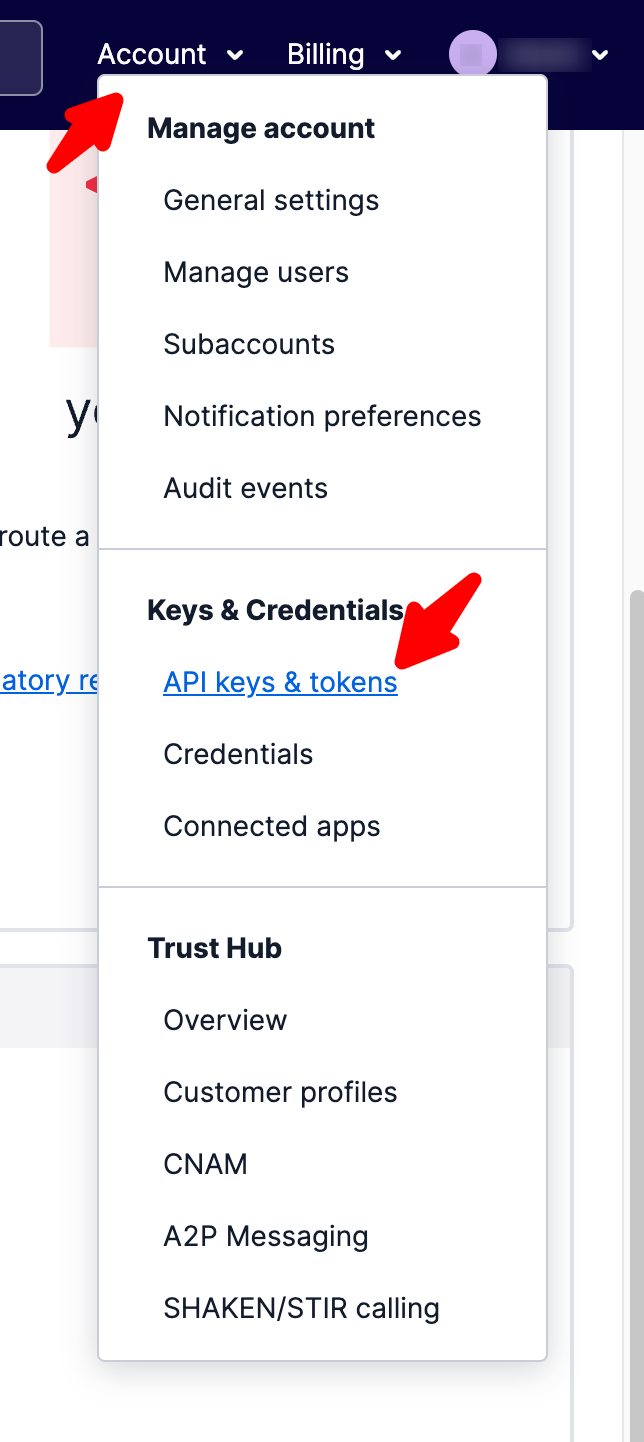
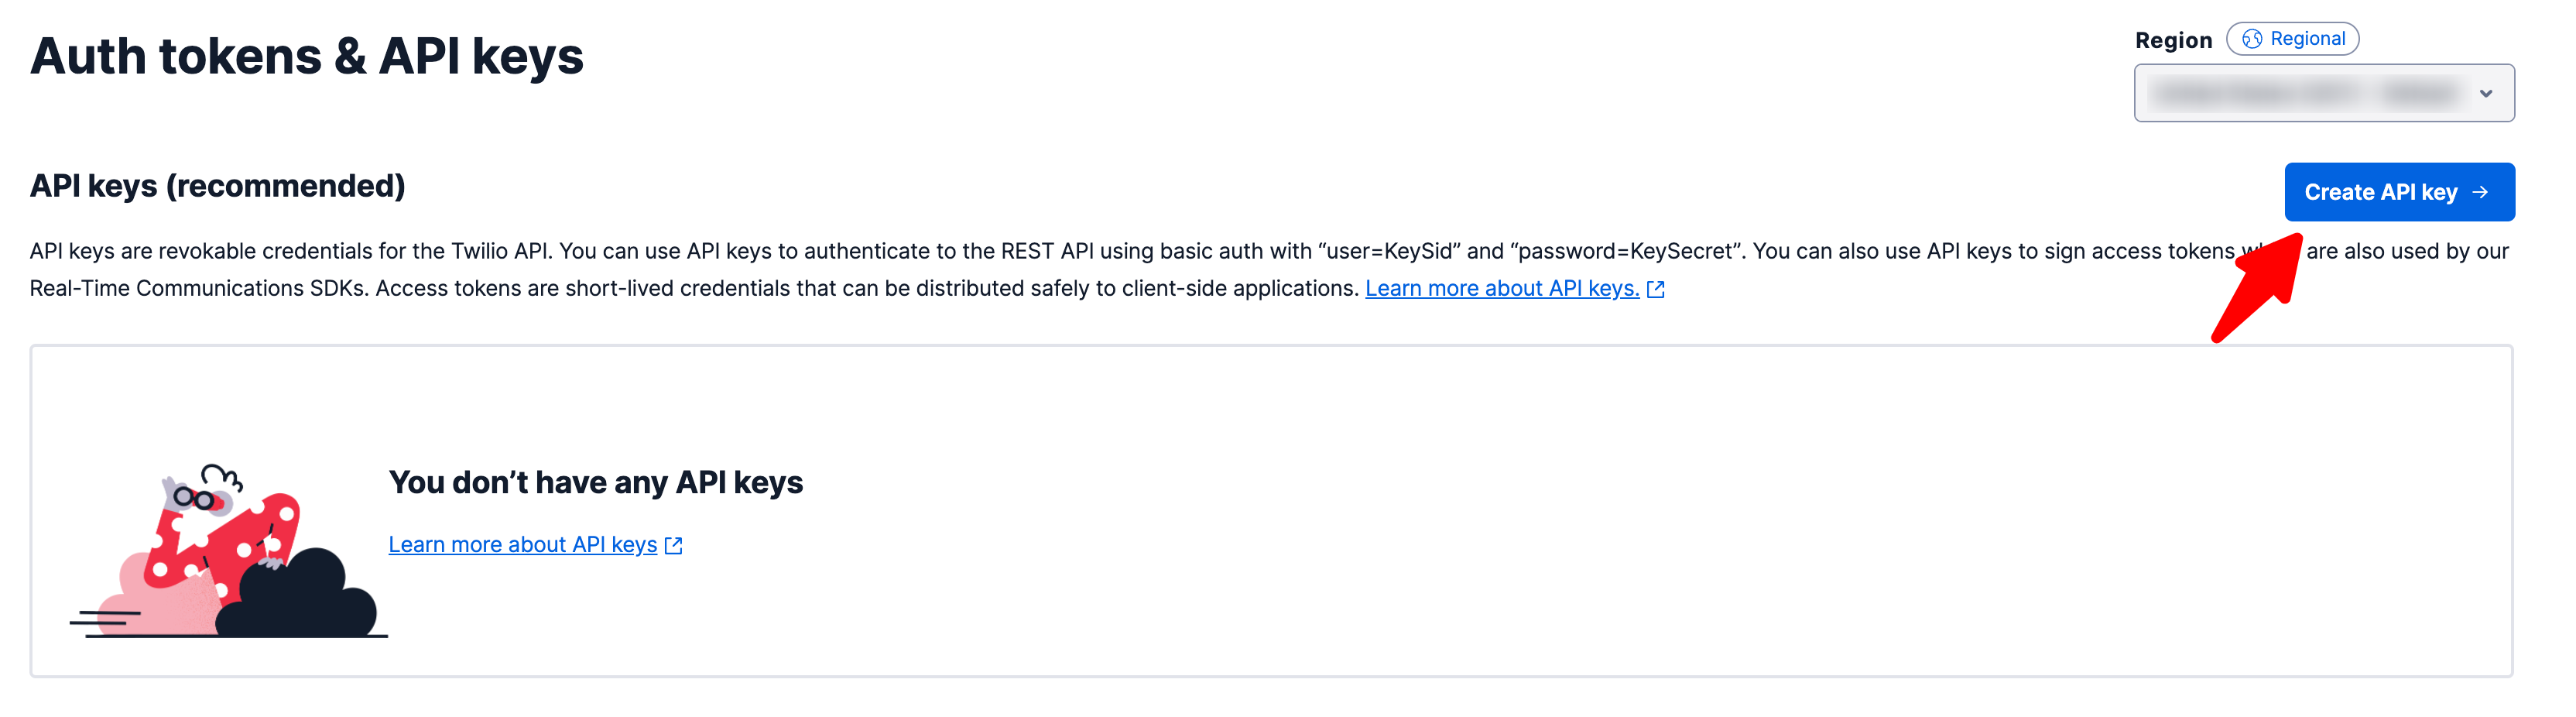
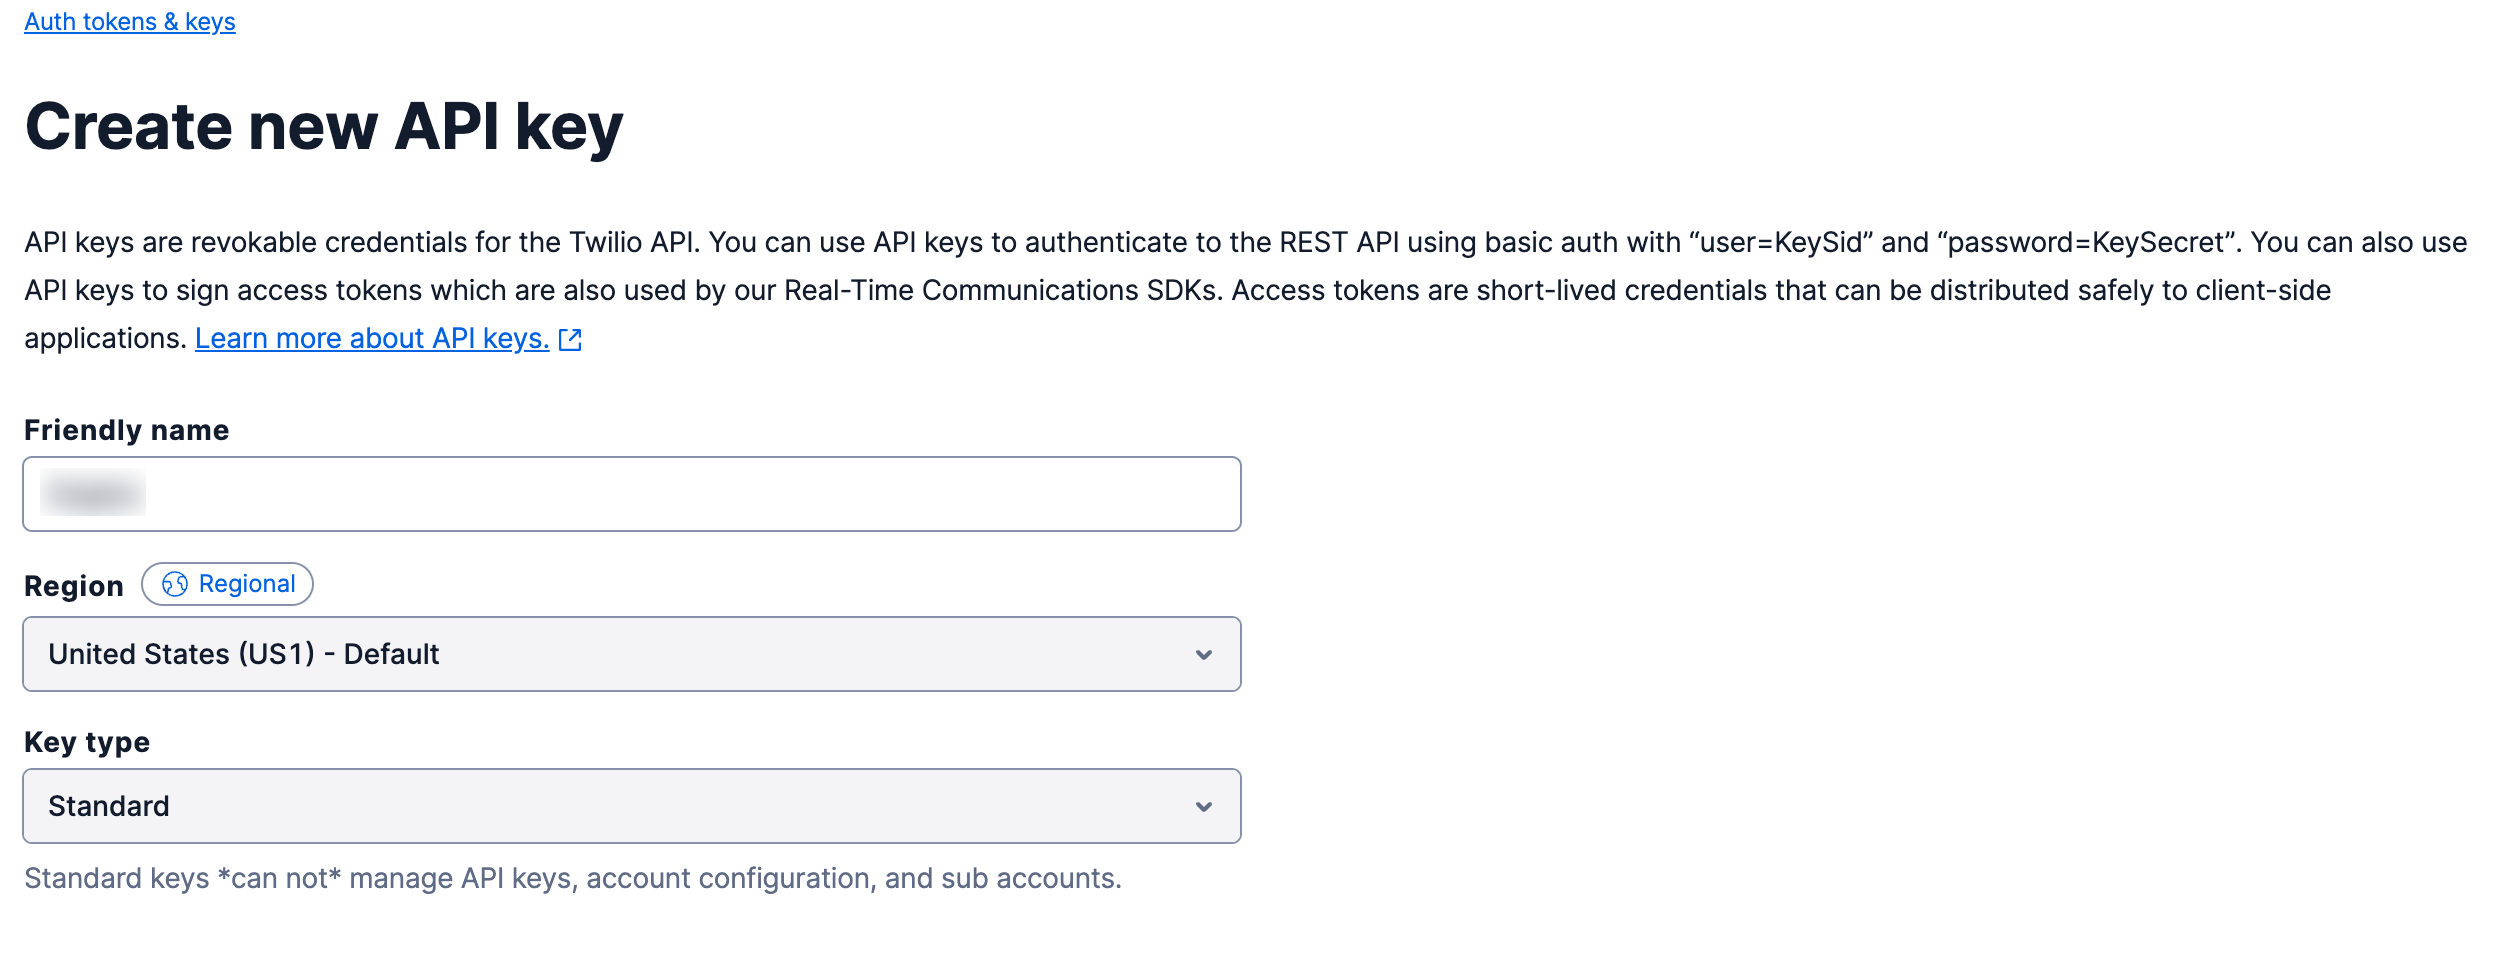
Now Select Messaging service then click on Services and Create Messaging service
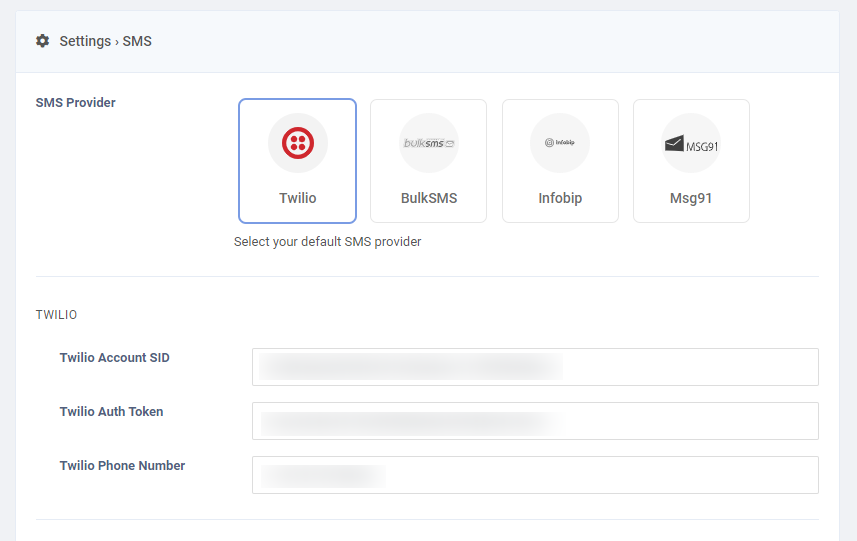
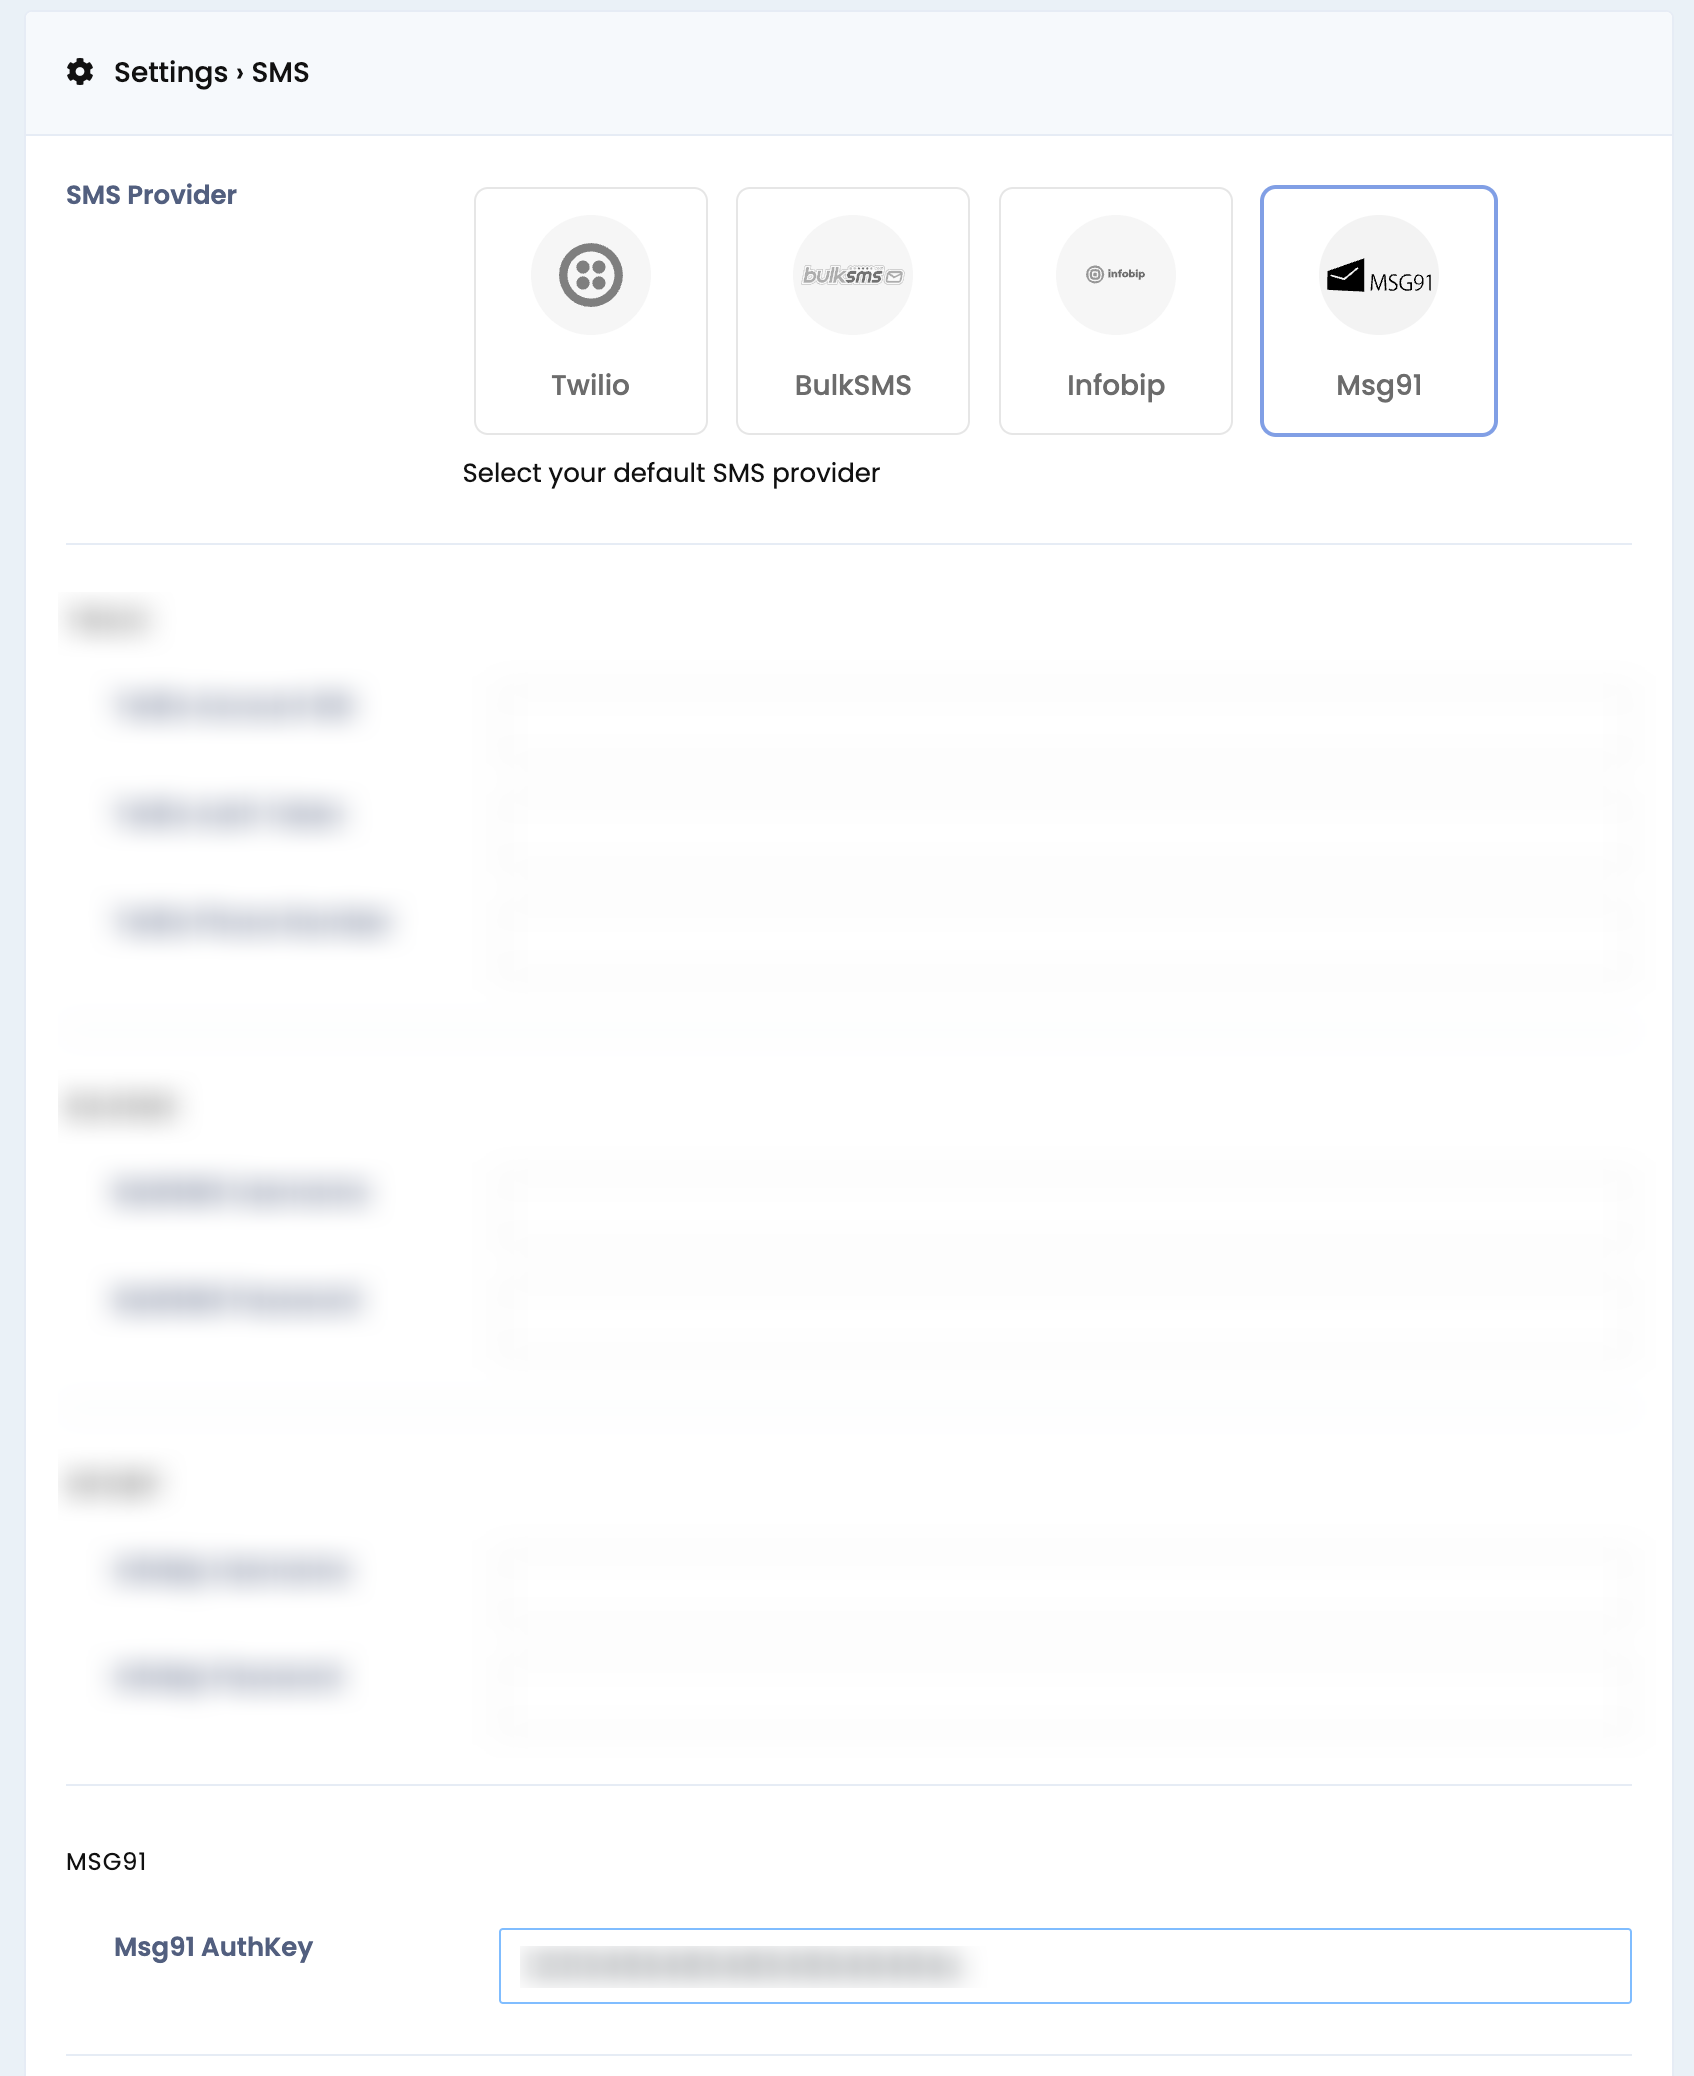
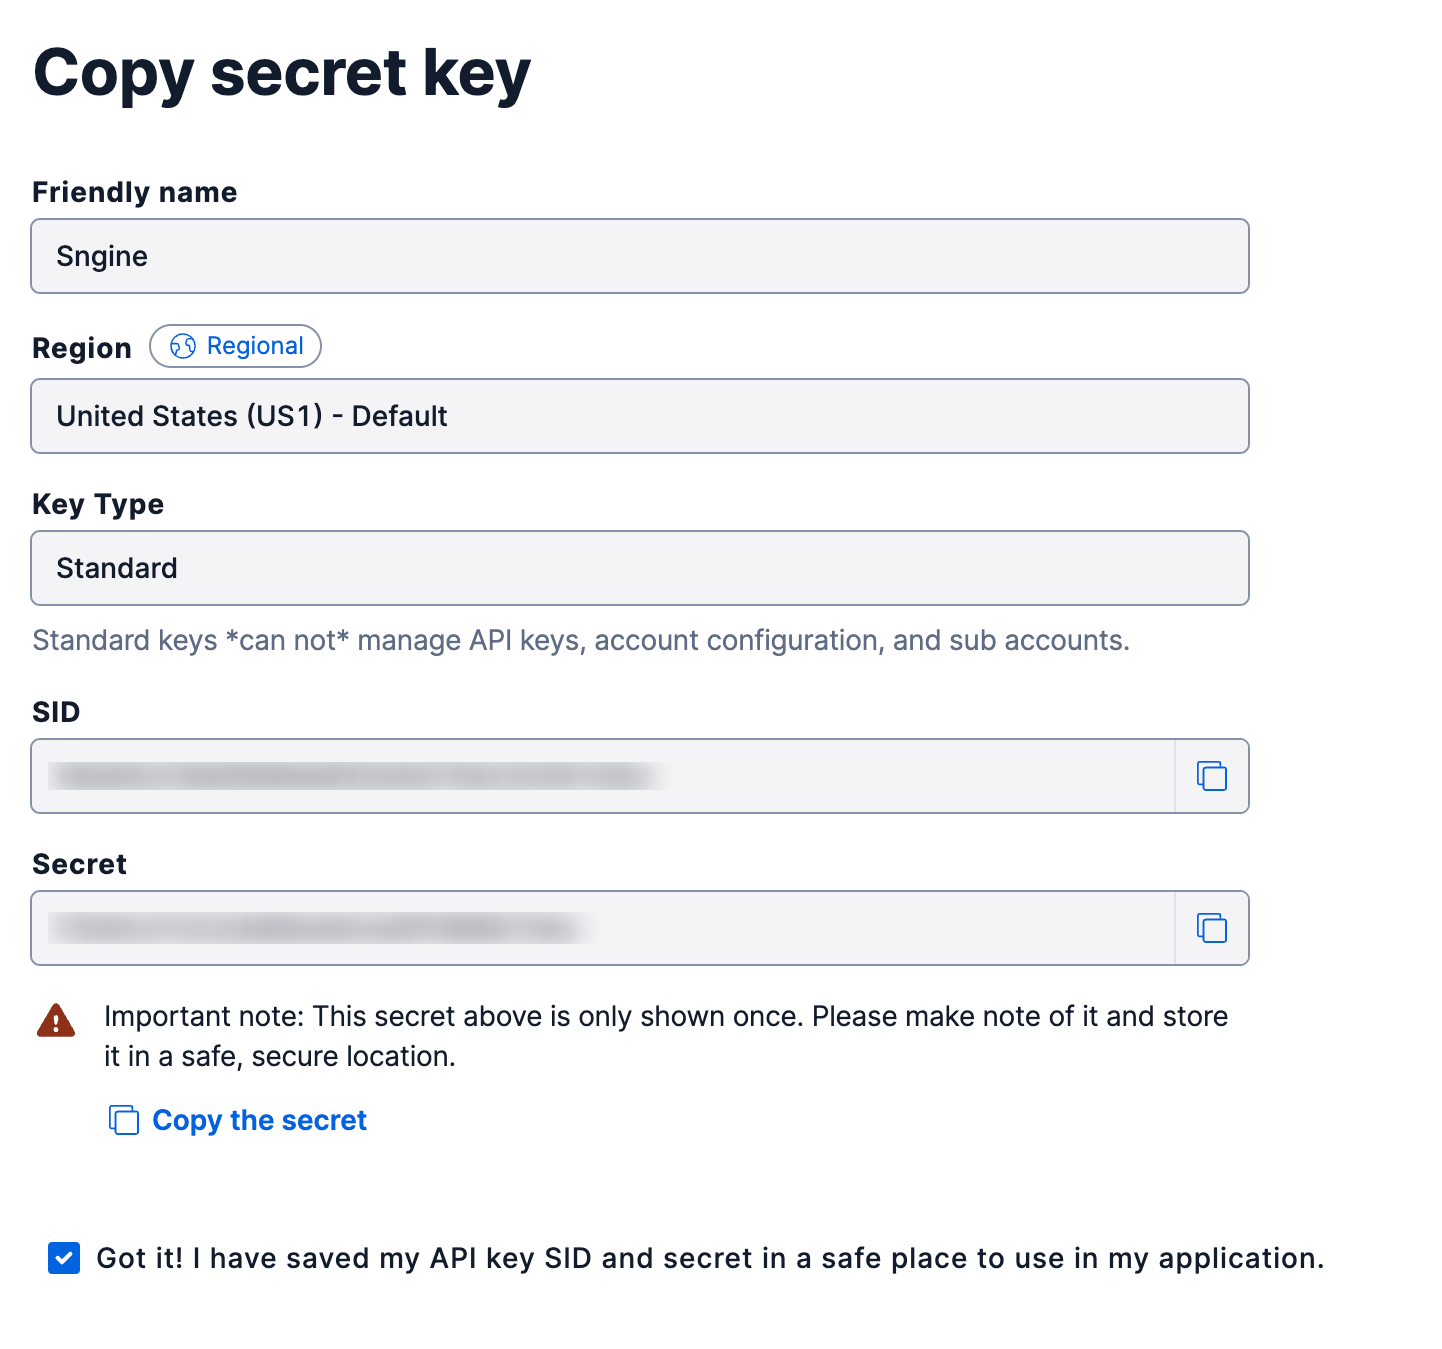
Now goto to Sngine Admin Panel -> Settings -> SMS Settings and paste both keys and phone
number as shown also you can add your own number to test your settings (Save First
before Testing)
That's all, Enjoy!
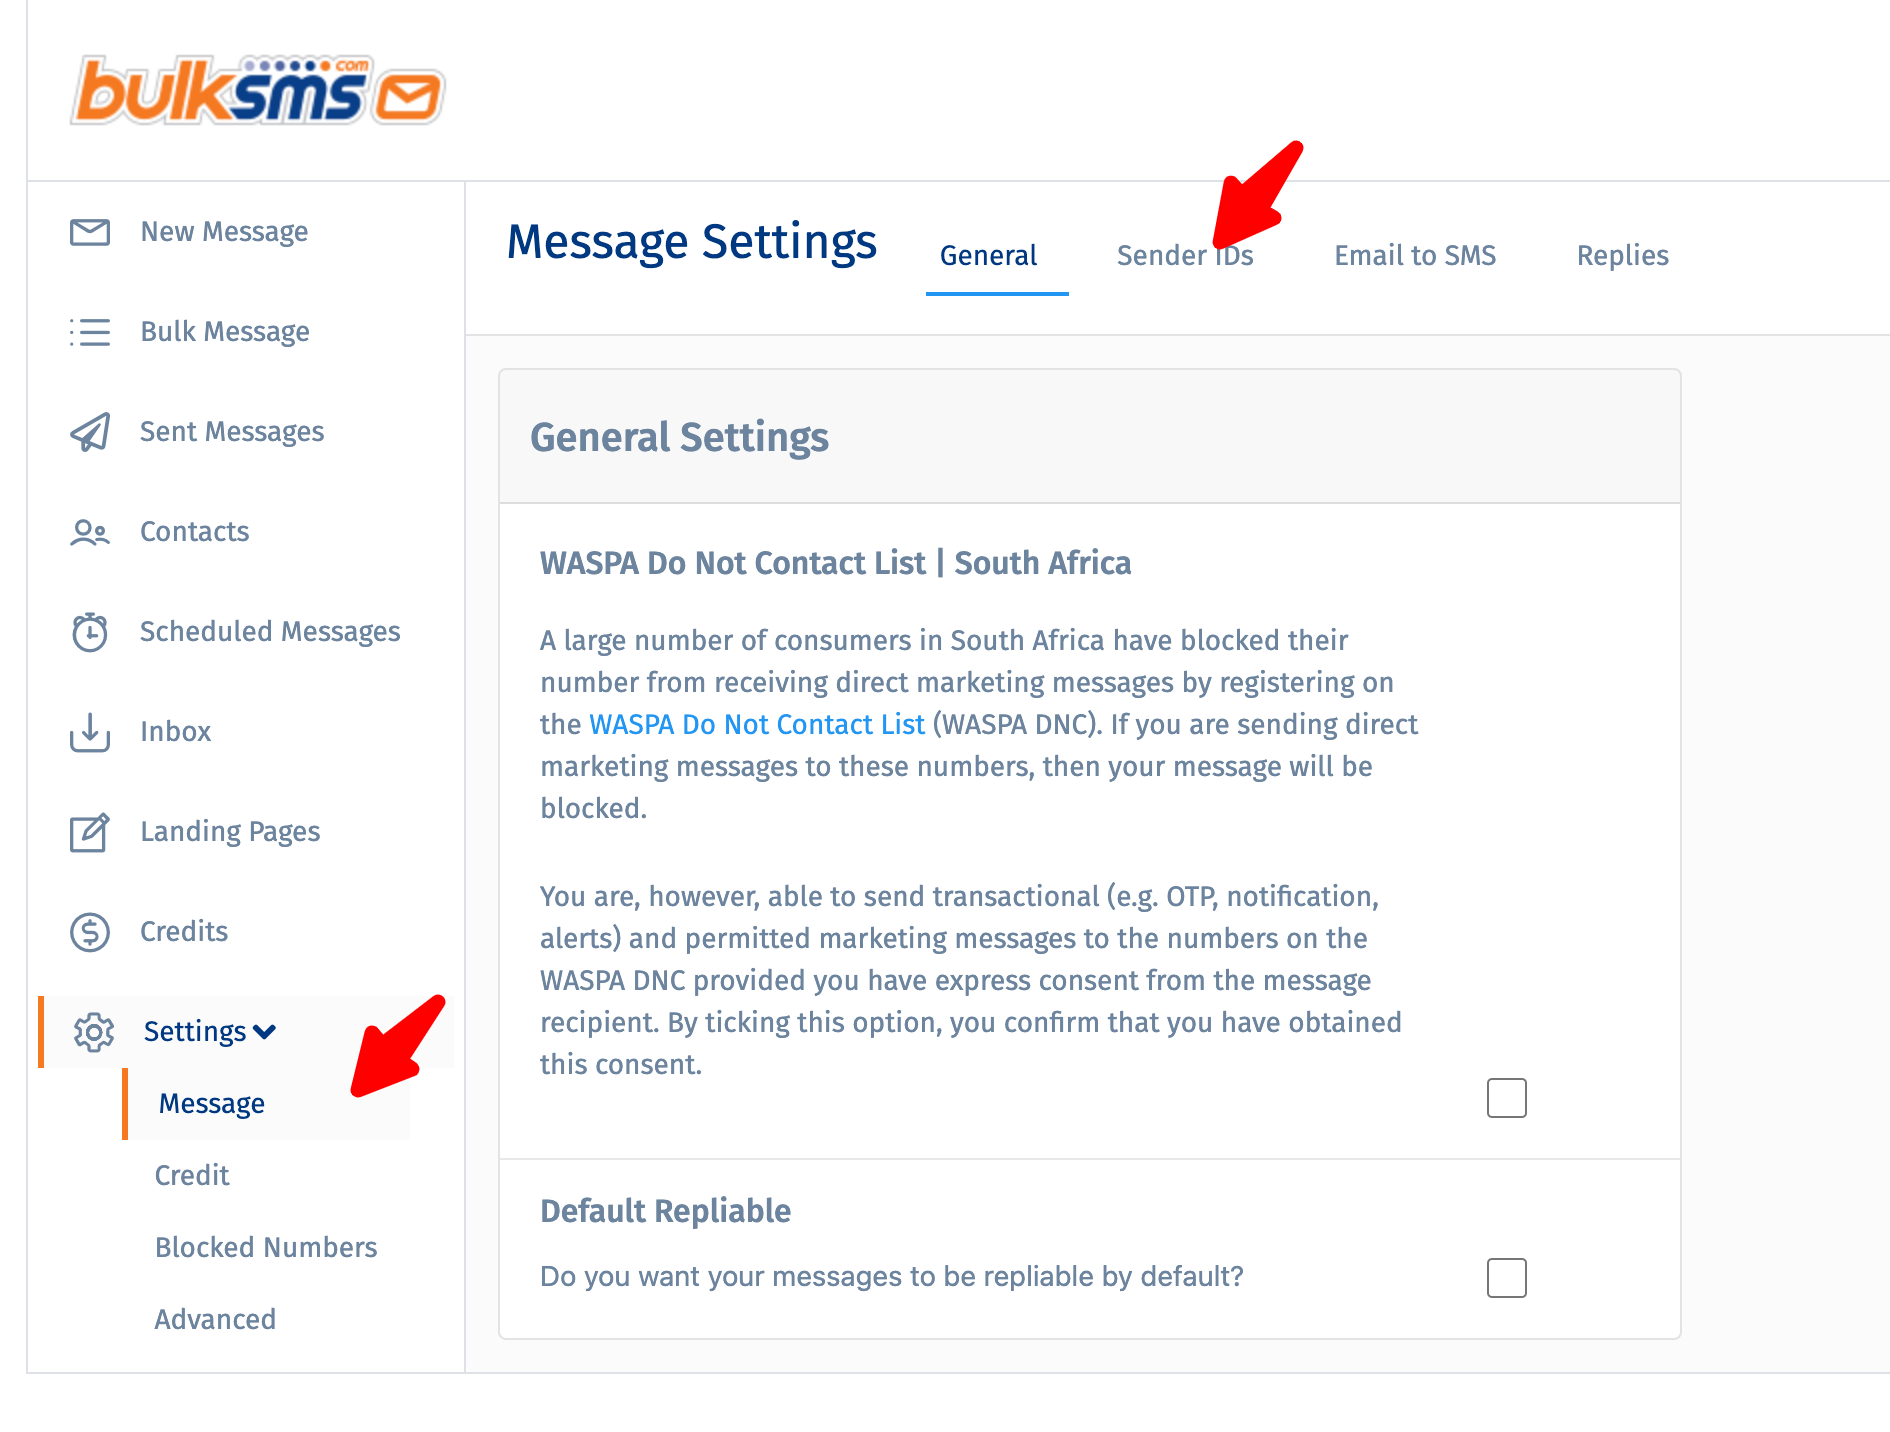
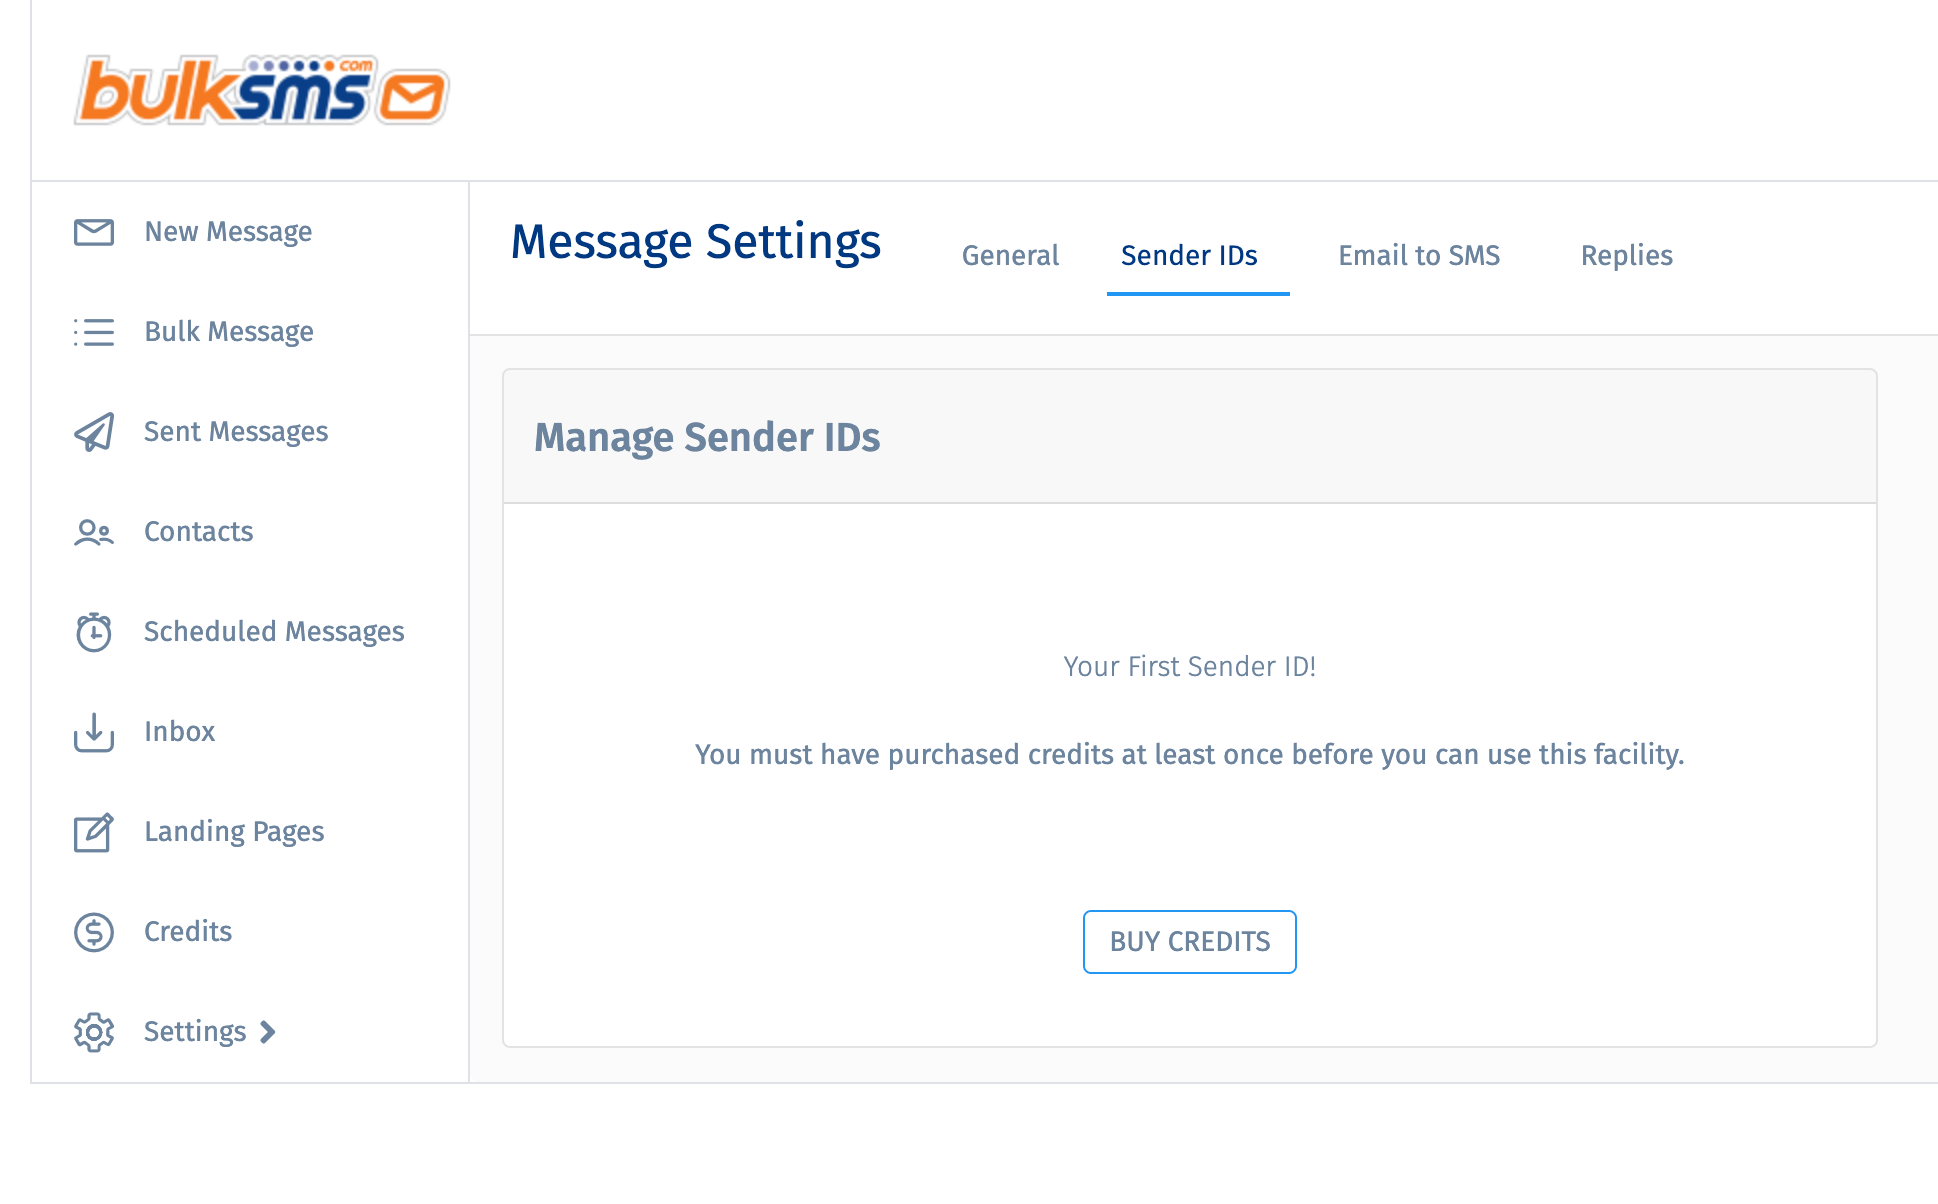
BulkSMS
After installing Sngine now you can in easy steps integrate BulkSMS with it to use SMS it for account activation and for
the two-way verification
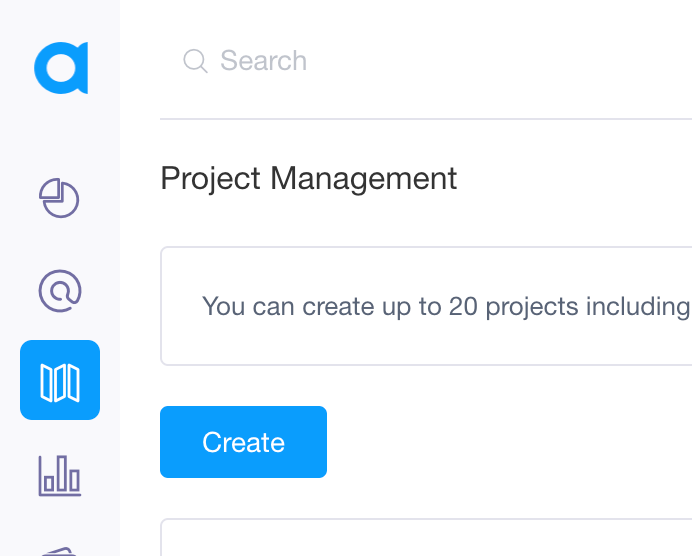
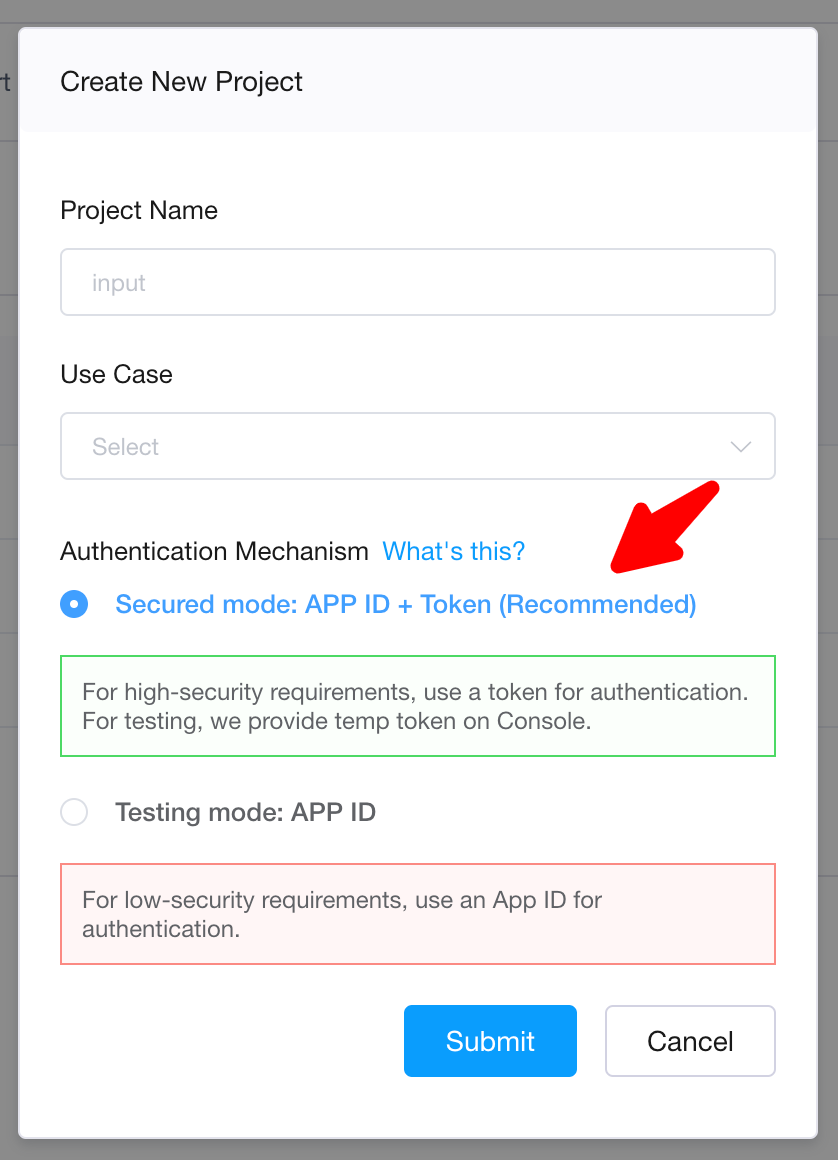
Now Select Secure Mode: APP ID + Token then enter your
project name
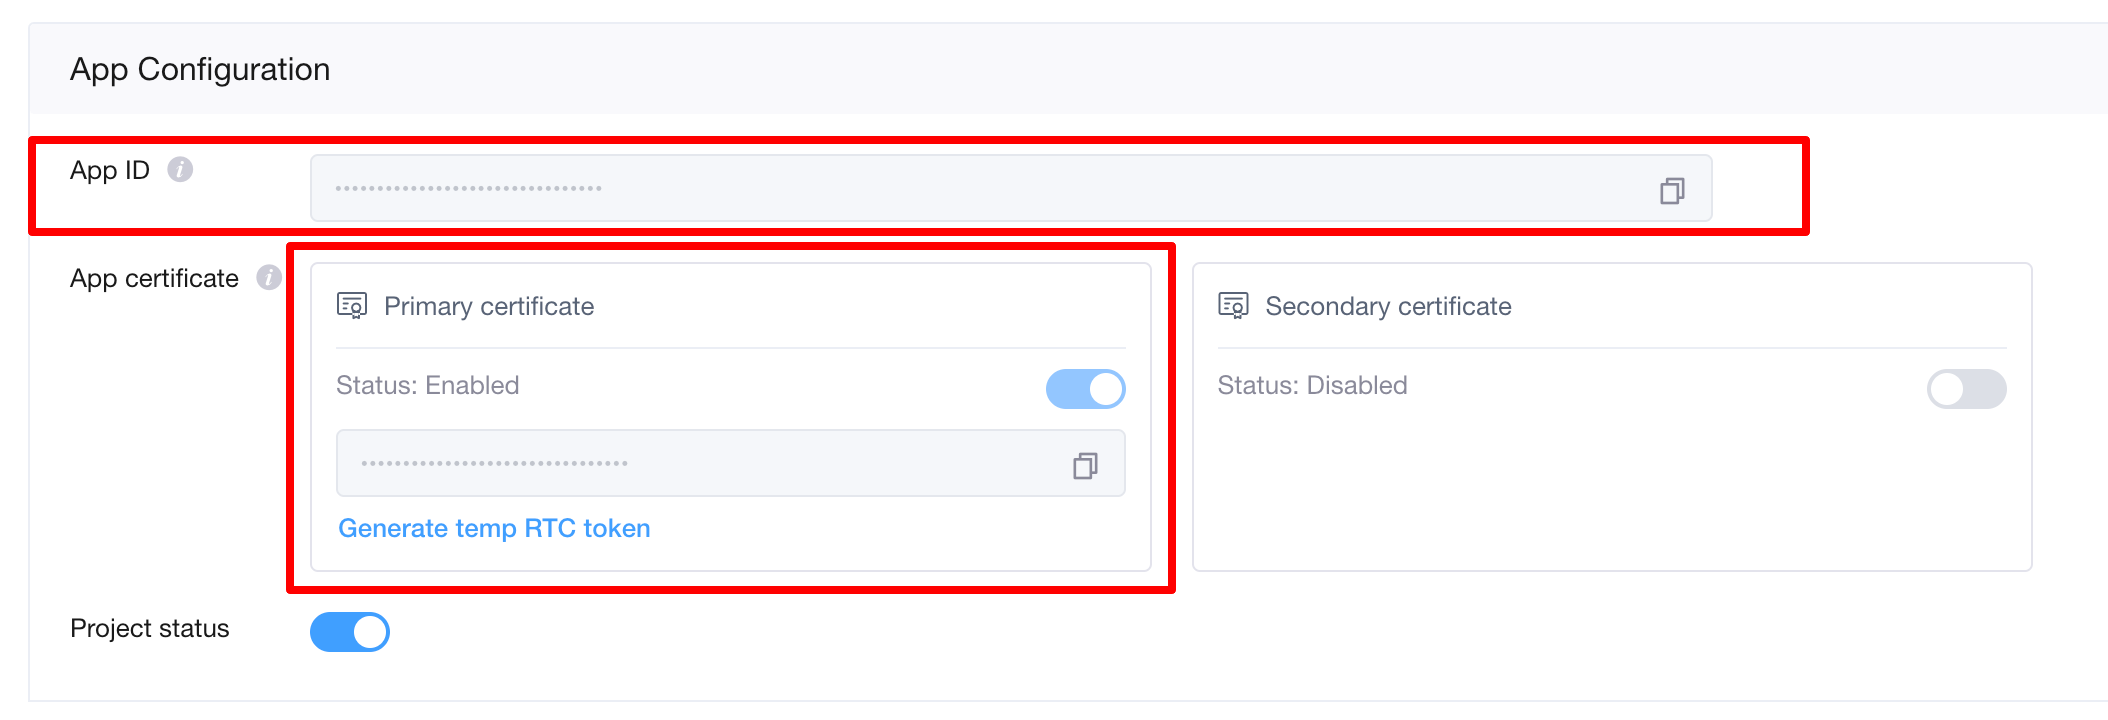
Now Copy your both App ID and App Certificate and copy them to Sngine admin panel
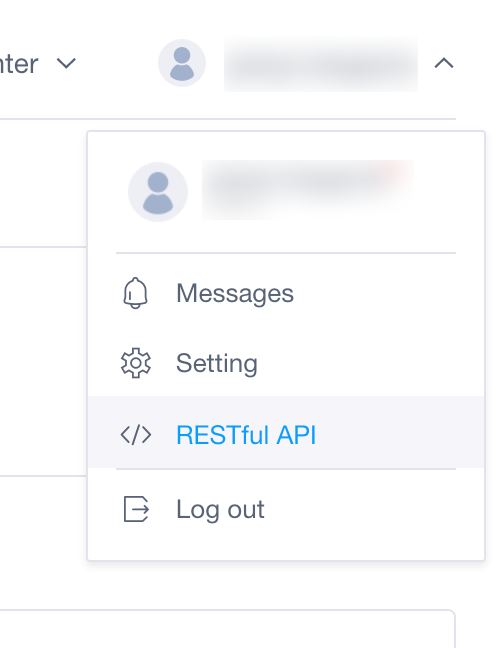
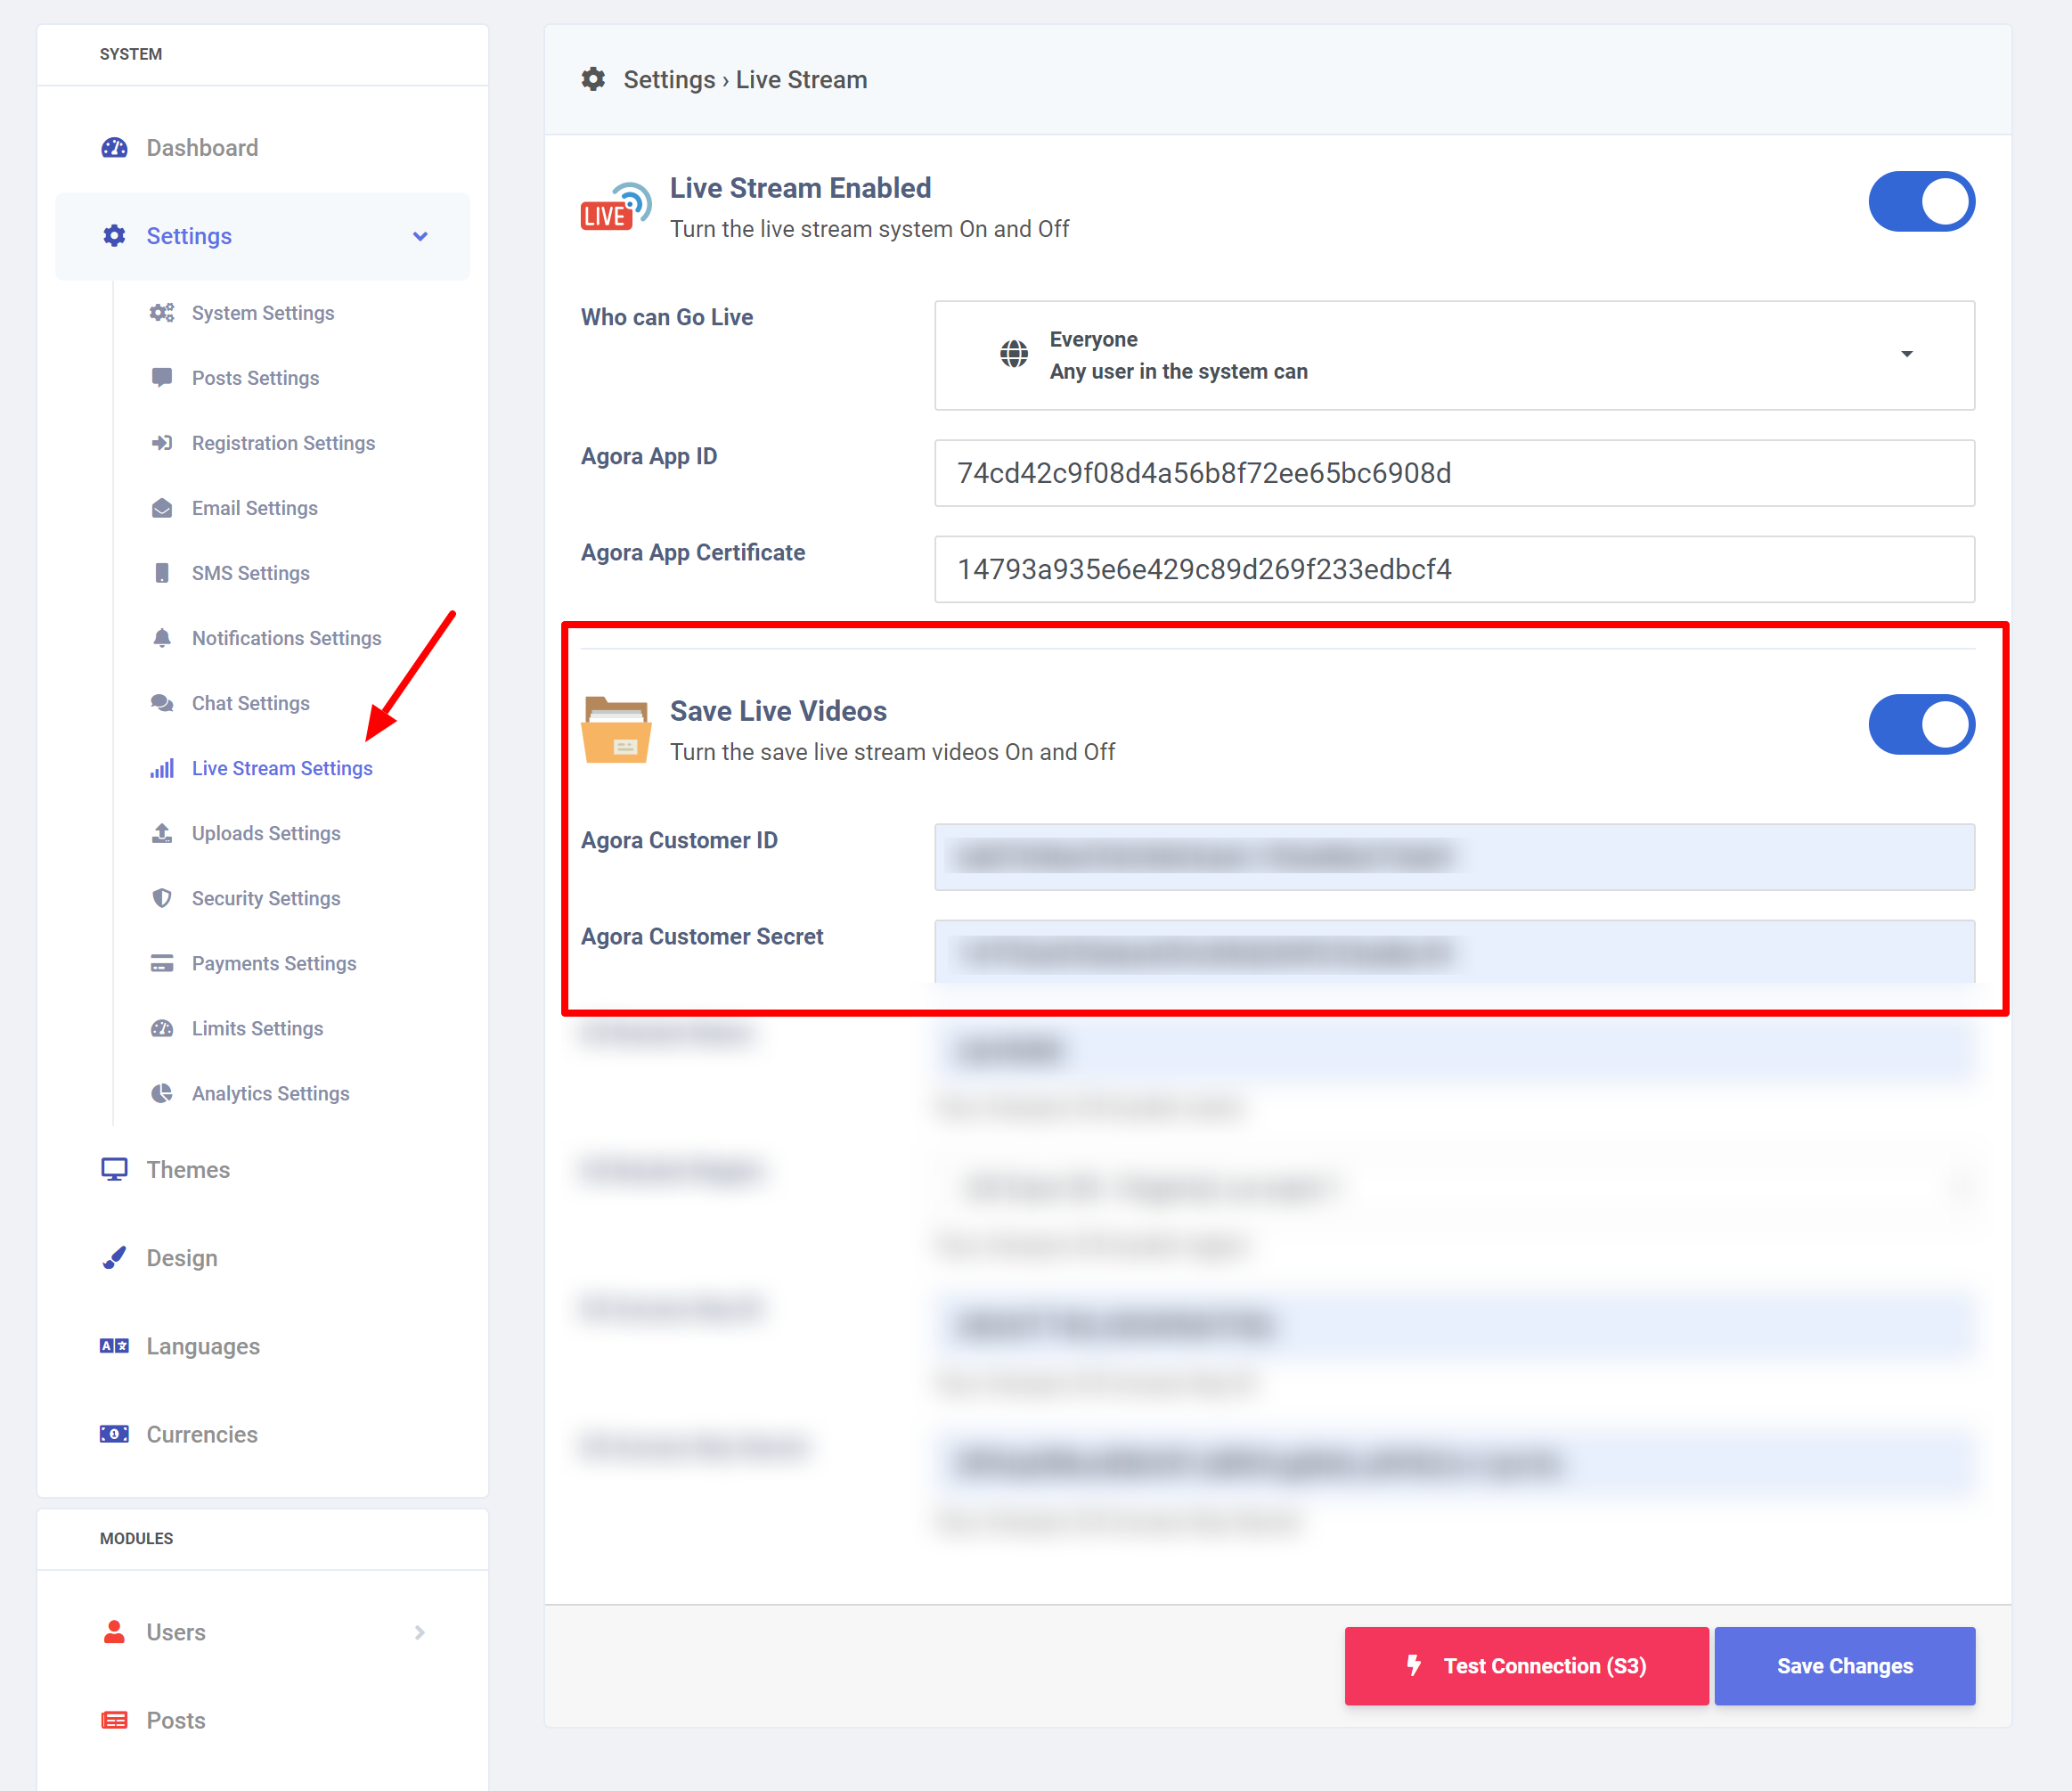
Now if you want to enable the Save Live Videos feature
you will need to get your Agora Customer ID & Customer
Certificate
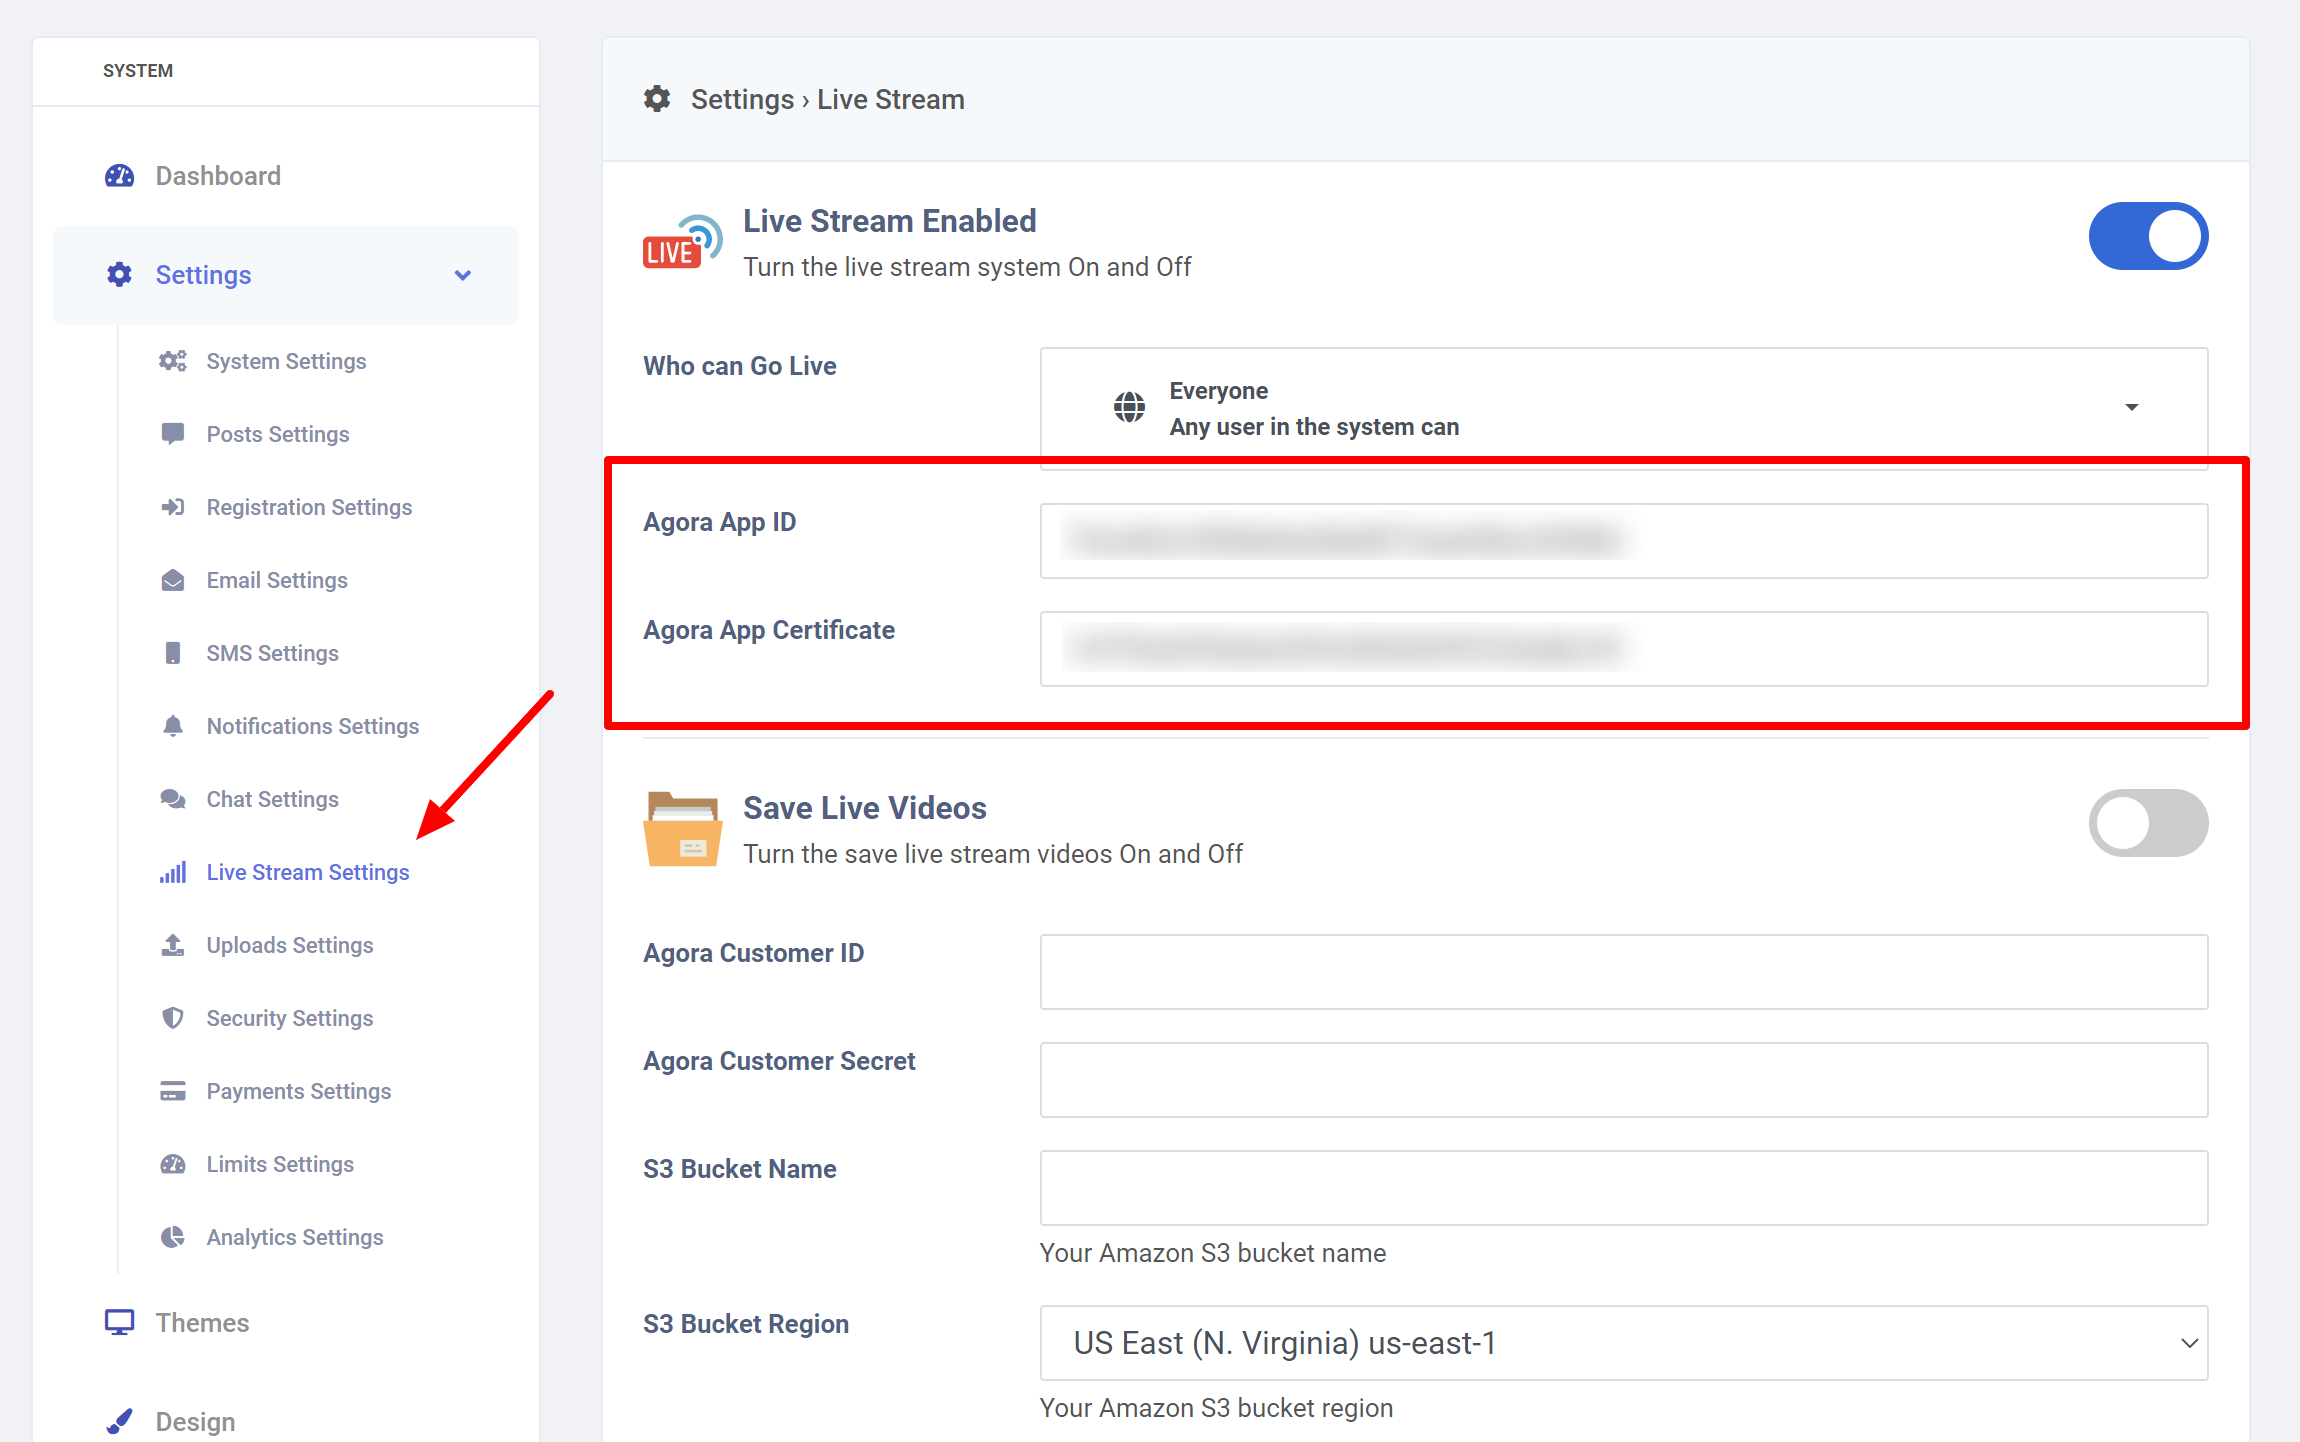
Now goto to Sngine Admin Panel -> Settings -> Live Stream Settings and paste both Agora Customer ID & Customer Certificate as shown
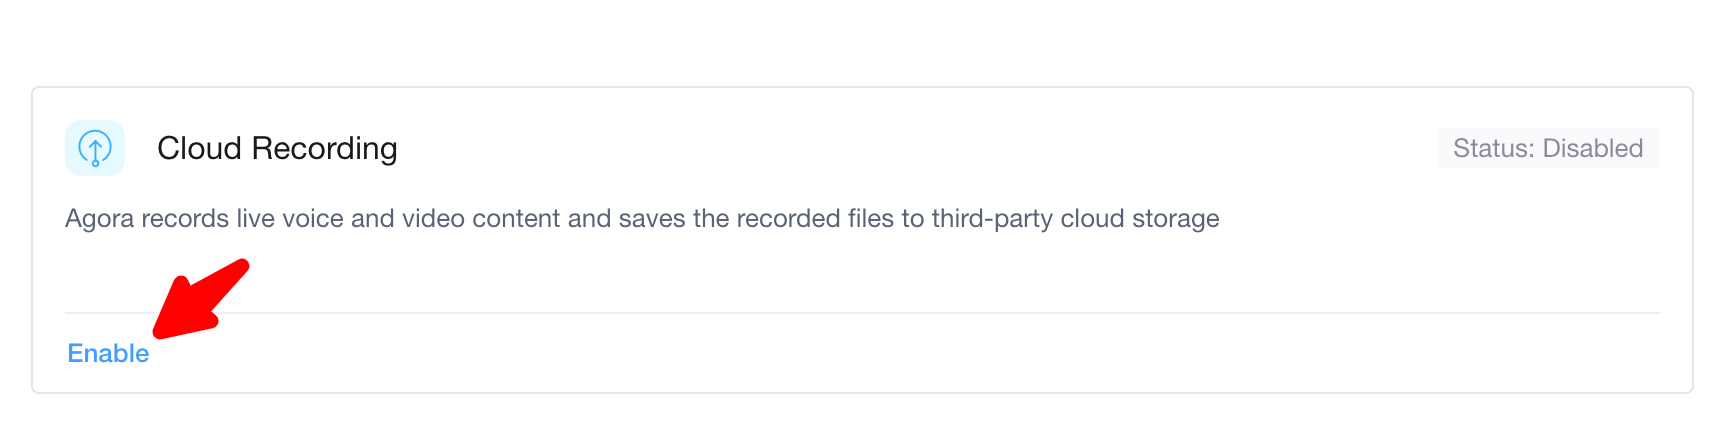
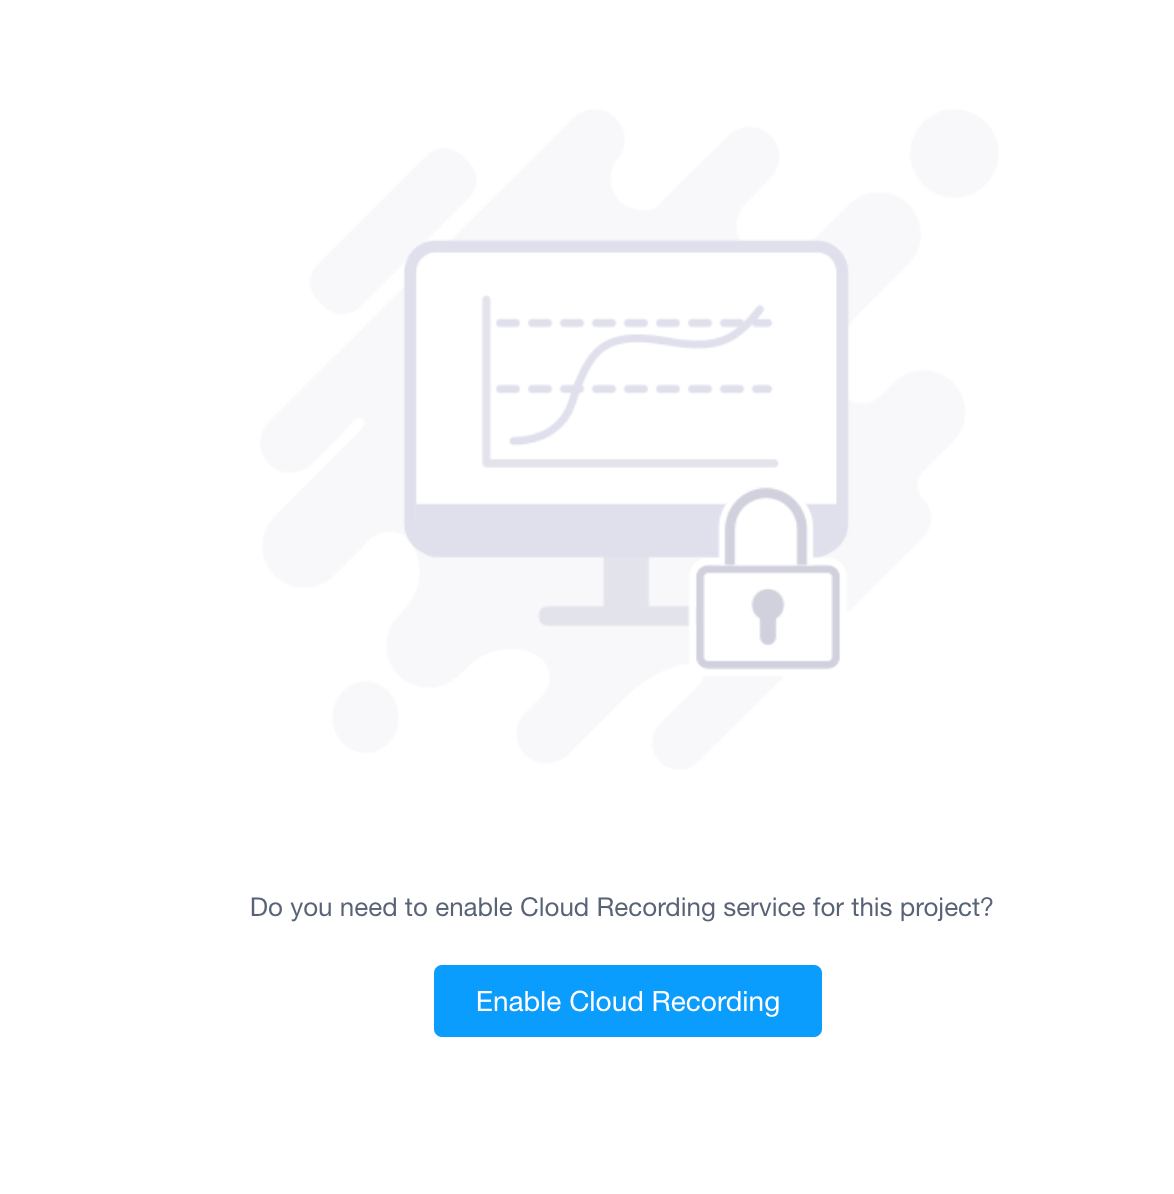
Now you need to enable Agora Cloud Recording for your
project
The final step you will need to creata new AWS S3 Bucket
to save your users live videos and you can simply follow the same steps Here and then enter your bucket info in Sngine Admin Panel ->
Settings -> Live Settings
That's all, Enjoy!
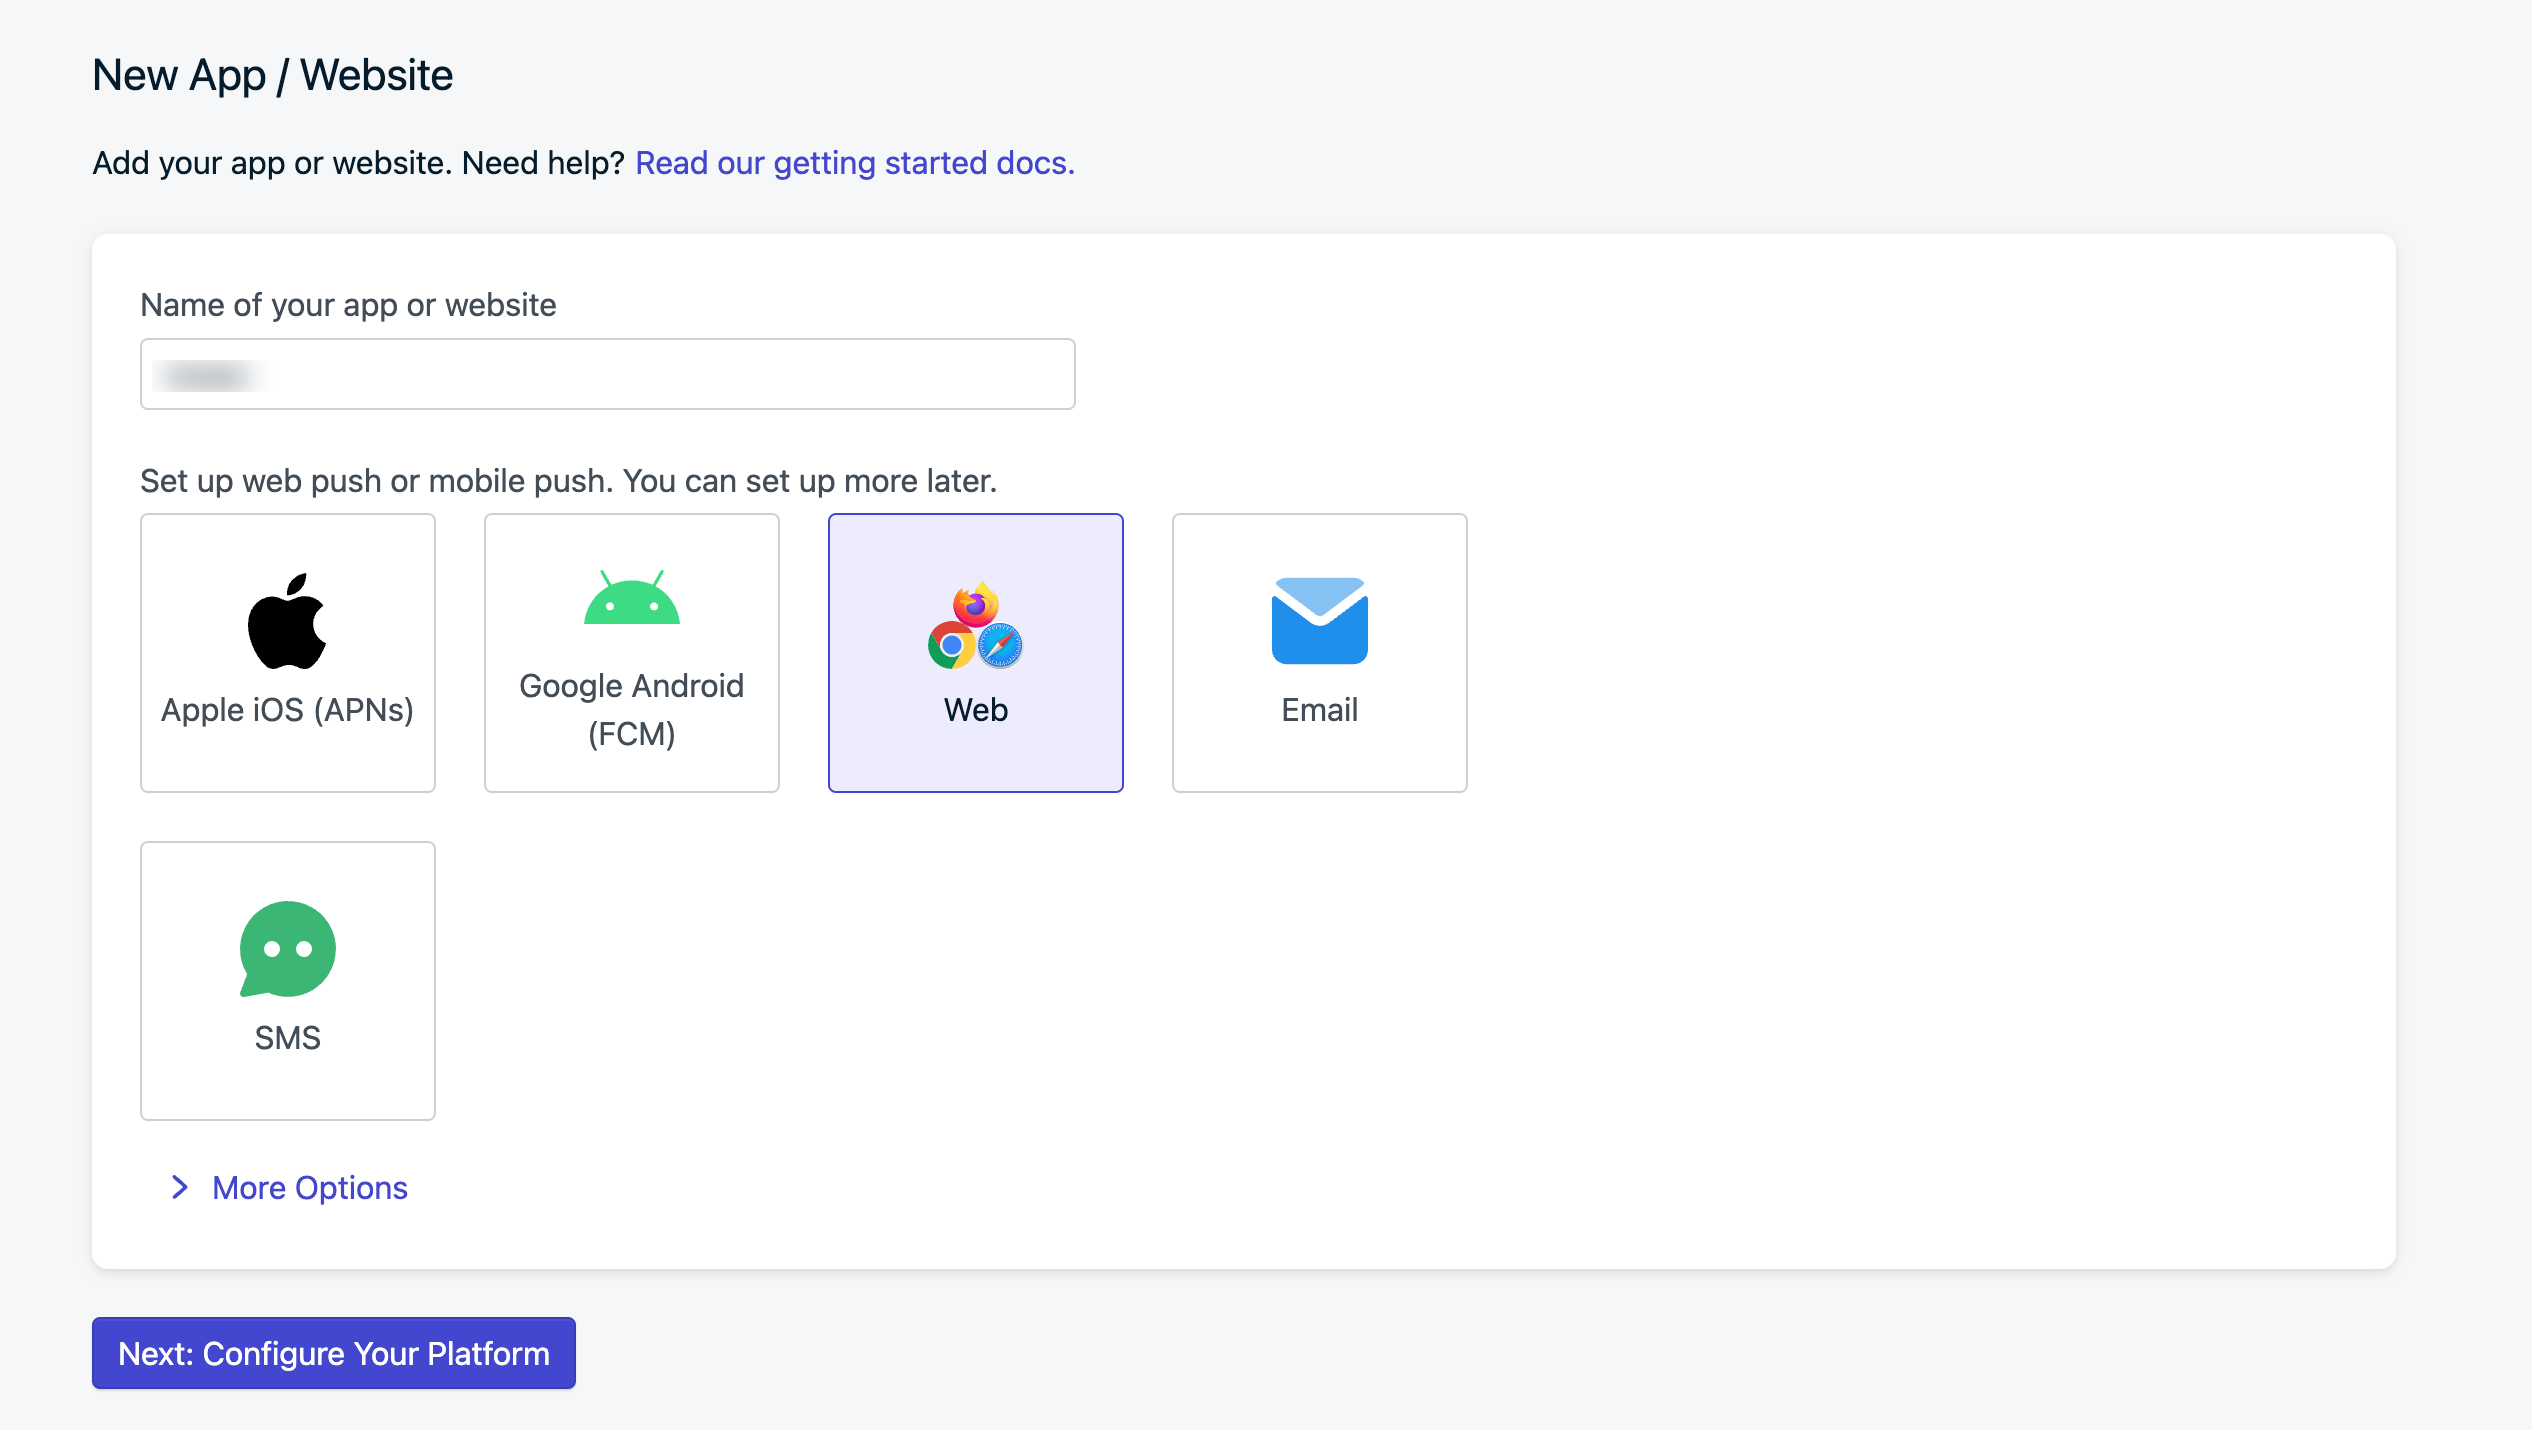
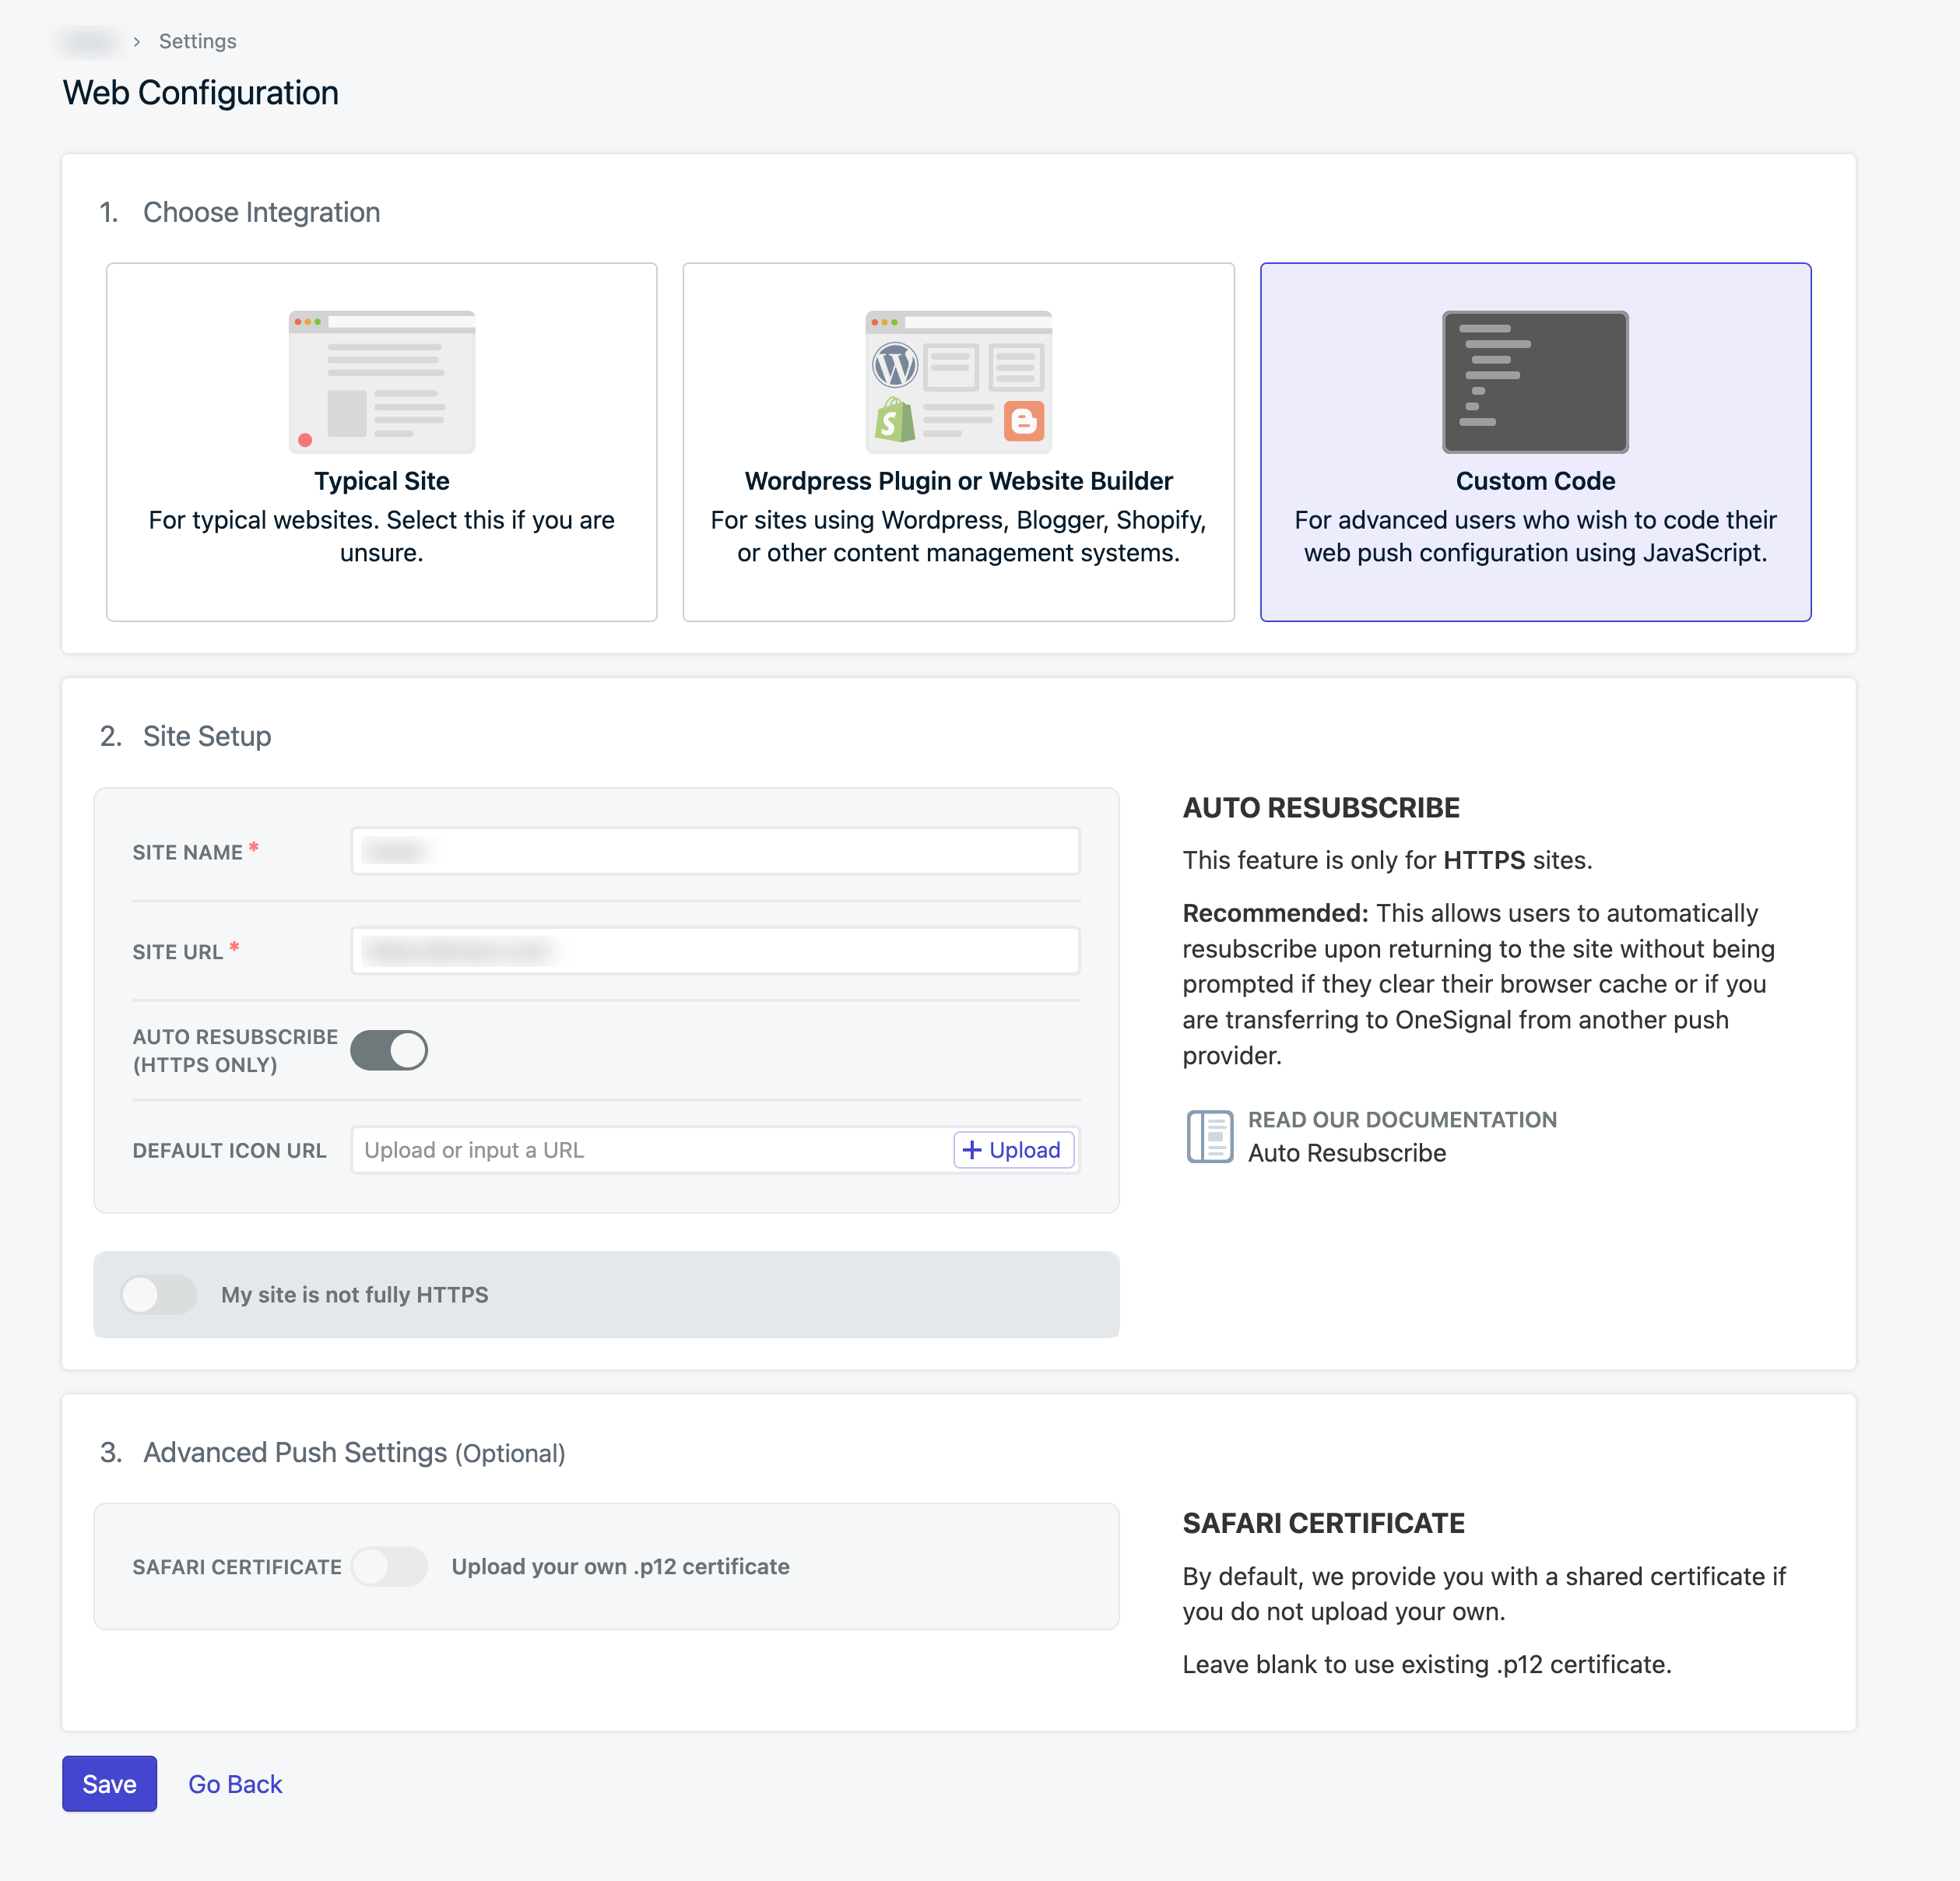
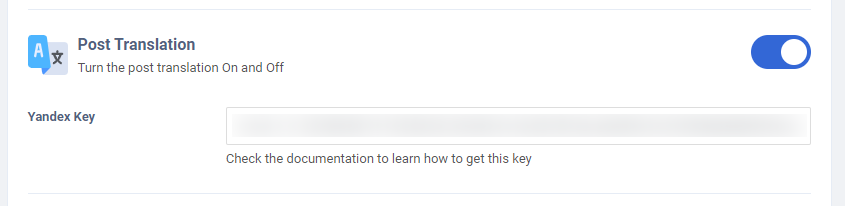
OneSignal Push Notifications
After installing Sngine now you can in easy steps integrate OneSignal Push Notifications with it to allow push
notifications feature
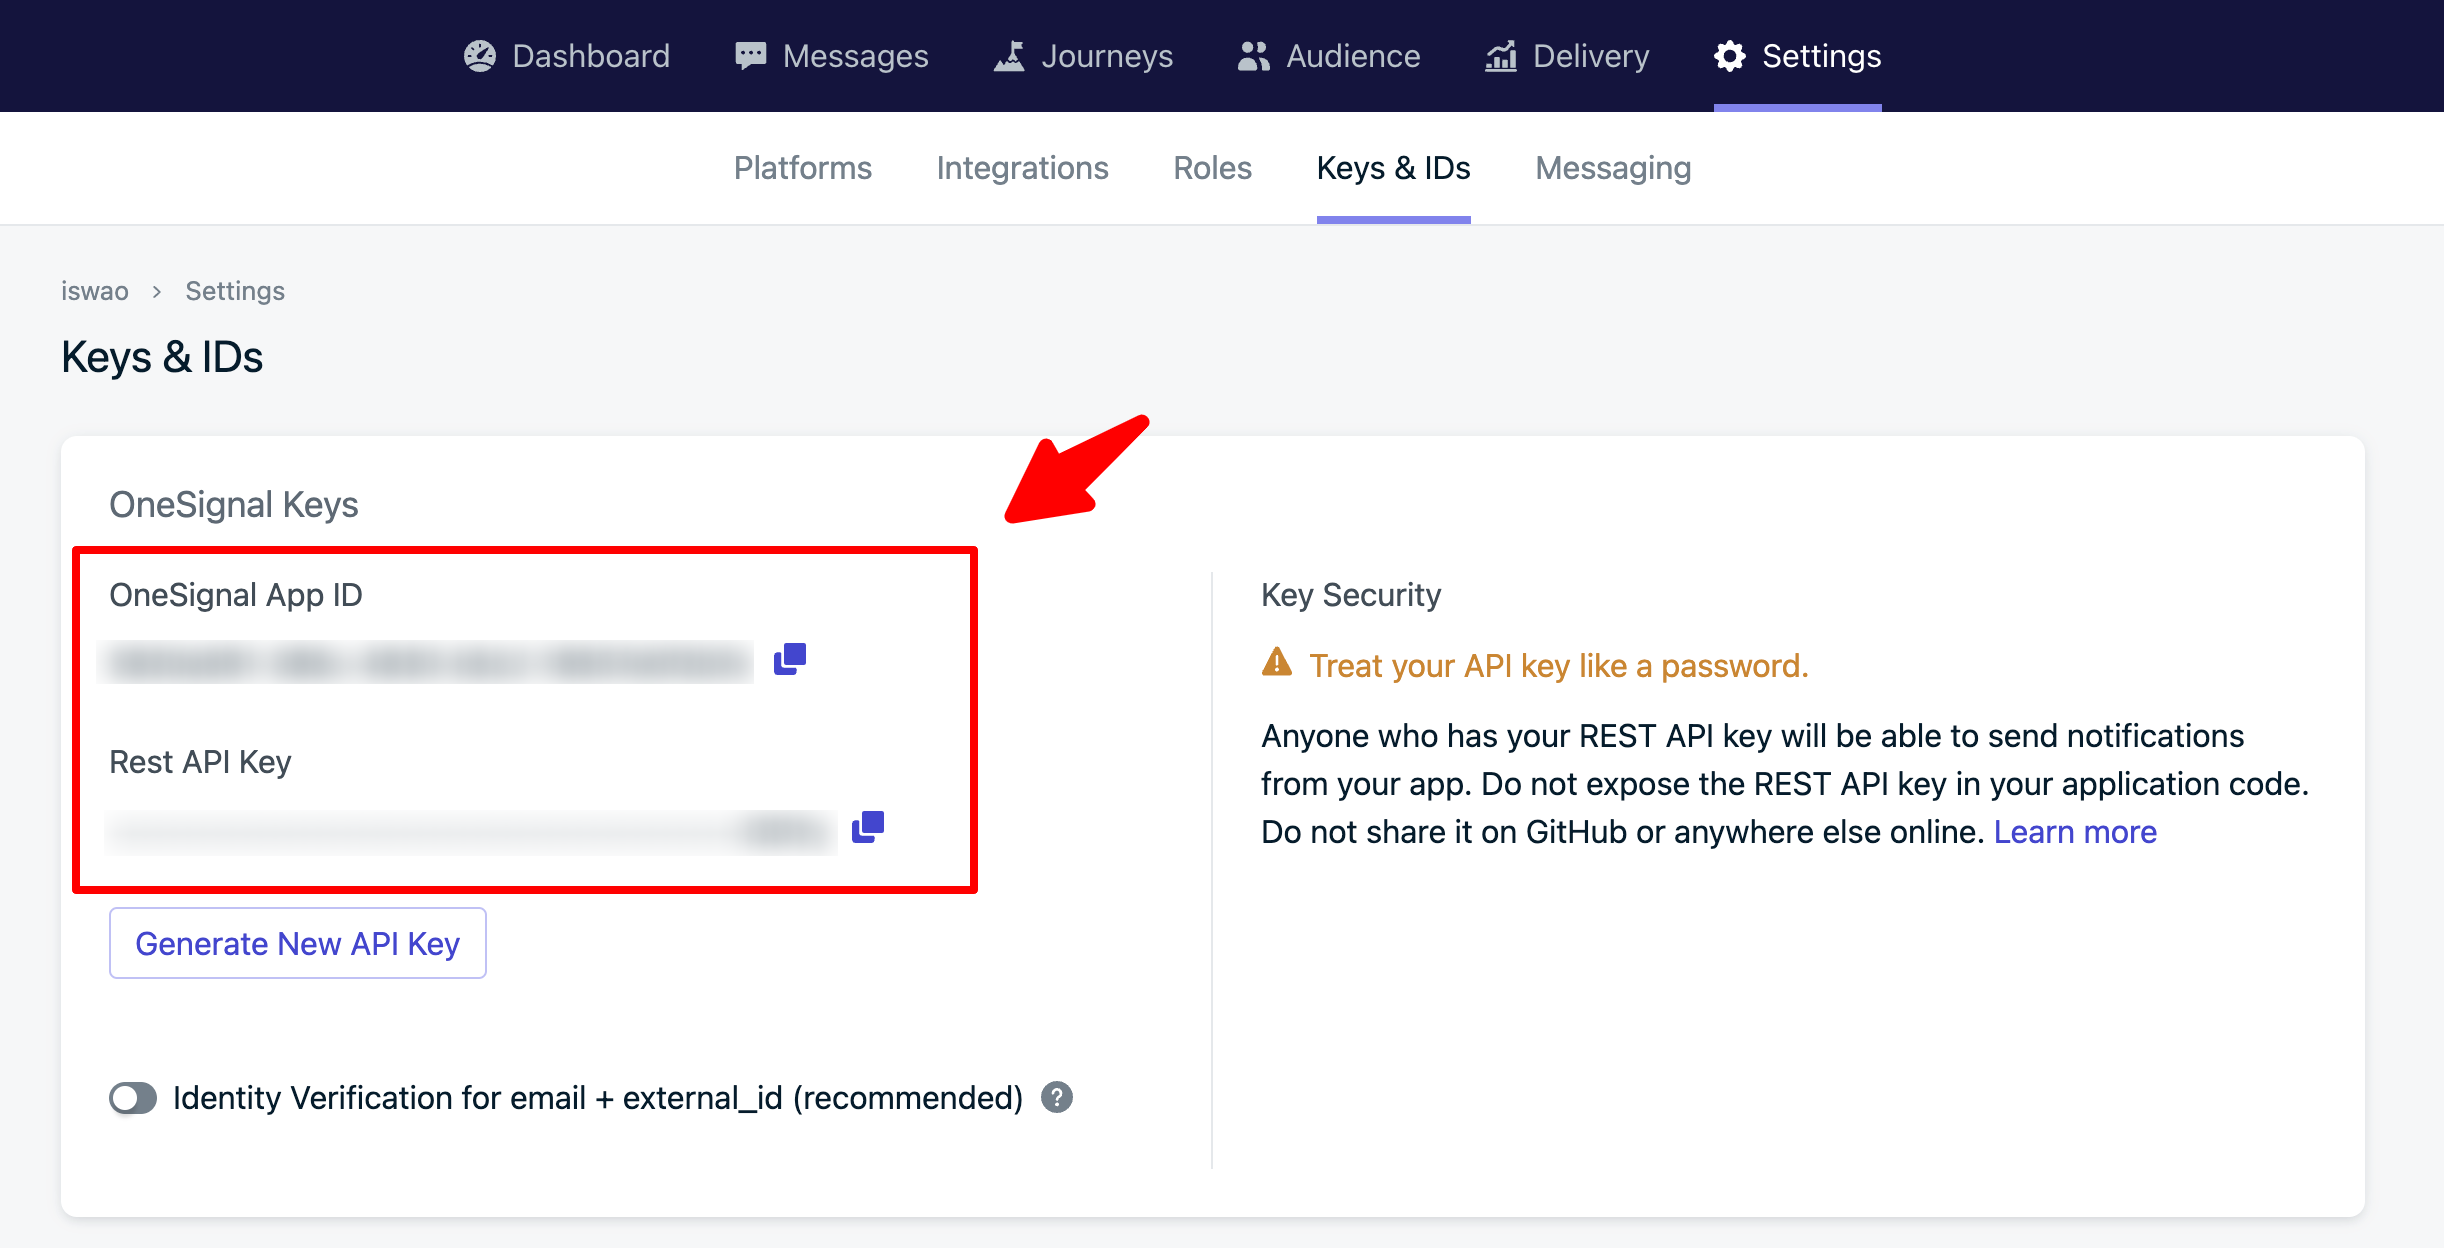
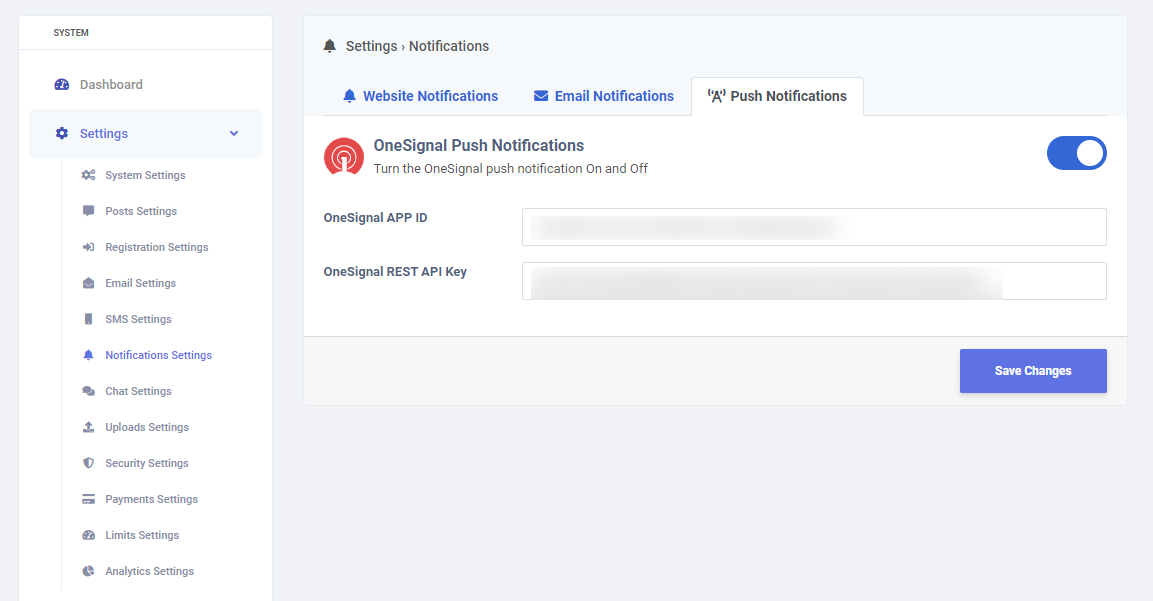
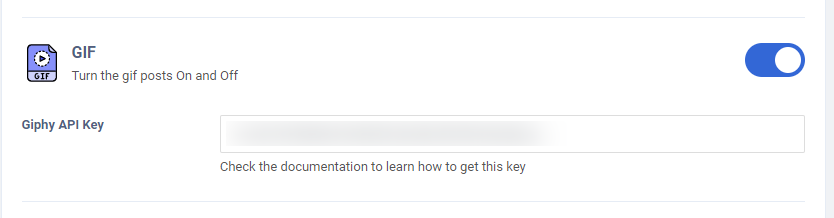
Now goto to your Sngine Admin panel -> Settings -> Post Settings and open your settings
page and paste this key
That's all, Enjoy!
Mobile
Learn how to customize the web-view apps that come with Sngine by default for Android
and IOS.
Android App
Import your APP into Android Studio (Make sure you have latest Android Studio version)
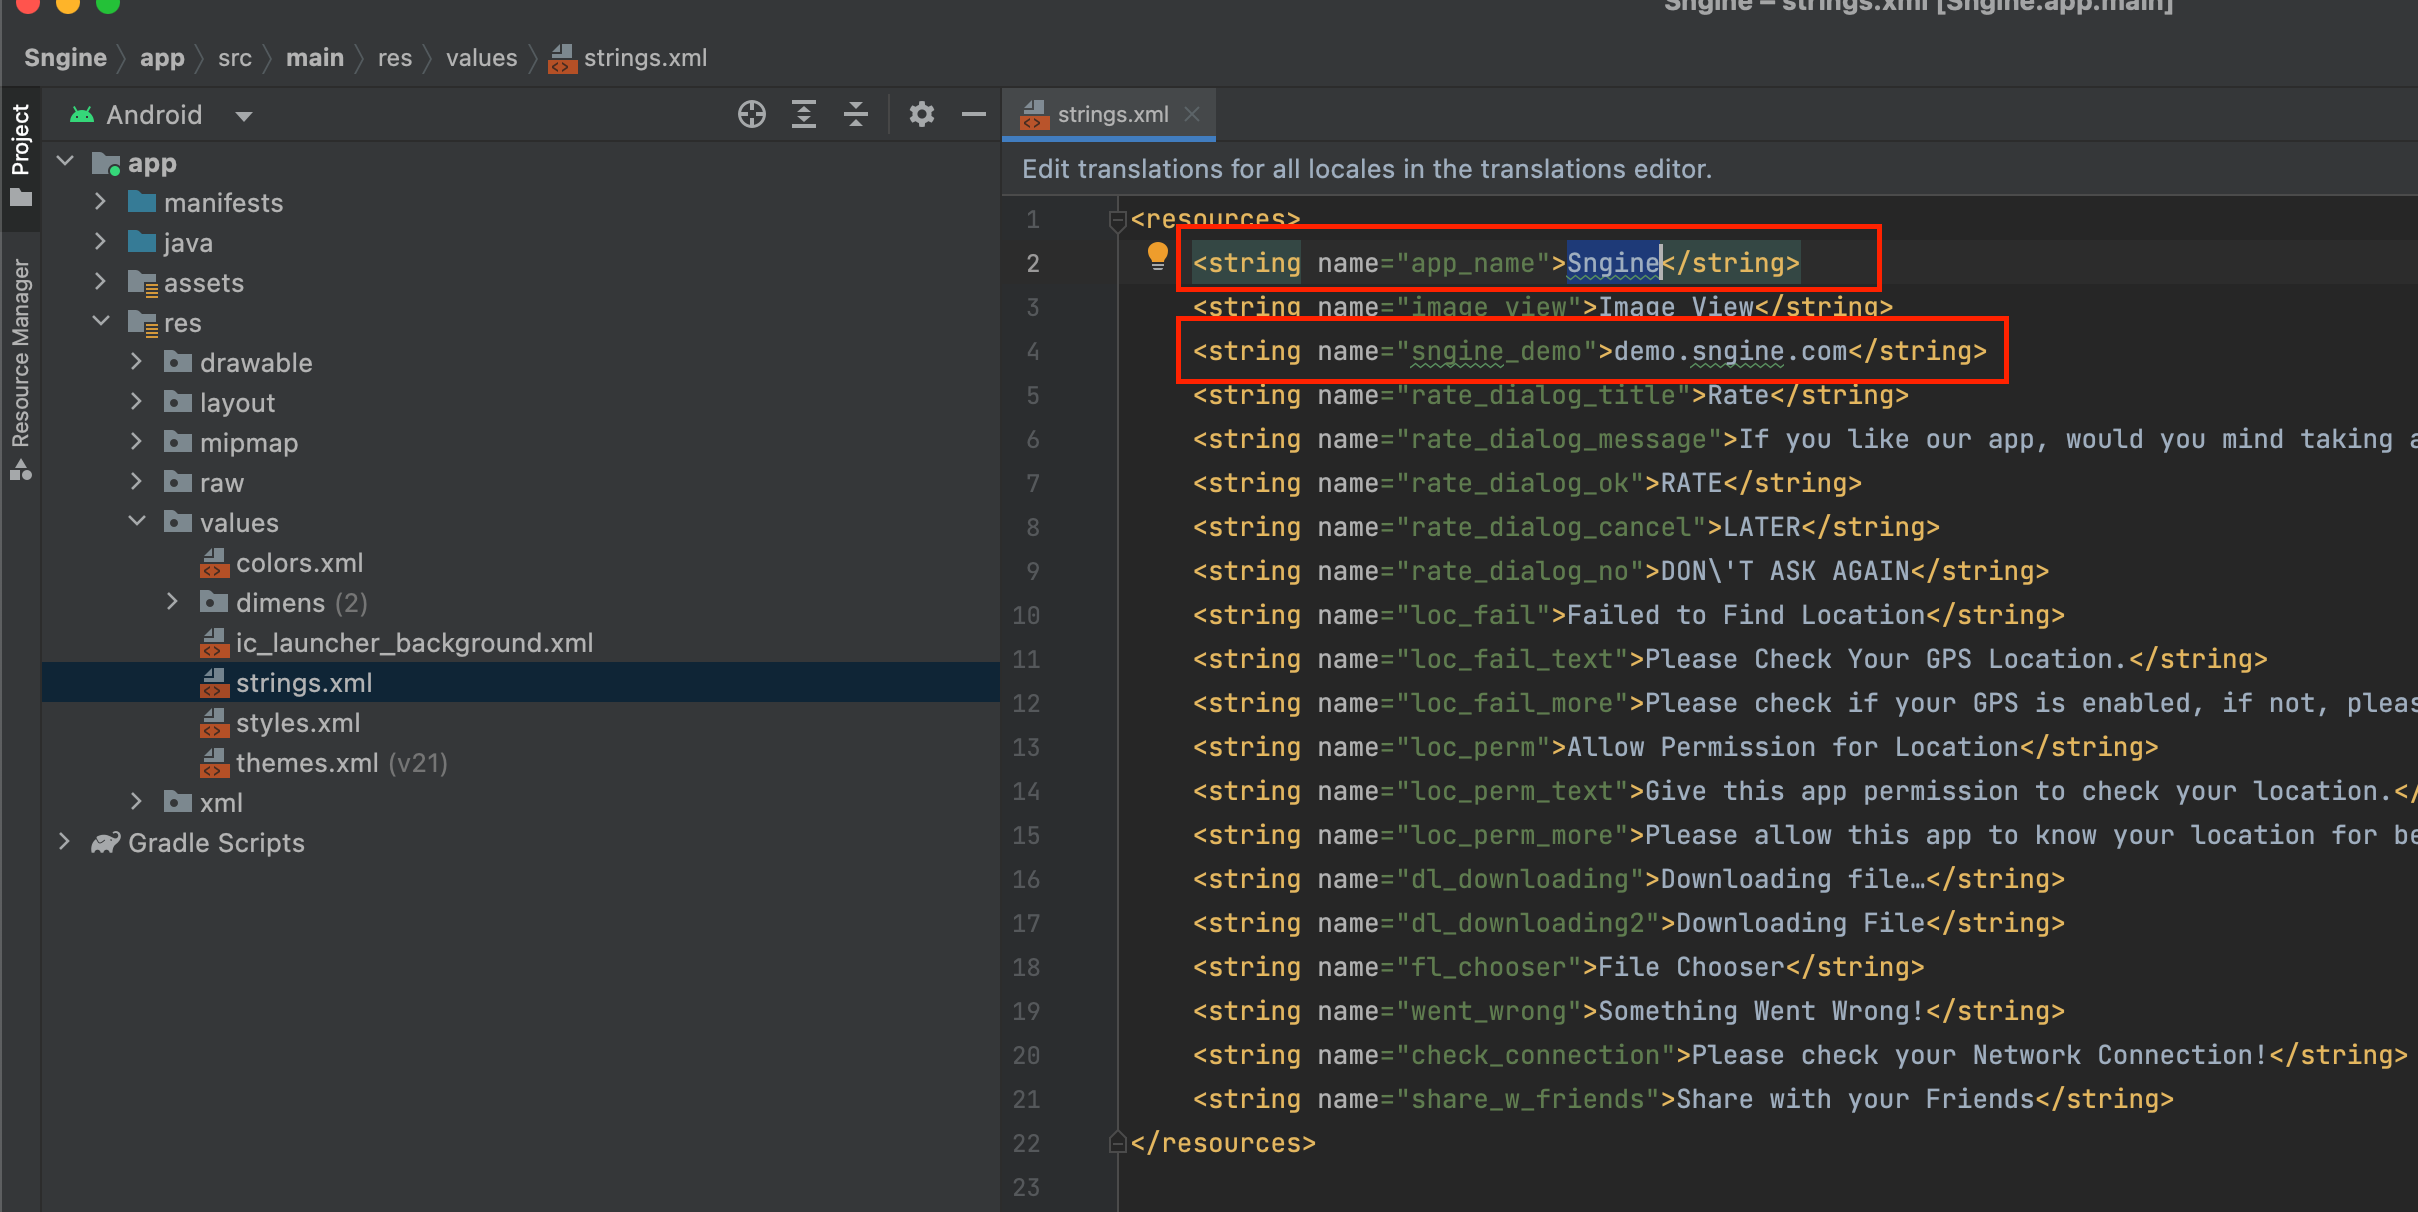
Change App Name & App - Open "Andriod\Sngine\app\src\main\res\values\strings.xml"
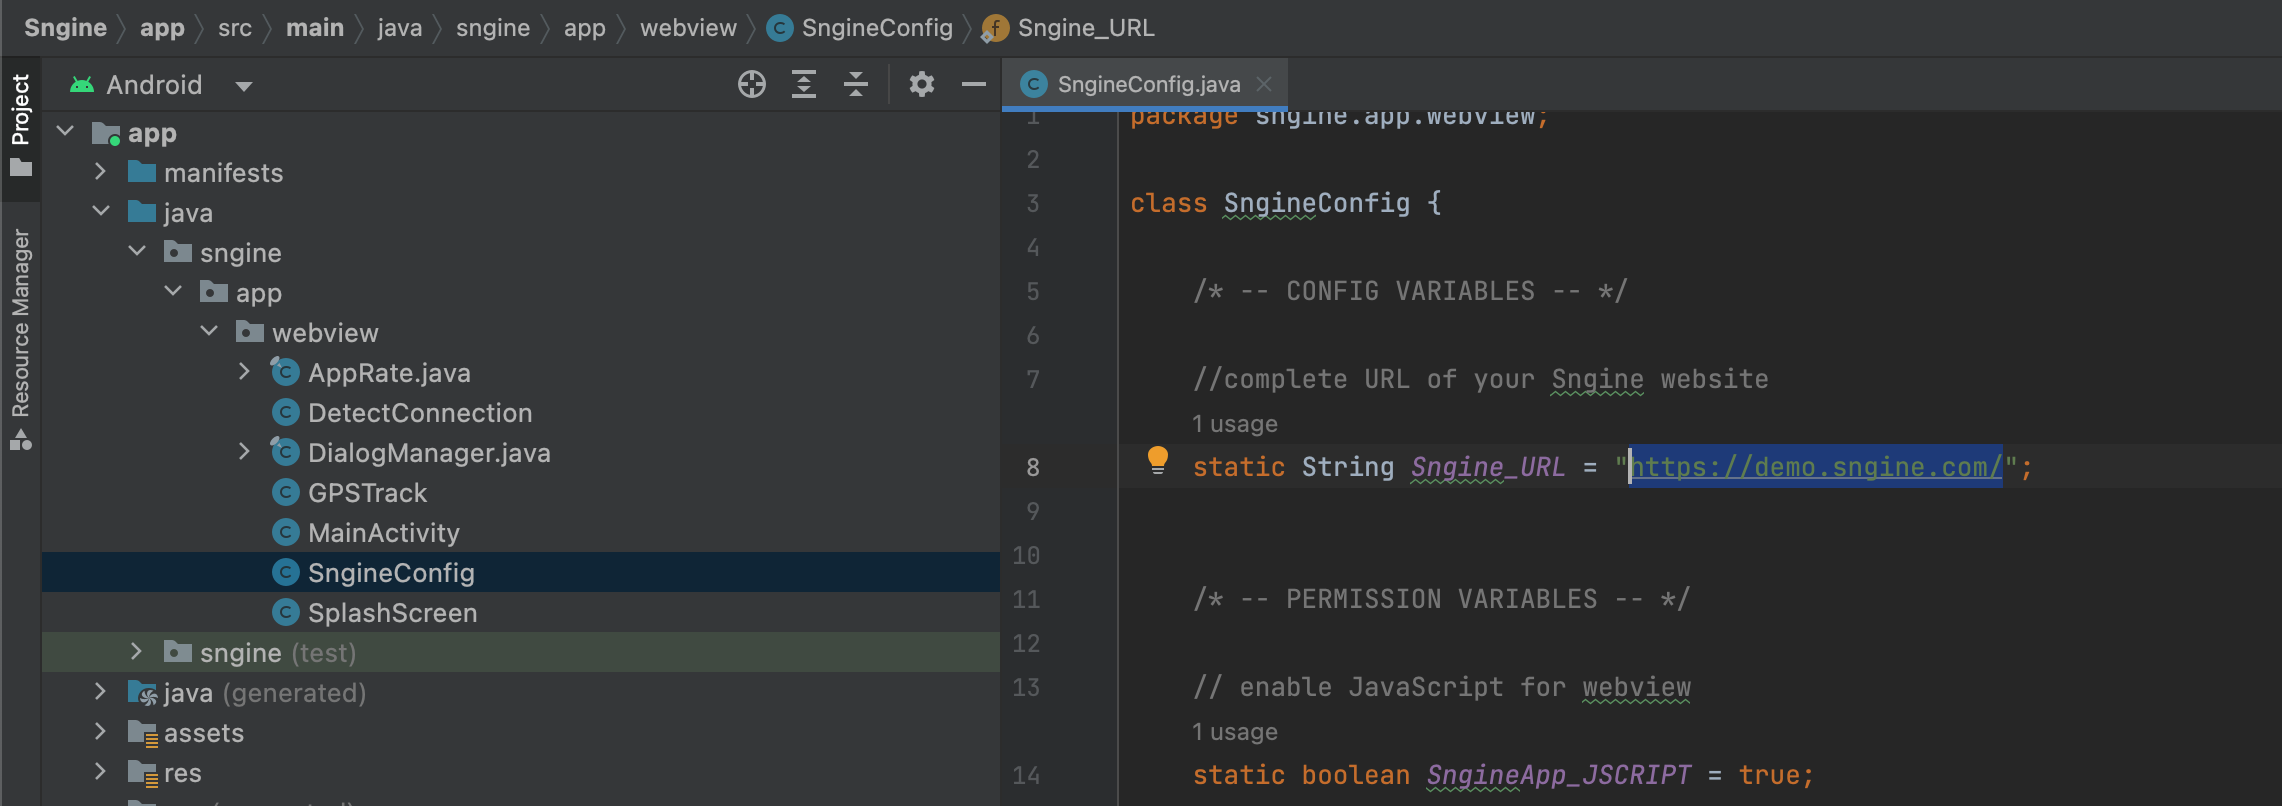
Change your website link from
"Andriod\Sngine\app\src\main\java\sngine\app\webview\SngineConfig.java"
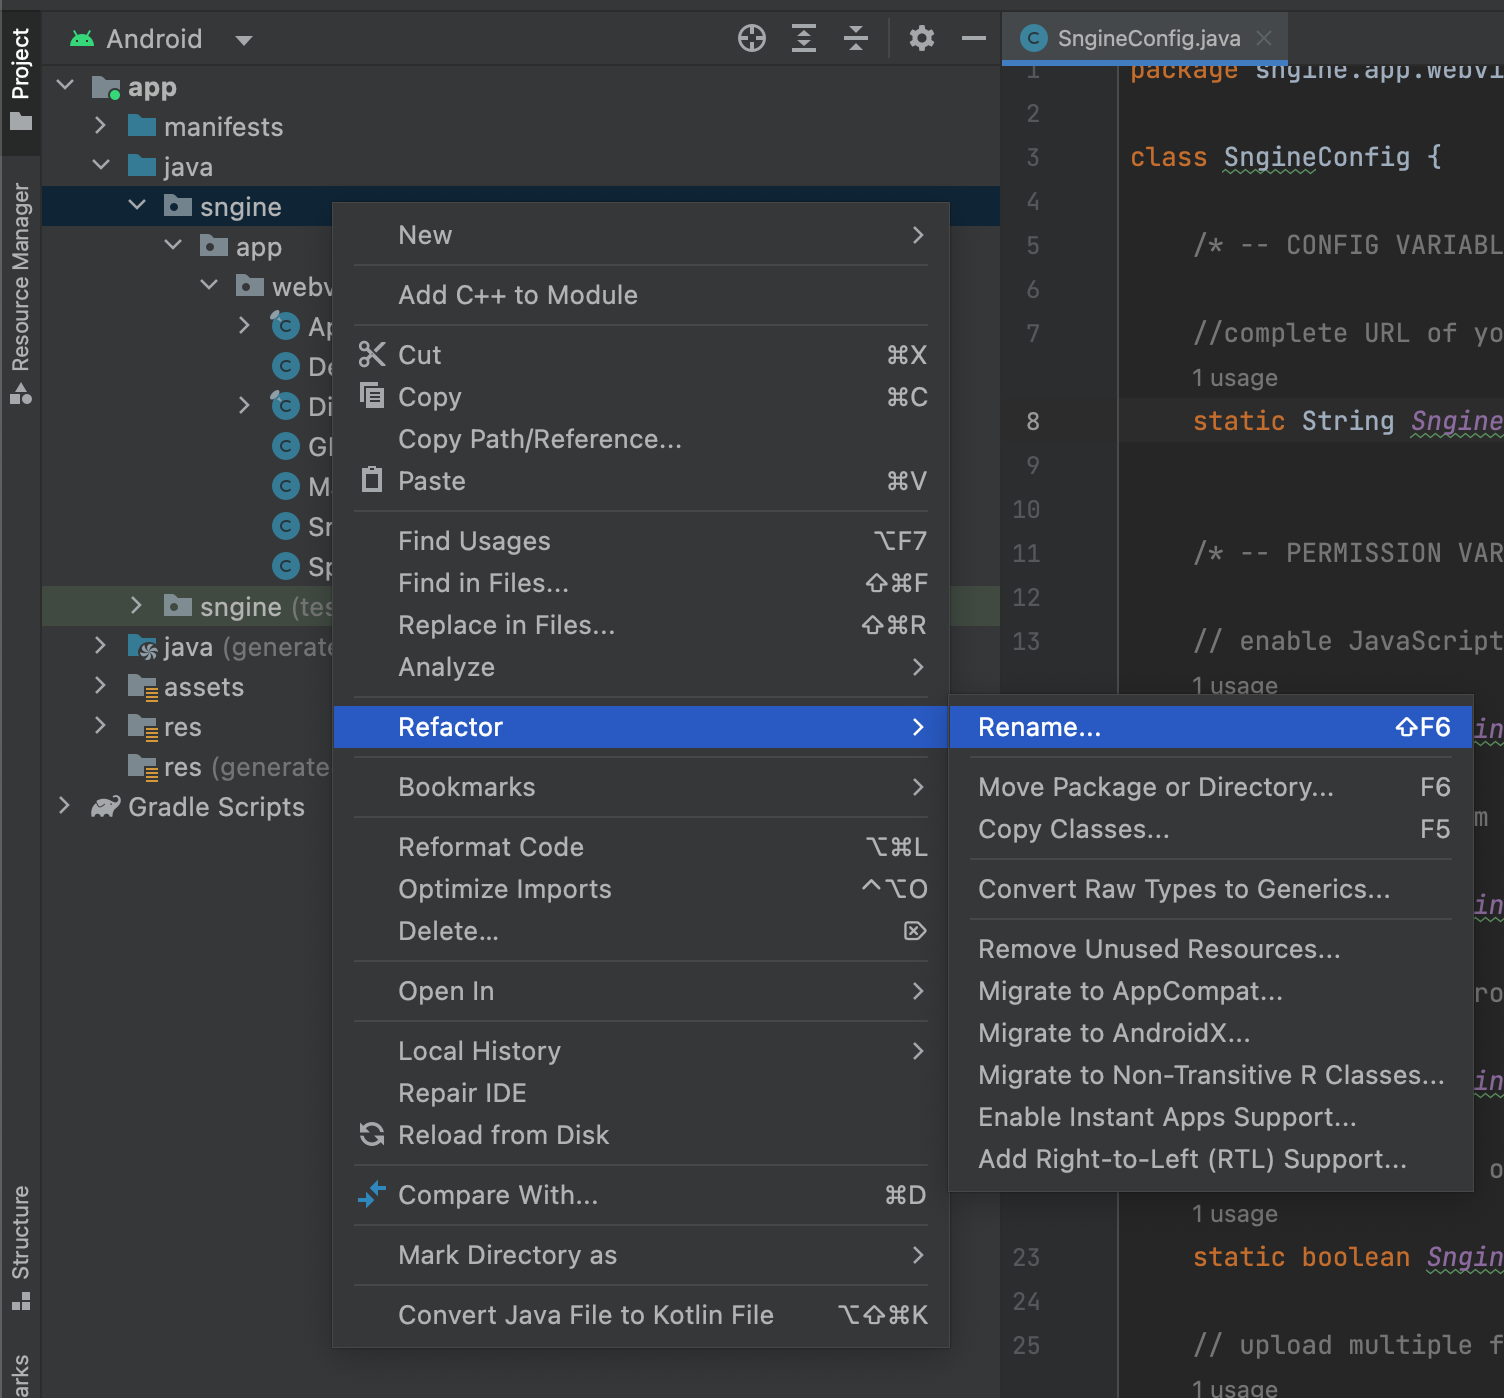
To change package name from "sngine.app.webview" go to
"Andriod\Java\Sngine" and set the cursor on sngine press Shift+F6 and Rename Package to
whatever you want
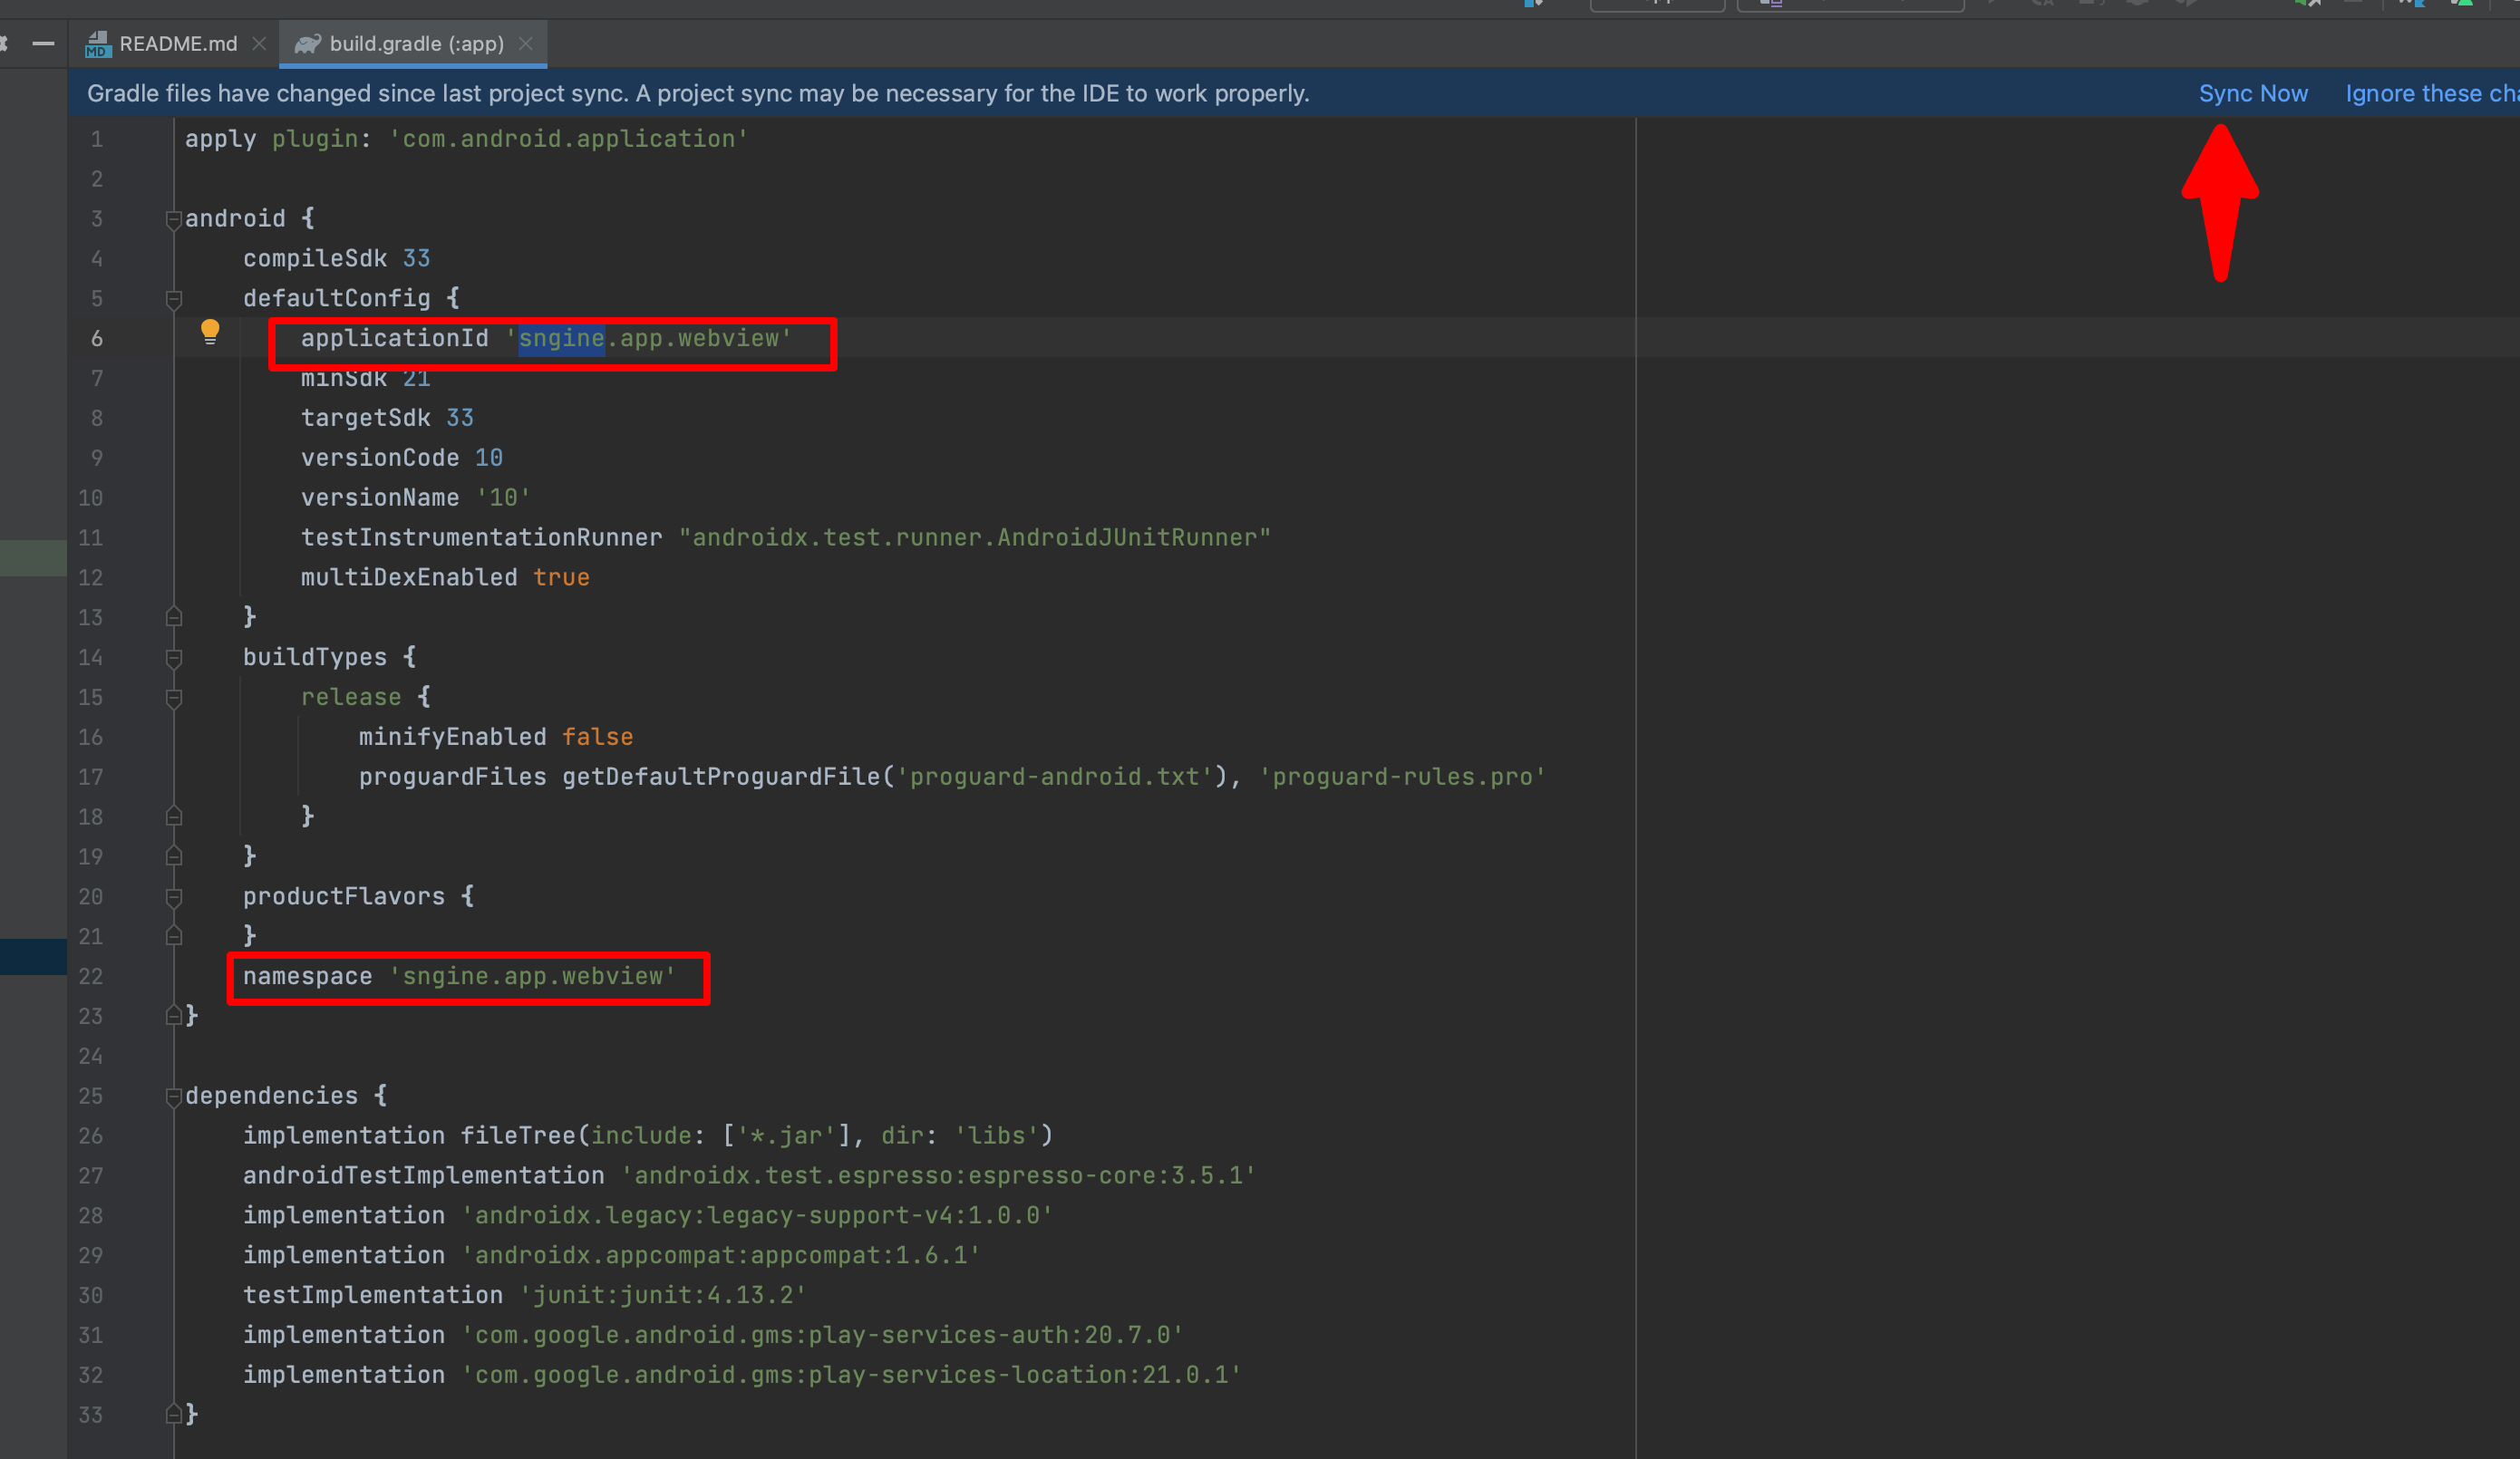
To change your applicationId from "sngine.app.webview"
go to "Andriod\Sngine\app\build.gradle"
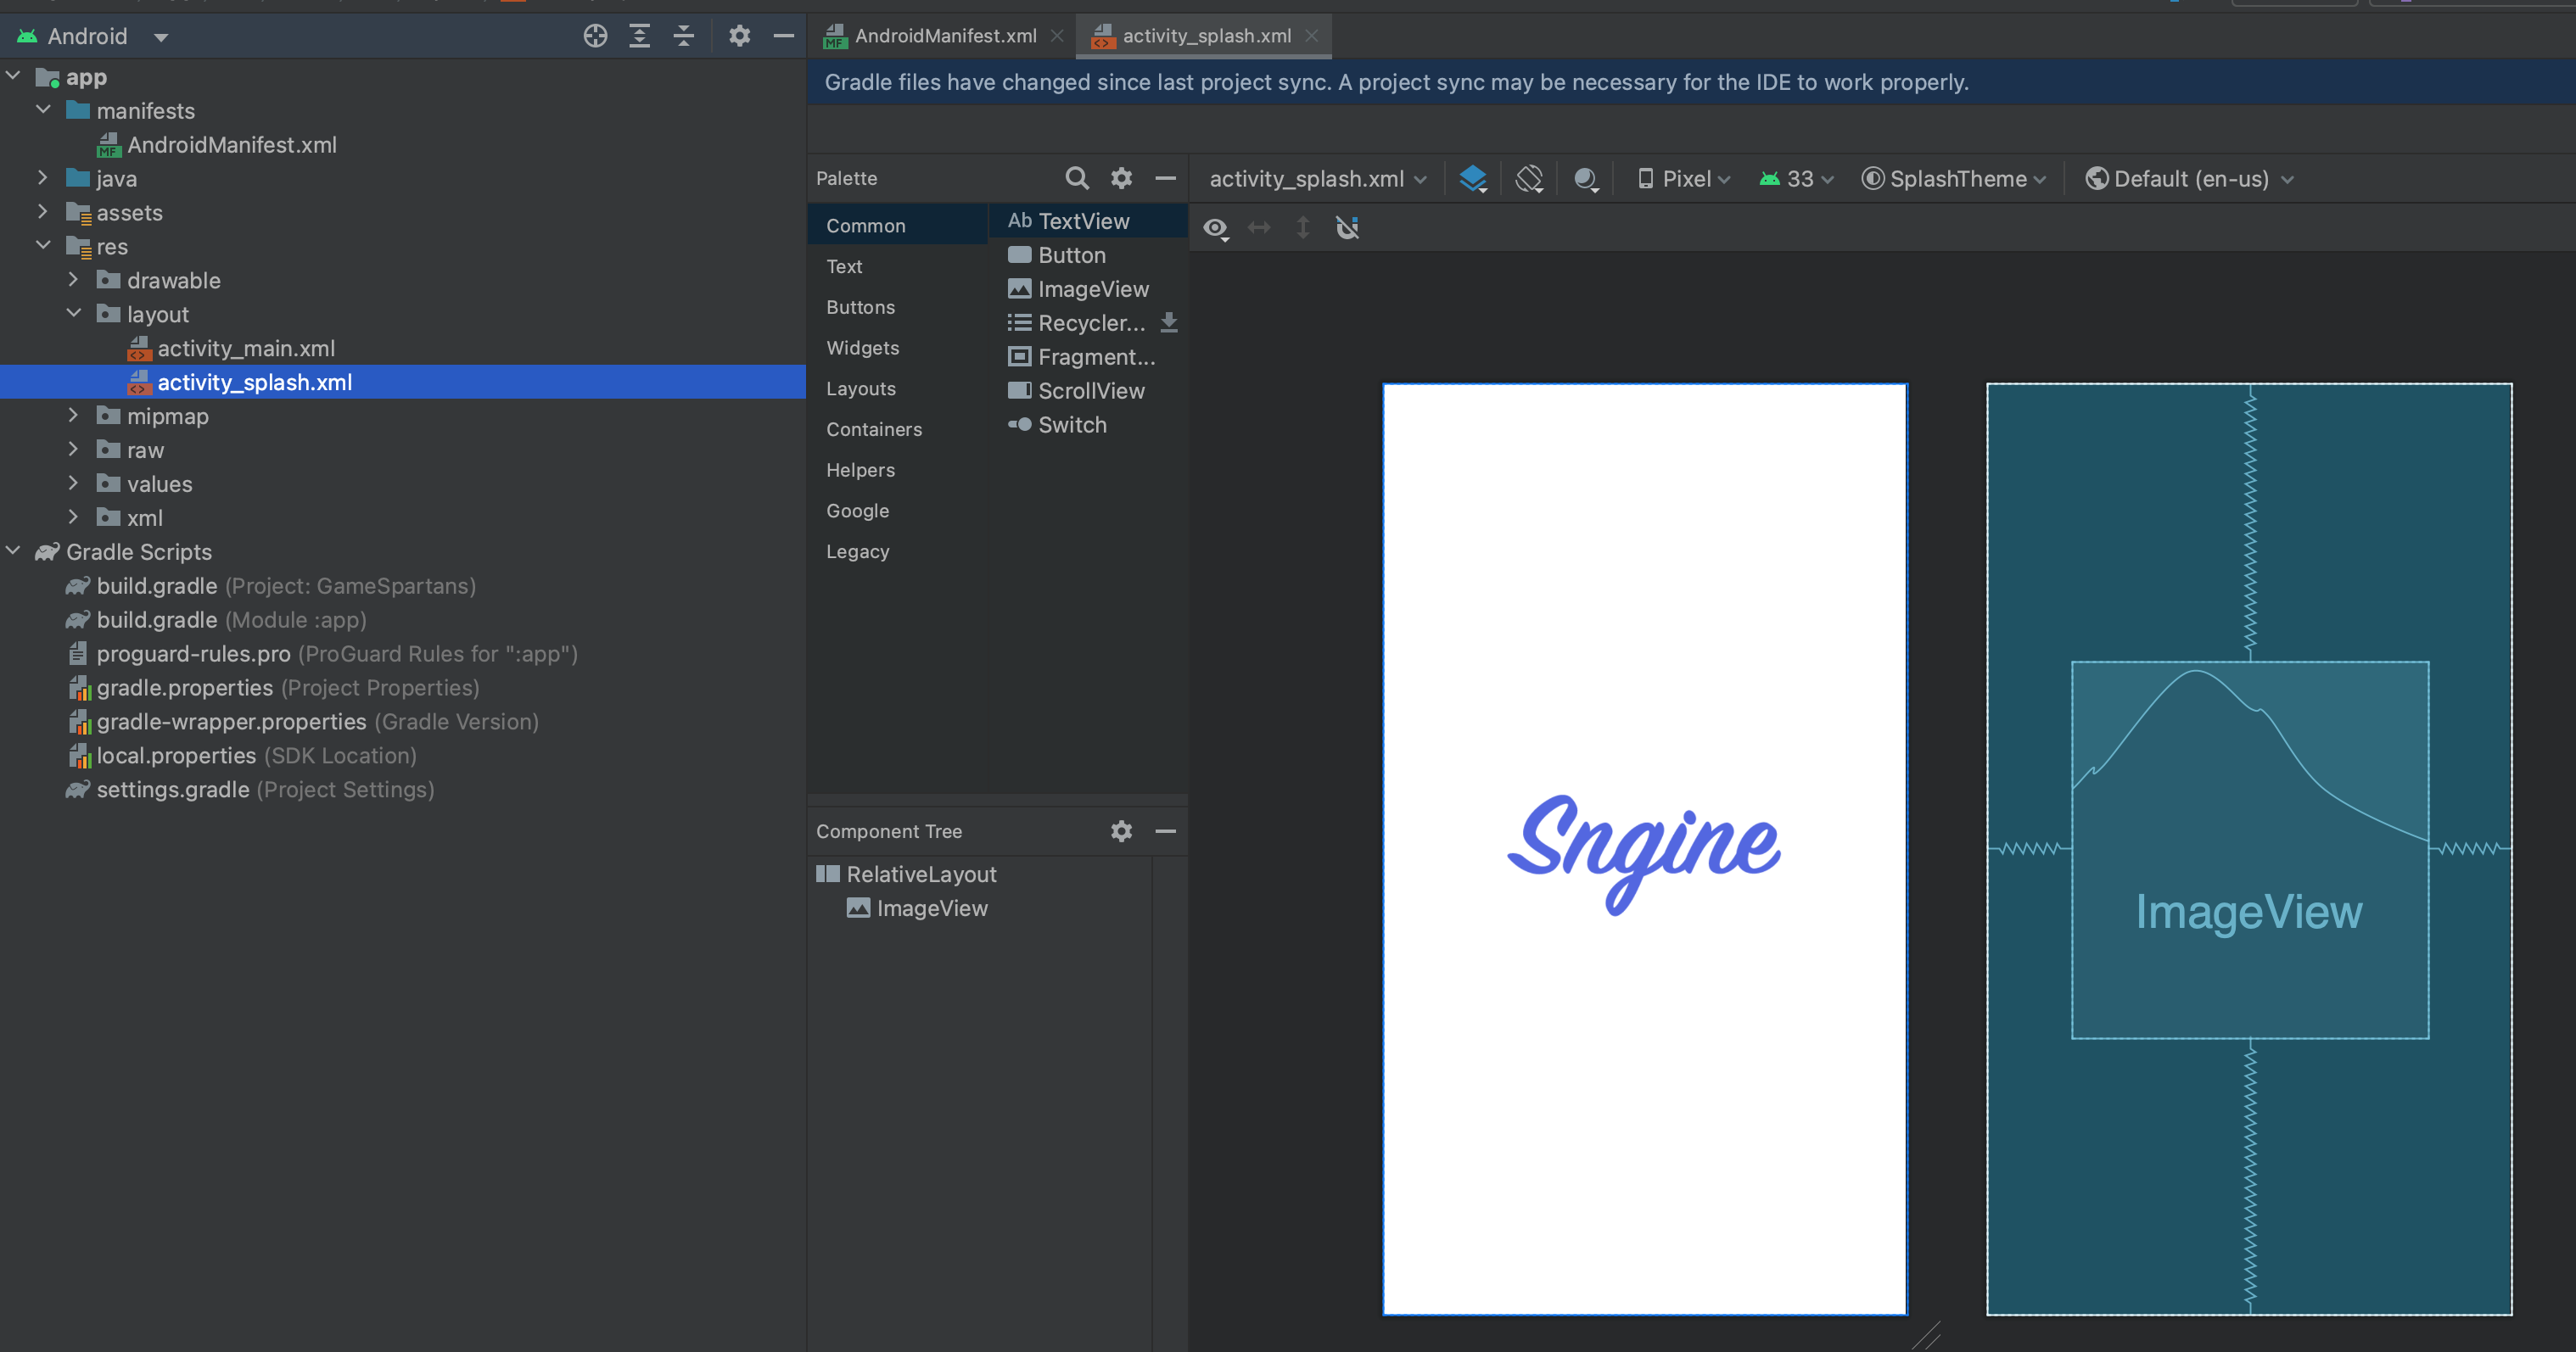
Change App Icon from "Andriod\Sngine\app\src\main\res\raw" and
"Andriod\Sngine\app\src\main\res\mipmap-*"
To change your App Splash Screens "res/layouts"
Export your APK
That's all, Enjoy!
IOS App
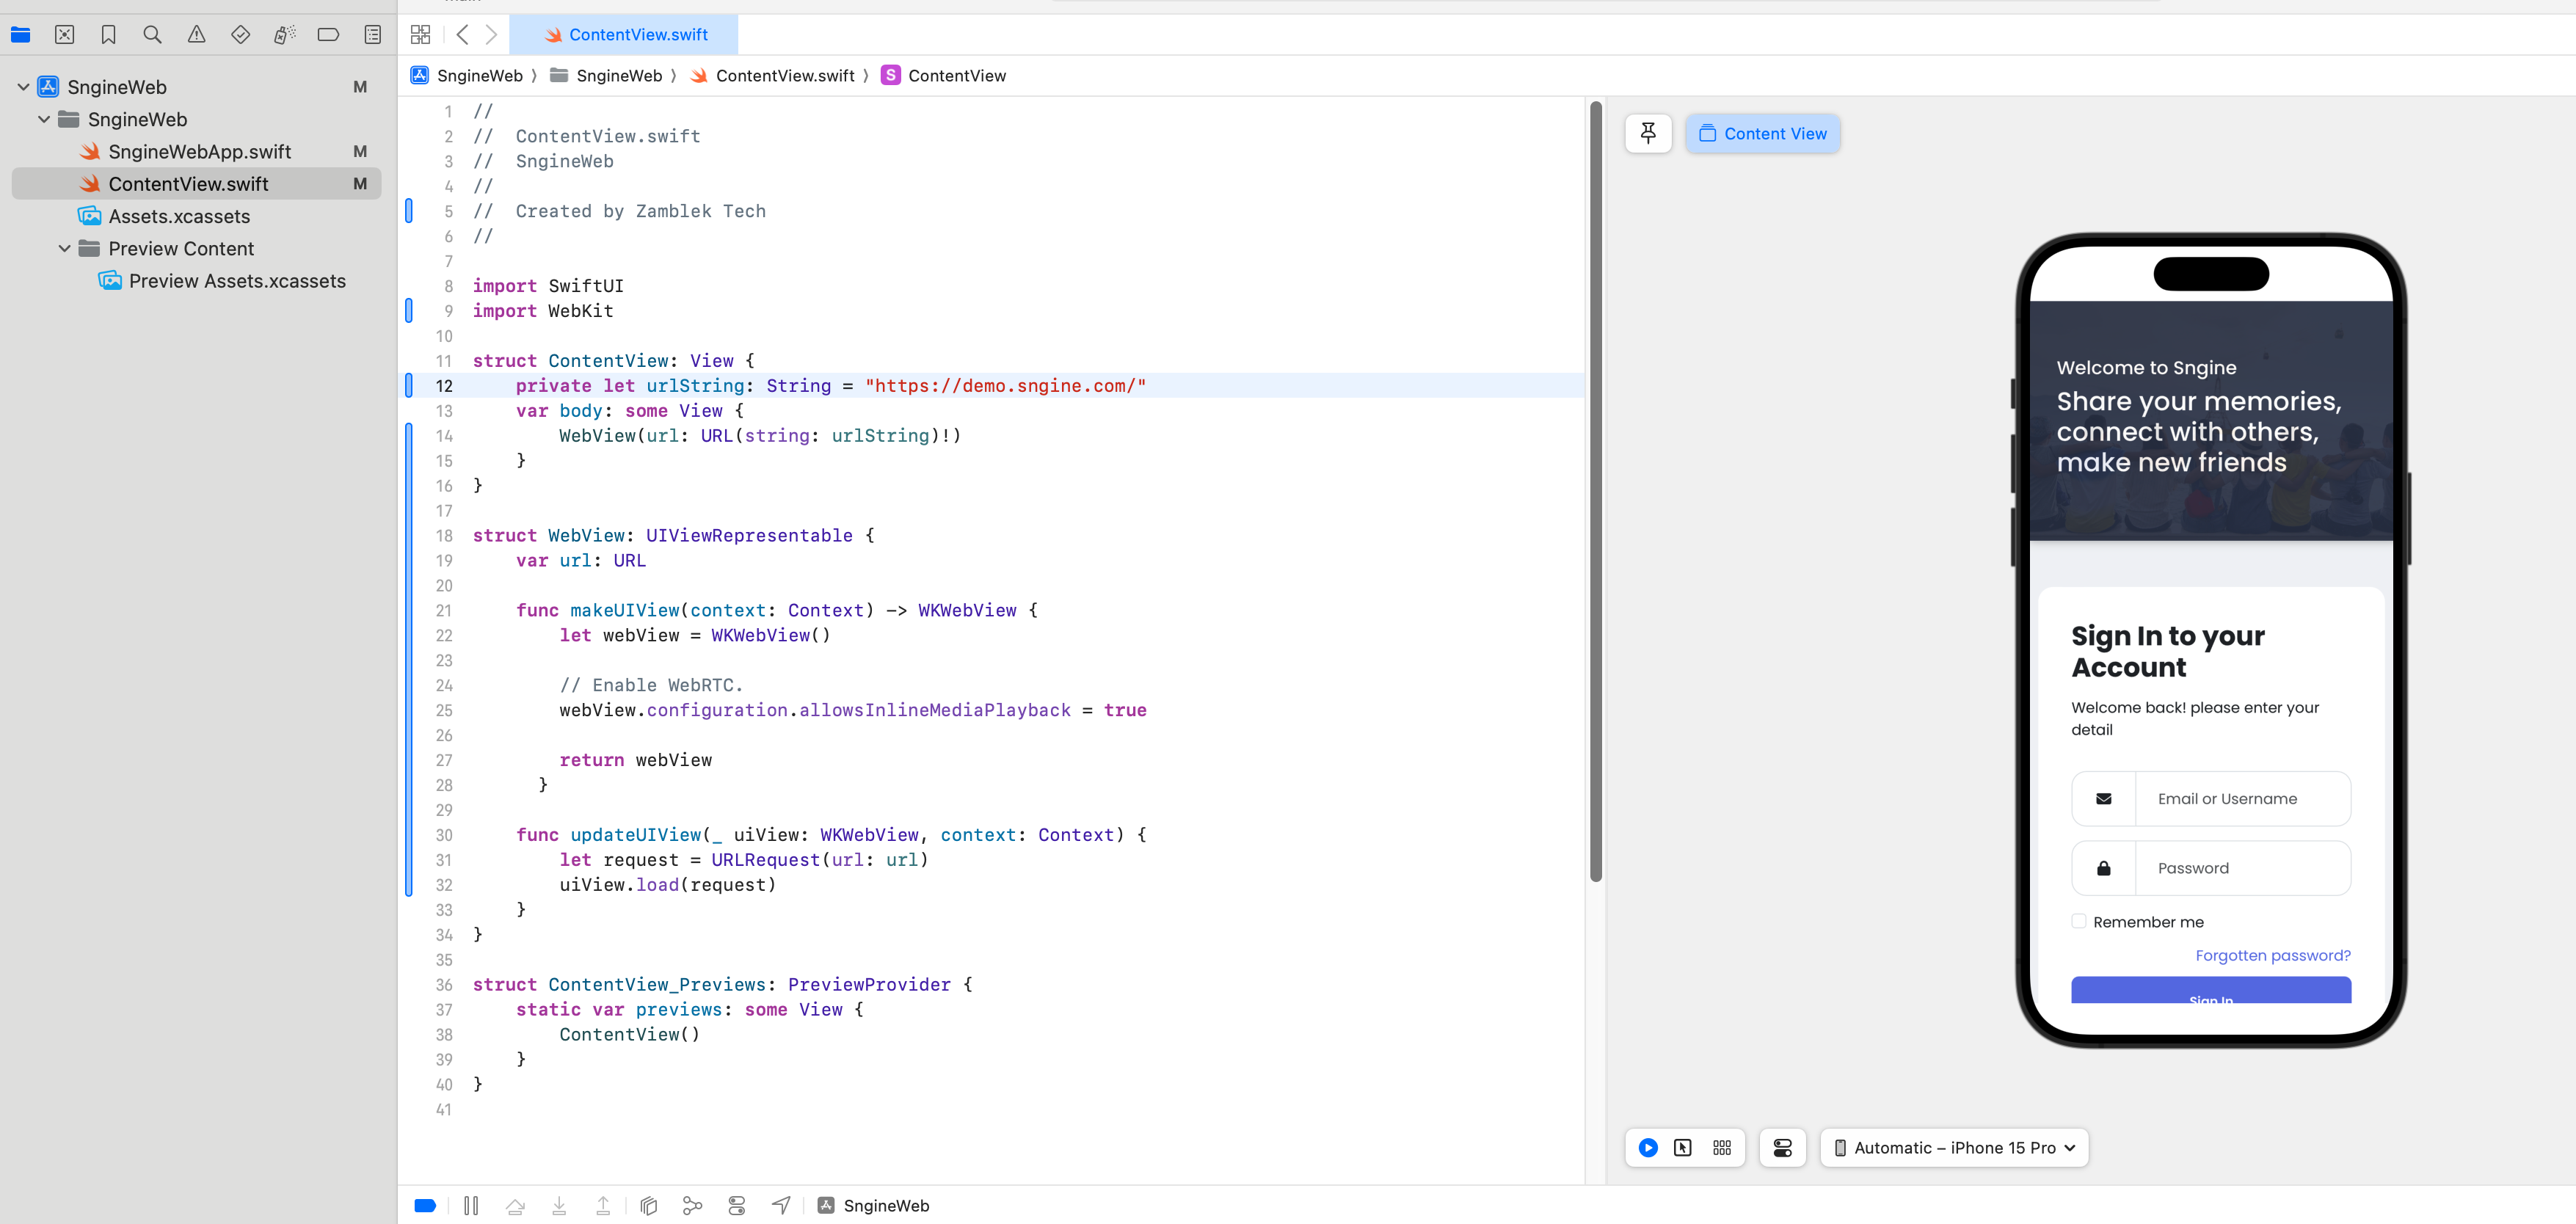
Import your APP into XCode
Change your website link
Change your app name and bundle identifier and app icon and build your app
That's all, Enjoy!
FAQs
Explore answers for the frequently asked questions related to how to install and run Sngine.
General
What PHP framework Sngine is built
on?
We don’t use any frameworks, Sngine is full pure PHP code.
what are Sngine dependencies?
Sngine depends on some 3rd-party libs for both PHP and JS and you can find them here:
/vendor
/node_modules
All Sngine dependencies are FREE and Open Souce with MIT, Apache v2.0 & LGPL (v2.1 & 3.0)
licenses which means they are totally free to use in commercial products like Sngine.
No, You can't run Sngine at 2+ end-products at the same time with same purchase code even
for testing or development (domain.com, sub.domian.com, domain.com/dir are 3 different
end-products), However you can install and run Sngine on your localhost along side with your
live server with no problem. For more info check the Envato license policy
https://codecanyon.net/licenses/standard
When is the next update coming up?
what are the new features?
When we have something to announce we will announce about as usual also there is no
specified date for every new update, We really encourage you to join Sngine group on
Facebook to see more discussion about what's coming next:
https://www.facebook.com/groups/sngine
Can support team install/update
Sngine or Build the apps for me?
Can support team install/update
Sngine as freelance work?
Yes we provide installation and update service as a freelance work, For any Freelance work
you can contact our development team from the contact form:
https://codecanyon.net/user/zamblek#contact
I got this error during the
installation "wizard cannot create the config file" How to fix it?
Just make sure that the includes folder is writable "777" then go and empty the database
(remove any table from it) then try to run the installer wizard again and after installation
change it back to its normal permissions.